background image

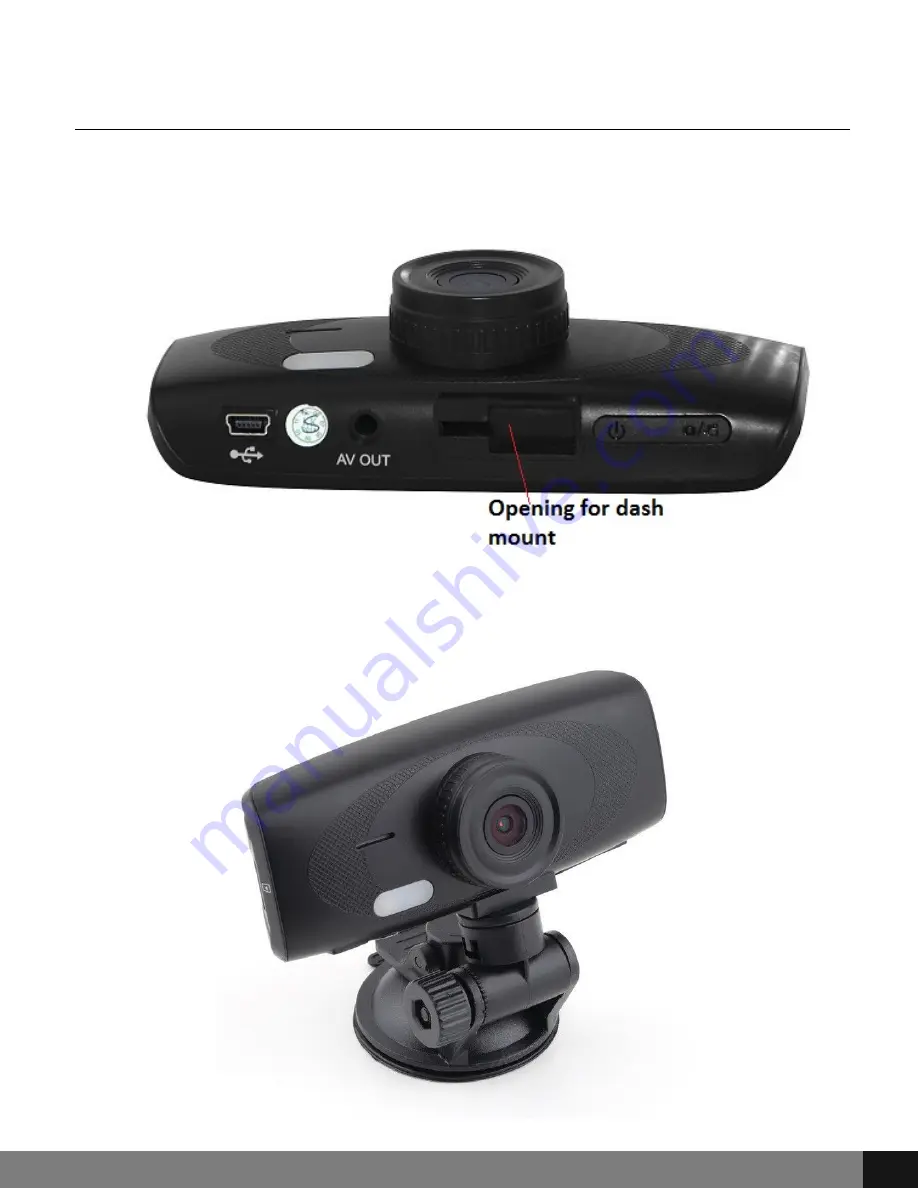
Attaching the Device to Tilting Suction Mount

On the top of the camera, you will see an open slot for the tilting suction 

mount at center. Align the mount’s arm with the camera device’s open slot, 

pressing down and forward to secure with mount. 

Now you may remove the clear film on the suction and attach to the glass 

surface. To remove the suction mount, pull the tag on the right-facing side of 

the suction and gently pull off the glass surface to detach.

G1W-H with mount

Spy Tec

www.spytecinc.com

Spy Tec

www.spytecinc.com

6

Summary of Contents for G1W-H

Page 1: ...G1W H Dash Camera User Manual Spy Tec www spytecinc com ...

Page 2: ...lution Sequence Quality Sharpness White Balance Color ISO Exposure Anti Shaking HDR Date Stamp Still Capture Settings Menu Set the Time and Date Adding License Number Set to Timestamp Auto Power Off Video Recording Taking Pictures Accessing Adding and Deleting Files Specifications Precautions Frequently Asked Questions FAQs How do I unfreeze the device Why is there unexpected interference Why is the...

Page 3: ...ording Up to 64 GB microSD Novatek NT96650 Aptina AR0330 G Sensor allows camera to stabilize if jarred and prevents loop recording over footage taken during an accident 2 7 screen Lightweight 140 degree wide angle Tilting suction mount Loop Recording Functions as a regular camera or dash camera Spy Tec www spytecinc com Spy Tec www spytecinc com 3 ...

Page 4: ...ng when finished or as the device charges press the power button and wait for the screen to appear When fully charged as indicated by the battery icon to the bottom right on the dash cam device screen you may remove the device from the charger and or continue using the direct power source If using battery power alone the battery icon will have a diminishing fill eventually resulting in an empty outl...

Page 5: ...microSD into an adapter and into your computer via USB Now a pop up window will appear and ask you to reformat your card Please note that any data stored on the microSD card will be deleted during the reformatting process Click Yes and allow the reformatting to begin Once the reformatting is complete detach card from adapter and put back into the camera device If no pop up appears as the microSD i...

Page 6: ...with the camera device s open slot pressing down and forward to secure with mount Now you may remove the clear film on the suction and attach to the glass surface To remove the suction mount pull the tag on the right facing side of the suction and gently pull off the glass surface to detach G1W H with mount Spy Tec www spytecinc com Spy Tec www spytecinc com 6 ...

Page 7: ...n The capture button features a still and video icon but is still only one button for both features To escape the menu screen press the Mode button Buttons are also located on each side of the viewing screen Up Arrows Navigates the selection options upward Down Arrows Navigates the selection options downward REC Enters Menu according to mode MODE Changes mode from Video Still Camera or Viewer Spy ...

Page 8: ...rom the Menu and navigate using the Up and Down buttons to the left of the screen to select On or Off and press the Capture button Exposure The exposure settings allow you to adjust the picture quality by enabling a certain amount of light to pass through a unit area of the lens By adding more value the greater the amount of light to pass through the camera as it is filming or taking still photos an...

Page 9: ...e button Date Stamp The date stamp may be enabled or disabled by selecting Date Stamp from the menu Select either On or Off and press the Capture button to save changes Set the Time and Date To set the time and date use the Up and Down buttons to select the System Setup icon last on the right of the settings menu and press the Capture button Here Time and Date are listed with an arrow pointing to c...

Page 10: ... choosing 3 minutes 5 minutes 10 minutes or Off in the menu Press the Capture button to save changes If you choose to use Screen Protection the screen will shut off but the camera will keep recording as settings prescribe IR LED Select the IR LED icon from the menu to enable or disable Infrared LED by choosing either Off or On in the menu Press the Capture button to save changes Format Select the For...

Page 11: ...of the screen to select an option and press the Capture button Options for this feature are 3M 2MHD VGA 1 3M 12M 10M 8M and 5M Sequence Enabling the sequence feature allows the camera to take 3 images within 1 second Select the Sequence option from the Menu and navigate using the Up and Down buttons to the left of the screen to select On or Off and press the Capture button Quality The quality setti...

Page 12: ... the menu In certain lighting conditions a higher ISO setting may create undesirable noise Select either Auto 100 200 or 400 and press the Capture button to save changes Exposure The exposure settings allow you to adjust the picture quality by enabling a certain amount of light to pass through a unit area of the lens By adding more value the greater the amount of light to pass through the camera a...

Page 13: ...just the next character Press the Capture button after selecting the desired format Auto Power Off By selecting Auto Power Off in the Menu the camera is able to power down automatically after 3 Minutes 5 Minutes or 10 Minutes This may be disabled by selecting Off in the menu After highlighting the selection press the Capture button to update settings Video Recording When the G1W H is powered on it au...

Page 14: ...enu selections after desired menu navigation To escape the menu press the MODE button In the Playback screen press the Menu button twice to access the Setup menu Here settings may be changed for Date Time values License Number Auto Power Beep Sound Language TV Mode Frequency Screen Protection IR LED Format Default Setting and Version just as explained in Video Settings 11 To access files on the Das...

Page 15: ...SVBS composite TV signal output NTSC PAL High definition TV terminal interface HDMI output Picture JPG file format Maximum output pixel 5 0 Mega Pixels Video Resolution 1920x1080 30 fps 1280x720 60 fps 848 x 480 30fps 640x480p 30fps Audio Built in Microphone Speaker AAC Codec MPEG4 G Sensor Support Memory External media SDHC supports 64GB Max microSD card NOT Included Interface USB HDMI AV microSD c...

Page 16: ...battery will diminish if not used for a long time so recharge it before use or storage MicroSD card real capacity may be slightly less than the nominal value If the capacity of the card is abnormal reformat the card Any previously stored data will be lost after reformatting the card The security and integrity of the internal files on the G1W H are not covered under warranty Do not adjust settings o...

Page 17: ...d interference If attached to a continual power supply make sure that the USB is securely plugged into the electrical source with cable completely connected to device Press the cable in if any loosening has occurred Why is the file length inconsistent Go to the Loop recording settings and select a set time frame for recording Why won t the camera auto start The camera may be set to motion detection...

Reviews: