background image

Manual Recording

The camera can be triggered manually. To start a camera that has been powered off, 
press the Power button for 1 second. A Welcome screen will briefly appear and the 
camera will start recording.

Turn off the camera by holding down the Power button for 1 second. A goodbye 
screen will briefly appear before the screen and all indicators on the camera go dark.

Note: 

If holding the camera by hand, make sure the display is pointed down toward 

the ground. If it’s pointed up, resulting videos will play upside down on your computer 
or TV.

Taking Photographs

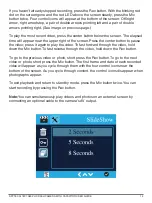
If you haven’t already stopped recording video, press the Rec button. With the 
blinking red dot on the screen gone and the red LED above the screen steady, press 
the Mic button twice. Press the center button to save the image in live view on the 
screen. You’ll hear the sound of a camera shutter. The date and time will be briefly 
superimposed at the bottom of the screen.

On-Screen Feedback (Photos)

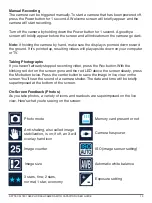
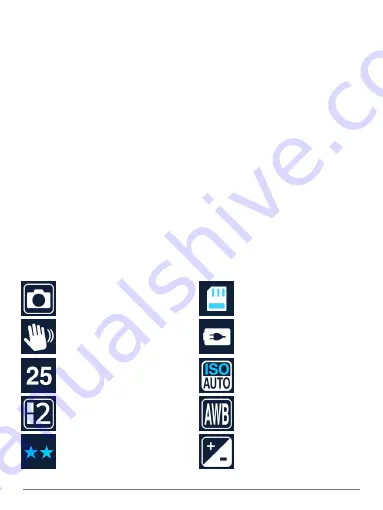
As you take photos, a variety of icons and readouts are superimposed on the live 
view. Here’s what you’re seeing on the screen:

SPYTEC A118C 1080P HD DASH CAMERA WITH CAPACITOR USER GUIDE

12

Photo mode

Anti-shaking, also called image 
stabilization, is on; if off, an X will 
overlay hand icon

Image counter

3 stars, fine; 2 stars,
normal; 1 star, economy

Image size

Memory card present or not

Camera has power

ISO (image sensor setting)

Automatic white balance

Exposure setting

Summary of Contents for A118C

Page 1: ...ily concealed wedge shaped camcorder that mounts right up against the windshield for capturing the driver s view The pocket size dash cam features a wide angle lens full high def resolution and color view screen Equipped with a G sensor the camera detects when your vehicle is bumped and automatically write protects video made during an incident ...

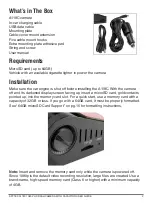
Page 2: ... darkened display screen facing up insert a microSD card gold contacts pointed up into the memory card slot For a quick start use a memory card with a capacity of 32GB or less If you go with a 64GB card it must be properly formatted See 64GB microSD Card Support on pg 15 for formatting instructions SPYTEC A118C 1080P HD DASH CAMERA WITH CAPACITOR USER GUIDE 2 Note Insert and remove the memory card...

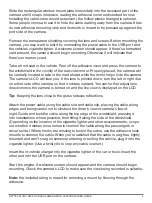
Page 3: ... can further adjust lens direction once the camera is turned on and the live view is displayed on the LCD Tip Keeping the lens close to the glass reduces reflections Attach the power cable using the cable slot and cable clip placing the cable along edges and being careful not to obstruct the driver s view or camera s line of sight Guide and tuck the cable along the top edge of the windshield press...

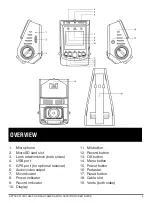
Page 4: ...lot 3 Lens rotation knob both sides 4 USB port 5 GPS port for optional receiver 6 Audio video output 7 Mic indicator 8 Power indicator 9 Record indicator 10 Display 11 Mic button 12 Record button 13 OK button 14 Menu button 15 Power button 16 Pedestal 17 Reset button 18 Cable slot 19 Vents both sides ...

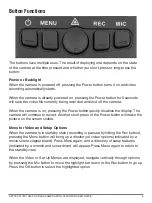
Page 5: ...ll continue to record Another short press of the Power button will make the picture on the screen visible SPYTEC A118C 1080P HD DASH CAMERA WITH CAPACITOR USER GUIDE 5 Menu for Video and Setup Options When the camera is in standby state recording is paused by hitting the Rec button pressing the Menu button will bring up a directory of video options indicated by a movie scene clapperboard Press Men...

Page 6: ...1280 x 720 at 60 frames per second 720p 1280 x 720 at 30 fps WVGA 848 x 480 or VGA 640 x 480 Press OK to make your selection and return to the options directory All videos from that point on will be recorded at the selected resolution until you choose to change it Loop Recording Video files are normally saved every 3 minutes but you can change the time interval to 1 or 5 minutes or turn off loop r...

Page 7: ...3 or 2 0 as well as 1 3 2 3 1 0 4 3 5 3 and 2 0 Motion Detection Since a dash cam is mainly used when your car or vehicles in view are moving the camera s motion detection capability is set to off by default However you can turn it on so that the camera starts recording only when it detects motion Record Audio Video is normally recorded with audio but you can turn off the microphone When the mic i...

Page 8: ...ime and displays a lock icon on the screen The file is saved to the RO Read Only directory so that is won t later be overwritten by loop recording G sensor sensitivity can be adjusted The default is middle sensitivity but you can set it to high or low sensitivity or turn it off entirely Tip Bumped or not if you see a noteworthy incident while the camera is recording that s a keeper meaning the vid...

Page 9: ...selection When you re ready to exit the Set Up Menu press the Menu button Date Time To highlight Date Time on the first row press the Mic button To select this option press the OK button Use the Rec button to increase each digit or the Mic button to decrease it Press the Menu button to go to the next field Press the OK button to accept the Date Time settings and return to the previous menu Time Zo...

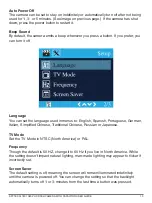
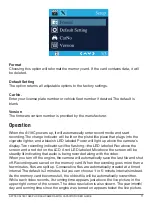
Page 10: ...ge used in menus to English Spanish Portuguese German Italian Simplified Chinese Traditional Chinese Russian or Japanese TV Mode Set the TV Mode to NTSC North America or PAL Frequency Though the default is 50 HZ change it to 60 Hz if you live in North America While the setting doesn t impact natural lighting man made lighting may appear to flicker if incorrectly set Screen Saver The default settin...
Page 11: ...ding indicators will be flashing the LED labeled Rec above the screen and a red dot on the LCD A red LED labeled Mic above the screen will be steadily lit indicating that audio is being recorded along with the video When you turn off the engine the camera will automatically save the last file and shut off Recordings are saved on the memory card When the recording goes more than a few minutes files...

Page 12: ... press the Rec button With the blinking red dot on the screen gone and the red LED above the screen steady press the Mic button twice Press the center button to save the image in live view on the screen You ll hear the sound of a camera shutter The date and time will be briefly superimposed at the bottom of the screen On Screen Feedback Photos As you take photos a variety of icons and readouts are...

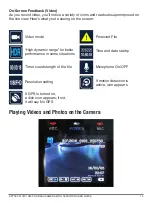
Page 13: ... live view Here s what you re seeing on the screen Video mode High dynamic range for better performance in some situations Timer counts length of the file Resolution setting If GPS is turned on a dish icon appears if not it will say No GPS Protected File Time and date stamp Microphone On OFF If motion detection is active icon appears Playing Videos and Photos on the Camera ...

Page 14: ...o To fast forward through the video hold down the Mic button To fast reverse through the video hold down the Rec button To go to the previous video or photo short press the Rec button To go to the next video or photo short press the Mic button The first frame and date of each recorded video will appear as you cycle through them with the four control icons near the bottom of the screen As you cycle...

Page 15: ...ideos but you ll also see a folder called RO read only that contains protected videos you can t readily delete 64GB microSD Card Support If a 64GB card is not recognized by the A118C you ll need to properly format it If the card has not been used before formatting it won t wipe out any data But if the card has been in use keep in mind that any data stored on the card will be lost during formatting...

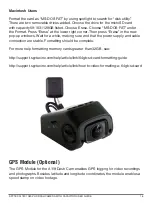
Page 16: ...in the new pop up windows Wait for a while making sure and that the power supply and cable connection are stable Formatting should be complete For more help formatting memory cards greater than 32GB see http support spytecinc com help article link 64gb sd card formatting guide http support spytecinc com help article link how to video formatting a 64gb sd card GPS Module Optional The GPS Module for...

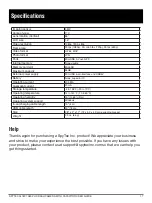
Page 17: ...y None capacitor IC Operating current 400 MA Quiescent current 20 mA Storage temperature 4 to 158 F 20 to 70 C Operating temperature 14 to 140 F 10 to 60 C Operating humidity 15 to 65 RH Operating system support Windows In car charging cable length 13 4 m USB cable length 30 76 cm Size 2 8 x 2 x 1 7 7 2 x 5 2 x 4 3 cm excluding bracket Weight 2 3 oz 66 g Specifications Help Thanks again for purcha...

Page 18: ...proof of sale of the device from STI or from approved resellers only Devices that are covered will be repaired or replaced at STI s discretion Devices requiring replacement will be fulfilled with a new or refurbished unit or a similar unit if the original unit is no longer available To take advantage of our warranty go to http www spytecinc com return policy and review our returns policy If your d...

Reviews: