background image

54

55

Fr

ançais

Fr

ançais

Délai:

(10s/1m/3m/
5m/10m/15m
/30m)

Permet de choisir l’intervalle de temps 
avant que la caméra enregistre la prochaine 
photo ou vidéo.

Réglage additionnel

: Il est possible de 

réduire le délai minimum entre les détections 
à 10 secondes (au lieu de 1 minute) en 
suivant la procédure suivante. 

À noter que 

la durée de vie des piles sera affectée.

Éteindre la caméra. Maintenir enfoncé la 
touche  «

» et allumer la caméra. «10sec 

enabled» apparaît à l'écran, signifiant que 
le délai minimum est maintenant de 10 
secondes (lorsque cette option est activée, 
le délai de 30 minutes est éliminé). Pour 
remettre le délai minimum à 1 minute, 
refaire la même procédure. «10sec disabled» 
apparaît alors à l'écran (voir figure plus bas).

Multi-Photo:

(1/2/3/4/5/6 
photos 
consécutives)

Permet de prendre jusqu’à 6 photos 
consécutives à chaque détection, avec un 
délai de 10 secondes entre chaque photo. 
Cette option permet d’obtenir jusqu’à 
6 photos sous différents angles lorsque la 
caméra est programmée en mode «PHOTO».

Durée vidéo:

(10s/30s/60s/90s)

Permet de configurer la durée 
d’enregistrement des séquences vidéo 
lorsque la caméra est programmée en mode 
«VIDEO».

Langue:

(English/
Français/Deutsch/
Italiano)

Permet de choisir la langue des menus de la 
caméra.

Sensibilité:

(Forte/Normale/
Faible)

Permet de choisir la sensibilité de détection 
de l’appareil. Les options de sensibilité 
sont «

Forte

», «

Normale

» ou «

Faible

». Le 

système détecte seulement une source de 
chaleur en mouvement. Faire en sorte d’avoir 
le moins d’objets possible devant la caméra 
lors du positionnement de cette dernière. 
Ceci évite qu’elle se déclenche lorsque 
le soleil pointe en sa direction au même 
moment qu’un objet est en mouvement 
devant l’appareil (par exemple
une branche).

Date:

Permet de configurer la date sous forme 
Mois / Jour / Année

Format heure:

(12h/24h)

Permet de choisir l’affichage de l’heure 
sur une période de 12 ou 24 heures. 
(Exemple: 6:00 pm ou 18:00)

Heure: 

Permet de configurer l’heure sous forme 
Heure / Minute

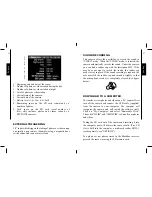
10SEC DISABLED

10SEC ENABLED

Délai de 10 sec.

Délai de 1 min.

Summary of Contents for TINY-W2s

Page 1: ...SURVEILLANCE CAMERA CAMÉRA DE SURVEILLANCE ÜBERWACHUNGS KAMERA TINY W2s model Modèle TINY W2s Modell TINY W2s User manual Manuel d utilisation Bedienungsanleitung www spypoint com ...

Page 2: ...for choosing the SPYPOINT TINY W2s monitoring system This manual will help you get the most out of your new device For the latest version of the user manual or for additional information visit our website at www spypoint com v 1 3 ...

Page 3: ... Receiver2 SD SDHC card up to 32GB1 up to 8GB2 No internal memory Viewing Built in screen 2 4 LCD TV output Composite video PAL NTSC Computer output USB 2 0 Power supply Camera accessories sold separately see OPTIONS Alkaline or lithium batteries 6x AA Lithium battery pack Rechargeable battery pack LIT 09 LIT C 8 External 12V jack 12 volt battery KIT 12V BATT 12V 12 volt adapter AD 12V Solar panel...

Page 4: ...mally open contact Night time illumination system LEDs 38 LEDs Type Infrared LEDs Exposure Automatic infrared level adjustment Optical field of view 40 Wireless photo transmission system Wireless range Maximum 250 ft Recommendations Operating temperature 20 C to 50 C 4 F to 122 F Storage temperature 30 C to 75 C 22 F to 167 F KIT INCLUDES SPYPOINT TINY W2s Blackbox receiver Installation straps 2 U...

Page 5: ...batteries is strongly recommended During the installation of alkaline batteries place the switch inside the battery case to ALK Insert the batteries in the battery case as indicated and insert it inside the camera see figure below Exact polarity must be followed We also recommend the use of new batteries to ensure maximum performance of your camera Lithium battery pack This camera can be powered b...

Page 6: ... charge of the lithium battery sold separately see OPTIONS or the 12 volt battery sold separately see OPTIONS During the installation of the rechargeable lithium battery or 12 volt battery slide the switch inside the battery case to RECH to activate the charging system of the solar panel POWER BLACKBOX RECEIVER It is possible to know the battery level of the receiver when it is turned on The TEST ...

Page 7: ... camera also beeps The camera supports a 32GB memory capacity the receiver supports 8GB Before inserting or removing the memory card the camera or the receiver must be turned off Failing to do so may cause loss of pictures or damage the pictures already recorded on the memory card When the SD card is full in the camera the viewing screen indicates Disk full when PHOTO VIDEO or TEST mode are select...

Page 8: ...distance When TEST mode is selected no picture or video is recorded Walk perpendicularly in front of the camera When the camera detects movement the light blinks to indicate that normally a photo or video would have been recorded If the system does not detect the movement increase the distance detection using the SETTINGS menu the option SENSITIVITY allows the user to set the sensitivity to HIGH M...

Page 9: ...he synchronization channel or to add other sets TINY W2s camera Blackbox receiver in the same area refer to the following procedure When more than one TINY W2s cameras are located in the same area of transmission it is necessary to manually synchronize each camera with its receiver on a different channel To do so 1 Turn on the first camera and choose the SIGNAL mode 2 Turn on the first receiver 3 ...

Page 10: ...op time These hours are the basic configuration of your camera Note The hours can be recorded over a 12 or 24 hours period Refer to SETTINGS TIME FORMAT 00 00 means midnight Transmission On Off Enables or disables the wireless transmission of images to the Blackbox receiver When the transmission is enabled Only pictures are transmitted to the receiver not videos The quality of the photos on the re...

Page 11: ...rançais Deutsch Italiano Select a language for the camera s menu Sensitivity High Medium Low Allow the user to choose between three different levels of sensitivity HIGH MEDIUM or LOW The camera will only detect sources of heat in movement Make sure to have the least possible objects in front of the camera during the positioning This prevents picture taken by the camera when oriented towards the su...

Page 12: ...e when a movement is detected The lithium battery pack and the AA batteries can remain safely inside the camera and it is ideal in case of a blackout A 12 volt DC adapter that can provide a minimum of 800 mA is required See OPTIONS for accessories Note When using the electricity power the MULTI SHOT mode and the DELAY between photos are disabled as the camera starts instantly every time it detects...

Page 13: ... minutes during that period of operation time start and time stop even if there is no detection This option allows the user to obtain pictures of game outside the detection range of the camera Note The TIME LAPSE mode only applies in PHOTO mode not in VIDEO mode When TIME LAPSE mode is selected the DELAY mode and the MULTI SHOT mode are disabled In addition the photo resolution is reduced to 800 x...

Page 14: ...ds the sound Under the camera you can find a rubber cap with the inscription MIC If the user does not want to record the sound the rubber cap needs to stay in place If the sound recording is required the user must lift the rubber cap and turned it slightly so that the microphone receiver is completely cleared See figure below DOWNLOAD TO A COMPUTER To transfer or view photos and videos on a PC you...

Page 15: ...n the screen Erase one To erase the photo or the video on the screen Format To format memory card and to erase all protected photos and videos Erase All To erase all stored photos and videos with the exception of protected photos and videos Exit To return to viewing screen Note The number of yellow stars that appear to the right of the screen corresponds to the resolution of the photos Low 3MP Med...

Page 16: ...he camera may be set to PHOTO or VIDEO mode and the screen turns off after a period of 60 seconds in order to preserve battery life OPTIONS See your local dealer or visit www spypoint com to find available products The following items are popular options that can be added to a SPYPOINT camera model TINY W2s SD Memory card SD 8GB Allows the user to record photos and videos Multi card reader RD25 1 ...

Page 17: ...d lithium battery directly into compatible devices Can also be combined with any 12 volt battery W K U b IR Booster IRB W 100 LED wireless infrared module that allows the user to amplify the infrared lights at night for clearer shots Black LEDs IR Booster IRB W B 100 invisible LED wireless infrared module that allows the user to amplify the infrared lights at night for clearer shots Secure Metal B...

Page 18: ... or maintained Any modification or tampering of the product will affect its operation performance durability and void this warranty REPAIR SERVICE Repairs for damages not covered by the warranty will be subject to a reasonable charge For technical assistance write to tech spypoint com Give a description of the problem with a phone number where you can be reached IMPORTANT Under no circumstances wi...

Page 19: ...e de surveillance SPYPOINT TINY W2s Ce manuel d utilisation vous permettra d utiliser votre nouvel appareil de façon optimal Pour la plus récente version du manuel d utilisateur ou pour toutes informations additionnelles consultez notre site web au www spypoint com ...

Page 20: ...de stockage Caméra1 Récepteur2 Carte SD SDHC jusqu à 32Go1 jusqu à 8Go2 Pas de mémoire interne Visionnement Écran intégré LCD de 2 4 6 1 cm Sortie TV Vidéo Composite PAL NTSC Sortie Ordinateur USB 2 0 Alimentation Caméra accessoires vendus séparément voir OPTIONS DISPONIBLES Piles alcalines ou au lithium 6x AA Bloc pile lithium Bloc pile rechargeable LIT 09 LIT C8 Externe Prise 12V Batterie 12 vol...

Page 21: ...nt externe Prise 1 8 pour contact sec Système d éclairage de nuit DEL 38 DEL Type DEL infrarouges Exposition Ajustement automatique de la puissance de l éclairage infrarouge Angle de champ de vision optique 40 Système de transmission photo sans fil Portée du signal sans fil Maximum 75m 250 ft Recommandations Température de fonctionnement 20 C à 50 C 4 F à 122 F Température de remisage 30 C à 75 C ...

Page 22: ...les AA 1 5V L emploi de piles alcalines ou au lithium est fortement recommandé Lors de l installation de piles alcalines glisser le commutateur du compartiment des piles à ALK Insérer les piles dans le support dans le sens indiqué et l insérer dans la caméra tel qu indiqué voir figure plus bas La polarité des piles doit être respectée Nous recommandons d utiliser des piles neuves pour assurer le r...

Page 23: ...ment à un panneau solaire SP 12V vendu séparément permettant de maintenir la charge de la pile lithium ou de la pile 12 volts vendue séparément Lors de l installation de la pile au lithium rechargeable ou de la pile 12 volts glisser le commutateur à l intérieur du compartiment des piles à RECH pour activer le système de recharge avec le panneau solaire ALIMENTATION RÉCEPTEUR BLACKBOX Il est possib...

Page 24: ...écessaireaufonctionnement de la caméra SPYPOINT TINY W2s et du récepteur Blackbox Lorsque la caméra est allumée et que le mode PHOTO VIDEO ou TEST est choisi l écran affiche Insérer carte mémoire et émet un signal sonore si la carte mémoire est absente La caméra accepte les cartes mémoire jusqu à une capacité de 32Go et le récepteur jusqu à 8Go Avant d insérer ou de retirer une carte éteindre la c...

Page 25: ...rroie d installation fournie hauteur d installation recommandée environ 1 mètre En mode TEST il est possible de prendre une photo en appuyant sur le bouton OK La photo est enregistrée et apparaît dans le mode VISIONNEMENT DEL BUSY La lumière BUSY située à la droite de l écran s allume lorsque la caméra enregistre un fichier PROGRAMMATION Allumer l appareil et naviguer sur l interface en appuyant s...

Page 26: ...u ajouter d autres ensembles caméra TINY W2s récepteur Blackbox dans un même périmètre d utilisation se référer à la procédure suivante Lorsque plusieurs caméras TINY W2s sont installées dans la même zone de transmission il est nécessaire de synchroniser manuellement chaque caméra avec son récepteur sur un canal différent Pour ce faire 1 Allumer la première caméra et passer en mode SIGNAL 2 Allume...

Page 27: ...onnement en tout temps période d activation de 24 heures les mêmes heures de début et d arrêt doivent être programmées exemple entrer 00 00 comme heure de début et 00 00 comme heure d arrêt Ces heures sont les configurations de base de votre appareil Note Les heures peuvent être inscrites sur une période de 12 ou 24 heures se référer à FORMAT HEURE dans le menu CONFIGURATION 00 00 équivaut à minui...

Page 28: ...ir jusqu à 6 photos sous différents angles lorsque la caméra est programmée en mode PHOTO Durée vidéo 10s 30s 60s 90s Permet de configurer la durée d enregistrement des séquences vidéo lorsque la caméra est programmée en mode VIDEO Langue English Français Deutsch Italiano Permet de choisir la langue des menus de la caméra Sensibilité Forte Normale Faible Permet de choisir la sensibilité de détecti...

Page 29: ...imentation Piles Électricité Permet de sélectionner l alimentation par piles ou par électricité Choisir ÉLECTRICITÉ si l appareil est branché à une prise électrique en utilisant un adaptateur 12 volts AD 12V vendu séparément Le branchement électrique conseillé lorsque la caméra est utilisée pour la sécurité permet d obtenir un temps de déclenchement instantané lors de la détection d un mouvement L...

Page 30: ...entier étroit Note Les détecteurs de côté nécessitent une plus grande consommation d énergie Time Lapse Désactivé 30s 1m 3m 5m 15m 30m 1h Permet de programmer la fréquence à laquelle la caméra prend une photo sans qu il y ait pour autant une détection de mouvement Par exemple si l option 5 minutes est sélectionnée dans le mode TIME LAPSE la caméra prend une photo toutes les 5 minutes durant la pér...

Page 31: ...le nombre de fichiers total inclus uniquement les photos et vidéos prises par une caméra SPYPOINT PRISE POUR DÉCLENCHEMENT EXTERNE Entrée 1 8 qui permet de déclencher la prise de photos ou de vidéos à l aide d un contact normalement ouvert Exemple l utilisation d un contact de porte magnétique relié à un système d alarme ENREGISTREMENT DU SON Cette caméra offre la possibilité d enregistrer le son ...

Page 32: ...à l aide de la carte mémoire de type SD Note Le nom des photos enregistrées par la caméra commence par PICT tandis que celles enregistrées dans le récepteur commencent par PICW VISIONNEMENT Permet de visionner les photos ou les vidéos sur l écran TFT 2 4 ou sur un téléviseur Visionner avec l écran 2 4 Lorsque le mode VISIONNEMENT est sélectionné la dernière photo ou la dernière vidéo enregistrée a...

Page 33: ...tecter au delà de la portée des DEL infrarouges Réduire la sensibilité de l appareil CONFIGURATION Sensibilité 3 Les petits animaux peuvent faire déclencher la caméra Réduire la sensibilité et ou augmenter la hauteur de la caméra 4 Le détecteur de mouvement peut détecter les animaux à travers le feuillage 5 Si la personne ou l animal se déplace rapidement il peut sortir du champ de vision de la ca...

Page 34: ... de l achat de l ensemble LIT C 8 Boîtier d alimentation 12 volts KIT 12V Boîtier d alimentation 12 volts résistant à l eau Inclus une pile 12 volts un chargeur un câble d alimentation de 12 pieds et une courroie de transport Câble d alimentation PW 12FT Câble d alimentation de rechange de 3 6m pour branchement de la caméra au KIT 12V Pile 12 volts et chargeur BATT 12V Pile de 12 volts rechargeabl...

Page 35: ...ibles à transmission sans fil permettant d amplifier la puissance de l éclairage infrarouge la nuit Boîtier de sécurité en métal SB T Boîtier permettant de sécuriser la caméra contre le vol De plus il la protège des bris pouvant être engendrés par les ours ou autres animaux Support pour caméras MA 360 Support ajustable pour caméras compatible avec fixations pour trépied standard de 1 4 20 Cadenas ...

Page 36: ...tions non conformes du produit affecteront son fonctionnement ses performances sa durabilité et annuleront la garantie SERVICE DE RÉPARATION Les réparations pour bris ou défectuosités non couverts par la garantie seront facturées à prix raisonnables Pour le soutien technique s v p écrire un courriel à tech spypoint com Décrire le problème rencontré et indiquer un numéro de téléphone pour vous rejo...

Page 37: ...den vielen Vorzügen dieser digitalen Überwachungskamera gehören die vielfältigen Einsatzmöglichkeiten und die benutzerfreundliche Bedienung Unsere Spitzeningenieure haben diese 8 MP Kamera entworfen entwickelt und durchdacht SiekannTagundNachtohneBlitzlichtscharfeund qualitativ herausragende Bild und Videoaufnahmen machen ...

Page 38: ... Video Modus Speicherplatz Kamera1 Empfänger2 SD SDHC Karten bis zu 32 GB1 Kein interner Speicher bis zu 8 GB2 Betrachten Eingebauter Bildschirm 2 4 LCD TV Ausgang PAL NTSC Computer Ausgang USB 2 0 Stormversorgung Kamera zubehör separat erhältlich siehe Zubehörteile Alkaline oder Lithium Batterien 6x AA Lithium Akku Wiederaufladbarer Lithium Akku LIT 09 LIT C8 Extern 12 Eingang 12 Volt Batterie KI...

Page 39: ...ur in Verbindung mit einer 12V DC Netzstromquelle Externer Auslöser 1 8 Buchse für einen Arbeitskontakt Nächtliches Beleuchtungssystem LEDs 38 LEDs Typ Infrarot LEDs Abdeckung Automatische Infrarotlevel Anpassung Optisches Sichtfeld 40 Kabelloses Fotoübertragungssystem Kabellose Reichweite Maximal 75m Empfehlung Betriebstemperatur 20 C bis 50 C 4 F bis 122 F Lagertemperatur 30 C bis 75 C 22 F bis ...

Page 40: ...amera werden 6 AA Batterien benötigt 1 5V Wir empfehlen den Einsatz von Alkali Batterien Beim Gebrauch von Alkali Batterien den Schalter im Batteriefach auf ALK d h Alkaline stellen Legen Sie die Batterien ein wie im Batteriefach angegeben Beachten Sie dabei die Polarität Wir empfehlen weiterhin dass benutzen von neuen Batterien um die maximale Leistung Ihrer Kamera zu garantieren Lithium Akkupack...

Page 41: ...Batterie aufrecht separat erhältlich mehr im Abschnitt Zubehörteile Beim Gebrauch des Lithium Akkus oder der 12V Batterie den Schalter im Batteriefach auf RECH d h Wiederaufladbar stellen um das Ladesystem des Solar Panels zu aktivieren STROMVERSORGUNG EMPFÄNGER Zum überprüfen des Batteriestatus von des Blackbox Empfängers wenn dieser eingeschalt ist Die LED leuchtet durchgängig für 8 Sekunden wen...

Page 42: ...ra eingeschaltet und keine Speicherkarte eingelegt ist zeigt der Bildschirm im Foto oder VIDEO Modus Speicherkarte einsetzen an weiterhin piept die Kamera dann Der SD Schacht der Kamera und dem Blackbox Empfänger eignen sich für Karten mit einer Speicherkapazität bis zu 32GB Bevor Sie eine Karte einsetzen oder entnehmen muss die Kamera oder der Blackbox Empfänger aus geschaltet werden Andernfalls ...

Page 43: ...d zeigt damit an dass im normalen Einsatz an dieser Stelle eine Aufnahme erfolgt wäre Erkennt das Gerät keine Bewegung müssen Sie die Entfernungserkennung am Rädchen DISTANCE neu einstellen oder das Gerät neu ausrichten Sie können Ausrichtung bzw Montagehöhe der Kamera besser einschätzen wenn Sie sich mit der Bewegungserkennung des Geräts vertraut gemacht haben Empfohlene Anbringungshöhe niedriger...

Page 44: ...onisation beendet ist 6 Die Kamera und den dazugehörigen Blackbox Empfänger nun ausschalten 7 Wiederholen Sie diese Schritte für jede weitere Kamera es ist möglich bis zu 9 Systeme in einem Gebiet anzubringen EINSTELLUNGEN Ermöglicht individuelle Einstellungen Zur Einstellung des Systems in Deutsch halten Sie die Taste gedrückt bis Sprache markiertist DrückenSieOKwählenSie Deutsch über die Tasten ...

Page 45: ...g in 12 Sekunden möglich Verzögerung Wählen Sie den Zeitabstand zwischen zwei Fotos oder Videos aus Zusätzliche Einstellung es ist möglich die Verzögerungszeit zwischen einzelnen Aufnahmen auf 10 Sekunden zu verringern anstelle von 1 Minute dafür die folgenden Schritte durchführen Zu beachten ist das dadurch die Batterielebensdauer etwas verkürzt wird Die Kamera ausschalten Drücken Sie und halten ...

Page 46: ...atzierung wenige Objekte vor der Kamera befinden Sonst kann es zu Bilder kommen durch beweglichen Objekte in direkter Sonneneinstrahlung z B ein Ast Datum Datumseinstellung im Format Monat Tag Jahr Zeitformat Erlaubt dem Benutzer zwischen 12 Stunden oder 24 Stunden Zeitbereich zu wählen z B 6 00 pm oder 18 00 Uhrzeit Uhrzeiteinstellung im Format Stunde Minute Sekunde Markierung Jedes Bild kann mit...

Page 47: ...t die Kamera ist sofort jederzeit Bereit wenn eine Bewegung erfasst wurde Außerdem wird keine Temperatur auf den Bildern abgespeichert Infrarot Erlaubt dem Benutzer die Anzahl der verwendeten LEDs zu wählen An Jede LED arbeitet wenn Nachts ein Bild oder Video aufgenommen wird EINE LED Nur eine LED arbeitet siehe Bild Diese Option kann nützlich sein wenn ein IR Booster Black LEDs IR Bosster verwend...

Page 48: ... In dieser Einstellung wird ein Bericht aufgezeichnet Die Aufzeichnung beginnt sobald die Kamera auf Foto oder VIDEO aktiviert wird Beim nächsten aktivieren wird ein neuer Bericht erstellt der aufgezeichnete wird überschrieben 1 2 3 4 5 6 7 8 9 1 Start und Endzeitpunkt des Berichts 2 Anzahl von Fotos und oder Videos die während des Tages aufgenommen wurden 3 Anzahl von Fotos und oder Videos die wä...

Page 49: ...omatisch und installiert die Software selbsttätig Klicken Sie auf Mein Computer und wählen Sie Wechselplatte Wenn Sie nun auf DCIM und 100DSCIM klicken finden Sie alle Bild und Videoaufnahmen Alternativ können Sie die SD Karte aus Ihrer Kamera nehmen und in das Lesegerät des Computers einlegen Sollte Ihr Computer über kein integriertes Kartenlesegerät verfügen müssen Sie den separat erhältlichen M...

Page 50: ...ay Über oder können Sie das vorherige oder nächste Bild aufrufen Die Optionen sind identisch mit den oben genannten für das 2 4 Display siehe oben PROBLEME UND LÖSUNGEN Kein Mensch Tier auf den Bildern 1 Die auf oder untergehende Sonne kann den Sensor aktivieren Richten Sie die Kamera neu aus 2 Bei Nacht kann der Bewegungssensor weiter reichen als die Infrarot Beleuchtung 3 Ein kleines Tier kann f...

Page 51: ...t Ladegerät LIT C 8 Lithium Akkupack für die Kamera anstelle von Alkali Batterien Diese Akkus sind sehr viel weniger kälteempfindlich als die Alkalibatterien und haben eine dreimal so lange Lebensdauer Ersatz Lithium Akkupack LIT 09 Praktische Ersatzakkus Wasserabweisende Batteriekassette KIT 12V Wasserdichte Batteriekassette Umfasst einen 12V Akku ein Ladegerät ein 3 5m Stromkabel und einen Trage...

Page 52: ...Änderungen am Gerät führen zu eingeschränkter Funktionstüchtigkeit und Lebensdauer in diesen Fällen erlischt die Garantie REPARATURDIENSTE Leistungen für Schäden die nicht von der Gerätegarantie abgedeckt sind werden in Rechnung gestellt Für technische Unterstützung wenden Sie sich bitte an info eurohunt de Beschreiben Sie Ihr Problem und hinterlassen Sie eine Telefonnummer unter der Sie erreichba...

Reviews: