background image

9

Settings

Use the 

 and 

 buttons to navigate in the interface and modify the selection, 

the OK button to select and the 

 button to return to the previous menu.

PHOTO

Allows the user to take photos. When the PHOTO mode is selected, the 

test light in front of the camera will flash for 60 seconds to allow the user to 

leave the area without being photographed.

VIDEO

Allows the user to take videos. When the VIDEO mode is selected, the 

test light in front of the camera will flash for 60 seconds to allow the user to 

leave the area without being recorded.

TEST

Allows the user to test the detection system of the camera. When the 

TEST mode is selected, no photo or video is recorded. Walk perpendicularly in 

front of the camera. When the camera detects a movement, the busy light and 

the test light blink to indicate that normally, a photo or video would have been  

recorded. If the system does not detect the movement, increase the detection  

distance using the "Sensitivity" option in the settings menu. Realignment 

of the camera can also be required. In TEST mode, it is possible to take a 

photo by pressing the OK button. The photo is saved and appears in the 

VIEW mode.

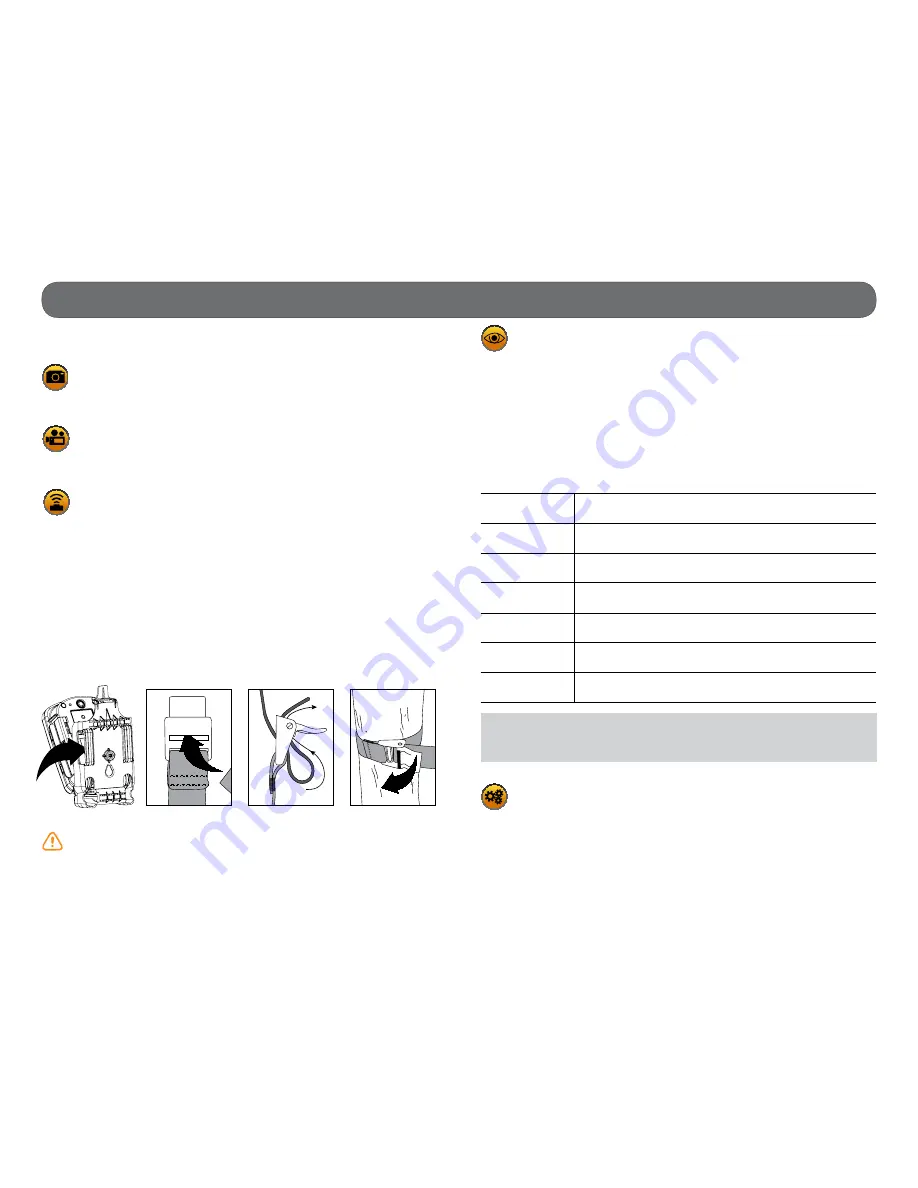
INSTALLATION WITH THE SUPPLIED STRAP

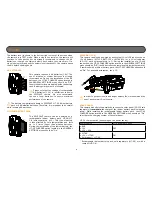
Use the mounting bracket slot for installation strap to fix the camera. The 

dimensions of the strap (included) is 1" X 60".


Recommended installation height: about 3 feet above the ground.

Do not place the camera facing the sun.

VIEW

Allows the user to view or delete recorded photos and videos on the 

camera screen.

• 

Viewing with the screen of the camera:


When the VIEW mode is selected, the latest photo or video recorded  

appears on the screen automatically. Press  

 

or 

 to view next or  

previous images. Press  

 

to


zoom in and  

 

to zoom out. When the zoom 

is activated, press OK to move the image by using 

   

or

 

. Press 

OK again then 

 to return to normal view.

Press OK to view the different options available:

Play:

Allows the user to play or pause the video on the screen 

(this option is available only for videos).

View date/time: Allows the user to view the date and time printed on 

the photo.

Protect:

Allows the user to protect a photo or video to prevent it 

from being deleted by selecting "Erase All".

Erase one:

Allows the user to erase the photo or the video seen on 

the screen from the memory card.

Erase all:

Allows the user to erase from the memory card all stored 

photos and videos, with the exception of protected files.

Format:

Allows the user to format the memory card and delete 

all protected photos and videos.

Exit:

Allows the user to exit the menu to return to the viewing 

screen.

Note: 

The number of yellow stars that appear to the right of the screen 

corresponds to the resolution of the photos.

=Low resolution     



=Medium resolution     



=High resolution

SETTINGS

Sets the advanced options of the camera.

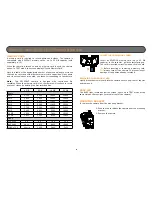
1. Insérez l’extrémité de la courroie dans la fente 

  qui se trouve au dos du mécanisme.

2. Insérez la courroie dans la fente sous le levier 

  et faites-la ressortir en arrière.

3. Créer une tension sur la courroie en la tirant vers 

  la droite, puis rabattez vers la gauche le levier pour

  maintenir la position.

Summary of Contents for HAWK

Page 1: ...P INT SPY INT P SPY v1 1 USER MANUAL Model HAWK SURVEILLANCE CAMERA Adventure series série expedition series série summit pro series série smart series série TINY series série se ...

Page 2: ...surveillance They are distributed and shipped all over the world and the market never stops growing Prosperous and respected GG Telecom is a company that constantly keeps abreast of new technologies and listens to its customers to deliver cutting edge products with practical solutions that improve hunting and outdoor activities JOIN THE SPYPOINT COMMUNITY facebook com spypoint youtube com spypoint...

Page 3: ...acket 8 Memory card 8 BUSY LED 8 Settings 11 REMOS Technology 11 Sound recording 12 File transfer to a computer 13 Troubleshooting 14 Error messages 14 Available accessories 15 Specifications HAWK 17 Limited warranty 18 Repair service 18 Table of contents ...

Page 4: ...io Cavo USB Nota Scheda di memoria e batterie acquistabili separatamente BUSY LED Diplay visualizzativo Telecomando Microfono Tasto Power Connessione pannello solare 12V Attaco USB Lettore SD Altoparlante incorporato Lente fotografica LED invisibili LED test Vano batterie Lente di rilevazione Dispositivo di montaggio Fori per il nastro di posizionamento Filettatura per treppiede Fori per il cavo l...

Page 5: ...unting bracket Slot for installation strap Tripod mount 9 1 2 3 6 4 5 7 8 9 12 10 14 11 13 15 16 17 18 19 Cable lock hole BUSY LED Viewing screen Navigation buttons Microphone Power button 10 11 12 13 14 15 12V Solar panel jack USB port SD card slot Built in speaker No SIM card slot for HAWK model 16 17 18 19 ...

Page 6: ...ripod mount Standard 20 tripod mount 10 Cable lock hole Allows the user to install a CL 6FT cable lock sold separately 11 BUSY LED Lights up during a detection when TEST mode is activated 12 Viewing screen Allows the user to access the main menu and view photos videos 13 Navigation buttons Buttons to set the camera 14 Microphone Records sound in video mode 15 Power button Press the button to turn ...

Page 7: ...ately p 15 This type of battery is less affected by cold temperatures and lasts up to 3 times longer than alkaline batteries During the installation of the lithium battery the LIT 09 CHARGER option located in the GENERAL SETTINGS menu should be On EXTERNAL 12V This camera can also be powered by an external 12 volt DC input such as a 12 volt battery KIT 12V BATT 12V or KIT6V 12V or a 12 volt adapte...

Page 8: ... 3800 7600 15200 30400 5 MP 3400 6800 13600 27300 6 MP 3200 6300 12600 25300 7 MP 2700 5500 10900 21800 8 MP 2400 4800 9500 19000 10 MP 1900 3800 7600 15200 12 MP 1600 3200 6300 12600 Video 320 x 240 4 h 8 h 16 h 32 h 640 x 480 2h10 4h10 8h20 16h40 1280 x 720 40 min 1h20 2h40 5h20 INSERTING THE MEMORY CARD Insert an SD SDHC memory card up to 32 GB capacity in the card slot gold contacts facing up ...

Page 9: ...to view or delete recorded photos and videos on the camera screen Viewing with the screen of the camera When the VIEW mode is selected the latest photo or video recorded appears on the screen automatically Press or to view next or previous images Press to zoom in and to zoom out When the zoom is activated press OK to move the image by using or Press OK again then to return to normal view Press OK ...

Page 10: ...ideo Note The file name of the photo corresponds to the digit before the video file name For example if the name of the photo is PICT001 the name of the video will be PICT002 Language English Français Deutsch Italiano Español Allows the user to select a language for the camera menus Sensitivity Low Medium High Allows the user to choose the detection sensitivity of the camera A higher sensitivity a...

Page 11: ...ideo in an area of 500 ft Wireless sensor MS 1 Off 1 2 3 4 5 6 7 Allows the camera to be triggered wirelessly by one or more MS 1 devices through the REMOS wireless technology sold separately IR Booster On Off Allows the camera to trigger up to a distance of 50ft one or more IR BOOSTER infrared lighting devices without the use of an additional transmitter through the REMOS wireless technology Sold...

Page 12: ...automatically records the sound Under the camera there is a rubber cap with the inscription MIC If the user does not want to record the sound the rubber cap needs to stay in place If sound recording is required the user must lift the rubber cap and turn it slightly so that the microphone receiver is completely cleared See figure below ...

Page 13: ...mputer It is recommended to use the supplied cable 3 The computer will detect the camera and install the driver automatically 4 Click on My Computer and select Removable Disk 5 Then click on DCIM and 100DSCIM to find all recorded photos and videos 6 Drag or save the files to the desired location Taking the memory card sold separately p 15 out of the camera and inserting it into the computer slot w...

Page 14: ...bility setting p 10 Small animals may trigger the unit Reduce sensibi lity setting p 10 and or raise height of camera Motion detector may detect animals through foliage If a person or animal moves quickly it may move out of the camera s field of view before the photo is taken Move the camera further back or redirect the camera Make sure the mounting post or tree is stable and does not move Red lig...

Page 15: ...th a water resistant ABS plastic case AC charger 12 ft power cable PW 12FT and carrying strap included Compatible with all SPYPOINT products equipped with a 12V power jack Solar panel SP 12V Solar panel with adjustable steel mounting kit Maintains the charge of the lithium batterypackdirectlyintocompatible devices Can also be combined with any 12 volt battery 9 ft power cable Rechargeable 12V batt...

Page 16: ... 1 7 ft 0 5 m max load weight 11 lbs 5 kg Fits most SPYPOINT products INFRARED BOOSTER IR Booster IRB W 100 LED wireless infra red module that allows the user to amplify the strength of the infra red lights for clearer night shots Invisible LEDs IR Booster IRB W B 100 invisible LEDs completely invisible to the naked eye wireless infrared module that allows the user to amplify the infrared lights a...

Page 17: ...ng Built in screen 2 4 LCD Computer output USB 2 0 Power source Accessories sold separately p 15 Alkaline or lithium batteries 6 x AA Lithium battery pack Rechargeable battery pack LIT 09 LIT C 8 External 12V jack 12V battery KIT6V 12V KIT 12V BATT 12V or 12V adapter AD 12V Solar panel Solar panel SP 12V combined with rechargeable battery pack LIT 09 LIT C 8 Detection system Motion sensor PIR Dete...

Page 18: ...ill be assumed by the customer Repairs for damages not covered by the warranty will be subject to a reasonable charge The customer will pay all shipping costs 1 BEFORE sending a product for repair the costumer is welcomed to contact GG Telecom technical support team at 1 888 779 7646 or tech spypoint com and to clearly describe the problem and give a phone number where she or he can be reached It ...

Reviews: