


9
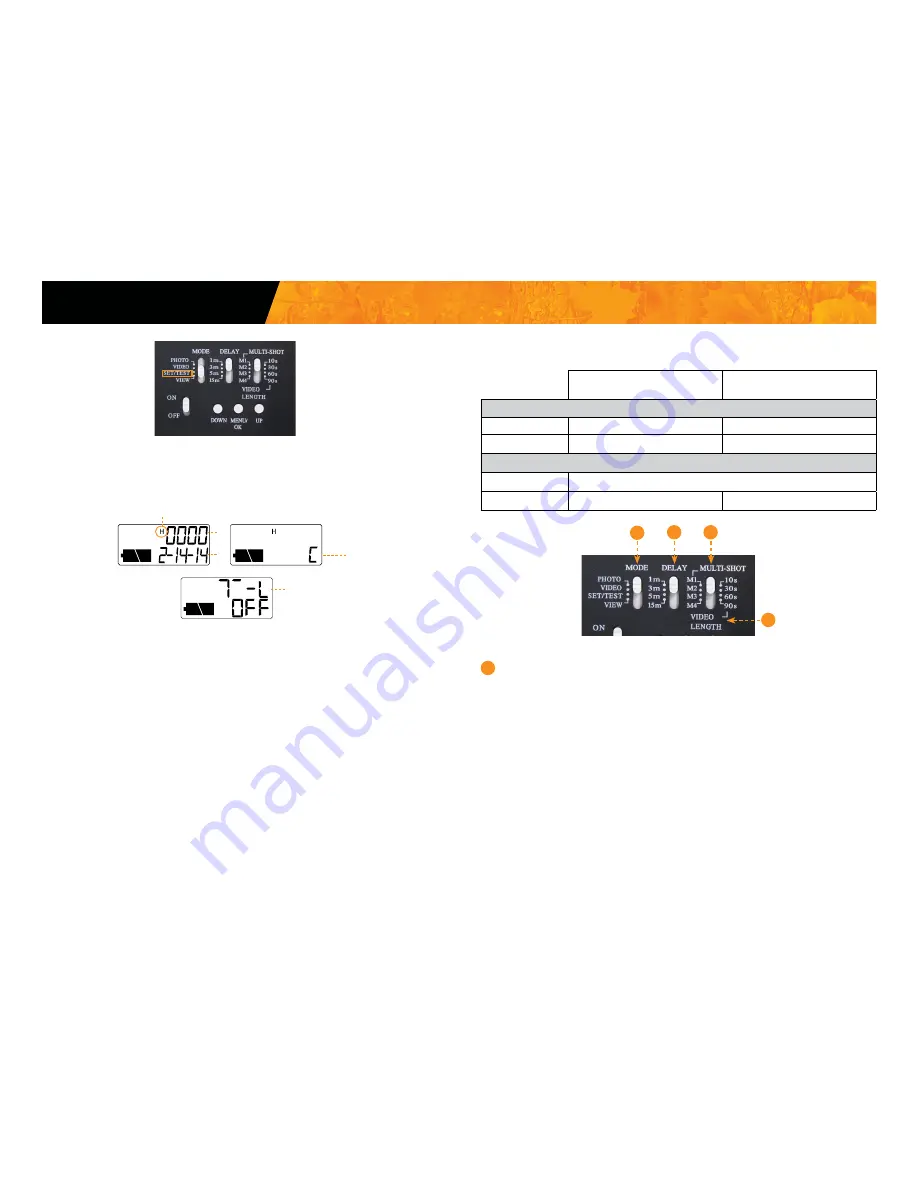
To configure the general settings, set the camera to
SEt/tESt
mode. Press
ok
to enter the menu. The flashing option is the one that can be modified
using
UP/ DoWN
. Press
ok
to confirm and to set the next option. Once you
went through all the options, turn the camera
off
to record the settings.
A
: Set the
Photo quality
(High/Low)
*
see table on next page
B
: Number of recorded files display
C
: Set the
Date/time
(MM/DD/YY, hh:mm)
D
: Set the
temperature
(Celcius/Farenheit)
E
: Set the option
time-lapse
(On/Off) *IRON-10 only
*
This table shows the photo and video resolution depending on the
photo quality setting (High/Low).
1
MoDE
Photo
Allows the user to take photos. When the PHOTO mode is selected, the test
light in front of the camera will flash for 60 seconds to allow the user to
leave the area without being photographed.
vIDEo
Allows the user to take videos. When the VIDEO mode is selected, the test
light in front of the camera (see above) will flash for 60 seconds to allow the
user to leave the area without being recorded.
SEt-tESt
Allows the user to test the detection system of the camera. When the SET/
TEST mode is selected, no photo or video is recorded. Pass in front of the
camera from left to right. When the camera detects a motion, the test light
blinks to indicate that the camera would normally have saved a photo or
video. If the system does not detect the movement, increase the detection
distance using the DISTANCE wheel or realign the system differently.
1
2
3
4
A
D
B
C
E
Settings
IRoN
IRoN-9
(Non-HD videos)
IRoN-10
(HD Videos)
Video
Low
320 x 240
640 x 480
high
640 x 480
1280 x 720
Photo
Low
3 mp
high
9 mp
10 mp