background image

17

7 Installing the Software onto a Computer

• Installing the Software

For Windows® Users: 

PC

   IMPORTANT!


•  Please backup all the necessary data before any driver/software installation.


•  Our CD-ROM is tested and recommended to use under English Window OS.

  IMPORTANT!


(For Windows® 98SE)


On Windows® 98SE Mass Storage function needs to install the 

SPYPEN NOX

 Driver.

  IMPORTANT!


(For Windows® ME, 2000, XP)


Directly plug-in the camera to transfer and play the pictures, video clips, no need to install the driver, but if you want 

to  use  PhotoStudio®,  Funhouse™,  PhotoPrinter®,  VideoImpression™  to  transfer  the  pictures  or  you  want  to  use 

NetMeeting function, please install the driver first.


IMPORTANT! 

– If the computer requests you to install the Windows operating system during the software installation, 

place  the  windows  CD  into  the  computer  CD-ROM  drive.    The  computer  will  install  the  necessary  files  from  the  CD 

automatically.  When the Windows software appears to have finished the operation close the Windows screen.  Remove 

the Windows CD and store safely.   


NOTE:


Microsoft® NetMeeting™ is already bundled with Windows® 2000 and XP OS.  Users using Windows® 2000 or XP do not 

need to install this software from the CD-ROM.


Open & Close

1. Before you begin, close all other software applications open on 

your computer.

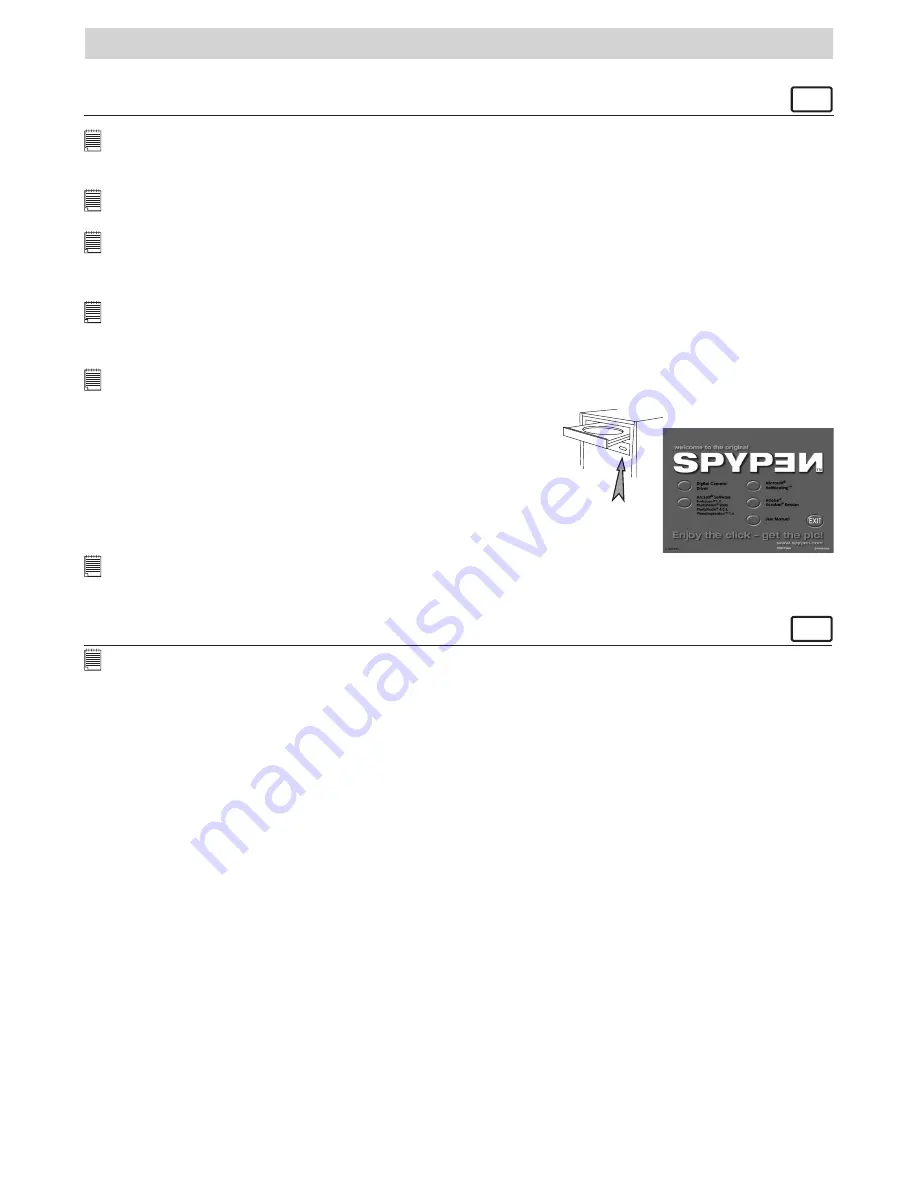
2. Insert the CD supplied into the computer CD-ROM Drive.

3. The CD User Interface Screen will automatically launch.

4. With the mouse, click on each software interface button in turn 

and follow the on screen instructions.  


NOTE:


If the setup screen doesn’t appear after loading the CD, then you can manually start it by double-clicking the “My Computer” 

Icon on your desktop, then double-clicking the icon for the CD-ROM drive.  When the CD-ROM window opens, double-click the 

“INSTALL-E.EXE” icon.

For Macintosh® Users: 

MAC


NOTE:


Directly plug-in the camera to transfer and navigate the pictures, video clips no need to install the driver.

1. Before you begin, close all other software applications opened on your computer.

2. Insert the CD supplied into the computer CD-ROM Drive.

3. Double click the CD-ROM icon “SPYPEN”.

4. Install the software included.

• Software Included with Your Camera

SPYPEN NOX Driver 

Plug & Play removable disk

Easy to use, just plug your camera to your computer and use it as a removable drive which will show up as an 

additional drive letter.  Use the ArcSoft® software suite to view, edit and print the Pictures.

PhotoStudio® 4.0 

Picture Editing Software

PhotoStudio® 4.0 is a full-featured, easy-to-use digital image-editing program that provides a complete 

set  of  photo  editing  and  retouching  tools,  plus  a  wide  selection  of  special  effects  and  enhancements.  

Its powerful features include a wide variety of input and output options, layers, multiple undo and redo 

functions, image management tools, editable text, multiple file format support and a lot more.

For further help on how to use PhotoStudio® 4.0, go to “Help” to access the Help Topics.  

Visit http://www.arcsoft.com for all your FAQ’s, tips and technical support.  

ArcSoft Funhouse™ 1.0 

Picture Editing Software

ArcSoft Funhouse™ is an image entertainment application that enables users to create “photo fantasies” 

by combining their personal photos with a wide variety of fantasy backgrounds.  Users can get their own 

images  from  digital  cameras,  scanners,  disk  drives  and  Photo  CDs,  and  seamlessly  combine  them  with 

just a few clicks of the mouse.  The fantasy backgrounds include fictional characters, classic works of art, 

Olympic heroes, 50’s funnies, bathing beauties, muscle men and a lot more.

For further help on how to use ArcSoft Funhouse™ 1.0, go to “Help” to access the Help Topics.

Visit http://www.arcsoft.com for all your FAQ’s, tips and technical support.  

Summary of Contents for Spypen Nox

Page 1: ...User s Manual NOX ...

Page 2: ... screen 4 OK button 5 Menu button 6 Power button 7 Left button 8 Down button 9 Reset button 10 Right button 11 Up button 12 Capture Playback selector 1 2 4 5 6 7 8 10 11 3 9 12 1 Shutter button 1 1 SD Secure Digital Card Slot 2 USB port 2 1 1 Docking station 2 Status LED 2 1 1 USB port on Docking station 1 ...

Page 3: ...ideo Clip Information Display On Off 12 Reviewing the Pictures 13 Zooming the Displayed Picture 13 Playing the Video Clip 14 Deleting One Picture Video Clip 14 Deleting All Pictures Video Clips 15 6 Using SD Card 15 Using the SD Secure Digital Card 15 To Format a Memory Card 16 7 Installing the Software onto a Computer 17 Installing the Software 17 Software Included with Your Camera 17 Computer Sy...

Page 4: ...ry by Mass Storage interface Communicate Send the pictures over the Internet to family and friends What can I do with my Video Clips Playback Playback video clips on a computer using the Windows Media Player or other Media software supplied Save Save video clips to the computer memory by Mass Storage interface Communicate Send video clips over the Internet to family and friends Camera Package Cont...

Page 5: ...ase The battery is non replaceable you can recharge the battery approximately 250 280 times Turning the Camera On and Off Fully press and hold the Power button until the status LED turns green and the camera is on Press and hold the Power button again the camera will be off Power button Status LED Checking the Battery Level Check the battery power level before taking pictures 1 Turn the camera on ...

Page 6: ...Mode on Flash Mode off Video Mode Continuous Picture Mode Self timer Normal Setting the Beep Sound On and Off You can turn the Beep sound on and off in any mode When the Beep sound is turned on the camera will beep when you press the buttons Turn on the camera Set the Capture Playback selector to Capture mode Press Press Press Press Press Press to select BEEP SOUND Press to select item Select EXIT...

Page 7: ... mode IMPORTANT The capture mode returns to Still Picture automatically after taking continuous pictures Please remember to set the capture mode to Continuous picture before taking continuous pictures NOTE The flash does not fire during the continuous mode The number of continuous pictures you can take will depend on the available memory and resolution setting Setting the 2X Digital Zoom This feat...

Page 8: ...ng this setting your pictures will be too dark NOTE Effective flash light range Approx 1 1 5 m Approx 3 5 feet Setting Quick View You can choose to save or delete picture s video clip immediately after taking picture s or recording video clip Turn on the camera Set the Capture Playback selector to Capture Press Press Press Press Press Press to select item Select EXIT to exit When quick review feat...

Page 9: ...tting is to highlight or blend the edges of the subject in pictures Normal Use when no special effect is needed Ideal for everyday pictures Hard Increases contrast on the edges of the image Ideal when you want to improve the clarity of an image or if you later may want to crop or cut out specific areas in the picture Soft Softens the edges of the image creating a soft focus effect Turn on the came...

Page 10: ... light colored subjects and for shooting outdoors on a clear day When shooting under very dark or very bright conditions you may not be able to obtain satisfactory results even after performing exposure compensation Exposure compensation returns to its standard default setting 0 after you turn off and turn on the camera again Setting White Balance Selecting the right type of white balance can help...

Page 11: ...ion 640 X 480 Normal Approximately 225 pictures NOTE Scene complexity affects a picture s file size For example a picture of trees in autumn has a larger file size than a picture of blue sky at the same resolution and quality setting Therefore the number of pictures that can be taken is for reference only The image counting may count one or two or without counting when taking a picture Setting Sel...

Page 12: ...e capture mode to Video before recording a video clip NOTE The wider resolution is 320x240 pixel You can record video clip for approximately 60 seconds per wider clips The number of video clips that can be taken is limited to the internal memory or SD card memory 5 Playback Pictures and Video Clips Turning Picture Video Clip Information Display On Off The information display is regarding picture t...

Page 13: ...2 Set the Capture Playback selector to Playback mode 3 Press Left Right button to view the pictures taken Zooming the Displayed Picture When viewing a single picture in Playback Mode you can zoom the picture you selected The scale of zoom is from X1 0 to X2 0 Either Turn on the camera Set the Capture Playback selector to Playback mode Press to select area to zoom in Press Press Press Or Turn on th...

Page 14: ...eft Right button to select the video clip you want to play 4 Press OK button to start playing video clip press OK button to stop NOTE Icon is shown on LCD screen when video clip is selected Deleting One Picture Video Clip Turn on the camera Set the Capture Playback selector to Playback mode Use Right Left button to choose a picture video clip you want to delete Please note that icon appears on the...

Page 15: ... can use to protect against accidental deletion of picture data Note however if you write protect a SD memory card you must remove write protection whenever you want to record to it format it or delete its pictures Files contained in the card may conflict with the Spypen Nox camera valuable data in your existing SD card may be distorted or lost when the card is inserted in the Spypen Nox camera We...

Page 16: ...mory Card Precautions 1 Use only a SD memory card with this camera Proper operation is not guaranteed when any other type of card is used 2 Electrostatic charge electrical noise and other phenomena can cause data corruption or even loss Always make sure that you always back up important data on other media MO disc computer hard drive etc 3 If a memory card starts to behave abnormally you can resto...

Page 17: ...ck the INSTALL E EXE icon For Macintosh Users MAC NOTE Directly plug in the camera to transfer and navigate the pictures video clips no need to install the driver 1 Before you begin close all other software applications opened on your computer 2 Insert the CD supplied into the computer CD ROM Drive 3 Double click the CD ROM icon SPYPEN 4 Install the software included Software Included with Your Ca...

Page 18: ...plete conferencing solution for the Internet and corporate intranet Powerful features let you communicate with both audio and video collaborate on virtually any Windows based application exchange graphics on an electronic whiteboard transfer files use the text based chat program and much more Using your PC and the Internet you can now hold face to face conversations with friends and family around ...

Page 19: ...sers PC MAC Connecting to Your Computer Connecting with the USB Cable USB Series A Plug Connects to your SPYPEN NOX USB Series A Plug Connects to your PC B 1 Turn on the camera 2 Plug the labelled end of the USB cable into the socket marked on your computer 3 Plug the other end of the USB cable into the USB port on your camera For Windows Users PC Transferring and Viewing the Pictures and Video Cl...

Page 20: ...m Setting up NetMeeting NOTE Set the Driver Type to WDM before starting NetMeeting for further detail please refer to Mass Storage WDM 1 Connect your SPYPEN NOX to the USB cable on one end 2 Connect the USB cable to a USB port on your PC on the other end 3 Put your SPYPEN NOX on top of your PC monitor or another flat surface 4 Connect your microphone not included to your audio card s external micr...

Page 21: ...full Turn the camera on or Wait until flash unit charging finishes or Delete images you no longer need or use another memory card Camera powers down during self timer countdown Battery is exhausted Recharge battery Recorded pictures are not saved in memory Camera powers off before the save operation is complete or Removing the memory card before the save operation is complete If the indicator is o...

Page 22: ...supportgroup com au Fax 353 0 61 702001 E mail europe arcsoft com Visit http www arcsoft com for technical support and frequently asked questions FAQ s 12 Appendix Technical Specifications Internal Memory 16MB NAND FLASH External Memory support SD card memory card up to 128MB not included Image Sensor 1 3M CMOS Still Image Resolution Resolution 1280 X 960 Super High Approx 20 pictures Resolution 8...

Page 23: ...y interference received including interference that may cause undesired operation Warning Changes or modifications to this unit not expressly approved by the party responsible for compliance could void the user s authority to operate the equipment NOTE This equipment has been tested and found to comply with the limits for Class B digital device pursuant to Part 15 of the FCC Rules These limits are...

Page 24: ...24 EN 0203 2002 SPYPEN Part No OM837592 R1 Printed in China ...

Reviews: