


©2016 Spyker Spreaders/A Brinly-Hardy Co.
7
1017459 Rev. A
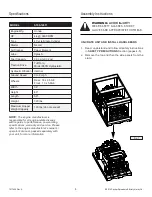
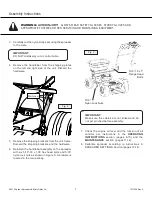
5/16”-18 x 1”
Flange Head
Bolts
5/16”
Nylon Lock Nuts
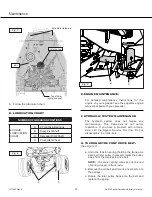
3. Carefully cut the nylon straps securing the spreader
to the crate.
IMPORTANT
:
DO NOT mistakenly cut a control cable.
4. Remove the handlebar from the shipping plates
on the left and right side of the unit. Discard the
hardware.
5. Remove the shipping brackets from the unit frame.
Discard the shipping brackets and the hardware.
6. Reinstall the handlebar assembly on the spreader
with six 5/16”-18 x 1.00 hex head bolts and 5/16”
nylon lock nuts as shown in Figure 3. Hardware is
located in the manual bag.
7. Check the engine oil level and the function of all
controls per instructions in the
OPERATING
INSTRUCTIONS
section (pages 8-10) and the
MAINTENANCE
section (pages 11-12).
8. Calibrate spreader according to instructions in
SPREADER SETTINGS Section (pages 13-14).
Assembly Instructions
IMPORTANT:
Make sure the cables are not kinked and do
not get pinched before assembly.
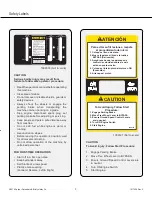
WARNING:
AVOID INJURY!
ALWAYS WEAR SAFETY GLASSES, STURDY GLOVES AND
APPROPRIATE FOOTWEAR WHEN SERVICING OR MAINTAINING EQUIPMENT.
Remove
Fig. 2
Fig. 3


