6
4. ASSEMBLE THE PRODUCT
Follow instructions below to assemble this product. Note that in this manual
the words “left” and “right” are used to refer to the product and its parts. As
such, these designations correspond to the “left” and “right” sides of a person
in position to exercise on this product. Also, for brevity, the word “screws” or
“nuts” is used where washers and other hardware may be involved.
STEP 1
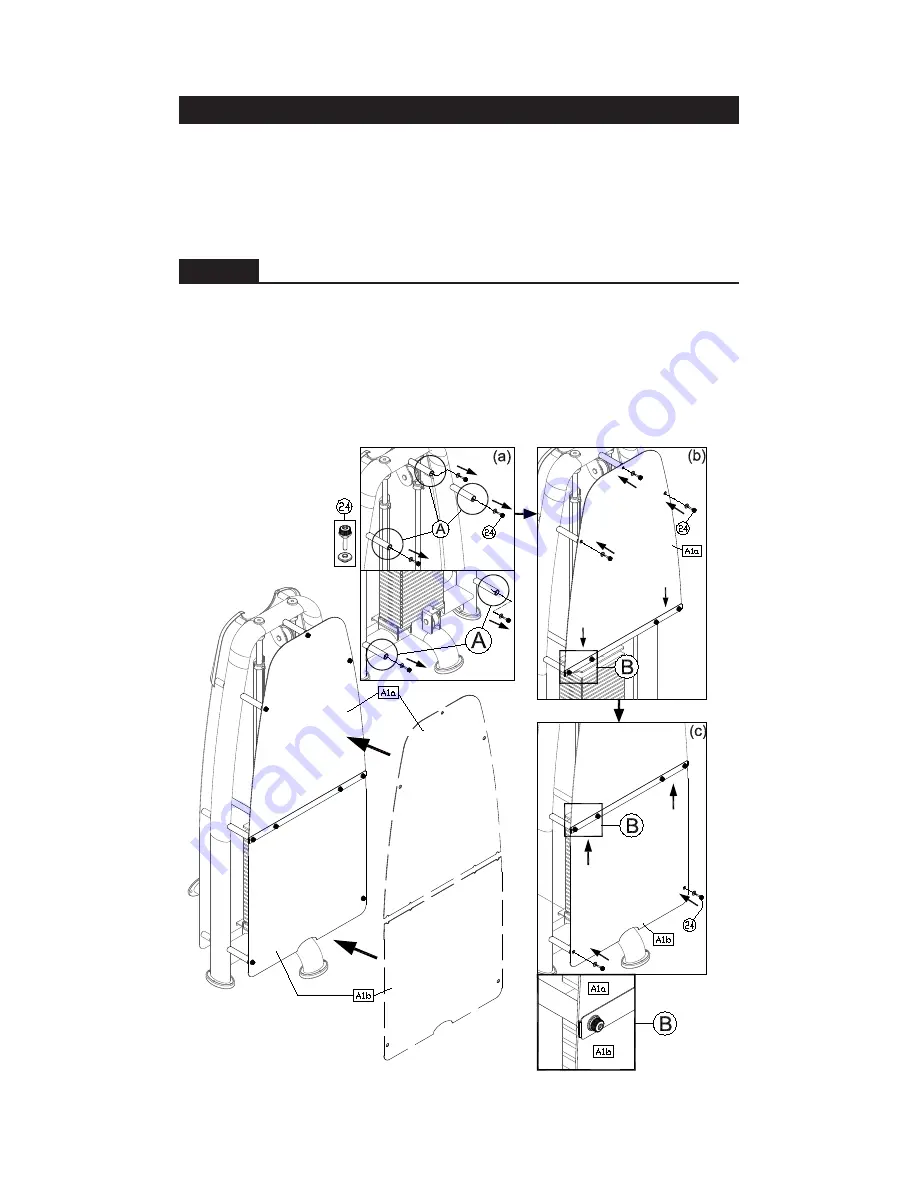
Install the Rear Covers
(a). Please remove screws (24) from the area A.
(b). First align the Top Rear Cover (A1a) cut out with the B area screws.
Afterwards align the screw holes on top, then tighten it with screws (24). (Note:
the cover needs to be in between mounting columns and mounting plate.)
(c). Repeat the process for Bottom Rear Cover (A1b) with aligning the cut out
to the B area screws. Afterwards, align the screw holes on the bottom, then
tighten them with screws (24). Finally tighten the screws on the area B.
Summary of Contents for S916
Page 19: ...18 ...


