

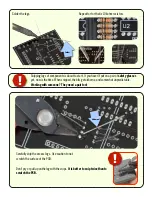


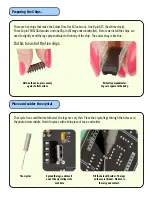

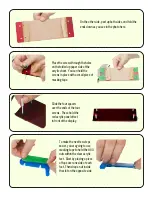


Preparing the resistors
Take resistors, and snip them from the tape.
Bend the legs as close as you can to the body
of the resistor for all of them, as in the picture
(right).
Note the color bands. You have four resistors
that are 10k, (brown - black - orange) and one
100 ohm (brown - black - brown).
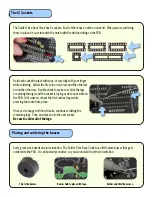
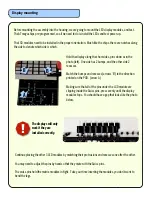
They all get the same bend, but it is
important to solder them in the correct
locations on the PCB.
The value for the required resistor is printed
on the PCB to reduce mistakes.
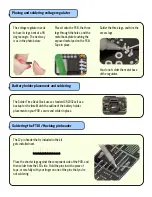
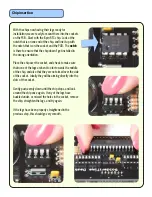
Preparing a 100 ohm resistor
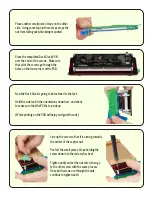
Placing and soldering the resistors
Start with the single 100 ohm resistor. It gets
placed in either orientation (no polarity). If you
have bent the legs properly, the resistor will
slide all the way down, and the resistor body will
touch the PCB.
Secure the resistor in place with some low tack
painter’s tape, or flare the legs out to hold it in
place. Double check to make sure it hasn’t
shifted, before soldering in place.
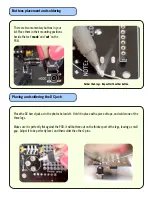
One : 100 ohm
Four : 10K ohm