background image

17

SETUP MODE

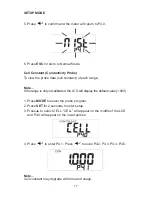
5.   Press 

 to confirm and the meter will return to P4.0.

6. Press 

ESC

 to return to Normal Mode. 

Cell Constant (Conductivity Probe) 

To view the probe data (cell constant) of each range: 

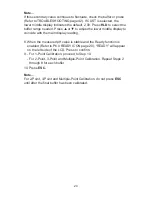
Note…


If the range is not yet calibrated, the LCD will display the default value (1.000). 

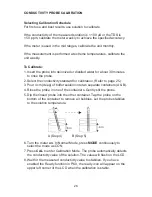
1. Press 

MODE

 to select the probe program.

2. Press 

SET

 for 2 seconds to enter setup. 

3.  Press ▲ to select CELL. “CELL” will appear on the middle of the LCD 

and P4.0 will appear on the lower portion.

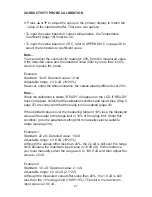
4. Press 

 to enter P4.1. Press 

 to enter P4.2, P4.3, P4.4, P4.5. 

Note… 

Cell constant may degrade with time and usage.  

Summary of Contents for 860031

Page 1: ...1 Bench Top Meters 860031 860032 and 860033 Instruction Manual ...

Page 2: ...2 View Slope Offset pH Probe 13 Calibration Review Conductivity Probe 15 pH Calibration Buffer pH Probe 16 Select Buffer 16 Cell Constant Conductivity Probe 17 Temperature Setting Conductivity Probe 18 Ready Icon 20 Temperature Units 20 Real Time Clock Setting 21 Reset 22 PH PROBE CALIBRATION 23 CONDUCTIVITY PROBE CALIBRATION 25 TDS CALIBRATION 28 SALINITY CALIBRATION 28 ...

Page 3: ...easurement 32 Total Dissolved Solid Measurement 33 Salinity Measurement 34 Automatic Temperature Compensation 35 Manual Temperature Compensation 35 Auto and Manual Range 36 Record Memory 37 Recall Memory 37 Recall Maximum Minimum 38 MAINTENANCE 39 TROUBLESHOOTING 42 ERROR CODES 43 PC CONNECTION 44 APPENDICES 47 OPTIONAL ACCESSORIES 51 SPECIFICATIONS 52 WARRANTY 56 ...

Page 4: ...e models Each model can be used for pH mV Conductivity TDS Salinity or Water Quality depending on the probe used To utilize your meter under additional parameters please refer to the list of probes in OPTIONAL ACCESSORIES on page 51 Instructions for all three models are contained within this manual Refer to the TABLE OF CONTENTS for the subsection within MEASUREMENT PROCEDURES that corresponds to ...

Page 5: ...to purchase a plug converter if using the meter outside of the US Plug the adaptor into the power port labeled DC located on the rear of the meter METER COMPONENTS Meter Drawer A built in drawer is located on the bottom of the bench top meter Pull the drawer out and use to store notes and other important reference data ...

Page 6: ...embly does not require tools The maximum swing angle is 70 and the maximum height of the holder is 378 mm Holder Assembly Holder Disassembly 1 Turn the base upside down 2 Use a cylindrical object with an approximate 12 mm diameter to push the arm out of the base To disassemble the holder from the base ...

Page 7: ...e holder can be attached to the right or left side of the meter Locate the two holes at the bottom of the meter The cylindrical knob on the holder base is designed to fit into the hole on the bottom of the meter The holder can hold up to 4 probes The wire of the probe can be fixed to the arm Turn clockwise to lock the holder into place Turn counterclockwise to adjust the holder up and down ...

Page 8: ...n MAX MIN indicate a maximum or minimum memory value HLD Holds the current reading on the display REC indicates the meter is in recall mode MEM indicates the current measured value is saved The digital number under MEM indicates the total number of saved records The are real time Y M D Year Month Date or H M S Hour Minute Second ATC indicates the meter is in Automatic Temperature Compensation Mode...

Page 9: ...or Recall Modes press to return to Normal Mode HLD REC Press to freeze the reading Press again to release Press for more than 1 second to switch between NORMAL and RECALL Modes MODE Press to switch the mode Press to increase the setting value MEMO Press to save the current reading Press to decrease the setting value MN MX CONFIRM Press to confirm calibration or parameter setting Press to view the ...

Page 10: ...to capture online or stored data MIC Conductivity probe input GND I Earth ground jack inputs standard tip connectors GND II Earth ground jack inputs standard tip connectors ANALOG Strip chart recorders input Use subminiature plug with positive tip BNC The port accepts pH ORP with a BNC connector Ensure that the connector is clean and dry before connecting ATC Phone jack input for the temperature p...

Page 11: ...is in Normal Mode Note To exit Setup Mode without saving press ESC until Normal Mode appears If the meter is in Setup Mode press ESC twice to exit For Conductivity pH and mV default settings refer to pages 54 55 Memory Transmission To transfer stored data from the meter to the computer 1 Connect a RS232 or USB cable to the rear of the meter then connect the other end of the cable with the D sub co...

Page 12: ...ansmit data for a different parameter press MODE to select your parameter before entering setup Clear Memory 1 Press MODE to select the parameter you want cleared before entering Setup Mode 2 Press SET for 2 seconds to enter setup Press to select the memory clear function 3 CLR appears on the middle display with P2 0 in the lower display 4 Press to enter step P2 1 The default NO icon flashes on th...

Page 13: ...ted View Slope Offset pH Probe 1 Press MODE to select the probe type as pH 2 Press SET for 2 seconds to enter setup 3 Press until ELE appears in the middle display and P3 0 appears in the lower display CAUTION THE MEMORY CLEAR PROGRAM IS DESIGNED TO CLEAR 99 MEMORIES AT ONE TIME PLEASE CAREFULLY CONSIDER IF YOU WANT TO CLEAR THE MEMORY AS THIS OPERATION CANNOT BE REVERSED ...

Page 14: ...n 115 change the probe immediately 5 Press to enter P3 2 P3 3 and P3 4 Note The solution range differs between NIST and Custom buffers 6 Press to enter P3 5 and view the offset value The offset value is the mV value of pH 7 default 0 0 The offset value will be different after calibration If the value is outside the range of 60 mV replace the probe ...

Page 15: ... default value There are 5 total calibration ranges for Conductivity TDS and SALT Range 1 to 3 Conductivity or TDS value Range 4 to 5 Conductivity TDS or SALT value 1 Press MODE to select the probe program 2 Press SET for 2 seconds to enter setup 3 Press to select CAL CAL appears on the middle of the LCD and P3 0 appears on the lower portion 4 Press to enter P3 1 Press to enter P3 2 P3 3 P3 4 P3 5...

Page 16: ... buffer pH 1 00 to 3 00 3 50 to 5 50 6 00 to 8 00 8 50 to 10 50 11 50 to 13 50 Select Buffer 1 Press SET for 2 seconds to enter setup 2 Press to select pH buffer BUF appears on the middle of the LCD and P4 0 appears on the lower portion 3 Press to enter P4 1 The default CUST will flash on the LCD and P4 1 will appear on the lower portion of the display If you use CUST buffers press to confirm and ...

Page 17: ...nge Note If the range is not yet calibrated the LCD will display the default value 1 000 1 Press MODE to select the probe program 2 Press SET for 2 seconds to enter setup 3 Press to select CELL CELL will appear on the middle of the LCD and P4 0 will appear on the lower portion 4 Press to enter P4 1 Press to enter P4 2 P4 3 P4 4 P4 5 Note Cell constant may degrade with time and usage ...

Page 18: ...le of the LCD and P5 0 will appear on the lower portion 4 Press to enter P5 1 The default Auto flashes on the middle of the LCD and P5 1 will appear on the lower portion To switch to manual temperature compensation mode press to change the status then press to confirm and enter P5 2 5 The default 2 1 flashes on the middle of the LCD and P5 2 will appear on the lower portion 6 To adjust the tempera...

Page 19: ... portion To adjust the solution temperature setting press or 8 Press to confirm and enter P5 4 Note When using the TDS measurement mode you must set the TDS conversion factor in P5 4 9 At P5 1 press three times to enter P5 4 The default 0 500 flashes on the middle of the LCD and P5 4 will appear on the lower portion If the TDS conversion factor of the solution is not 0 5 press or to adjust the val...

Page 20: ...r display 3 Press to enter P6 1 YES will flash on the LCD display and P6 1 will appear on the lower display 4 Press to switch between YES or NO 5 Press to confirm and return to P6 0 6 Press ESC to return to Normal Mode Temperature Units To select either Celsius or Fahrenheit temperature scale 1 Press SET for 2 seconds to enter setup 2 Press to select unit on the upper display P7 0 will appear in t...

Page 21: ...l time clock independent of the meter s power source 1 Press SET for 2 seconds to enter setup 2 Press to select rtc on the LCD display P8 0 appears on the lower display 3 Press to enter P8 1 The year flashes in the lower left corner of the LCD display The year is the last two digits only for example 1999 would be 99 Symbol Y M D H M S Definition Yr Mo Day Hr Min Sec Range 99 12 31 23 59 59 4 Press...

Page 22: ...ant to reset When resetting pH mV only pH and mV will revert to the default values The COND TDS SALT parameters will not be reset unless you select the mode as COND TDS SALT Refer to pages 54 55 for default values of each parameter 2 Press SET for 2 seconds to enter setup 3 Press to select the reset section of the meter 4 rSt will appear on the LCD and P9 0 will appear directly below 5 Press to en...

Page 23: ...nd measurement instability 3 Select the pH buffer and pour solution a sufficient amount to totally immerse the probe tip into a clean container 4 Dip the probe into the container immersing the probe tip 5 Stir the probe gently to create a uniform sample 6 Press CAL to enter calibration mode CAL will flash on the lower left of the LCD Note The main display indicates the measured value and the secon...

Page 24: ...coincide with the main display reading 8 When the measured pH value is stable and the Ready function is enabled Refer to P6 0 READY ICON page 20 READY will appear on the left side of the LCD Press to confirm 9 For 1 Point Calibration proceed to Step 10 For 2 Point 3 Point and Multiple Point Calibration Repeat Steps 2 through 8 for each buffer 10 Press ESC Note For 2 Point 3 Point and Multiple Poin...

Page 25: ...sly calibrated the conductivity meter at 1413 uS in the 0 to 1999 uS range when you re calibrate at 1500 uS again also in the 0 to 1999 range the previous 1413 uS calibration point will be replaced in this range 0 to 1999 uS However the meter will retain the calibration data for other ranges that have not yet been calibrated Note The temperature coefficient of the meter defaults to 2 1 per C and p...

Page 26: ...ion Refer to page 25 3 Pour 4 cm deep of buffer solution into two separate containers A B 4 Rinse the probe in one of the containers Gently stir the probe 5 Dip the rinsed probe into the other container Tap the probe on the bottom of the container to remove air bubbles Let the probe stabilize to the solution temperature 6 Turn the meter on In Normal Mode press MODE continuously to select the mode ...

Page 27: ...LCD If READY does not appear check that the calibration solutions and input value Step 9 page 27 are correct and that the ready icon is enabled page 20 If the standard value is over the measuring range or 10 less the displayed value will be equal to the range limit or 10 of the range limit Under this condition go to the parameter setting first to manually select a suitable range see page 36 Exampl...

Page 28: ... TDS values are related to conductivity You can calibrate the meter by using the conductivity standards above and then program the meter with a given conversion factor 1 Perform the conductivity calibration procedure page 25 2 Select the correct conductivity to TDS conversion factor Refer to Appendix A page 47 or calculate the TDS conversion factor for other solutions using the formula shown in Ap...

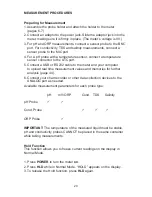
Page 29: ...USB or RS232 cable to the meter and your computer to upload real time measurement values and memories for further analysis page 44 6 Connect your chart recorder or other data collection devices to the ANALOG port as needed Available measurement parameters for each probe type pH mV ORP Cond TDS Salinity pH Probe Cond Probe ORP Probe IMPORTANT The temperature of the measured liquid must be stable pH...

Page 30: ...e bottle and cap and slide the bottle and cap off the probe Rinse the probe tip with deionized or distilled water before use If the probe tip is dehydrated soak it for 30 minutes in a KCl solution DO NOT wipe the pH probe dry Wiping the probe may cause static and cause calibration and measurement instability 2 Press POWER to turn the meter on ATC appears on the LCD to indicate that the automatic t...

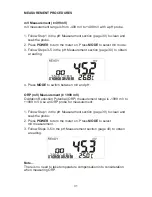
Page 31: ...o obtain a reading 4 Press MODE to switch between mV and pH ORP mV Measurement 1999 mV Oxidation Reduction Potential ORP measurement range is 1999 mV to 1999 mV Use an ORP probe for measurement 1 Follow Step 1 in the pH Measurement section page 30 to clean and soak the probe 2 Press POWER to turn the meter on Press MODE to select mV measurement 3 Follow Steps 3 5 in the pH Measurement section page...

Page 32: ... in P5 3 page 18 Before measuring remove the probe cover if needed To measure 1 Rinse the probe with de ionized or distilled water 2 Press POWER to turn the meter on Press MODE to select CON measurement Before measuring set the temperature coefficient P5 4 on page 19 Note Reference temperature or Tref page 48 of the meter is set at 25 C and CANNOT be adjusted 3 Immerse the probe tip glass bulb com...

Page 33: ...ty probe measures 0 00 to 9 99 ppm 0 0 to 99 9 ppm 0 to 999 ppm To measure 1 Rinse the probe with de ionized or distilled water 2 Press POWER to turn the meter on Press MODE to select TDS measurement Before measuring set the temperature coefficient P5 2 on page 18 and TDS conversion factor P5 4 on page 19 Note Tref page 48 of the meter is set at 25 C and CANNOT be adjusted 3 Immerse the probe tip ...

Page 34: ...r 2 Press POWER to turn the meter on Press MODE to select salinity measurement 3 Immerse the probe tip completely into the sample 4 Stir the probe gently to create a uniform sample 5 Wait until the reading has stabilized If enabled in setup READY will illuminate to indicate a stable reading 6 Press MODE to switch between SALT and CON TDS Note pH and conductivity probes CANNOT be placed in the same...

Page 35: ...obe 1 Disconnect the temperature connector from the rear of the meter 2 Press MODE to select pH Mode 3 To set the temperature press for more than 1 second CAL will flash on the LCD 4 Press or to change the temperature value Press to save and return to Normal Mode Conductivity Probe The temperature sensor is built into the conductivity probe Follow the manual temperature setting procedures in P5 1 ...

Page 36: ...ange 3 0 to 1999 uS 0 to 1999 f ppm Range 4 0 to 19 99 mS 0 to 19 99 f ppt0 to 11 38 ppt Range 5 0 to 199 9 mS 0 to 199 9 f ppt0 to 80 0 ppt Note f stands for TDS conversion factor Normally the meter will automatically select a range while taking readings To select a specific range or correspondent resolution 1 While in Normal Mode press to select the range setting 2 If you select automatic range ...

Page 37: ...ductivity TDS and salinity readings 1 In any measurement or Hold Mode press MEMO to save the data 2 MEM will appear on the LCD The memory number and measured value will flash and the meter will return to Normal Mode Note Further data can not be saved once the memory is full See Clear Memory page 12 to create additional space Recall Memory This function recalls readings stored in the memory 1 Press...

Page 38: ... page 12 Recall Maximum Minimum This function reviews a maximum and minimum value for all the data points stored in the memory 1 Press REC for 2 seconds to enter Recall Mode REC will flash on the LCD 2 Press MN MX to view the minimum value of the memory Press MN MX again to view the maximum value 3 To exit memory recall press REC for more than 2 seconds and return to Normal Mode Note All records a...

Page 39: ...ted by a plastic bottle containing solution To use or store the probe 1 Rotate the bottle to remove the bottle from the probe Pull down the cover and remove it from the probe 2 After use put the cover back on the probe and plug the probe into the bottle Rotate the bottle to fit into the cover tightly ...

Page 40: ... on the probe but you may remove it before calibration and measurement If removing the cover the probe must be uncapped in Calibration and Measurement Modes Do NOT touch the surface of the conductivity probe s testing element with hard objects Do NOT use anything to rub the platinum black surface of the probe or the original constants will be changed and the testing range will be affected If the s...

Page 41: ...tter put the sensing element in a 0 1 N HCl solution for 10 minutes Rinse in distilled water If the contamination is oil or grease clean with a mild detergent Rinse in distilled water Upon completion of either cleaning method immerse the probe in a saturated buffer solution with pH 4 01 for 15 minutes and rinse with distilled water After cleaning soak the probe in solution for at least 8 hours Pro...

Page 42: ...d re calibrate or replace the probe 3 Move to a new location for measurement RF emissions from unknown sources may disrupt readings Readings not changing 1 Check to see if the meter is in Hold Mode 2 Release the HOLD function 3 Check to see if the meter is in MTC if so input the temperature value Slow response 1 Clean and re calibrate or replace the probe Wrong real time Incorrect real time displa...

Page 43: ...ults in conductivity or pH value error E02 or E03 will also appear in the temperature column If E04 is caused by high liquid temperature E03 cool down the liquid temperature E12 Factory calibration data error pH Restart the meter E13 Slope or Offset value of the pH probe is out of range E16 Factory calibration data error conductivity Restart the meter E17 Cell constant of the conductivity probe is...

Page 44: ... you to install the software that comes with your meter You can download the software that came with your meter directly Go to the www sperdirect com software htm and find your meter or search for you meter 860030 860031 or 860033 and download from product page Note Some software may not be directly available to download due to it must be purchased If you find that the software you need is not ava...

Page 45: ...ue is the Voltage reading in mV the third value is Conductivity in mS uS the fourth value is TDS in ppm ppt the fifth value is SALT in ppt the sixth value is Temperature of the pH probe in C F the seventh value is Temperature of the conductivity probe in C F x means one of 0 1 2 9 PC CONNECTION Format in Memory Transmit pH Mode Normal Data pxx xxpH Txxx xC F xx 2007 04 18 18 48 48LRCCRLF Errors Ex...

Page 46: ...C CRLFPC CONNECTION Format in Memory Transmit TDS Mode Normal Data Dxxxx xx xx xxx x ppm ppt Txxx xC F xx 2007 04 18 18 48 48LRCCRLF Errors ExxNul ExxNul xx 2007 04 18 18 48 48LRCCRLF Description TDS Temp LRC CRLF Format in Memory Transmit Salt Mode Normal Data Sxx x xx xx ppt Txxx xC F xx 2007 04 18 18 48 48LRCCRLF Errors ExxNul ExxNul xx 2007 04 18 18 48 48LRCCRLF Description Salt Temp LRC CRLF ...

Page 47: ...libration standard solutions The calibration standard requires the TDS value at a standard temperature such as 25 C To determine the conductivity to TDS conversion factor use the following formula Factor Actual TDS Actual Conductivity 25 C Definitions Actual TDS Value from the solution bottle label or from a standard buffer which is made using high purity water and precisely weighted salts Actual ...

Page 48: ...temperature It is mandatory to associate the temperature together with a conductivity result If no temperature correction is applied the conductivity is the value taken at the measurement temperature Linear Temperature Correction In moderately and highly conductive solutions temperature correction can be based on a linear equation involving a temperature coefficient θ The coefficient is usually ex...

Page 49: ... equation T2 should be selected as a typical sample temperature and should be approximately 10 C different from T1 The temperature coefficients of the following electrolytes generally fall into the ranges show below Acids 1 0 1 6 C Bases 1 8 2 2 C Salts 2 2 3 0 C Drinking water 2 0 C Ultra pure water 5 2 C Average temperature coefficients of standard electrolyte solutions expressed as C of the con...

Page 50: ... 4 01 4 00 4 00 4 00 4 01 pH 6 86 6 98 6 95 6 92 6 90 6 88 6 86 pH 9 18 9 47 9 38 9 32 9 27 9 22 9 18 pH 12 45 13 43 13 21 13 00 12 81 12 63 12 45 30 C 35 C 40 C 45 C 50 C pH 1 68 1 69 1 69 1 70 1 70 1 71 pH 4 01 4 01 4 02 4 03 4 04 4 06 pH 6 86 6 85 6 84 6 84 6 83 6 83 pH 9 18 9 14 9 10 9 07 9 04 9 01 pH 12 45 12 29 12 13 11 99 11 84 11 70 ...

Page 51: ...e Holder Arm For 860032 Conductivity TDS Salinity 850038P Replacement Conductivity TDS Salinity Probe 840054 USB Cable 860030H Bench Top Probe Holder Arm For 860033 Water Quality 840016 pH Probe non ATC 840049 Spear Tip pH Probe non ATC 840051 Flat Surface pH Probe 850038P Replacement Conductivity TDS Salinity Probe 850059P Replacement ATC pH Probe 850088 ORP Probe 840054 USB Cable 860008 pH4 3 bo...

Page 52: ...9 f ppt 0 to 199 9 f ppt f TDS conversion factor 0 01 ppm 0 1 ppm 1 ppm 0 01 ppt 0 1 ppt 1 FS digit Salt Based on NaCl 0 to 11 38 ppt 0 to 80 0 ppt 0 01 ppt 0 1 ppt 1 FS digit Unit of Measure ATC or MTC Calibration Calibration Acceptable Window pH Yes Automatic buffer recognition NIST 1 25 at 6 86 CUSTOM 1 00 Conductivity Yes Maximum 5 points one point per range 20 of the factory default value and...

Page 53: ...rature 0 0 to 10 0 C Conductivity Coefficient Tc Reference temperature Factory set at 25 C Tref Conductivity TDS conversion factor 0 300 to 1 000 TDS Non linear compensation Salt Operating temperature 5 C to 40 C Operating RH Up to 95 w o condensation Storage Temperature 20 C to 60 C Storage RH Up to 95 w o condensation Weight 18 oz 533 g Dimensions 8 x 6 x 2 217 x 168 x 58 mm ...

Page 54: ...lue 14 13 uS 141 3 uS 1413 uS 14 13 mS 141 3 mS CAL Cond TDS SALT solution value Ra1 to Ra5 P4 0 P4 1 4 5 CELL Constant 1 000 CELL Ra1 to Ra5 P5 0 P5 1 P5 2 P5 3 P5 4 Temp setting ATC MTC Tc M Temp TDS Factor ATC 2 1 25 C 0 500 COEF Auto or NAn 0 0 to 10 0 0 300 to 1 000 P6 0 P6 1 Ready function Enable or disable yes rdy no or yes P7 0 P7 1 Temp unit Select C or F C U C or F P8 0 P8 1 8 6 Real tim...

Page 55: ... or yes Follow pH or mV of Normal Mode P3 0 P3 1 3 4 P3 5 Electrode Slope Offset 100 0 0 0 mV ELE Slope value Offset value P4 0 P4 1 4 5 Buffer solution Select buffer CUSt buF NISt or CUSt P6 0 P6 1 Ready function Enable or disable yes rdy no or yes P7 0 P7 1 Temp unit Select C or F C U C or F P8 0 P8 1 8 6 Real time clock Setting YMD HMS No default rtc rtc P9 0 P9 1 RESET Reset confirm Always def...

Page 56: ...oes not cover probes batteries battery leakage or damage resulting from accident tampering misuse or abuse of the product Opening the meter to expose its electronics will break the waterproof seal and void the warranty To obtain warranty service ship the unit postage prepaid to SPER SCIENTIFIC LTD 8281 E Evans Rd Suite 103 Scottsdale AZ 85260 480 948 4448 The defective unit must be accompanied by ...

Reviews: