Page 15
For technical questions, please call 1-888-866-5797.
Item 64823 64824
NOTICE
Clean the Spray Gun and Cup IMMEDIATELY after EVERY use and when it will be idle for more
than 30 minutes. Delayed or inadequate cleaning will permanently clog the Spray Gun.
DO NOT USE LATEX PAINT IN THIS SPRAY GUN.
S
AFETY
Op
ERA
TION
M
AINTENANCE
S
ET
up
After Every use
WARNING! TO pREVENT FIRE,
IF A FLAMMABLE SOLVENT NEEDS TO BE uSED,
ADHERE TO THE FOLLOWING:
a.
Follow solvent manufacturer’s clean up
instructions and safety precautions.
b.
Flush Spray Gun a full hose
length from air compressor.
c.
If collecting flushed solvents in
metal container, transfer to nonmetal
container, and flush metal container.
d.
Work far away from any ignition
sources in a vapor free area.
e.
Keep class ABC fire extinguisher nearby.
Solvent Selection
Follow the paint and solvent manufacturer’s recommendations for cleaning, solvent type, and disposal.
post-Cleaning
NOTICE: Do not immerse Spray Gun Body in
solvent. Do not allow solvent to enter the air inlet.
1. Use solvent recommended by paint manufacturer.
2. Designate a container for spent solvent.
3. Remove Cup’s Lid. Carefully scrape paint out
of Cup and dispose of excess paint properly.
4. Add 1/4 cup of solvent (sold separately) to
Cup. Replace Lid and Close Air Vent, then
shake Spray Gun for several seconds.
5. Remove Lid, pour solvent into spent solvent
container and wipe away any paint residue
from Cup and Lid with clean cloth.
6. Add 1/4 cup of solvent to Cup. Replace
Lid and pull out Air Vent to open.
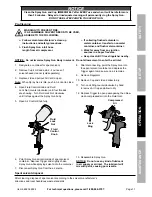
7. Open Fluid Control Knob and Fluid Lock Nut
(counterclockwise) until four threads are
showing. Turn Fluid Control Knob Lock clockwise
until it stops against the Spray Gun body.
8. Open Air Control Knob fully.
9. Point Spray Gun at interior side of spent solvent
container. Depress Trigger and slightly shake
Spray Gun while spraying solvent into the
container. Once the Cup is empty, repeat the
process until the solvent comes out clean.
10. Disconnect Spray Gun from the air source.
11. After disconnecting, point the Spray Gun into
the spent solvent container and depress the
Trigger again to make sure no air remains.
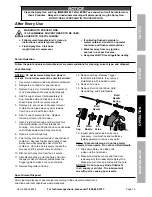
12. Remove Regulator and Cup.
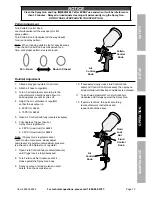
13. Remove Air Cap. Depress Trigger
to retract Fluid Needle, then remove
Fluid Nozzle with included wrench.
14. Remove Air Valve.
15. Remove Fluid Control Knob, Fluid
Need Spring, and Fluid Needle.
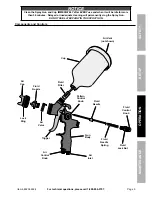
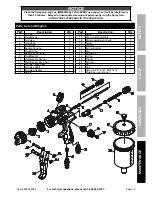
Air
Cap
Fluid
Nozzle
Air
Valve
Fluid
Needle
Fluid
Needle
Spring
16. Inspect parts and soak in solvent as
necessary. Use brushes and toothpicks
(sold separately) to remove any paint.
Note:
To prevent damage, do not use metal
objects to clean parts. Do not bend Fluid Needle.
17. Wipe down Spray Gun Body with
a clean cloth and solvent.
18. Make sure all parts are dry and free from
residual paint, then reassemble Spray Gun.
Make sure Air Valve’s pin slides into top hole.
NOTICE:
Do not use any kind of lubricant
in air supply or air inlet. The lubricant will
mix with paint, causing poor results.
Spent Solvent Disposal
After cleaning, dispose of spent solvent according to the solvent manufacturer’s
directions and local hazardous waste standards.


