


©
Spectradyne LLC, All rights reserved
10
Version 2.5.0 Revision 3, July 2020
Initializing the Cartridge
Single-click to Acquisition
Prime and acquire data with a single click of the
“
GO!
”
button.
➢
P
ress “
GO!
” to
prime the cartridge and
start data acquisition automatically
(see
6).
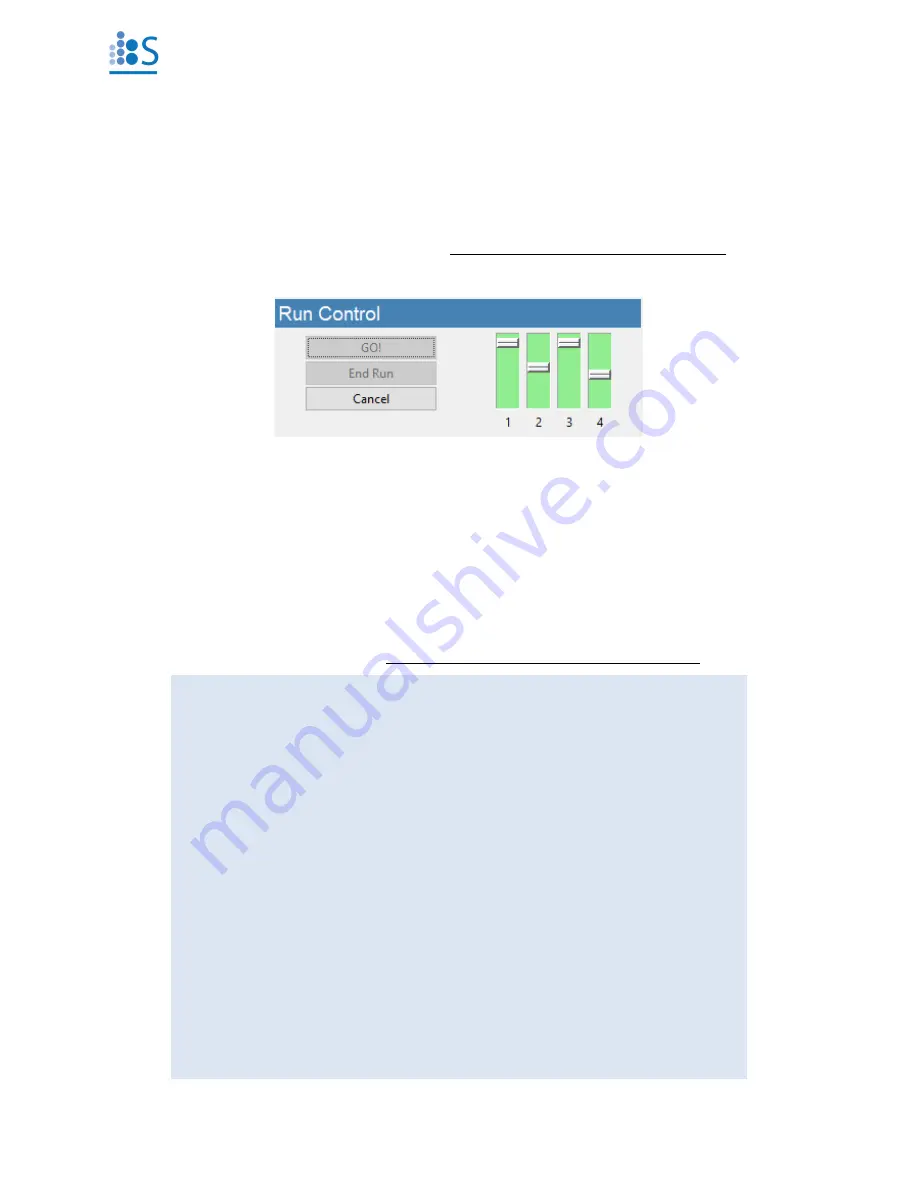
Fill Monitors
➢
The fill monitors are vertical sliders in the Cartridge Initialization frame that indicate the fill
status in various parts of the cartridge (see Figure 6).
➢
The priming routine typically requires 1-2 minutes to complete. During the process, it is
normal for fill monitors to vary between all levels and show different colors.
➢
After normal priming, the fill monitors should have approximately the pattern shown in
Figure 6.
➢
When the routine is complete,
data acquisition will begin automatically
.
Figure 6.
Run Control frame and fill monitors status.
Troubleshooting Tip:
➢
If the priming routine encounters an issue, one or more of the fill monitors
will remain in a red color and the priming routine will not complete.
➢
If Fill Monitor 1 or 3 is red:
❖
An issue with the running buffer is likely.
❖
Check that sufficient running buffer remains in the reservoirs
❖
Stop the priming by clicking “Cancel” and then “End Run” to eject
the cartridge.
❖
Replace the running buffer and use the cleaning cartridge to flush
the system with the new running buffer.
➢
If Fill Monitor 2 or 4 is red:
❖
There may be an issue with the sample:
▪
Is there insufficient conductivity and/or surfactant in the
sample?
▪
Is the sample too highly concentrated?
❖
There may be an issue with the cartridge:
▪
Try measuring the sample in a new cartridge.