Speco 4 Channel H.264 Mobile User Manual Download Page 43


42 


4.7.8   

Log File 

The  log  file  keeps  a  list  of  the  important  events  that  happened  to  the  DVR.    The  log  file  can  be  saved  to  a 
USB flash memory as a text file so that it can be viewed and archived to a computer.    The following are what 
the DVR keeps in its log file: 


Power on / off 


Power loss / DVR restart 


Changes in the menu 


DVR initialization 


HDD initialization 


Network connection / disconnection 


Record start / stop 


4.8   

COPY   


To set up the COPY menu, move the cursor to the COPY icon using the 

,

    in the MENU screen. 

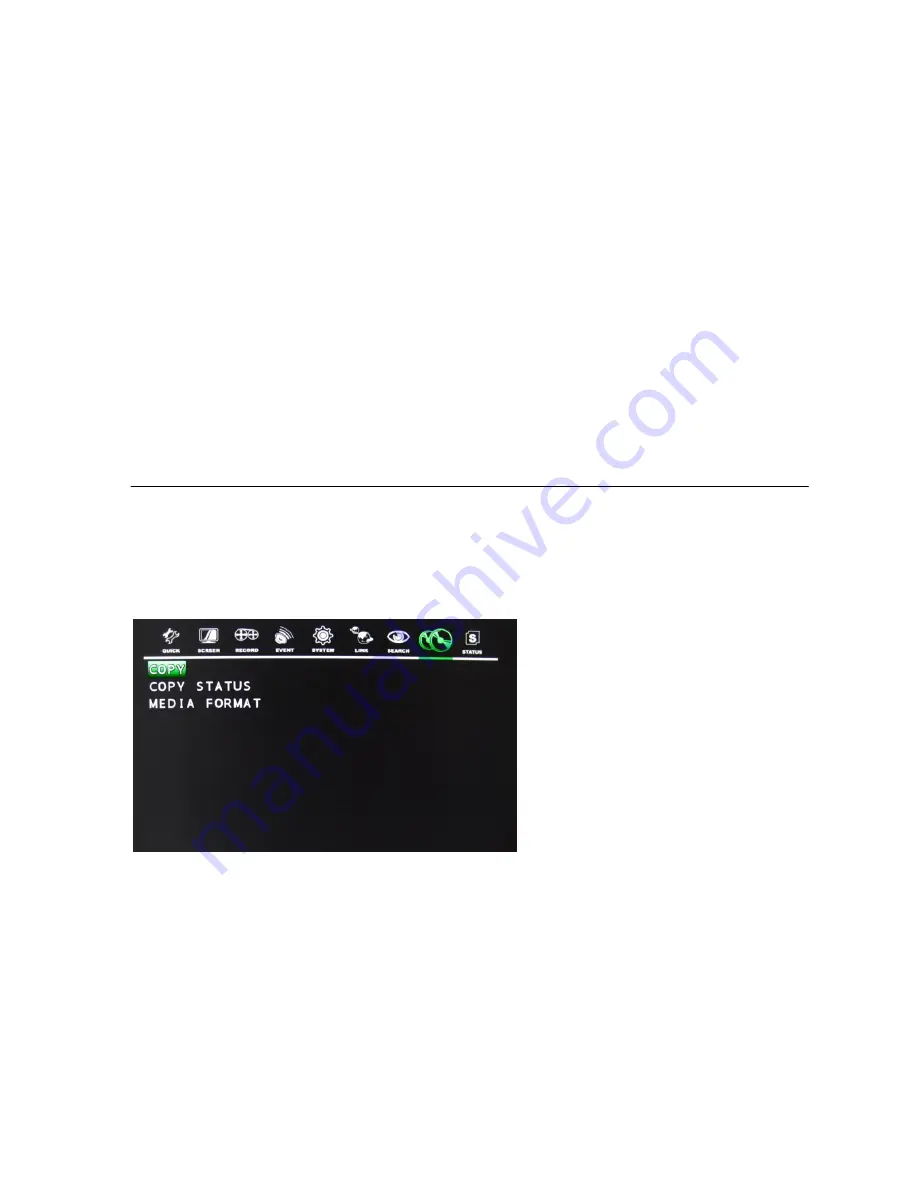
Press the ENTER button when the cursor is on the COPY icon and the following items appear. 


4.8.1       Copy 


At the COPY menu, move the cursor to COPY using the 

▲,▼

 buttons. 

Press the ENTER button and the following screen appears.   


Summary of Contents for 4 Channel H.264 Mobile

Page 1: ...logies 200 New Highway Amityville NY 11701 1 800 645 5516 www specotech com Speco Technologies is constantly developing product improvements We reserve the right to modify product design and specifica...

Page 2: ...ence 14 4 2 2 Display 15 4 2 2 1 HDD Free Space 15 4 2 2 2 HDD Free Space Mode 15 4 2 2 3 Record Status 15 4 2 2 4 Clock Display 15 4 2 2 5 Date Time Mode 16 4 2 2 6 Title Display 16 4 2 2 7 Title Mod...

Page 3: ...et Mask 33 4 6 1 4 Gateway 33 4 6 1 5 DNS 33 4 6 1 6 Port 33 4 6 1 7 Dynamic IP Server 34 4 6 1 8 Backup IP Server 34 4 6 1 9 Network Frame 34 4 6 2 RS485 34 4 6 3 PTZ 35 4 6 4 E MAIL 35 4 6 4 1 Send...

Page 4: ...3 Operation 49 7 3 1 DVR Menu Setting 49 7 3 1 1 Auto Manual 49 7 3 2 On 49 7 3 3 Loading 49 7 3 4 Off 49 7 4 Verification 50 7 4 1 DVR Status 50 7 4 2 DVR Screen 50 8 MEDIA VIEWER 50 8 1 Connection...

Page 5: ...n full frame rate of every channel Digital Watermark Smooth reverse playback Ease of operation Remote controller Front keys and Network Viewer Supported copy media USB memory stick External USB HDD CD...

Page 6: ...Vp p 20k Audio Output Line 1CH BNC RCA RECORDING Compression H 264 Resolution NTSC 720 H 480 V 720 H 240 V 340 H 240 V PAL 720 H 576 V 720 H 288 V 340 H 288 V Speed NTSC 340 x240 Max 120Images CIF 720...

Page 7: ...Change Monitoring Software Watchdog Recovery Auto Reboot By Watchdog Automatic Database Recovery OTHERS OS Embedded Linux Menu Type Graphic Text Language 13 kinds English Korean Japanease Polish Spani...

Page 8: ...larm Output 1 Relay NO RS 485 for External 2 pins Box Connector Terminal Control PTZ Block Ethernet Basic USB 2 0 Basic ELECTRICAL Power Source Input DC 7V 35V Output DC 12V 2A Power Consumption Appro...

Page 9: ...cesses the Main Menu go back to the previous menu Button 6 Fast Forward Press this button to speed up playback speed Button 7 Press this button to slow down playback speed Button 8 Change the playback...

Page 10: ...ut 3 AUDIO VIDEO OUT RCA Connectors for connecting the Audio Video Output 4 VGA OUTPUT D sub 15 pin Connector for connecting the PC Monitor 5 POWER IN Camera Power In 6 ETHERNET PORT 10 100 Base T RJ...

Page 11: ...ward value Focus control of PTZ 11 FREEZE F Freeze Up going value Focus control of PTZ 12 SEARCH PRESET Display the search menu Enter the preset mode of PTZ 13 COPY AF Display the copy menu Auto focus...

Page 12: ...oor B Rear Door C Turn Right D Turn Left E Braking F Warning Light G Emergency H Shock I High Speed J Excessive Braking K Excessive Speeding L Lengthy Stop M Stop w o W Light NOTE When an event is hap...

Page 13: ...tton on the DVR or from the Remote will open the main menu 4 1 Quick Setup Menu Pressing the Quick button will open the Quick Setup page Select the desired item by pressing button from the remote cont...

Page 14: ...recording using the button from the remote When a video loss alarm or motion is detected the DVR will store pre recorded data for the selected time The pre recording time can be set from 0 seconds to...

Page 15: ...the buttons When the desired channel is selected change the value of AUTO SEQUENCE duration using the button This sets the length of time for switching each channel in a sequence The value can be set...

Page 16: ...on to choose ON or OFF The default is ON 4 2 2 4 Clock Display Use the buttons to choose ON or OFF The default is ON If turned ON the remaining capacity of the fixed not backup HDDs will be displayed...

Page 17: ...creen in terms of Kilometer or Mile ON Each channel title will be displayed on the screen WHITE The color of the border line will be displayed on the multi channel screen in white BLACK The color of t...

Page 18: ...e buttons and then press the ENTER button To exit this CHARACTER TABLE screen press the ESC button 4 2 4 Covert Press the ENTER button when the cursor is on the COVERT and this screen appears CHANNEL...

Page 19: ...appears You can control brightness contrast hue and saturation of each camera The default is 50 ON Selected channel will be displayed in black screen Covert SELECT Select among LIVE PLAYBACK NETWORK...

Page 20: ...appear User can select any item using button from the remote 4 3 1 Record Setup This menu allows you to configure a weekly recording schedule In the schedule you must use the predefined programs 0 9 i...

Page 21: ...tection or continuous recoding At the RECORD menu move the cursor to the RECORD PROGRAM using buttons Press the ENTER button when the cursor is on the RECORD PROGRAM and the following screen appears U...

Page 22: ...to 10 To exit this REPEAT RECORD menu press the ESC button You have to turn the recording off to see Image Quality Screen RECORD TIME A period how long you can record in free space of installed HDD s...

Page 23: ...r to the EVENT icon using the in the MENU screen 4 4 1 Motion Detection At the EVENT menu Move the cursor to the MOTION DETECTION using buttons Press the ENTER button when the cursor is on the MOTION...

Page 24: ...button 4 4 2 Event Screen Mode At the EVENT menu move the cursor to the EVENT SCREEN MODE using buttons Select the EVENT SCREEN MODE using the button 4 4 3 Event Check At the EVENT menu move the curs...

Page 25: ...the type of sensor which is connected with DVR using the button To exit this SENSOR INPUT menu press the ESC button 4 4 6 Relay Output At the EVENT menu move the cursor to the RELAY OUTPUT using the...

Page 26: ...so change when any event occurs The default value is 4 SPEED PARAMETER The below said parameter values may change depending on the acceleration speed of the vehicle a SPEED LIMIT b LENGTHY STOP c EXCE...

Page 27: ...in the MENU screen Press the ENTER button when the cursor is on the SYSTEM icon and the following items appear 4 5 1 Storage At the SYSTEM menu move the cursor to the STORAGE using the buttons Press...

Page 28: ...Normal and Event recording 2 BACKUP Only for backup Move the Cursor to EXTERNAL SDCARD to see the below screen There is an option of having another 4 SDCARD Memory sticks externally as shown above You...

Page 29: ...the SYSTEM menu move the cursor to the CLOCK using the buttons 4 5 2 1 Date Time At the CLOCK menu move the cursor to the DATE TIME using the buttons Use the buttons to move the cursor to the desired...

Page 30: ...ton 4 5 2 VIDEO STANDARD 5 5 3 VIDEO STANDARD 4 5 3 Video Standard At the SYSTEM menu move the cursor to the VIDEO STANDARD using the buttons You can select either NTSC or PAL using the button Press t...

Page 31: ...tton If you select OFF password menu won t work 4 5 5 2 Set Password At the ADVANCED SETUP menu move the cursor to the SET PASSWORD using the buttons Press the ENTER button when the cursor is on the S...

Page 32: ...using the buttons NOTE You can use only 0 9 number buttons to setup the PASSWORD The default of ADMIN is 11111111 USER1 is 22222222 USER2 is 33333333 USER3 is 44444444 USRE4 is 55555555 If you forget...

Page 33: ...WARE UPGRADE screen press the ESC button 4 6 LINK To set up the LINK menu move the cursor to the LINK icon using the in the MENU screen Press the ENTER button when the cursor is on the LINK icon and t...

Page 34: ...r to the SUBNET MASK using the buttons Select the desired position using the buttons and set the data value using the buttons 4 6 1 4 Gateway At the NETWORK menu move the cursor to the GATEWAY using t...

Page 35: ...uttons Select ON using the buttons Move the cursor to the BACKUP IP SERVER using the buttons Input the backup server IP using the buttons to change the value and the buttons to move the cursor 4 6 1 9...

Page 36: ...ed channel using buttons Use the buttons to select the right model of installed PTZ camera Press the button to set up a ID of the PTZ camera Use the buttons ial to select the desired ID Press the butt...

Page 37: ...the cursor to the SMTP SERVER using the buttons to input the e mail sever address to be used by DVR Select the character using the buttons and then press the ENTER button To exit this CHARACTER TABLE...

Page 38: ...the DVR LOCATION using the buttons Press the ENTER button and the following screen appears Select the character using the buttons and then press the ENTER button To exit this CHARACTER TABLE screen pr...

Page 39: ...ion please refer to Section 5 Wireless 4 6 8 1 Mobile Server Input the IP address of the Mobile Server here For more information please refer to Section 5 Wireless 4 7 SEARCH To set up the SEARCH menu...

Page 40: ...hour blocks that contain data will be displayed in yellow Move the highlight to the desired hour block and then press the ENTER button to start the playback 4 7 2 Search Copy Move the cursor to the S...

Page 41: ...R button when the cursor is on it and the following screen appears Event search provides an overview of the all event related recordings so that a specific event can be quickly pinpointed and accessed...

Page 42: ...earch screen 4 7 6 File Search Move the cursor to the FILE SEARCH icon using the in the MENU screen Press the ENTER button when the cursor is on it and the following screen appears File search is capa...

Page 43: ...le Power on off Power loss DVR restart Changes in the menu DVR initialization HDD initialization Network connection disconnection Record start stop 4 8 COPY To set up the COPY menu move the cursor to...

Page 44: ...utton to copy You can see a password input message You need this password when opening the file in network viewer 4 8 2 COPY STATUS 4 8 2 Copy Status At the COPY menu move the cursor to COPY STATUS us...

Page 45: ...following screen appears Select the media using the button Move the cursor to MEDIA FORMAT and then press the ENTER button The message FORMATTING will be displayed while formatting 4 9 STATUS SCREEN...

Page 46: ...space including the hard drive space in the expansion bays 2 FIXED HDD FREE SPACE Displays the available remaining hard drive space including the hard drive space in the expansion bays 3 RECORD PROGRA...

Page 47: ...Displays currently assigned subnet mask 4 GATEWAY Displays currently assigned gateway 5 DNS DOMAIN NAME SERVER Displays currently assigned DNS server information 6 PORT Displays currently assigned net...

Page 48: ...ss the ENTER button when the cursor is on the EXIT icon and the following items appear Move the cursor to the desired item using the buttons and press the ENTER button SAVE ONLY Select this item if yo...

Page 49: ...can play back video monitor live video and access the DVR menu settings on both ETHERNET connection and wireless networking You can monitor ONE mobile DVR by setting the MAC IP address 6 3 Mobile Man...

Page 50: ...ection will work automatically You don t need to press any buttons for the wireless function after power is on MANUAL If you need a wireless connection you must press the button manually 7 3 2 On Wire...

Page 51: ...The Monitor screen will display Connected and the Wireless LED of the DVR will be on if the wireless connection is a success 8 MEDIA VIEWER 8 1 Connection Execute the MEDIA VIEWER on PC 8 1 1 IP Adre...

Page 52: ...2 Verification The DVR is connected 9 MOBILE MANAGER 9 1 Connection Execute the Mobile Manager on PC If MOBILE SERVER SETTING is correct the list of mobile DVR s will display on Mobile Manger automati...

Page 53: ...cted The location on the MAP and LIVE image and DVR information will display 9 1 1 Mobile Server Setting Enter the MENU select the LINK and WIRELESS Insert the SERVER IP address MOBILE SERVER You have...

Page 54: ...53 If the PC uses firewall or common router this PC can t be DVR SERVER If it is behind a router make the PC port to 12313 9 2 Verification The DVR is now connected...

Reviews: