background image

62

P 282

PL


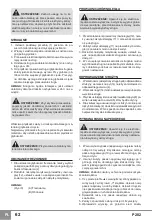
OSTRZE ENIE:

  Zwrócić  uwag   na  to,  e 

no e nadal obracaj  si  przez pewien czas po wył

-

czeniu struga. Odczekać a  silnik elektryczny zatrzy

-

ma si  ostatecznie, dopiero po tym mo na odstawić 

elektronarz dzie na bok, w celu zapobie enia uszko

-

dzeniu no y lub obrabianej powierzchni.

STRUGANIE

1.   Ustawić  podstaw   przedni   (1)  poziomo  do  po

-

wierzchni obrabianej nie dotykaj c jej ostrzami.

2.  Wł czyć elektronarz dzie i odczekać a  ostrza osi

-

gn  pełn  pr dko ć.

3.  Przesuwać elektronarz dzie bardzo uwa nie wywie

-

raj c nacisk na strug.

4.  Odstawić strug poza detalem obrabianym nie nachy

-

laj c go w dół.

5.  Od pr dko ci posuwów struga i gł boko ci strugania 

zale y jako ć ko cowego wyniku. Przy grubszej ob

-

róbce mo na zwi kszyć gł boko ć ci cia. Precyzyj

-

na obróbka wymaga zmniejszenia gł boko ci ci cia 

oraz wolniejszego przesuwania struga.

UWAGA:

  Struganie  b dzie  łatwiejsze,  je li  ustawić 

obrabiany detal pod lekkim nachyleniem w dół i na ze

-

wn trz..


OSTRZE ENIE: 

Zbyt szybkie przesuwanie 

pogorszy  jako ć  obrabianej  powierzchni  i  uszkodzi 

ostrza lub silnik elektryczny. Zbyt wolne przesuwanie 

mo e opalić z wierzchu lub pogorszyć jako ć obrabia

-

nej powierzchni.

Wła ciwa pr dko ć zale y od rodzaju obrabianego ma

-

teriału i gł boko ci ci cia.

Najpierw wypróbować strug na niepotrzebnym kawałku 

materiału, aby ustalić odpowiednie warto ci pr dko ci i 

gł boko ci.


OSTRZE ENIE:

 Przymocować obrabiany ma

-

teriał do stołu roboczego.

OBCINANIE I FREZOWANIE

1. Dla ustawienia gł boko ci frezowania nale y wybrać 

po dan  warto ć przy pomocy d wigni regulacji gł

-

boko ci frezowania (2).

2. Rozlu nić nakr tk  motylkow  prowadnicy równole

-

głej (12), ustawić suwak na po dan  szeroko ć fre

-

zowania i ponownie zakr cić nakr tk  motylkow .

UWAGA:

(Rys.10)    

    (A) Frezowanie; 

                      (B) Obcinanie

PROWADNICA RÓWNOLEGŁA


OSTRZE ENIE:

 Upewnić si ,  e elektrona

-

rz dzie zostało wył czone, a wtyczk  wyj to z gniaz

-

da sieci zasilania, przed dokonaniem zmiany nasta-
wienia lub wymiany ostrzy struga.

1.  Przed zało eniem prowadnicy równoległej (12), nale

-

y usun ć wkr t ustalaj cy (11) i przesun ć prowad

-

nic  do struga.

2.  Zało yć wkr t ustalaj cy (11) na prowadnicy równole

-

głej i z powrotem mocno dokr cić wkr t.

3. Rozlu nić  nakr tk   motylkow   suwaka,  ustawić  su

-

wak na po dan  szeroko ć strugania i ponownie j  

dokr cić.

4.  W celu sprecyzowania szeroko ci strugania mo na 

wypróbować strug na niepotrzebnym materiale, zmie

-

rzyć obrabiany odcinek i w razie konieczno ci skory

-

gować nastawienie. 

ODPROWADZENIE STRU YN

1.   W zale no ci z jakiej strony struga b d  odprowadzane 

stru yny, woreczek na pył (14) nale y zamontować do 

odpowiedniego otworu (4).

2.  Woreczek na pył (14) mo na ustawić po lewej lub po pra

-

wej stronie struga.

3.  Przycisk ustalaj cy kierunek odprowadzania pyłu (8) po

-

winien wskazywać na otwór (6), który b dzie czynny.

4.  Dla skutecznego usuwania pyłu i stru yn mo na pod

-

ł czyć ko cówk  (4) do układu odprowadzania pyłu lub 

do odkurzacza. W ten sposób mo na zapewnić sobie 

bezpieczne i czyste  rodowisko pracy. 

WYMIANA PASKA NAP DOWEGO


OSTRZE ENIE:

  Upewnić  si ,  e  elektrona

-

rz dzie zostało wył czone, a wtyczk  wyj to z gniaz

-

da sieci zasilania przed dokonaniem zmiany nastawie-
nia lub wymiany ostrzy struga.

1.  W celu wymiany paska nap dowego najpierw nale y 

odkr cić  trzy  wkr ty  krzy akowe  mocuj ce  osłon  

paska nap dowego (10) po lewej stronie struga, pa

-

trz c od tyłu. 

2.   Usun ć  zu yty  pasek  nap dowy  wyci gaj c  go  z 

górnego kr ka, obracaj c r k  kr ek dolny. U y

-

wać mi kkiego p dzla do czyszczenia kr ków i ota

-

czaj cej powierzchni.

UWAGA: 

Zakładać okulary ochronne podczas oczysz

-

czania kr ków.
3. Trzy proste profile   z wewn trznej strony paska po

-

winny wej ć w trzy rowki „V” kr ków. Ustawić nowy 

pasek nap dowy na dolny kr ek. Ustawić drugi ko

-

niec paska wokół kr ka górnego i obracać do naci

-

gni cia paska i uruchomienia obu kr ków.

4. Sprawdzić  r k ,  czy  pasek  nap dowy  obraca  si  

swobodnie.

5. Zało yć z powrotem osłon  i dokr cić trzy wkr ty.

6. Wprowadzić  wtyczk   do  gniazda  sieci  zasila

-

Summary of Contents for P 282

Page 1: ...usiva responsabilidad que este producto está conforme con todas las disposiciones aplicables de la presente directrices aplicables y las correspondientes normas armonizadas 2006 42 EC 2004 108 EC hasta el 19 de Abril de 2016 2014 30 EU a partir del 20 de Abril de 2016 2011 65 U EN 60745 1 EN 60745 2 14 EN 55014 1 EN 55014 2 EN 61000 3 2 EN 61000 3 3 El expediente técnico está archivado en SPARKY E...

Page 2: ...3 2 5 8 1 7 11 12 6 4 9 18 13 10 14 17 16 15 13 1 2 3 9 4 5 7 8 A B 10 6 ...

Page 3: ...ed under stringent SPARKY Quality Standards to meet superior performance criteria You will ind your new tool easy and safe to operate and with proper care it will give you many years of dependable service WARNING Carefully read through these original instructions before using your new SPARKY power tool Take special care to heed the Warnings Your SPARKY power tool has many features that will make y...

Page 4: ...g protection Wear eye protection Double insulated for additional protection Connection to vacuum cleaner Conforms to the relevant European Directives Conforms to the requirements of Customs Union regulations Conforms to the requirements of Ukrainian standards Refer to original instructions YYYY Www Production period where the variable symbols are YYYY year of manufacture ww calendar week number P ...

Page 5: ... vibration emission may differ This may signii cantly increase the exposure level over the total working period An estimation of the level of exposure to vibration should also take into account the times when the tool is switched off or when it is running but not actually doing the job This may signiicantly reduce the exposure level over the total working period Maintain the power tool and the acc...

Page 6: ...conditions will reduce personal injuries c Prevent unintentional starting Ensure the switch is in the off position before connecting to power source and or battery pack picking up or carrying the tool Carrying power tools with your inger on the switch or energising power tools that have the switch on invites accidents d Remove any adjusting key or wrench before turning the power tool on A wrench o...

Page 7: ...r stick your finger into the chip chute Shavings may jam in the chute when cutting damp wood Clean out the chips with a stick but only when the tool has been turned off and unplugged from the power point Do not leave the machine running unattended Oper ate the tool only when controlled by both hands When leaving the planer switch off and set it with the front base up on a wooden block so that the ...

Page 8: ...e the depth of cut plane a scrap piece of wood measure the differ ence in thickness and adjust the setting if necessary WARNING Always ensure that the number on the ring is at the 0 position when the tool is not in use at this position the blade can not cut the work piece REMOVING AND INSTALLING PLANER BLADES WARNING Always ensure that the tool is switched off and unplugged from the power supply b...

Page 9: ...te that that the planer blades continue to spin for some time after switch ing off the planer Wait until the motor has completely stopped before setting down the tool to prevent dam age to the planer blades or the surface PLANING 1 Rest the front base 1 flat on the workpiece surface without the blades making any contact with the work piece 2 Switch on the tool and wait for the blades to reach full...

Page 10: ...ht They may vibrate loose over time Re lubricate all moving parts at regular intervals GENERAL INSPECTION When the carbon brushes are worn out both brushes must be replaced simultaneously with genuine brushes at SPARKY service centre for warranty and post war ranty service If the replacement of the supply cord is necessary this has to be done by the manufacturer or his agent in order to avoid a sa...

Page 11: ...auchers entsprechen Einfach in der Bedienung und ungefährlich bei richtiger Handhabung wird dieses Gerät bei bestimmungsgemäßem Gerbrauch Ihnen lange Jahre zuverlässig dienen WARNUNG Lesen Sie die ganze Bedienungsanleitung aufmerksam durch bevor Sie das neu erworbene SPARKY Elekt rowerkzeug in Betrieb nehmen Beachten Sie besonders die Texte die mit dem Wört Warnung beginnen Ihr SPARKY Elektrowerkz...

Page 12: ...örschutz und Sicherheitsbrillen Doppelte Isolierung für zusätzlichen Schutz Staubsaugeranschluss Entspricht den einschlägigen Europäischen Richtlinien Entspricht den Anforderungen der Zollunion Regelungen Entspricht den Anforderungen der ukrainischen normativen Dokumenten Lesen Sie die Bedienungsanleitung YYYY Www Zeitabschnitt der Produktion wobei die variablen Symbole sind YYYY Kalenderjahr der ...

Page 13: ...be können allergische Reaktionen und oder Atemwegserkrankungen des Benutzers oder in der Nähe befindlicher Personen hervorrufen Bestimmte Stäube wie Eichen oder Buchenstaub gelten als krebserzeugend besonders in Verbindung mit Zusatz stoffen zur Holzbehandlung Chromat Holzschutzmittel Asbesthaltiges Material darf nur von Fachleuten bearbeitet werden Benutzen Sie möglichst eine Staubabsaugung Um be...

Page 14: ...chen Schlages f Wenn der Betrieb des Elektrowerkzeuges in feuchter Umgebung nicht vermeidbar ist ver wenden Sie einen Fehlerstromschutzschalter Der Einsatz eines Fehlerstromschutzschalters ver mindert das Risiko eines elektrischen Schlages 3 SICHERHEIT VON PERSONEN a Seien Sie aufmerksam achten Sie darauf was Sie tun und gehen Sie mit Vernunft an die Arbeit mit einem Elektrowerkzeug Benutzen Sie k...

Page 15: ...e Haltung des Materials mit der Hand oder an den Körper gepresst ist nicht ausreichend und kann zum Verlust der Kontrolle füh ren Tragen Sie stets Schutzbrille und Gehörschutz und verwenden Sie eine Staubmaske Um eine eventuelle Überhitzung zu vermeiden dre hen Sie das verwendete Verlängerungskabel ganz von der Kabeltrommel Falls die Verwendung einer Verlängerungsleitung er forderlich ist stellen ...

Page 16: ...mmungs gemäss verwendet wird ist es unmöglich alle Restri sikofaktoren zu eliminieren Die nachfolgend angege benen Gefahren können in Zusammenhang mit den konstruktiven Besonderheiten und dem Design des Elektrowerkzeuges entstehen Gehörprobleme wenn keine effektiven Schutzmass nahmen getroffen werden Ziehen Sie immer den Stecker aus der Steckdose bevor Sie das Elektrowerkzeug reparieren oder ein s...

Page 17: ... die Schrauben 13 fest Zuerst ziehen Sie die beiden äußerst gelegenen Schrauben und am Ende die Schraube in der Mitte fest 4 Wiederholen Sie die Vorgehensweise auch für das andere Messer BEMERKUNG Wenn die Messer verschlissen sind muss man den Satz von zwei Messern wechseln damit das Ungleichgewicht gefährliche Schwingungen des Elektrowerkzeugs vermieden werden können WARNUNG Wenn Sie die Messer e...

Page 18: ...eitung müssen Sie die Tiefe reduzieren und den Hobel langsamer vorwärts schieben BEMERKUNG Das Hobeln wird leichter sein wenn Sie den bearbeitenden Teil mit einer leichten Neigung nach unten und nach außen stellen WARNUNG Ein zu schnelles Vorwärtsschie ben kann die Qualität der bearbeitenden Oberfläche verschlechtern sowie die Messer oder den Elektro motor beschädigen Zu langsames Vorwärtsschieben...

Page 19: ...eug immer aus und ziehen Sie den Stecker aus der Steckdose vor jeder Überprüfung oder Wartung Überprüfen Sie regelmäßig alle festhaltenden Elemente und überzeugen Sie sich dass sie gut festgezogen sind Falls sich irgendwelche Schrauben gelockert haben zie hen Sie diese unverzüglich fest damit Sie Risikosituatio nen vermeiden können Schmieren Sie regelmäßig alle sich bewegenden Teile ALLGEMEINE ÜBE...

Page 20: ...atur beseitigt Beanstandungen bezüglich eines beschädigten SPAR KY Elektrowerkzeugs können nur anerkannt werden wenn das Gerät unzerlegt im ursprünglichen Zustand dem Lieferanten oder der befugten Kundendienstwerk statt vorgelegt wird Bemerkungen Lesen Sie aufmerksam die ganze Betriebsanleitung durch bevor Sie mit der Arbeit beginnen Der Hersteller behält sich das Recht vor Verbesserun gen und Änd...

Page 21: ...acile et sécurisée Et avec une utilisation correcte il vous servira longtemps AVERTISSEMENT Lire attentivement les instructions avant d utiliser votre nouvel outil Prêter attention aux sections Avertissement Votre outil électrique possède des caractéristiques qui facilitent votre travail Cet instrument a été conçu et produit selon toutes les exigences de sécurité pour que son usage et son entretie...

Page 22: ...tion adaptés lunettes de protection et casque anti bruit Double isolation pour une meilleure sécurité Raccordement à un aspirateur Conforme aux directives européennes applicables Conforme aux exigences des règlements de l Union douanière En conformité avec les exigences des standards ukrainiens Lisez les instructions d utilisation YYYY Www Période de production où les symboles variables sont les s...

Page 23: ...s de l utilisation Pouruneestimationprécisedel influencevibratoirependantuncertaintempsd utilisation ilestrecommandédeprendreaussi en considération les espaces de temps pendant lesquels l appareil est éteint ou sous tension mais pas vraiment utilisé Ceci peut réduire considérablement l influence vibratoire pendant toute la durée du travail Entretenez l outil et ses accessoires en bon état Gardez v...

Page 24: ...risque de choc électrique 3 SÉCURITÉ DES PERSONNES a Rester vigilant regarder ce que vous êtes en train de faire et faire preuve de bon sens dans votre uti lisation de l outil Ne pas utiliser un outil lorsque vous êtes fatigué ou sous l emprise de drogues d alcool ou de médicaments Un moment d inatten tion en cours d utilisation d un outil peut entraîner des blessures graves des personnes b Utilis...

Page 25: ...e est en parfait état À la suite d un long travail les parties métalliques extérieures et les accessoires peuvent devenir très chauds Débranchez toujours l appareil avant de le mettre de côté Ne surchargez pas l outil électroportatif laissez le fonctionner à une vitesse raisonnable La surcharge apparaît lors de l exercice d une pression trop forte cas dans lequel le moteur électrique commence à to...

Page 26: ...lames ou que vous réglez la profondeur du rabotage Contact avec les lames Pénétration dans la zone de travail située sous la base lorsque la machine fonctionne Rebondissement ricochet de la pièce traitée ou de parties de celle ci Rupture d une lame Choc causé par les fragments d une lame qui se brise L outil électroportatif ne doit pas être utilisé à l exté rieur lorsqu il pleut dans un milieu hum...

Page 27: ...euses et une possible détérioration de l outil électroportatif AVERTISSEMENT Avant de placer les lames éliminez les copeaux collés sur le tambour 15 et sur les lames Utilisez des lames de la même taille et du même poids que celles d origine car autrement le tambour va vibrer Ceci entraînera un rabotage de mauvaise qualité et une détérioration probable de la machine Serrez attentivement les boulons...

Page 28: ...e La bonne vitesse à appliquer dépend du type de la sur face traitée et de la profondeur de coupe Commencez par faire un assai sur un morceau de maté riau dont vous n avez pas besoin ain de déterminer la bonne vitesse et profondeur AVERTISSEMENT Fixez le matériau à traiter sur la table de travail REALISATION DE BISEAUX ET FRAISAGE 1 Pour ajuster la profondeur de fraisage sélectionnez la valeur dés...

Page 29: ... ci Si le câble d alimentation est endommagé il doit être remplacé par le constructeur ou un spécialiste agréé par celui ci ain d éviter les éventuels risques liés à son remplacement NETTOYAGE La machine et les trous de ventilation doivent être main tenus propres ain d assurer la sécurité de travail Il faut vériier régulièrement s il n y a pas des corps étran gers ou poussière accumulée dans la gr...

Page 30: ...estazione Se utilizzato correttamente l utensile risulterà maneggevole e sicuro e garantirà un uso duraturo AVVERTENZA Leggere attentamente tutte le istruzioni prima dell utilizzo dell utensile Leggere con cura soprattutto le parti introdotte da Attenzione Questo utensile SPARKY presenta numerose caratteristiche che faciliteranno il Suo lavoro Sicurezza qualità ed afidabilità sono punti chiave nel...

Page 31: ...re occhiali protettivi Doppio isolamento per una protezione supplementare Collegamento ad aspirapolvere Corrisponde alle direttive europee applicabili Corrisponde alle esigenze dei regolamenti dell unione doganale Conforme alle esigenze dei documenti normativi ucraini Prendere conoscenza delle istruzioni per l uso YYYY Www Periodo di produzione ove i simboli variabili sono YYYY l anno di produzion...

Page 32: ...abili o senza adeguata manutenzione il livello di vibrazione può variare Ciò può au mentare sensibilmente il livello di esposizione durante il lavoro Per una precisa deinizione del livello di esposizione dovrebbe essere preso in considerazione anche l arco di tempo in cui l utensile è spento o funzionante ma non in uso Ciò può ridurre sostanzialmente il livello di esposizione durante il lavoro Uti...

Page 33: ...nsili con il dito sull interruttore o si inserisce la spina nella presa con l interruttore in posizione ON aumenta il rischio di incidenti d Togliere tutte le chiavi di regolazione prima di accendere l utensile Una chiave lasciata inserita in una parte rotante di un utensile può provocare danni a persone e Non utilizzare l utensile in condizioni estreme Mantenere sempre l equilibrio ed i piedi ben...

Page 34: ...iare a piallare Tenere l elettroutensile durante il lavoro ad un minimo di 200 mm dal viso e dal corpo Disinserire sempre l elettroutensile ed aspettare fin ché le lame si arrestino completamente prima di fare qualsiasi aggiustaggio Non mettere mai le dita sullo scivolo per i trucioli Esse potrebbero incepparsi nello scivolo quando si taglia legno umido Portare via i trucioli con una stecca ma sol...

Page 35: ...ve essere eseguita dal fabbricante o da un suo specialista di centro assistenza per evitare i pericoli che risulterebbero in seguito alla sostituzione AGGIUSTAGGIO DELLA PROFONDITÀ DI PIALLATURA ATTENZIONE Accertarsi che l elettroutensi le sia disinserito e che la spina sia disinnestata dalla presa prima di cambiare l impostazione o di sostituire i coltelli della pialla 1 Per una piallatura più pr...

Page 36: ...an te di blocco 6 siano in ordine Prima di accendere la macchina accertarsi che il cilindro portacoltelli non tocca nessuna superficie 1 Innestare la spina nella presa premere il pulsante di blocco 6 e tirare l interruttore 5 Fig 8 2 Per arrestare la macchina semplicemente rilasciare l interruttore 5 3 Se si desidera rimettere in marcia l apparecchio è ne cessario azionare contemporaneamente il pu...

Page 37: ...llocare la nuova cinghia nel rullo nuovo Siste mare l altra estremità della cinghia intorno al rullo su periore e rotarlo finché sia tesa e cominci a muovere i due rulli 4 Verificare a mano se la cinghia giri liberamente 5 Riporre il coperchio e stringere le viti 6 Innestare la spina nella presa avviare la macchina per un minuto per essere certi che il motore elettrico e la cinghia funzionano bene...

Page 38: ...anti in cui si riconoscano difetti di mate riale e o di lavorazione Le prestazioni di garanzia saranno erogate solo se la macchina richiesta sarà inviata in condizioni integre al rivenditore o ad un centro di assistenza accompagnata dallo scontrino iscale Ulteriori informazioni Leggere attentamente tutte le istruzioni sull uso prima di adoperare questo prodotto L azienda produttrice si riserva il ...

Page 39: ... sus expectativas Ha sido fabricada conforme a las exigentes Normas de calidad de SPARKY para cumplir los más elevados requisitos de funcionamiento Su nueva herramienta es fácil y segura de manejar y con el debido cuidado le dará muchos años de servicio iable AVISO Lea detenidamente todo el Manual de instrucciones antes de usar su nueva herramienta SPARKY Preste especial atención a los Avisos Su h...

Page 40: ...n Llévense gafas de protección Doble aislamiento de protección adicional Conexión a una aspiradora Conformidad con las directrices europeas aplicables Cumple con las regulaciones de la Unión Aduanera Compatible con los requisitos de los documentos normativos ucranianos Conozca las instrucciones de explotación YYYY Www Período de producción en que los símbolos variables son YYYY año de producción w...

Page 41: ...ariar Esto puede aumentar signiicativamente el nivel de exposición durante el tiempo total de trabajo Una estimación del nivel de exposición a la vibración también debería tener en cuenta el tiempo en que la máquina está apagada o cuando está en marcha pero no trabajando Esto puede reducir de forma importante el nivel de exposición durante el tiempo total de trabajo Mantenga la herramienta los acc...

Page 42: ... de medicación Una pe queña falta de atención cuando se está trabajando con herramientas puede provocar un grave daño personal b Utilice equipos de protección personal Lleve siempre un protector para los ojos El equipa miento de protección como mascarilla zapatos de seguridad antideslizantes casco o protección para los oídos utilizado correctamente reducirá los da ños personales c Evite el arranqu...

Page 43: ...otro cuerpo me tálico pueden averiarse las cuchillas y la herramien ta eléctrica lo cual es una premisa de accidente de trabajo Sea sumamente cauteloso al asir las cuchillas Antes de empezar a operar cerciórese de que los tornillos de sujeción de las cuchillas están bien atie sados Sostenga la herramienta eléctrica firmemente con ambas manos Proteja sus manos de las piezas móviles Antes de empezar...

Page 44: ...sólo conforme a su destinación Queda terminante mente prohibida cualquier otra aplicación 1 Base anterior móvil 2 Palanca de regulación de la profundidad de fresado 3 Regulador de ajuste de la profundidad de cepillado 4 Terminal de evacuación de polvo 5 Interruptor 6 Botón de bloqueo del interruptor 7 Asa 8 Botón de cambio del sentido de evacuación del polvo 9 Lugar para guardar la llave de tuerca...

Page 45: ...ENCIA El cepillo está diseñado para poder operar con cuchillas que estén bien nive ladas y correctamente atiesadas en sus asientos Al montar nuevas cuchillas es muy importante que sean introducidas bajo ángulo recto hasta el final en sus asientos y sus bordes cortantes deben estar perfec tamente nivelados o sea paralelamente a la superfi cie de la base posterior Apenas después de cumplir todos est...

Page 46: ...VERTENCIA Cerciórese de que la herra mienta eléctrica está desconectada y que el enchufe ha sido retirado de la toma de corriente antes de mo dificar los ajustes y montar o desmontar las cuchillas del cepillo 1 Para colocar el guía paralelo 12 retire el tornillo de fijación 11 y deslice el guía hacia el cepillo 2 Coloque el tornillo de fijación 11 del guía paralelo y atiéselo fuertemente 3 Afloje ...

Page 47: ...uave para quitar el polvo acumulado Durante la limpieza lleve gafas de protección para proteger sus ojos Si el cuerpo de la máquina debe limpiarse desempólvelo conunpañosuaveyhúmedo Sepuedeusarundetergente de limpieza suave ADVERTENCIA No se deben emplear alco hol gasolina u otros disolventes Nunca utilice deter gentes corrosivos para limpiar las piezas de plástico ADVERTENCIA El agua no debe entr...

Page 48: ...s mais rigorosas do consumidor Fácil de manutenção e seguro durante a utilização sendo correctamente manipulado este instrumento eléctrico servir lhe á ielmente durante muitos anos ATENÇÃO Leia atentamente toda a instrução para o uso antes de começar a trabalhar com o Seu novo instru mento eléctrico SPARKY Preste especial atenção aos textos que começam com a palavra Aten ção O Seu instrumento eléc...

Page 49: ...ones protectores Leve óculos protectores Duplo isolamento para protecção adicional Conexão com aspirador de po Conformidade com as directrizes europeias aplicáveis Está conforme com as exigências dos regulamentos da União Alfandegâria Conformidade com es exigências dos documentos normativos ucranianos Conheça a instrução de exploração YYYY Www Período de fabrico onde os símbolos variáveis são YYYY...

Page 50: ...arado Em tais casos o nível do impacto pode crescer consideravelmente dentro do período laboral total Ao avaliar o nível de impacto das vibrações é preciso considerar também o tempo em que o instrumento está desli gado ou está ligado mas sem funcionar Tal pode diminuir consideravelmente o nível do impacto dentro do período laboral total Mantenha o instrumento eléctrico e os acessórios em bom estad...

Page 51: ...amento da fer ramenta eléctrica em áreas húmidas deverá ser utilizado uma disjuntor de corrente de avaria A utilização de um disjuntor de corrente de avaria reduz o risco de um choque eléctrico 3 SEGURANÇA DE PESSOAS a Esteja atento observe o que está a fazer e tenha prudência ao trabalhar com a ferramenta eléctri ca Não utilizar uma ferramenta eléctrica quando estiver fatigado ou sob a influência...

Page 52: ...rresponde à da corrente no minal da ferramenta usada bem como da perfeição do extensor Depois dum trabalho prolongado as peças metálicas externas e os acessórios podem ficar quentes de mais Sempre desconecte a ferramenta antes de deixá la de lado Não sobrecarregue a ferramenta deixe a trabalhar a velocidade razoável O sobrecarregamento pode resultar duma pressão exagerada o que vai atrasar o movim...

Page 53: ... não se deve usar à intempérie em tempo de chuva em ambiente húmido depois de chuva ou perto de líquidos e gases inflamáveis O local de trabalho tem de se manter bem iluminado Conhecimento do instrumento eléctrico Antes de começar a trabalhar com o instrumento eléctri co conheça todas as suas especiicidades operacionais e as condições de segurança Utilize o instrumento só para o que está destinado...

Page 54: ...os parafusos para ver se estão bem fixados ADEVRTÊNCIA A plaina foi construída para trabalhar com facas bem niveladas e correctamente fi xadas nos seus leitos Quando vai montar novas facas é muito importante que as facas tenham sido metidas nos seus leitos sob ângulo recto e até ao fim sendo os seus extremos cortantes idealmente nivelados i e ficarem paralelos para com a base traseira Recém depois...

Page 55: ...ELA ADEVRTÊNCIA Assegure se de que o instrumento eléctrico foi desconectado e a ficha foi retirada da rede antes de mudar a configuração ou substituir as facas da plaina 1 Para colocar a guia paralela 12 aparte o parafuso de fixação 11 e deslize a guia para a plaina 2 Coloque o parafuso de fixação 11 da guia paralela e aperte o bem 3 Afrouxe a asa porca do deslizador posicione o des lizador na lar...

Page 56: ...de limpeza limpe o com um pano macio levemente úmido Pode ser utilizado um fraco detergente ATENÇÃO Não se admite o uso de álcool gasolina ou outro solvente Não utilize nunca substân cias corrosivas para limpar as peças de plástico ATENÇÃO Não se admite a penetração de água em contacto com o instrumento IMPORTANTE Para garantir a segurança do trabalho com o instrumento eléctrico ou a sua coniabili...

Page 57: ...znymi standardami jako ci SPARKY aby zapewnić najwy sz jako ć funkcjonowania To łatwe i bezpieczne w u ytkowaniu urz dzenie odpowiednio stosowane i konserwowa ne zapewni Pa stwu długie lata niezawodnej pracy UWAGA Prosimy o dokładne zapoznanie si z niniejsz instrukcj obsługi przed u yciem urz dzenia SPARKY zwra caj c szczególn uwag na ostrze enia i uwagi Dzi ki swoim cechom urz dzenie SPARKY zapew...

Page 58: ...uchawki ochronne Zakładać okulary ochronne Podwójna izolacja zabezpieczenia dodatkowego Podł czenie do odkurzacza Zgodny z odpowiednimi dyrektywami europejskimi Spełnia wymagania przepisów Unii Celnej Zgodno ć z wymogami ukrai skich dokumentów normatywnych Zapoznać si z instrukcj obsługi YYYY Www Okres produkcji w którym zmiennymi symbolami s YYYY roku produkcji ww tydzie kalendarzowy P STRUG ...

Page 59: ...dzie nale ycie konserwowane poziom emisji wibracji mo e si ró nić Mo e to znacznie zwi kszyć poziom ekspozycji w ł cznym czasie pracy Aby dokładnie okre lić poziom ekspozycji na drgania nale y tak e brać pod uwag okresy gdy urz dzenie jest wył czone lub gdy nawet jest wł czone ale nie wykorzystywane do pracy Mo e to znacznie obni yć poziom ekspozycji na drgania w ł cznym czasie pracy Chronić urz d...

Page 60: ...zenia pozostaj c pod wpływem leków alkoholu lub narkotyków w trakcie leczenia lub b d c zm czonym Chwila nieuwagi podczas pracy urz dzeniem mo e być przyczyn powa nych uszkodze ciała b Stosować wyposa enie ochronne Zawsze u ywać ochrony oczu Wyposa enie takie jak maska p pyłowa buty na podeszwie antypo lizgo wej kask ochronniki słuchu redukuje zagro enie uszkodzenia ciała c Unikać przypadkowego wł...

Page 61: ...rzeci ać elektronarz dzia pozostawić je by pracowało we wła ciwej pr dko ci Przeci enie wyst puje przy zbyt du ym nacisku poniewa wte dy elektronarz dzie zaczyna obracać si wolniej w wyniku czego skuteczno ć ulega zmniejszeniu i jest mo liwe uszkodzenie silnika elektrycznego Zawsze gdy jest to mo liwe stosować układ do od prowadzenia pyłu W obszarze pracy nie wolno trzymać szmat cierek pakuł sznur...

Page 62: ...z dzia i osprz tu tylko zgodnie z przeznaczeniem Ka de inne zastosowanie jest stanowczo zakazane 1 Ruchoma podstawa przednia 2 D wignia do regulowania gł boko ci frezowania 3 Regulator nastawienia gł boko ci strugania 4 Ko cówka do odprowadzenia pyłu 5 Wył cznik 6 Przycisk blokuj cy wył cznika 7 R koje ć 8 Przycisk do zmiany kierunku odprowadzenia pyłu 9 Miejsce na przechowanie klucza maszynowego ...

Page 63: ...bardzo wa ne jest by zostały wprowadzone pod k tem prostym w ło u do oporu a ich kraw dzie tn ce powinny być idealnie wyrównane czyli powinny być równoległe do powierzchni podstawy tylnej Dopie ro po spełnieniu tych wszystkich warunków mo na przyst pić do dokr cania wkr tów Je li no e ostrza wysuni te s na zewn trz lub nie s pod k tem pro stym istnieje mo liwo ć zaci cia si w korpusie i spowodowan...

Page 64: ...z da sieci zasilania przed dokonaniem zmiany nasta wienia lub wymiany ostrzy struga 1 Przed zało eniem prowadnicy równoległej 12 nale y usun ć wkr t ustalaj cy 11 i przesun ć prowad nic do struga 2 Zało yć wkr t ustalaj cy 11 na prowadnicy równole głej i z powrotem mocno dokr cić wkr t 3 Rozlu nić nakr tk motylkow suwaka ustawić su wak na po dan szeroko ć strugania i ponownie j dokr cić 4 W celu s...

Page 65: ...Podczas czyszczenia zakładać okulary ochronne W razie czyszczenia korpusu elektronarz dzia u ywać do tego mi kkiej wilgotnej cierki Mo na stosować tak e łagodny preparat do mycia OSTRZE ENIE Nie u ywać spirytusu ben zyny lub innych rozpuszczalników Nigdy nie stosować preparatów r cych do czyszczenia cz ci z tworzy wa sztucznego OSTRZE ENIE Nie dopuszczać dostania si wody do urz dzenia UWAGA W celu...

Page 66: ...64 P 282 RU 64 66 67 68 A 69 70 72 73 282 SPARKY SPARKY SPARKY SPARKY ...

Page 67: ...65 RU YYYY Www YYYY ww P ...

Page 68: ...66 P 282 RU P 282 720 W 16000 min 1 0 2 mm 82 mm 0 18 mm EPTA 01 2014 3 5 kg EN 60745 II EN 60745 LpA 86 dB A pA 3 dB LwA 97 dB A wA 3 dB 6 2 7 EN 60745 EN 60745 ah 4 7 m s2 K 1 5 m s2 EN 60745 2 ...

Page 69: ...67 RU 1 a b c 2 a b c d e f 3 a b c d e f g ...

Page 70: ...68 P 282 RU 4 a b c d e f g 5 a ...

Page 71: ...69 RU 200 mm 1 2 3 4 5 6 7 8 9 10 11 12 13 14 15 ...

Page 72: ...70 P 282 RU 16 17 18 VI EN 60745 I 60745 1 3 1 2 3 0 1 17 13 2 16 15 2 1 16 2 17 3 17 4 15 17 ...

Page 73: ...71 RU 3 4 5 6 a b 5 6 1 6 5 8 2 5 3 6 5 9 1 1 2 3 4 5 1 2 2 12 10 A B ...

Page 74: ...72 P 282 RU 1 12 11 2 11 3 4 1 14 4 2 4 3 8 6 4 4 1 10 2 3 V 4 5 6 2 SPARKY ...

Page 75: ...73 RU SPARKY SPARKY SPARKY ...

Page 76: ...74 P 282 UK 74 76 77 78 A 79 79 82 82 282 SPARKY SPARKY SPARKY SPARKY ...

Page 77: ...75 UK YYYY Www YYYY ww P ...

Page 78: ...K EN 60745 2 i i i P 282 i 720 W i i 16000 min 1 0 2 mm 82 mm EPTA 01 2014 3 5 kg EN 60745 II Ï i EN 60745 LpA 86 dB A i pA 3 dB LwA 97 dB A i wA 3 dB 6 2 7 EN 60745 EN 60745 i i i ahCHeq 4 7 m s2 i CHeq 1 5 m s2 ...

Page 79: ...77 UK 1 a b c 2 a i i b c d e f i 3 a b c d e f g 4 a ...

Page 80: ...78 P 282 UK b c d e i f g 5 a i i 200 mm ...

Page 81: ...79 UK 1 2 3 4 5 6 7 8 9 10 11 12 13 14 15 16 17 18 EN 60745 I 60745 ...

Page 82: ...80 P 282 UK 1 3 1 2 3 0 1 17 13 2 16 15 2 1 16 2 17 3 17 4 15 17 3 4 5 6 b 5 6 ...

Page 83: ...81 UK 1 6 5 8 2 5 3 6 5 9 1 1 2 3 4 5 1 2 2 12 10 A B 1 12 11 2 11 3 4 1 14 4 2 4 3 8 6 4 4 1 10 2 3 V ...

Page 84: ...82 P 282 UK 4 5 6 2 SPARKY SPARKY i SPARKY SPARKY ...

Page 85: ...83 BG 83 85 86 87 A 88 89 91 92 282 SPARKY SPARKY SPARKY SPARKY ...

Page 86: ...84 P 282 BG YYYY Www YYYY ww P ...

Page 87: ...85 BG P 282 720 W 16000 min 1 0 2 mm 82 mm 0 18 mm EPTA 01 2014 3 5 kg EN 60745 II EN 60745 LpA 86 dB A pA 3 dB LwA 97 dB A wA 3 dB 6 2 7 EN 60745 EN 60745 ah 4 7 m s2 K 1 5 m s2 EN 60745 P2 ...

Page 88: ...86 P 282 BG 1 a b c 2 a b c d e f 3 a b c d e f g 4 a ...

Page 89: ...87 BG b c d e f g 5 a ...

Page 90: ...88 P 282 BG 200 mm I 1971 40 1 2 3 4 5 6 7 8 9 10 11 12 13 ...

Page 91: ...89 BG 14 15 16 17 18 EN 60745 I 60745 1 3 1 2 3 0 1 17 13 2 16 15 2 1 16 2 17 3 17 4 15 17 ...

Page 92: ...90 P 282 BG 3 4 5 6 a b 5 6 1 6 5 8 2 5 3 6 5 9 1 1 a 2 3 4 5 1 2 2 12 10 A B ...

Page 93: ...91 BG 1 12 11 2 11 3 4 1 14 4 2 14 3 8 4 4 4 1 10 2 3 V 4 5 6 2 SPARKY ...

Page 94: ...92 P 282 BG SPARKY SPARKY SPARKY 1607R05 ...

Page 95: ... 30 Сб с 09 00 по 16 00 Вс с 10 00 по 16 00 КОНТАКТЫ 38 044 360 46 77 38 066 77 395 77 38 097 77 236 77 38 093 360 46 77 Детальное описание товара https storgom ua product rubanok sparky p 2 2 html Другие товары https storgom ua elektrorubanki html Powered by TCPDF www tcpdf org ...

Reviews: