Instruction Manual
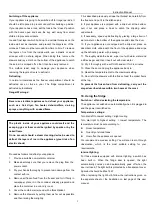
Changing the light bulb:
Never use a stronger light bulb than indicated above. The
voltage indicated on the bulb must , in any case, comply with the
relevant data marked on the rating plate of your appliance.
Unplug the appliance from the main fuse.
Remove the transparent lamp cover
Remove the old bulb by unscrewing it and screw in the
replacement bulb.
Fit the lamp cover back in place.
T
emperature range:
Thanks to the natural air circulation in the fridge there is a range
of different temperatures which are suitable for the storage of
different foods. The coldest areas are directly over the salad
crisper, in the lowest part of the fridge and against the back wall,
the warmest areas are in the front upper part and on the door.
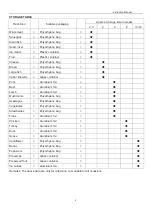
Arrange the foods according to the following table and store it
not too tightly packed so that the air can circulate freely.
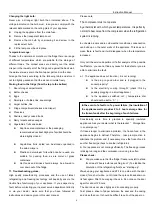
Storing food in the fridge (from the top to the bottom)
1. Door storage compartments
a) Butter, cheese
b) Eggs
c) Small jars or bottles, tins, seasonings
d) Larger bottles, tins
2. Fridge compartment(shelves and crisper)
a) Preserves
b) Pastries, ready cooked foods
c) Dairy / meats and sausages
d) Vegetables, fruits and salad
Kept in sealed containers or the packaging
recommended overleaf.High proof spirits should be
stored tightly closed.
Vegetables, fruits, salad can be stored unpacked in
the salad crispers.
Plastic and aluminium foils which can be reused, are
suitable for packing food, as are metal or glass
containers.
Hot foods and drinks should always be allowed to
cool down out of the fridge.
11. Troubleshooting guides:
High quality manufacturing processes and the use of latest
refrigerating and freezing technology will basically ensure the
trouble free functioning of your appliance. If you suspect any
fault, before contacting your nearest service department directly
or via your dealer, make sure that you have followed all
instructions and advice given in this user manual.
Please note:
In unheated rooms and in cold weather conditions, condensation
can build up on the outer walls of the appliance. This does not
mean there is fault and it will disappear when the temperature
increases.
Only call the service department if after analysis of the possible
fault factors, you can not find any cause for the defect or you are
able to eliminate the fault.
a) The appliance does not function ( it is not running)
Is the plug in good order and is it plugged in the
socket properly?
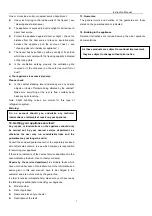
Test: place a sheet of paper between the seal and the casing
and close the door. It should be difficult to pull out the paper on
In the event of a fault or of a power failure, the insulation of
the appliance walls provides 2 to 5 hours storage time for
the frozen foods after the beginning of such failures.
Considerably more time is granted in specially insulated
appliances. Ask your dealer what is the relevant “ Storage time
in an emergency.”
If it takes longer to eliminate a problem, the frozen food in the
appliance begins to defrost. Therefore , take prompt action to
eliminate the problem and, if necessary, move the frozen food to
another freezer (perhaps to another refrigerator)
b) Your appliance is not cooling sufficiently. The freezing process
is taking too long and the compressor is running too often
Please check:
Did you make sure that the fridge / freezer was left to stand
for at least 2 hours before switching it on? ( To stabilize the
circulation of the refrigerating fluid) see “ starting up”
If no
t, unplug your appliance and lift it to one side, with the door
closed, for a short while, i.e. tilt it and then place it back down on
its feet again. After 2 hours plug it back in. Do not open the door
again for about 12 hours.
The door does not close tightly and it not sealing properly.
Is the electricity coming through? (check this by
possibly plugging in a small appliance)
Is the appliance switched on? ( temperature dial
should not be set to “ 0 “ )
6
The compressor must not operate
by a thermostat with which you set temperatures. It is perfectly
normal to hear noise from the compressor when the refrigeration
system is running.
Summary of Contents for BIFF70
Page 11: ......

