4
RMH-203/40SFXMH Hand-Held Radio-Microphone
Battery Installation
Unscrew the battery cover and insert a PP3 9-volt alkaline battery, being careful to observe the correct polarity.
Screw the battery cover back in position to hold the battery in contact. When the microphone is switched on,
the battery indicator should flash once. If no flash occurs, please check the polarity and make sure the battery
is a new one.
Operation
Switch on the microphone; the battery indicator should flash red once.
Switch on the amplifier, turn the volume up a little way and speak directly into the microphone.
Best results will be obtained by speaking fairly close to the grille (20 to 40 mm).
You can adjust the volume to suit your audience, but, to avoid feedback (high pitched whistling), do not point
the microphone directly at the loudspeaker or stand directly in front of the speaker. If you are in a confined
space, turn the volume down.
When you are not using the microphone, turn it off to prolong the battery life.
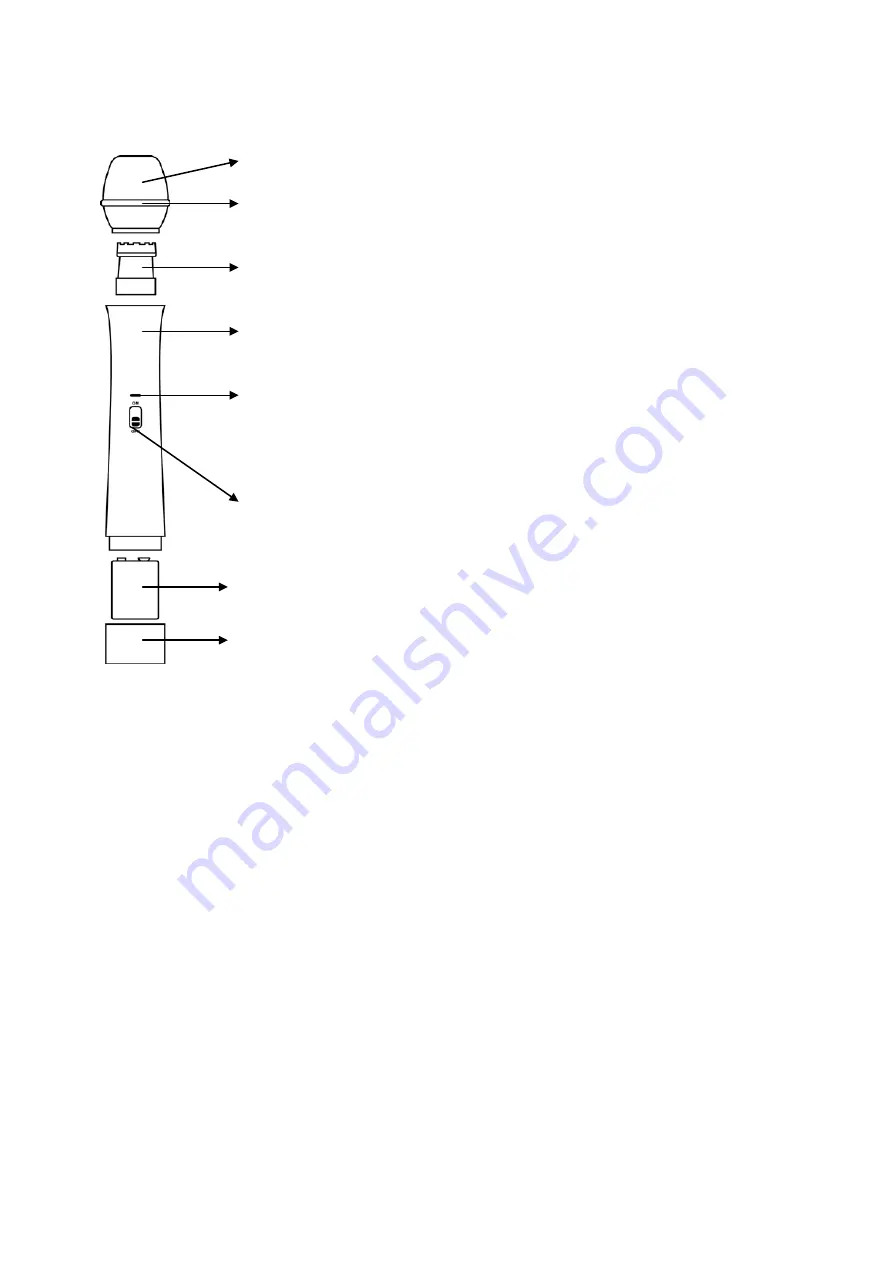
1) Windshield Grille
Protects the cartridge and prevents breath noise
2) Anti-Roll Ring
Prevents microphone from rolling when on a flat
surface
3) Cartridge
Converts the acoustic signals into electrical signals
4) Microphone Casing
Houses and protects the transmitter and
components
5) Battery Indicator
Indicates the battery status.
Normal: flashes red when microphone is switched on
Low Battery: red light remains permanently on
Dead Battery: does not light at all
6) Microphone On/Off Switch
7) Battery
PP3 9 Volt Alkaline
8) Battery Compartment
Unscrew to replace battery


