4
5
Slee /M e
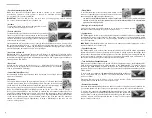
To select mute mode, press the sleep/mute button on the
remote, or repeatedly press the control button on the front
panel until the red light (top right) illuminates.
Tip: When using MAINstageHD with a digital signal that is never off (i.e., optical out from a
satellite receiver) use the Sleep/Mute button to put the MAINstageHD into the Standby/Mute
mode when turning off your TV.
Dial g+ ice cla i ci c i
Using the IR remote, push either Normal (•), or Increase (
+
) which provides
additional output and clarity at typical vocal frequencies.
S
e e e
The MAINstageHD system uses sophisticated computer controlled electronics to virtualize the
soundfield and control audio functions. Should the unit appear to operate erratically, simply
unplug it from the wall outlet for 60 second and plug it back in to reset the internal computer
to normal operation.
IMPORTANT:
From the Off position, you will need to re-engage any special settings (i.e., stereo,
reversed channels, rear channels on).
S eake P
ec i
The MAINstageHD uses a state-of-the-art digital amplifier section which allows significantly
higher music peaks to be heard cleanly. If the system is played at levels that might harm
the speakers, the amplifiers will shut down to protect the speakers from damage. When the
protection system is activated, you will hear the system repeatedly mute and unmute. To
deactivate the protection system, simply turn down the volume.
T
O he Rea Cha el O
When the rear channel outputs are turned off (factory default position), the MAINstageHD’s
VMD surround algorithms directs all information to the MAINstageHD. To create its virtual
surround, the MAINstageHD’s default surround mode directs all information to the internal
speakers. To add real rear surround speakers, you must turn on the Rear Channel Outputs (see
Set-Up Guide).
To turn on the rear channels,
simultaneously press
both
the front panel
source and volume down (–) buttons. The system will make a “beep”
sound to confirm.
Repeating this process will make a “boop” sound, turning off the rear channels and
re-integrating them with the front for virtual surround.
Re e e he cha el
Mounting the MAINstageHD upside down under a counter or using it as the rear channels in a
5.1 surround system are two reasons one might want to reverse the left and right channels.
To reverse the channels,
simultaneously press
both
the source and
volume up (+) buttons on the MAINstageHD front panel. The system will
make a “beep” sound to indicate the function has changed to the reverse
mode. Do it again, and the system will make a “boop” sound to signal
that it is back to normal L/R.
1. Operation
Vaca i ( a e
e )
i ch
Make sure that the rear-located power switch is left On (–) for normal
use/standby operation. If the system is unused for extended periods
(i.e., vacation) it may be turned Off (O).
IMPORTANT:
From the Off position, you will need to re-engage any special settings
(i.e., stereo, reversed channels, rear channels on).
V l
e
To adjust the volume level, use the remote and –,
or use the front panel buttons ( + and –)
S
ce elec i
To select the source, press the Source button on the remote
control, or press the center control button on the front panel
of the unit. Lights on the front panel will indicate the source
selected. Repeated presses will toggle the unit through the
source inputs sequentially.
Starting with the 1/8˝ mini jack (source 1 - analog), then the RCA jacks (source 2 - analog), then
the coaxial digital input (source 3 - digital), then the optical digital input (source 4 - digital),
finally the unit will switch to mute mode indicated by illuminated red (top right) LED, one more
press will bring the unit back to the 1/8˝ mini jack input.
A
- /
- ff
MAINstageHD has an automatic turn-on/turn-off feature. It will turn off (standby mode)
when the source equipment (TV, etc.) has no sound output for approximately one minute (or
immediately for digital signals) and will immediately turn on when a signal is present. When in
Standby, the red LED flashes.
Ba le el
Use the remote control to adjust the bass + or –. Adjusting the bass from the
remote will also adjust the level of an external subwoofer if one is connected,
such as soundmatters’ SUBstage.
I
Se i i i (S
ce 1)
A continuously variable input selection knob is provided. See Set-Up Guide on
proper level matching.
S
d
The system always powers up from Vacation (master on/off) with the virtual
surround sound feature On. It is the default position. Press the surround button
on the remote to turn off the surround feature, the upper left red light will go off.
Press again to turn surround mode back on, illuminating the light.
Add a second MAINstageHD or amplified speaker pair in the rear of the room to provide a
total 5.1 surround experience. You will need to activate the rear channel outputs (see Turn
on the Rear Channel Outputs, next page), and reverse the channels on the rear MAINstage
(either electronically on the HD, or with cabling on an original MAINstage). Adjust the level
of the rear amplifier/speaker for best balance between the front and rear (for questions
contact our customer support department). If using a MAINstage in the rear, use the
source 1 - analog 1 input.


