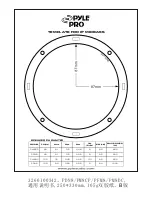
Mounting
Before mounting
A depth of at least 80 mm is required for flush mounting. Measure the depth of the area where you are
to mount the speaker, and ensure that the speaker is not obstructing any other components of the car.
Keep the following in mind when choosing a mounting location.
•Make sure that nothing is obstructing around the mounting location of the rear tray where you are to
mount the speaker.
•A hole for mounting may already be cut out of the inner panel of the rear tray. In this case, you need
to modify the board only.
•If you are to mount this speaker system in the rear tray, make sure that the speaker terminals, frame
or magnet do not touch any inner parts of the car, such as the torsion bar springs (when you open or
close the trunk lid), etc.
Also make sure that the speaker grille does not touch any inner fittings, such as seat belts, head rests,
center brake lights, inner covers of the rear wipers, curtains or air purifiers etc.
1
Parts list
2
3
(
×
2)
(
×
2)
1
Mark the four bolt holes and make them 3.3 mm
*
in diameter.
*
When using
6
: ø 5 mm
Mounting from the car interior (Top mounting)
*
White cord — Left speaker
Grey cord — Right speaker
Power amplifier etc.
Black-striped cord
2
3
How to remove the grille net.
4
(
×
2)
4 m
5
6
(
×
8)
ø 4
×
30
(
×
8)
4
1
Rear tray
4
*
2
5
6
4
c
Press and insert the edges of the grille net.
3
2
3
2
c
ø
3.3 mm
147 mm
216 mm
7.5 mm


