

VGN-CR Series Hard Disk Drive
Replacement Instructions
FOR TECHNICAL SUPPORT IN THE US CALL TOLL FREE 1-866-651-7669 FROM 9:00 AM TO 11:00 PM EST
P/N 994655000
Rev. A
2/2
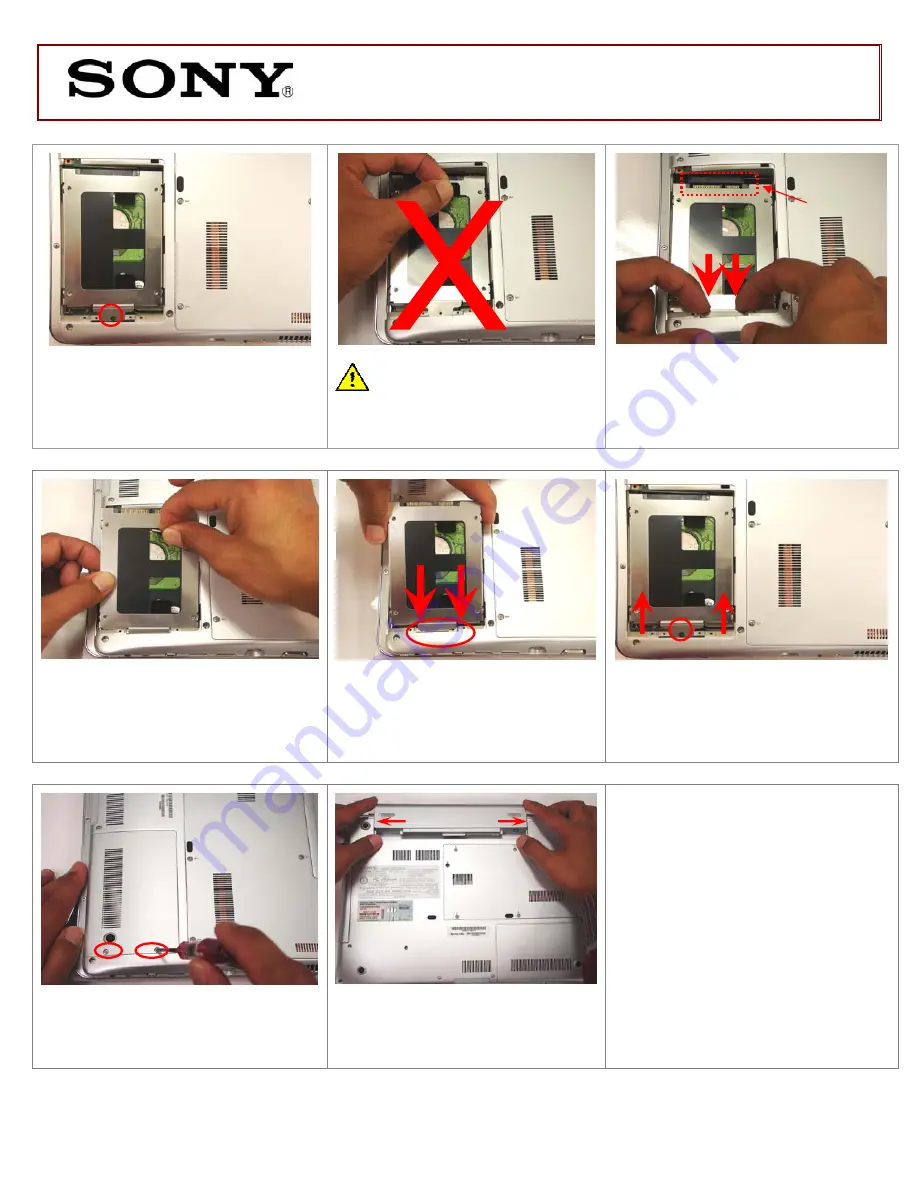
Step 4.
Using the enclosed magnetic
screwdriver, remove the individual
screw indicated in the picture.
CAUTION: Do not pull the
plastic tab before releasing the
hard drive from the connector!
Step 5.
With even force slide out the
HDD as shown.
Some force may be
required to unlock the HDD from the
connector.
Step 6.
Gently pull out the original
HDD away from the computer as
shown.
Step 7.
Hold the new HDD by the
edges and slide the tab inside the
opening at an angle.
Step 8.
Align the HDD with the
connector and with even force push
in the new HDD. Reinstall the
previously removed screw.
Step 9.
Reinstall the HDD access
door removed and properly tighten
the two screws.
Step 10.
Reinstall the Battery
Pack. Reconnect the AC Adapter.
Step 11.
Power on your computer
and continue with the recovery
process by following instructions
described on the back of the recovery
disk’s case.
Return the old HDD Bay to Sony
following the included shipping
instructions.
Fully disconnect
before removal
of HDD
(HDD Reinstallation) Steps 7-10
(HDD Removal)
(Battery tabs should be properly locked)


