background image

Using Smart Capture

Capturing a still image

About

 t

h

Sof

tw

ar

on y

o

ur

 Not

e

book Com

p

ut

er

42

n

N

Using Smart Capture

You can use Smart Capture to shoot still images and record video clips from a digital
camera connected to your computer.

Capturing a still image

1

Launch Smart Capture from the Start menu, in "Programs / Smart Capture".

2

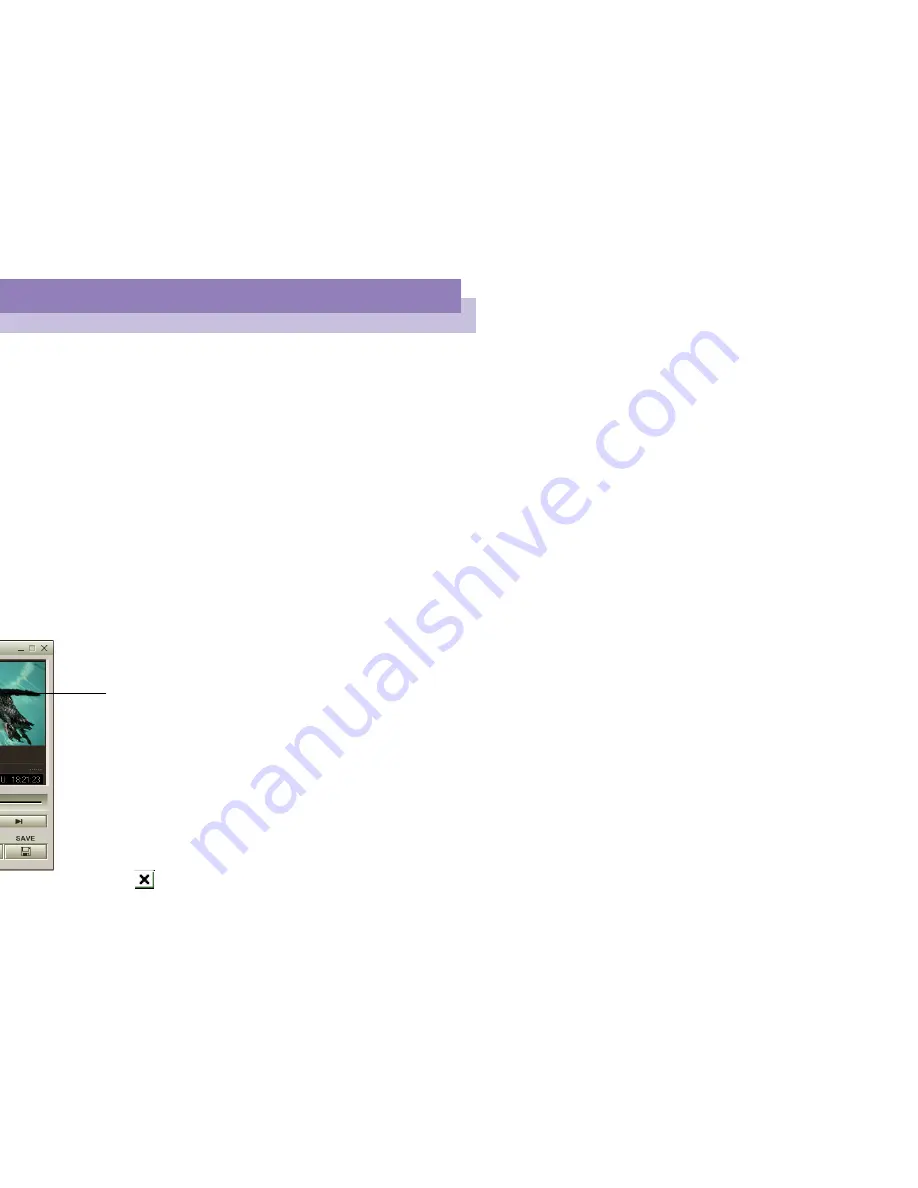
The finder window will appear, displaying the image of the subject.

3

Adjust the focus on the subject you want to shoot.

4

Click the CAPTURE button on the Smart Capture window. The Still Viewer
window will appear with the image you shot in the Still Image Display area.

5

To end Smart Capture click the

button in the top right corner of the window.

You can capture still images 
from i.LINK™ compatible 
devices. For connecting the 
device, refer to "Connecting a 
Digital Video Camera Recorder" 
in your Notebook Computer 
user guide. Also consult the 
Smart Capture on-line help for 
information on installation and 
use.

Captured still image

Summary of Contents for VAIO PCG-X29

Page 1: ...n N ut the Software on r Sony Notebook mputer ...

Page 2: ...thod claims of certain U S ntellectual property rights owned by Macrovision Corporation and other rights owners ht protection technology must be authorized by Macrovision Corporation and is and other limited viewing uses only unless otherwise autorized by Macrovision se engineering or disassembly is prohibited are License Agreement oftware License Agreement the EULA is a legal agreement between Co...

Page 3: ...m and except as permitted by aw you may not decompile reverse engineer or disassemble the SONY E in whole or in part Except for the transfer of the SONY SOFTWARE th the SONY HARDWARE and prior agreement of the recipient to be he terms and conditions of this EULA you may not sell or rent the TWARE and its copy to any third party rranty SONY warrants the media on which the SONY SOFTWARE is be free f...

Page 4: ...th or personal injury caused by the negligence of n This EULA is effective until terminated You may terminate this y time by destroying the SONY SOFTWARE related documentation es thereof This EULA will terminate immediately without notice from u fail to comply with any provision of this EULA Upon termination estroy the SONY SOFTWARE related documentation and all copies Law This EULA shall be gover...

Page 5: ...r Sony has determined that this product meets the ENERGY STAR guidelines for NERGY STAR Office Equipment Program is an international program that promotes ugh the use of computers and their office equipment The program backs the issemination of products with functions that effectively reduce energy consumption It n which business proprietors can participate voluntarily The targeted products are of...

Page 6: ... rmation and technical assistance please refer to your Customer Service ware environment with the Digital Image Library photos backgrounds shows etc PictureGear is your assistant for creating and implementing avers panoramas combined images You can even animate your preferred mation Tools create labels for all your medias with PictureGear Label Maker ies in a variety of formats e read the PictureG...

Page 7: ...e layer MD Player a command and control center designed to assist you in organizing and playing tion of audio and sound files The Media Bar allows you to play audio CDs DVDs in the DVD ROM CD ROM drive or play audio or video files in n your hard drive Video images are displayed in a separate Movie window ove and resize to full screen ct a Sony MD deck that includes a CONTROL A1 or Control A1 II ja...

Page 8: ...e for more details d Smart Connect Monitor ect and Smart Connect Monitor you can copy edit or delete files on another equipped with Smart Connect connected to your computer with an i LINK t a document on a printer connected to another VAIO computer voice memo and shoot an image then post the memo and the image on the orded file will be easily recognized thanks to the label that appears on your e r...

Page 9: ...nt the Jog Dial to o configure the Jog Dial to start any application establish a dialup connection simply by turning and pressing the Jog Dial Finally the Jog Dial Utility figure your i LINK connections and to set a Timer that can launch any time you select See Setting up the Jog Dial and the Jog Dial Setup Help file s you to browse interactively through the contents of your Memory Sticks isplay M...

Page 10: ...opriate profile depending on the application you re working with and the PowerPanel or the PowerPanel Help file for details tup ebook Setup to confirm system information specify preferences for system nge hardware settings for your Sony Notebook computer ation read the help file of Sony Notebook Setup he window design of the Sony Software compatible with UI Design selector CD ROM overy CD ROM allo...

Page 11: ...ce driver or software title may correct a problem you are h your computer and you may not need to recover the entire contents of your se this Recovery CD ROM on the Sony notebook you purchased and not on any other Sony PC facturer s PC ...

Page 12: ...n the groundbreaking features introduced with Windows 98 At the ows 98 Second Edition maintains the best support for older Windows based technologies For questions and technical assistance go online to rosoft com support 5 0 ation is the Internet browser of Microsoft The Setup Wizard configures your ect automatically to the service provider of your choice A full e mail package nd and receive mail ...

Page 13: ...n all major computer platforms Once Acrobat Reader is installed you can DF files from within your Web browser by clicking on a PDF file embedded in quickly see the first page while the rest of the document is being downloaded d technical assistance go online at be com Apple technology that makes video sound music 3D and virtual reality come ernet browser and Windows mation see the web site at le c...

Page 14: ...modes via NeoMagic and enjoy the benefits of r desktop on two screens the window design with UI Design Selector the window design of Sony software compatible with UI Design point Settings then click Control Panel esign Selector or and select the design you like y ign Selector window design changes to give you a preview of the chose for the Sony Software her design click on or elector closes and ch...

Page 15: ...ony Notebook Setup screen art button on the Windows taskbar s select Sony Notebook Setup The Basic window will appear you hance the features by clicking the Basic Advanced tab ab for the item you want to change nish click OK ...

Page 16: ...e of the sounds while the operating system is loading You can disable your touchpad by connecting an optional mouse to your computer s mouse port PS 2 or USB You can also customize the settings of your mouse using the mouse utility ord Set the password to secure your computer Disabling ports releases resources to the system To change the serial settings click Advanced on the Basic Advanced tab Tog...

Page 17: ...xtended battery life main features Profile Selection APS based on the currently active application elect special Power Profiles manually from the menu dit and create new profiles hared with BatteryScope armony with Windows settings erPanel the computer the PowerPanel icon appears in the task tray by ting on the PowerPanel icon you will see a tooltip with the active agement profile ect a power prof...

Page 18: ...t are designed to meet management goals ranging from maximum power management to no ment files ption mum Battery Life Provides power saving features to give you maximum y life and good performance It reduces the brightness of the display and into System Suspend mode after a specified time period mum Performance Provides the best system performance while still ving power wer The power management st...

Page 19: ... on at all times while it conserves power This is ideal for slide show presentations You can establish settings for LCD Standby Hard Disk Standby and System Suspend to optimize power ement for your system unications Extends battery life by initiating a quick display time out You o establish settings for LCD Video Standby Hard Disk Standby and m Suspend to optimize power management for your system ...

Page 20: ...ate and the lock and processor stop To return the system to the active state press any key power switch on your computer m Suspend Puts the system into System Suspend mode a power gement state that saves the state of the system and peripheral devices in ry RAM Power consumption reduces to a minimum and the system ns on To return the system to the active state press any key or the power h on your c...

Page 21: ... parameters such as LCD brightness or hard disk activity Video Standby Turns off the LCD to save power If you turn off the Video by timer the display remains active except when the system enters System nd mode The video display system is one of the largest consumers of power system ve multi purpose bay device You can remove the device inserted in the purpose bay without turning off the power ve ex...

Page 22: ...matically enables PowerPanel set the power management splay the power management settings by clicking the first icon on the kbar PowerPanel ize the PowerPanel toolbar to suit your portable computing needs pre defined Power Management settings or create new profiles Please anel Help for more information ...

Page 23: ...ter 23 n N y Power notebook computer with a battery the CPU can be set to Maximum de to save battery power these functions with Jog Dial ...

Page 24: ...dicates the level of performance of s and meanings ase refer to the Specifications chapter CPU performance Battery Optimized Performance Used with a battery The CPU operates at Low Speed Maximum Performance Used with the AC adapter The CPU operates at High Speed ...

Page 25: ...icating the total maining in the battery and the estimated time until the battery fully play a detailed battery information window by double clicking the e the BatteryScope toolbar as well the taskbar at the bottom of the screen bars from the pop up menu then click BatteryScope you can change it ng window by dragging and dropping it on your desktop w battery gauges on the shared PowerPanel and Bat...

Page 26: ...mation about the batteries k the battery icon on the task tray to display the BatteryScope window ears displaying the General tab which contains information such as the to empty and charging time Battery status Discharging Fully charged Charging Not in use No battery ...

Page 27: ...eries imary battery tab to display information for the battery in the bay on condary battery tab to display information for the battery in the bay on de play the information about each battery such as estimated time to roduct information ...

Page 28: ...ter 28 n N e BatteryScope application bar and alarm system ize the BatteryScope toolbar to suit your portable computing needs as fy the alarm settings Please refer to the BatteryScope Help for more ...

Page 29: ...our favorite software with the efly describes how to use VAIO Action Setup You can also refer to the tup Help for more detailed information O Action Setup screen Jog Dial Icon in the task tray and select Jog Dial Setup VAIO Action IO Action Setup screen appears ...

Page 30: ...on Setup Jog Dial ernal timer at the left of the dialog and then select the application you want to link u can use the internal timer to start software at a specific time It can ns even when the computer is off or in System Hibernation Mode For on read the VAIO Action Setup online help INK at the left of the dialog and then select one of the available tabs For on on the different available setting...

Page 31: ...can select which when the computer is connected to an external display art button select Settings and then click Control Panel l Panel appears k Display y Properties appear ttings tab dvanced tab MagicMedia 256XL Properties appears eoMagic tab agic settings appear isplay type ...

Page 32: ...can be set with the resolution slider to either 640 480 or 800 600 Properties reappear and the selected display is enabled between displays by moving the Jog Dial while pressing the Fn key CRT Projector in step 6 of Selecting a Display you can set the so forth as appropriate for the type of external computer display or Equipment displayed The internal LCD panel An external computer display or an R...

Page 33: ...ter 33 n N s in step 6 of Selecting a Display ced Settings window appears isplay type ...

Page 34: ... display Timing is selected in Monitor settings you can set for the refresh rate and resolution of the internal and external displays lution esolution for the projector that you are going to use Function Connection to an external computer display Connection to a projector ...

Page 35: ...ter 35 n N play TV in step 6 of Selecting a Display you can change settings such as nd the display position s in step 6 of Selecting a Display ced Settings screen appears V Options tab ...

Page 36: ... onnection to a PAL TV or video monitor onnection to a standard US Japanese TV or video monitor unction onnection to a TV or video monitor that has an S VIDEO onnector tandard video output unction his helps prevent problems with TV flicker ...

Page 37: ...rection of the arrow or press the centre on the window in the centre of the screen n Under Scan ay is bigger than the TV screen checking this check box allows to adjust to the size of the TV screen Function Adjusts the TV contrast Adjusts the TV brightness ...

Page 38: ...function Mode pported by your notebook s built in video chip depending on the actual performance of ay Number of colors 16 777 216 24 bits 16 777 216 24 bits 16 777 216 24 bits Number of colors 256 16 777 216 24 bits 16 777 216 24 bits 16 777 216 24 bits ...

Page 39: ...tached to the tor your LCD display and the monitor can function as a single desktop he cursor off one display and onto the other This allows you to drag an open application window or a toolbar from one display to the other ion of a single desktop distributed across separate displays is referred esktop Virtual desktop External monitor Your LCD display ...

Page 40: ...ual display mode then follow these steps art button on the Windows taskbar tings and click Control Panel isplay icon ttings tab dvanced button eoMagic tab et Dual Display option and click OK The System Settings Change appears restart your system s 1 to 3 to display the Display Properties screen splay icon number 2 ...

Page 41: ...t to make the the virtual desktop ize dual display mode by changing the position of the two desktops virtual desktop roperties screen drag the icons of display 1 or display 2 moving them on relative to each other The two display icons must be connected to desktop Click OK to apply the change the dual display setting t Windows to return to single display mode Save your work and close ations before ...

Page 42: ...he Start menu in Programs Smart Capture window will appear displaying the image of the subject ocus on the subject you want to shoot APTURE button on the Smart Capture window The Still Viewer ll appear with the image you shot in the Still Image Display area rt Capture click the button in the top right corner of the window Captured still image ...

Page 43: ...ewer 43 n N e captured images in Still Viewer menu select Programs Smart Capture and click Still Viewer You can delete your images or send them by e mail wer click the button ...

Page 44: ...image via e mail art button on the Windows taskbar ograms and click Smart Capture Viewer ill image you want to send via e mail using or Your e mail window will appear with the selected file attached to ge mail ...

Page 45: ...E using the Switch Capture Mode Button will appear in the finder Turn the camera towards the subject mage APTURE button to shoot a video clip you can shoot up to 60 seconds o the settings you chose in the Recording options section APTURE button when finished Player window will open and the captured video clip will appear in the er window Click here ...

Page 46: ...46 n N playback the images Click X to pause x to stop playback rt Capture click Captured video clip ...

Page 47: ...47 n N aptured video clips ovie Player software playback the images Click X to pause x to stop playback vie Player click ...

Page 48: ...it by e mail art button on the Windows taskbar ogram and then Smart Capture e Player ession Settings window will open compression rate by moving the slider Compression When compression is completed a window message will ou want to attach the file to your e mail send the e mail ...

Page 49: ...book computer Recovery CD in the following cases t of a serious system crash to modify the size of your partitions n Recovery CD allows you to individual driver if a device is not functionning properly individual application in the case you have problems running it system recovery only when your system is seriously damaged e g if Windows does not or your PC behaves abnormally etc The system recove...

Page 50: ...tions available em recovery means that you will lose all your data stored on your C drive and your D drive if tition settings Therefore before applying a system recovery copy your data to an external disk does not allow you to do that try to copy your data from the DOS prompt to a floppy a zip ional hard disk etc ke sure that your computer is connected to AC not the batteries before you attempt a ...

Page 51: ...ur notebook computer Select this option only if hange the sizes of your partitions Please note that this option will xisting data both on the C and D drives before starting the recovery screen press Y to confirm the deletion of the current partitions reen displays a selection of sizes for your new C drive According to you select the recovery process will create 1 or 2 partitions on the hard more d...

Page 52: ...plication Recovery recovery utility allows you to reinstall individual applications rogram can fix the problems encountered if it does not run correctly r an application recovery pplication Recovery CD ROM vol 2 of 2 ur computer using AC power only and wait until Windows has pplication Recovery CD ROM in the CD ROM drive The Install arts running automatically nstall Manager menu appears follow the...

Page 53: ...use the Application Recovery CD ROM whether the driver you plan to reinstall is on the Application Recovery Only device drivers that are not delivered with Windows can be e Drivers directory nderlying sub directories for the appropriate driver h the Add New Hardware wizard in the Windows start menu ngs then Control Panel to install the appropriate device by hrough the appropriate folders ...

Page 54: ...m the factory with 2 logical does not mean that your computer contains two physical hard disks sk space allocation using your notebook computer your C drive contains all the files ndows and other pre installed software while the D drive comes drive is the ideal storage space for all your documents especially big l motion pictures captured with DVgate ...

Page 55: ...ystem recovery but do not want to loose all the data our hard disk copy all the files you want to keep on the D drive system recovery process choose to keep the current partition n Doing so will keep your D drive unchanged after the recovery r more information on the recovery process see the chapter Using the covery CD ROMs eed to change the size of your partitions you can do so by performing cove...

Reviews: