VAIO Computer Quick Start
40
5
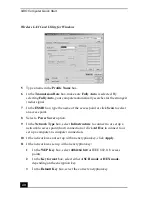
Type a name in the Profile Name box.
6
In the Tranmission Rate box, make sure Fully Auto is selected. By
selecting Fully Auto, your computer automatically searches for the strongest
(radio) signal.
7
In the ESSID box, type the name of the access point or click Scan to select
an access point.
8
Select a Power Saver option.
9
In the Network Type box, select Infrastructure to connect to or set up a
network to access point (host) connection or click Ad Hoc to connect to or
set up a computer-to-computer connection.
10 If the network was not set up with an encryption key, click Apply.
11 If the network was set up with an encryption key:
1
In the WEP Key box, select 40bit/64 bit for IEEE 802.11b access
points.
2
In the Key format box, select either ASCII mode or HEX mode,
depending on the encryption key.
3
In the Default Key box, select the correct encryption key.
Wireless LAN Card Utility for Windows
Summary of Contents for VAIO PCG-R505GCK
Page 8: ...VAIO Computer User Guide 8 ...
Page 28: ...VAIO Computer Quick Start 28 ...
Page 57: ...63 Printer Connections Printing With Your Computer ...
Page 62: ...VAIO Computer Quick Start 68 6 Click OK ...
Page 86: ...VAIO Computer Quick Start 92 ...
Page 87: ...93 Connecting Mice and Keyboards Using External Mice and Keyboards ...
Page 92: ...VAIO Computer Quick Start 98 ...
Page 93: ...99 Floppy Disk Drives and PC Cards Using Floppy Disk Drives Using PC Cards ...
Page 104: ...VAIO Computer Quick Start 110 ...
Page 105: ...111 Docking Stations Connecting the Docking Station ...
Page 114: ...VAIO Computer Quick Start 120 ...
Page 146: ...VAIO Computer Quick Start 152 ...
Page 147: ...153 Memory Upgrades Upgrading Your Computer s Memory ...
Page 154: ...VAIO Computer Quick Start 160 ...
Page 155: ...161 Using the Recovery CDs Application and System Recovery CDs Using Your Recovery CDs ...


