Sony Not
e
book Us
er
G
u
id
e
Using your notebook
14
n
N
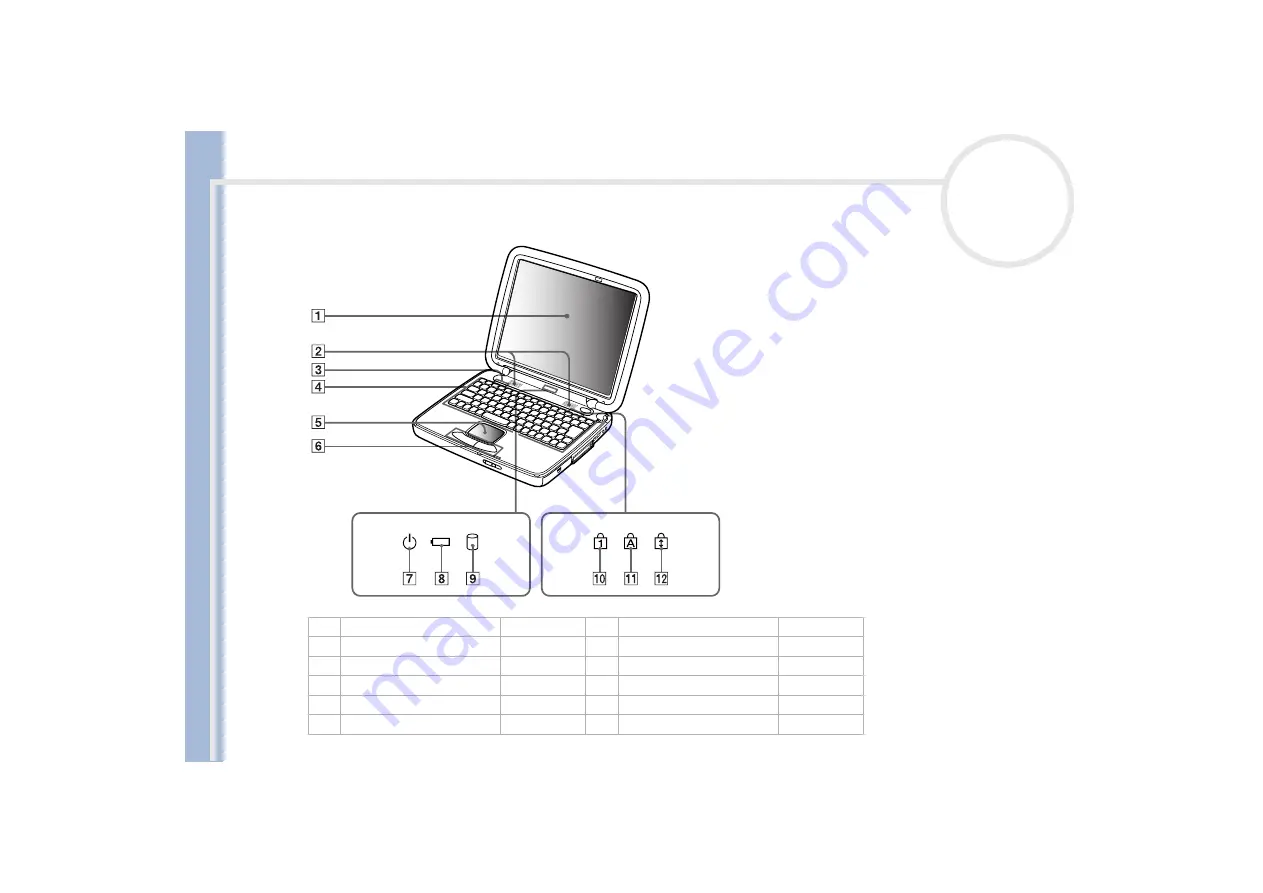
Front
1
LCD screen
(page 70)
7
power indicator
(page 26)
2
speakers
8
battery indicator
(page 26)
3
ID label
9
hard disk drive indicator
(page 26)
4
keyboard
(page 24)
10
Num Lock indicator
(page 26)
5
touchpad
(page 29)
11
Caps Lock indicator
(page 26)
6
left and right buttons
(page 29)
12
Scroll Lock indicator
(page 26)


