background image

16

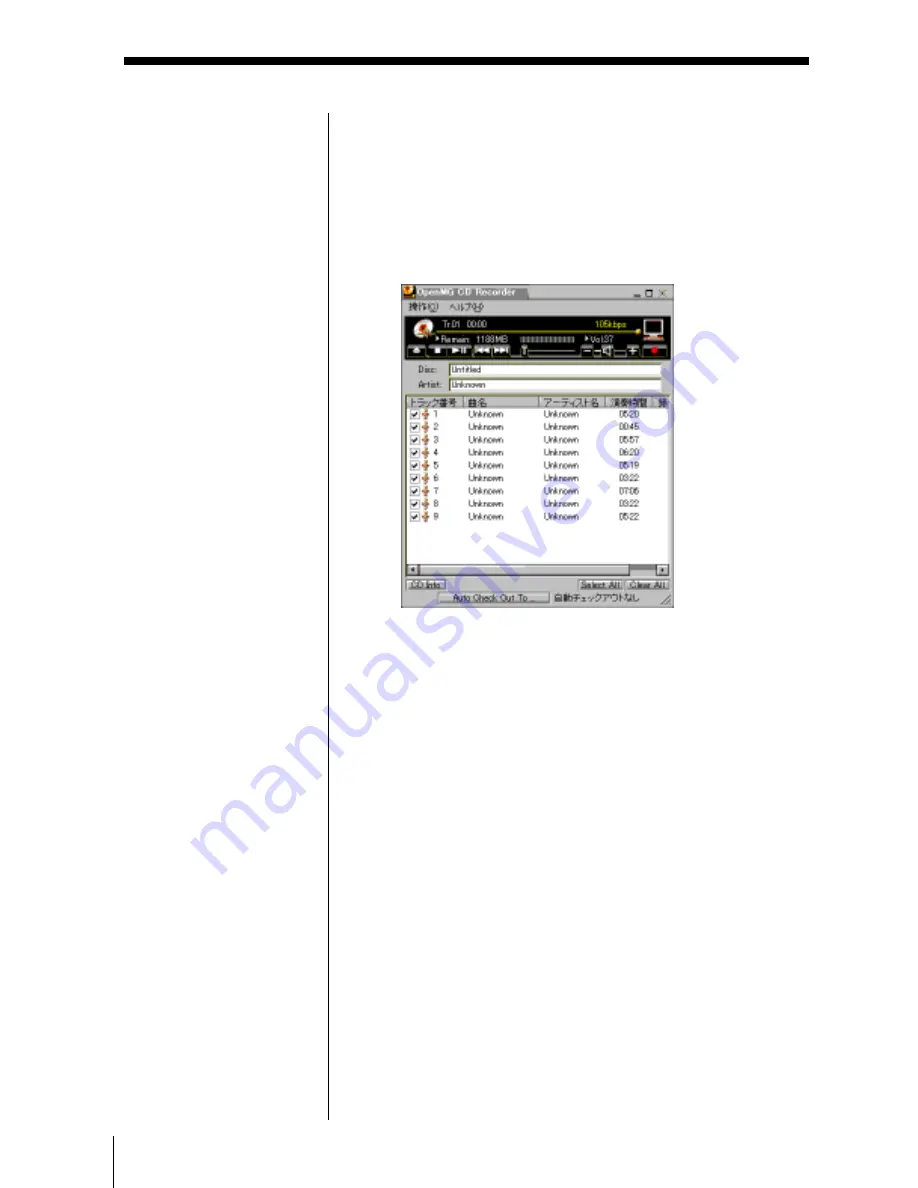
Recording a CD on your computer

1

Insert an audio CD into the CD-ROM drive.

2

Click Recorder.

The CD Recorder window appears.

3

To select certain tracks from your CD, uncheck all
unwanted tracks.

You may also click the Clear All button, and then
select the desired tracks.

4

Click 

z

 (record).

The recording begins.

When the recording is finished, the new CD album
appears in the Album Title list of the OpenMG
Jukebox window.

On the bitrate

You can choose the bitrate from 132kbps, 105kbps,
66kbps. If you choose a higher bitrate, recording will
be done with a better sound, however the recordable
time will be shorter. If you choose a lower bitrate, you
can record longer, however the sound will not be as
good. See below for the recording time according to
the bitrate.

To choose the bitrate, click Controls – Settings. The
Settings dialog box appears. Click the Setting Option
tab, and choose from the ATRAC3 Bitrate list. Refer to
the online help for more information.

To import MP3 files

Use the OpenMG File
Importer application. The
Music Clip Player
supports playback of MP3
files whose bitrate is 32–
256 kbps. For details, see
“Importing MP3 files” of
the OpenMG Jukebox
Help.

To name the album and
songs

Enter the name using the
keyboard, or retrieve the
name via connection to
the CDDB on the Internet.
For details, see “Adding
information, such as title
of a track” of the
OpenMG Jukebox Help.

Summary of Contents for VAIO Music Clip MC-P10

Page 1: ...4 645 934 11 1 1999 Sony Corporation MC P10 Personal Network Player Operating Instructions ...

Page 2: ... interference that may cause undesired operation Program 1999 Sony Corporation Documentation 1999 Sony Corporation Sony VAIO and the VAIO logo Music Clip OpenMG and the OpenMG logo are trademarks of Sony Corporation IBM and PC AT are registered trademarks of International Business Machines Corporation Microsoft Windows and the Windows 98 logo are registered trademarks of Microsoft Corporation MMX ...

Page 3: ...14 Starting the OpenMG Jukebox 14 OpenMG Jukebox basic controls 14 Recording a CD on your computer 16 Transferring the songs to the Music Clip Player Check out 17 Playing songs on the Music Clip Player 18 Using the display information 19 Additional operations Playing songs repeatedly MODE 20 Changing the equalizer EQ 21 Limiting the maximum volume level with Auto Volume Limiter System AVLS 22 Lock...

Page 4: ...d data provided by Electronic Music Distribution EMD services over digital networks such as the Internet records audio CDs onto the hard disk of your computer the imported songs are encoded in ATRAC3 or MP3 format converts the existing MP3 and WAV format audio files into OpenMG format WAV format audio files are converted into ATRAC3 format and MP3 format audio files are converted into ATRAC3 forma...

Page 5: ...ukebox enables you to transfer the sound data stored on your computer s hard disk to the Music Clip Player Check out and transfer it from the Music Clip Player to your computer Check in Check in out restrictions You cannot check out the same song more than three times excluding certain songs However if you transfer a checked out song back to your computer Check in you can then check out the song a...

Page 6: ...um 233 MHz and above Pentium II 400 MHz and above recommended Hard disk drive space 20 MB and above RAM 64 MB and above CD ROM drive Audio output USB port Operating system Windows 98 Display SVGA 800 600 pixel supports High Color 16 bit and above Internet access ...

Page 7: ...e OpenMG Jukebox Help files from the Windows 98 Start menu click Programs OpenMG Jukebox Help To open the Music Clip Help files click Programs OpenMG Jukebox Music Clip Help Selecting a topic from the contents Click Help on the main menu of the OpenMG Jukebox and then click Contents The Help Contents list appears Select the desired topic Searching using a Keyword 1 To search using a Keyword select...

Page 8: ...etting started Your Music Clip Player comes with the following items Music Clip Player 1 Size AA LR6 battery 1 Headphones 1 Neck strap 1 USB cable 1 CD ROM OpenMG Jukebox installation disc 1 Operating Instructions 1 ...

Page 9: ...Q MODE buttons pages 18 20 21 6 Battery compartment page 12 Parts and controls 7 Strap holder page 13 8 HOLD switch page 22 9 Headphones jack page 18 0 AVLS switch page 22 qa USB connector page 14 qs Clip 1 2 3 4 5 6 8 7 9 q qa qs Refer to the page numbers indicated in parentheses for details ...

Page 10: ...m the Start menu and then double clicking Setup exe on the CD ROM drive icon display Music Clip Registration icon on the desktop When you restart your computer after installing the software Music Clip Registration icon will appear on the desktop Make sure that you can connect to the Internet then double click this icon to register yourself for the repertoires and EMD services For details on the cu...

Page 11: ...Jukebox users 1 If you want to register yourself as the user of the previous version do it first You may skip this step if you have already done registration or you do not want to register yourself as the user of the previous version 2 Use the delivered CD ROM to update OpenMG Jukebox Be sure to perform this step to add drivers necessary for the new version You can use old files you previously rec...

Page 12: ...or on the display page 19 reads empty t Note If you do not use the battery correctly it may cause damage from leakage and corrosion Please follow the directions below Make sure the polarity is correct Do not charge a dry cell battery If you do not intend to use the player for an extended period of time remove the battery If you have battery leakage replace with a new battery after cleaning the bat...

Page 13: ...d your neck 1 Remove the string portion from the neck strap 2 Attach the string to the neck strap holder 3 Thread the headphones cord on the neck strap to prevent the cord from getting twisted String portion To the headphones jack Connect the string portion back to the neck strap ...

Page 14: ...ting the Music Clip Player to your computer Starting the OpenMG Jukebox From the Windows 98 Start menu click Programs OpenMG Jukebox OpenMG Jukebox or click on the Windows desktop The OpenMG Jukebox displays To exit the OpenMG Jukebox Click the Close button on the OpenMG Jukebox USB cable supplied To the USB connector To the USB connector Note While the Music Clip Player is connected to the comput...

Page 15: ...splays the shuffle repeat play status 4 Play mode control buttons Controls recording playback volume etc 5 Edit My Select Opens the My Select window 6 Portable Player Opens the Portable Player window 7 Album title column Displays the Original or y Select album list 8 Song column Displays the songs included in the selected album 1 2 3 4 5 6 7 8 ...

Page 16: ...e time will be shorter If you choose a lower bitrate you can record longer however the sound will not be as good See below for the recording time according to the bitrate To choose the bitrate click Controls Settings The Settings dialog box appears Click the Setting Option tab and choose from the ATRAC3 Bitrate list Refer to the online help for more information To import MP3 files Use the OpenMG F...

Page 17: ... Album title column and click The song names included in the selected album appear in the Song Title list of the Portable Player window 3 Click Check out begins To cancel Checking Out Click Stop To transfer the songs from the Music Clip Player to your computer See Checking in a checked out song Check in of the OpenMG Jukebox Help Note Before transferring make sure the Music Clip Player is connecte...

Page 18: ... To stop playback Press Nx play stop T o locate the next song locate the beginning of the current song locate previous songs P r e s s once once repeatedly z Tip The Music Clip Player does not have the power switch The Music Clip Player automatically turns off about 10 seconds after it stops playing Press Nx play stop again to start playback The Music Clip Player starts playing from the song last ...

Page 19: ...mation on the Music Clip Player display Repeat mode page 20 Remaining battery EQ page 21 Play Volume indicators While playing the N icon and the song number appear While changing the volume VOL and the volume level appear Note The display turns off about 10 seconds after playback stops S1 ...

Page 20: ...songs repeatedly while holding down the SHIFT button press MODE repeatedly Each time you press the MODE button the repeat mode indicator changes as follows 1 F t F t SHUF F t no indication Repeatmodeindicator 1 F F SHUF F To cancel Repeat Play While holding down the SHIFT button press MODE repeatedly until the repeat indicator disappears Note The repeat mode is reset to the factory setting no indi...

Page 21: ...t to the factory setting no indicator if the battery is removed R To change the EQ while holding down the SHIFT button press EQ repeatedly Each time you press EQ the EQ indicator changes as follows S1 t S2 t S3 t no indicator EQindicator S1 S2 S3 No indicator To cancel EQ While holding down the SHIFT button press EQ repeatedly until the EQ indicator disappears EQ SHIFT ...

Page 22: ...g the maximum volume level with Auto Volume Limiter System AVLS To limit the maximum volume level Slide the AVLS switch to LIMIT To cancel AVLS Slide the AVLS switch to NORM To protect your ears you can limit the maximum volume level using the Auto Volume Limiter System AVLS switch When the AVLS switch is activated the volume will not exceed the defined limit even when turned up all the way AVLS s...

Page 23: ...aker or TV Operation If the Music Clip Player is brought directly from a cold to a warm location or if it is placed in a very damp environment moisture may condense on the parts inside the Music Clip Player Should this occur the Music Clip Player may not operate properly Remove the battery and let the Music Clip Player sit for approximately two or three hours or until the moisture evaporates Clean...

Page 24: ... requirements Size AA LR6 battery 1 USB bus power Battery life Approx 5 hours continuous playback Power consumption Approx 360 mW Dimensions approx Approx 43 4 7 8 31 32 inches 119 8 21 5 24 mm w h d Mass Approx 1 69 oz 48 g including battery Operating temperature 41 F to 95 F 5 C to 35 C not condensed Environment temperature 4 F to 140 F 20 C to 60 C not condensed Supplied accessories See page 8 ...

Page 25: ... files Installation information Software updates The Sony e mail support service answers your questions by electronic mail Just send your question in an e mail message and a customer service representative will send you a reply To send a question to Sony e mail support address the message to SOS info sel sony com The Sony fax back service provides you with answers to commonly asked questions You c...

Page 26: ... value page 16 The Music Clip Player does not function cIf the Music Clip Player is connected to the computer disconnect it cMake sure that the Hold function is deactivated page 22 c Ifthebatteryisweak replaceitwith a new one cCheck out the songs to the Music Clip Player if 00 appears on the display The commercially available USB cable cannot be connected cUse the supplied USB cable On the softwar...

Page 27: ...e remaining check out count to the original value The Check in count decreased with no actual Check in What happened cDisconnecting or connecting the USB cable while checking a song in causes this error Never disconnect the USB cable while checking a song into your computer I cannot find a song I certainly checked out cDidn t you disconnect the USB cable while checking a song out Do not disconnect...

Page 28: ...e to 66Kbps The backlight only turns on while the USB cable is connected to my computer Why is this cYou have no battery installed in your OpenMG Jukebox Power is supplied to OpenMG Jukebox from your computer via the USB cable and is cut off when the cable is disconnected You need a battery to use your OpenMG Jukebox while the USB cable is not connected ...

Page 29: ...annot be played if copied onto other computers 3 Music contents Checked Out from a computer cannot be played if copied onto other computers 4 Music contents Checked Out from a computer must be Checked In to the same computer You cannot Check In to other computers 5 Installation of the same OpenMG Jukebox software onto other computers is impossible 6 Usage Rule for using music If Usage Rule is incl...

Page 30: ...tware This software was developed in accordance with the arrangement currently made between Sony and SDMI If this arrangement is modified in the future some of the software functions may become unavailable Sony will offer a pay upgrade kit in this case Notes SONY is not liable in case of failure of recording or downloading of the data as well as contents broken or erased due to the malfunction of ...

Page 31: ...for preventing illegal usage of audio files and to promote legal music distribution services The copyright protection technology OpenMG used in the OpenMG Jukebox is based upon the SDMI standard Check in Check out Check out is to transfer an audio data managed on a personal comuputer by an OpenMG compliant software to a portable player Music Clip Player etc Returning the checked out audio data bac...

Page 32: ...i Disc with the addition of a new technology to increase the compression rate approximately one tenth MP3 MP3 is the abbreviation for MPEG 1 Audio Layer3 fixed in one of the working group of ISO named MPEG This is an audio codec standard which can compress audio signal almost one tenth As this technology is opened there are may variety of products ...

Page 33: ...ducts purchased in the United States of America SONY warrants this VAIO Music Clip hardware product the Product against defects in material or workmanship as follows 1 Labor For a period of ninety 90 calendar days from the original date of purchase from SONY or a SONY authorized reseller SONY will repair defects in material or workmanship in the Product at no charge or pay the associated labor cha...

Page 34: ...ether or not contained in the Product SONY excludes all warranties express or implied in respect of any software provided with the product and any such software is provided AS IS unless expressly provided for in any enclosed software limited warranty Please refer to the End User License Agreements included with the Product for you rights and obligations with respect to the software This Limited Wa...

Page 35: ...d by SONY prior to sending the Product to SONY for service SONY is not liable for any loss or damage to these items This Limited Warranty does not cover any consumable items such as batteries supplied with this Product cosmetic damages damage or loss to any software programs data or media or damage due to 1 acts of God accident misuse abuse negligence commercial use or modifications of this Produc...

Page 36: ...s on how long an implied warranty lasts so the above limitations or exclusions may not apply to you This Limited Warranty give you specified legal rights and you many have other rights which vary from state to state Technical Support Although technical support is not provided free of charge under this Limited Warranty SONY has established a telephone number for technical support Charges may apply ...

Page 37: ...ony It Is Important That You Register Your VAIO Music Clip Player By registering you receive the following benefits Your 90 day limited hardware warranty is automatically extended to a full year from the original date of purchase You receive free access to Club VAIO an online resource developed exclusively for VAIO owners One Year Hardware Telephone Support ...

Page 38: ...d 22 I Install 10 M MP3 32 N Neck strap 9 O OpenMG Jukebox 15 OpenMG Jukebox Help 7 Overview 4 P Parts and controls 9 Playback 18 Precautions 23 R Recording a CD 16 Repeat mode 20 Restrictions on the copyright protection 29 S SDMI 31 Sony s Support Options 25 Specifications 24 Starting the OpenMG Jukebox 12 System requirements 6 T Transferring the songs 17 Troubleshooting 26 U Uninstall 11 Unpacki...

Page 39: ...39 ...

Page 40: ...Sony Corporation Printed in Japan ...

Reviews: