background image

Operations

12

-EN

Adjusting the
picture

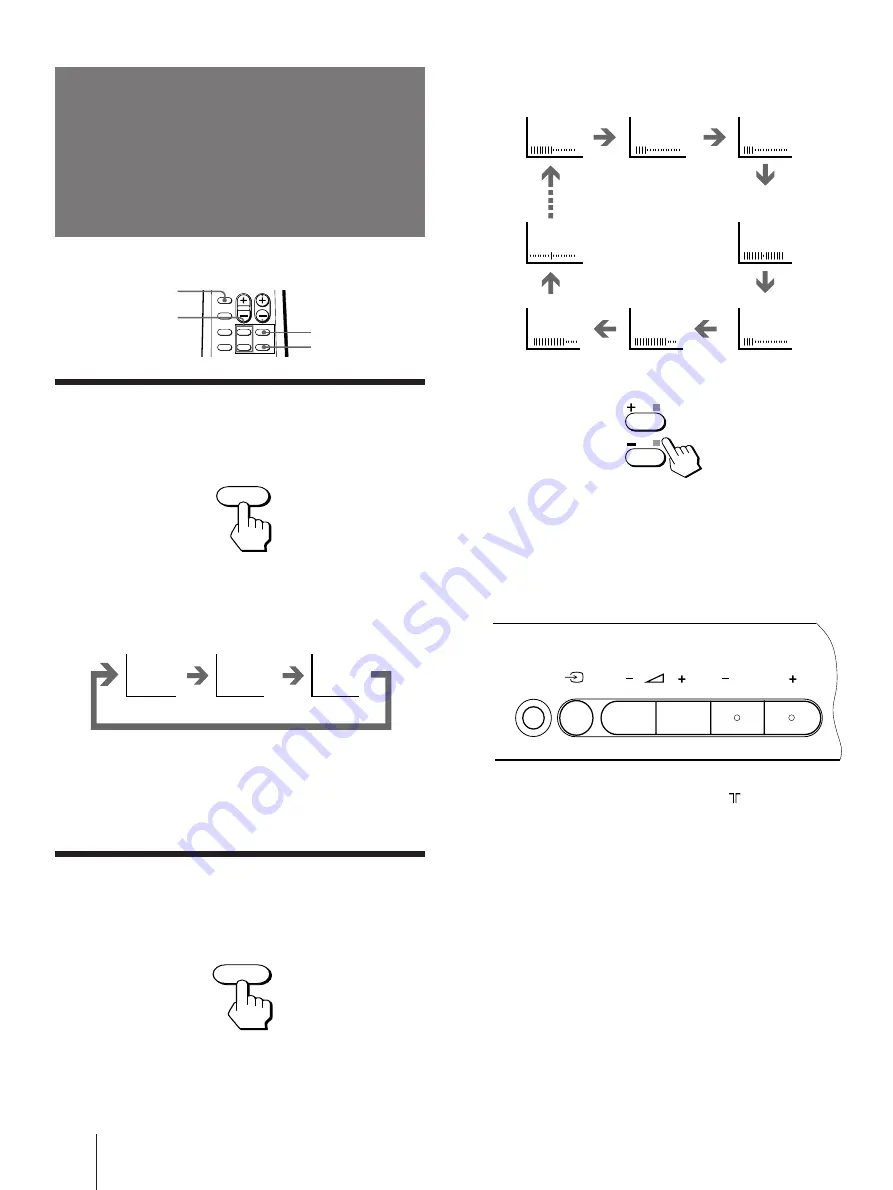
Each time you press SELECT, the screen changes as
follows:

2

Press +/– to adjust the item.

3

To adjust other items, repeat steps 1 and 2.

Note

You can also use SELECT and 

Á

 +/– on the TV to adjust the

picture setting.

If the color of the picture is abnormal

When receiving programs through the 

 (antenna)

terminal:

Change the  “TV SYSTEM“ or “COLOR SYSTEM“
setting or adjust the “COLOR“ level in the on-screen
display until the color becomes normal.

If the color of the picture is abnormal

When receiving programs through the 

 (VIDEO

INPUT) jacks:

Change the  “COLOR SYSTEM“ setting or  adjust the
“COLOR“ level in the on-screen display until the color
becomes normal.

Note

Normally set “COLOR SYSTEM“ to “AUTO“.

Selecting the picture mode

Press PIC MODE until the mode you want
appears.

Each time you press PIC MODE, the screen changes as
follows:

Note

If you change the picture mode after the following
adjustments, the adjustment changes in accordance with the
picture mode.

Adjusting the picture setting

1

Press SELECT until the item you want to
adjust appears.

SOUND

MODE

+/–

SELECT
PIC MODE

Standard
picture

Soft picture
(good for video
games)

High contrast
picture

Front of TV

(Operative for
NTSC signal
only)

÷

0

PICTURE

COLOR

BRIGHT

HUE

SHARPNESS

BASS

BALANCE

TREBLE

PIC MODE

DYNAMIC

STANDARD

SOFT

SELECT

  PROGR 

SELECT

Summary of Contents for Trinitron KV-T21TF2

Page 1: ... 1997 by Sony Corporation 3 861 104 11 1 Trinitron Color TV Operating Instructions KV T21TF2 ...

Page 2: ...2 ...

Page 3: ...3 1 PROGR SELECT PROGR VHF LOW D K SELECT ...

Page 4: ...4 ...

Page 5: ...he supplied screws as shown on page 2 to fasten the TV to the TV stand or to stabilize the TV against a wall or a pillar Use of other screws may damage the TV Note on the remote commander The supplied remote commander is used on several models of the TV If you do not find instructions for some controls that are on the remote commander that means your TV does not employ the features of those contro...

Page 6: ...r Connecting a VHF antenna or a combination VHF UHF antenna 75 ohm coaxial cable round Attach an optional IEC antenna connector to the 75 ohm coaxial cable Plug the connector into the antenna socket at the rear of the TV Rear of TV Rear of TV On a wall ...

Page 7: ...hen connecting a monaural VCR Connect the yellow plug to VIDEO and the black plug to L AUDIO L MONO When connecting a VCR to the antenna terminal Preset the signal output from the VCR to the program position 0 When connecting video equipment to the VIDEO INPUT jacks or the VIDEO IN jacks Do not connect video equipment to the VIDEO INPUT jacks at the front and the VIDEO IN jacks at the rear of your...

Page 8: ...V until TV SYSTEM appears 2 Press on the remote commander or on the TV until the picture and sound become normal Notes If you do not know your local TV system consult your nearest authorized service center or dealer The setting of the TV SYSTEM is memorized for each program position Presetting channels manually 1 Press SELECT on the remote commander or the TV until TV SYSTEM appears on the screen ...

Page 9: ...ly or To start presetting channels automatically from the specified program position Press PROGR or number buttons on the remote commander or PROGR on the TV until the required program position appears on the screen after step 4 Presetting channels manually 1 Press SELECT on the remote commander or the TV until TV SYSTEM appears on the screen 2 Press on the remote commander or Á on the TV to selec...

Page 10: ...ss and then 2 and 5 To scan through program positions Press PROGR until the program position you want appears 3 Press Á to adjust the volume Watching the TV VIDEO 1 MUTING 2 5 Operations Turning off the TV To turn off the TV temporarily Press u on the remote commander The u indicator lights up To turn off the TV completely Press U on the TV If the power on the TV is turned off in standby mode the ...

Page 11: ...11 Operations EN ...

Page 12: ...cks Change the COLOR SYSTEM setting or adjust the COLOR level in the on screen display until the color becomes normal Note Normally set COLOR SYSTEM to AUTO Selecting the picture mode Press PIC MODE until the mode you want appears Each time you press PIC MODE the screen changes as follows Note If you change the picture mode after the following adjustments the adjustment changes in accordance with ...

Page 13: ...gh the antenna terminal Change the TV SYSTEM setting level in the on screen display until the sound becomes clear Selecting the sound mode Press SOUND MODE until the mode you want appears Each time you press SOUND MODE the screen changes as follows SOUND MODE MUSIC SPORTS DRAMA SOFT ...

Page 14: ...l Information If you have any problems read this manual again and check the countermeasure for each of the symptoms listed below If the problem persists after trying the methods below contact your nearest authorized service center or dealer Snowy picture Noisy sound Check the antenna Check the antenna connection on the TV and on the wall Check the TV SYSTEM setting Dotted lines or stripes This may...

Page 15: ...3 UHF A14 to A79 CATV A 8 to A 2 A to W 4 W 6 to W 84 3W 3W Antenna 75 ohms external terminal VIDEO IN jacks phono jacks Video 1 Vp p 75 ohms Audio 500 mVrms high impedance 2 Headhone jack Ú MONITOR OUT jacks phono jacks Video 1 Vp p 75 ohms Audio 500 mVrms 22 in 54 51 516 464 478 21 Power requirements Power consumption W Television system Color system Channel coverage D K I BG M Audio output spea...

Page 16: ...Additional Information 15 EN ...

Reviews: