background image

– 18 –

KV
-1499XF

RM-952

SECTION 2

DISASSEMBLY

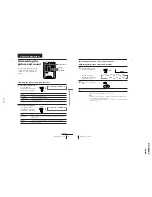
2-2. CHASSIS ASSY REMOVAL

Chassis assy

Lever

Lever

2-1. REAR COVER REMOVAL

1

 Eight screws

     (+BVTP 4 

× 

16)

3

 Two screws

     (+BVTP 4 

× 

16)

2

 Rear cover

2-3. F BRACKET REMOVAL

3

 One screw

     (+BVTP 3 

× 

12)

4

 One screw

     (+BVTP 4 

× 

16)

1

 Three connectors

2

 F board

Lever

2-4. SERVICE POSITION

(Note: Remove F Bracket first.)

Summary of Contents for TRINITRON KV-1499XF

Page 1: ...MODEL COMMANDER DEST CHASSIS NO KV 1499XF RM 952 ME SCC U16X A MODEL COMMANDER DEST CHASSIS NO CHASSIS TRINITRON COLOR TV SERVICE MANUAL BG 3S SelfDiagnosis Supported model ...

Page 2: ... 1 Minijack Picture tube 14 inch Tube size cm 37 Measured diagonally Screen size cm 34 Measured diagonally Dimension w h d mm 466 341 416 Mass kg 13 Design and specifications are subject to change without notice SAFETY RELATED COMPONENT WARNING COMPONENTS IDENTIFIED BY SHADING AND MARK ON THE SCHEMATIC DIAGRAMS EXPLODED VIEWS AND IN THE PARTS LIST ARE CRITICAL TO SAFE OPERATION REPLACE THESE COMPO...

Page 3: ...ergence 22 3 3 Focus Adjustment 24 3 4 G2 Screen and White Balance Adjustments 24 4 CIRCUIT ADJUSTMENT 4 1 Adjustments with Commander 25 4 2 Adjustment Method 26 4 3 Picture Quality Adjustments 31 4 4 A Board Adjustment After IC003 Memory Replacement 31 4 5 Picture Distortion Adjustment 32 Section Title Page 5 DIAGRAMS 5 1 Block Diagram 35 5 2 Frame Schematic Diagram 38 5 3 Circuit Boards Location...

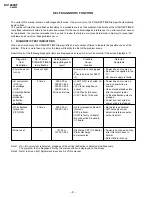
Page 4: ...cro reset No of times STANDBY TIMER lamp flashes Does not light 2 times 5 times Self diagnostic display Diagnostic result 002 000 or 002 001 255 003 001 255 004 001 255 at the same time 005 000 or 005 001 225 101 00 or 101 001 225 Probable Cause Location Power cord is not plugged in Fuse is burned out F4601 F H OUT Q511 is shorted A board 13V is not supplied A board IC 503 faulty A board IC 301 fa...

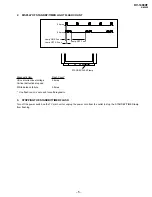
Page 5: ...ection stopped White balance failure 5 times One flash count is not used for self diagnostic 3 STOPPING THE STANDBY TIMER FLASH Turn off the power switch on the TV main unit or unplug the power cord from the outlet to stop the STANDBY TIMER lamp from flashing Lamp ON 0 3 sec Lamp OFF 3 sec Lamp OFF 0 3 sec 2 times 5 times STANDBY SLEEP lamp ...

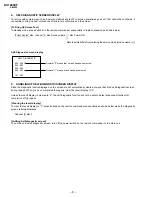
Page 6: ...tected Numeral 1 means a fault has been detected 101 000 SELF DIAGNOSTIC 5 HANDLING OF SELF DIAGNOSTIC SCREEN DISPLAY Since the diagnostic results displayed on the screen are not automatically cleared always check the self diagnostic screen during repairs When you have completed the repairs clear the result display to 0 Unless the result display is cleared to 0 the self diagnostic function will no...

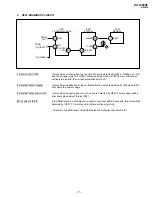
Page 7: ...509 and IC001 shut down the power supply Vertical deflection overcurrent Occurs when an overcurrent on V drive line is detected by Q507 Power supply will be shut down when detect this by IC001 White balance failure If the RGB levels do not balance or become low level within 5 seconds this error will be detected by IC301 TV will stay on but there will be no picture Refers to the RGB levels of the A...

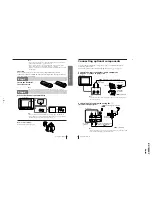
Page 8: ...dren to climb onto it Do not plug in too many appliances to the same power socket Do not damage the power cord Clean the TV with a dry and soft cloth Do not use benzine thinner or any other chemicals to clean the TV Do not scratch the picture tube 4 Using Your New TV Getting Started Step 1 Connect the antenna If you wish to connect a VCR see the Connecting a VCR diagram below Using Your New TV IEC...

Page 9: ...completed making all other connections otherwise a minimum leakage current might flow through the antenna and other terminals to ground Insert the batteries into the remote 6 Using Your New TV 1 Connecting optional components You can connect optional video components such as a VCR multi disc player camcorder or video game To watch the picture of the connected equipment press see page 11 Connecting...

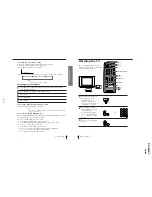
Page 10: ...resetting channels You can preset up to 100 TV channels in numerical sequence from program number 1 using the remote and the buttons on your TV as well Presetting channels automatically 1 Press U to turn on the TV 2 Press AUTO PROGR To preset channels automatically from a specified program number 1 Press SELECT until AUTO PROGRAM appears 2 Press or The on screen display will start flashing 3 Press...

Page 11: ...uce the following problems double images and lines moving across the TV screen You can use the fine tuning function as below 1 Select the program number you want to adjust 2 Press SELECT until MANUAL PROGRAM appears on the screen 3 Press or on the remote control once 4 Press to display FINE on the screen 5 Press or continuously until the above problems are minimized The or icon on the screen flash...

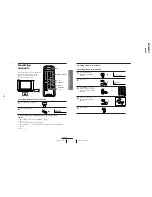
Page 12: ...inutes No Wake Up timer After 12 hours SLEEP TIMER 30M SLEEP TIMER 60M SLEEP TIMER OFF SLEEP TIMER 90M After 30 minutes No Sleep Timer After 60 minutes After 90 minutes Watching the TV continued 11 Using Your New TV Using Your New TV LANGUAGE LANGUAGE ENGLISH SELECT To Turn off temporarily Turn off completely Mute the sound Watch the video input VCR camcorder etc Jump back to the previous channel ...

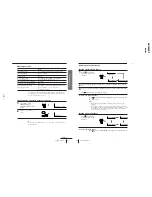
Page 13: ...red sound mode Select To DYNAMIC listen to dynamic and clear sound that emphasizes the low and high sound DRAMA listen to sound that emphasizes vocals and background music SOFT receive soft sound PIC MODE SELECT or Advanced Operations continued 14 Advanced Operations PICTURE COLOR BRIGHT HUE TREBLE BASS SHARP SELECT PICTURE 60 Adjusting the picture and sound settings 1 Press SELECT until the desir...

Page 14: ...ILD LOCK OFF SELECT TV 1 2 3 4 6 7 8 9 0 5 JUMP SOUND MODE FAVORITE PROGR Á SELECT or 16 Additional Information Additional Information Self diagnosis function Your TV is equipped with a self diagnosis function If there is a problem with your TV the u indicator flashes red The number of times the u indicator flashes indicates the possible causes 1 Check that the u indicator flashes red a number of ...

Page 15: ...incomplete The power cord antenna or VCR is not connected The TV is not turned on 18 Additional Information Troubleshooting continued Possible cause Symptom Solutions Press to increase the volume level Press to cancel the muting Do not use a hair dryer or other equipment near the TV Adjust the antenna direction for minimum interference Contact a Sony dealer for advice Use a highly directional ante...

Page 16: ...s does not indicate a malfunction The TV s demagnetizing function is working This does not indicate a malfunction Lines moving across the TV screen The u indicator on your TV flashes red a number of times between 3 second intervals TV cabinet creaks A boom sound is heard when the TV is turned on 20 Additional Information Identifying parts and controls Refer to the pages indicated in parentheses fo...

Page 17: ...uttons 10 6 SELECT button 8 7 PIC MODE button 13 8 or buttons 7 9 display button 11 º muting button 11 video button 11 volume buttons 10 A B button not used for this model Timer setting buttons 12 wake up timer sleep timer FAVORITE button not used for this model SOUND MODE button 13 Teletext operation buttons not used for this model text enlarge reveal hold index text clear p FASTEXT red green yel...

Page 18: ...MOVAL Chassis assy Lever Lever 2 1 REAR COVER REMOVAL 1 Eight screws BVTP 4 16 3 Two screws BVTP 4 16 2 Rear cover 2 3 F BRACKET REMOVAL 3 One screw BVTP 3 12 4 One screw BVTP 4 16 1 Three connectors 2 F board Lever 2 4 SERVICE POSITION Note Remove F Bracket first ...

Page 19: ... spring Picture tube 3 DGC holder 3 DGC holder 2 5 REPLACEMENT OF PARTS For replacement of the Multi Button unscrew it and exchange with the new part 2 5 1 REPLACEMENT OF MULTI BUTTON Multi button Two screws BVTP 3 12 2 5 2 REPLACEMENT OF LIGHT GUIDE For replacement of the Light Guide unscrew it and exchange with the new part Light guide ...

Page 20: ...inal is built into the rubber 3 Do not turn the foot of rubber over too hard The shatter hook terminal will stick out or damage the rubber HOW TO HANDLE AN ANODE CAP 3 When one side of the rubber cap is separated from the anode button the anode cap can be removed by turning up the rubber cap and pulling it up in the direction of the arrow c 2 Using a thumb pull up the rubber cap firmly in the dire...

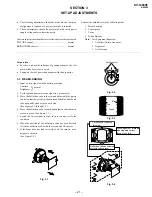
Page 21: ...ower and degauss with the degausser 3 1 BEAM LANDING 1 Input a white signal with the pattern generator Contrast Brightness 2 Set the pattern generator raster signal to a green raster 3 Move the deflection yoke to the rear and adjust with the purity control so that the green is at the center and the blue and the red take up equally sized areas on each side See Figures 3 1 through 3 3 4 Move the def...

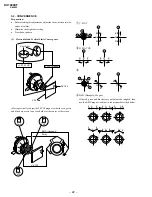
Page 22: ...agnet so that the red green and blue dots are on top of each other at the center of the screen R G B G R B Center dot C3 board RV 702 V STAT Magnet H STAT VR 4 BMC Hexapole Magnet If the red green and blue dots are not balanced or aligned then use the BMC magnet to adjust in the manner described below 1 V STAT 2 H STAT VR BMC Hexapole V STAT Purity V STAT BMC Purity R G B R G B R G B R B R G G G B...

Page 23: ...rgence a d c b a to d Permalloy assembly Fix a Permalloy assy corresponding to the misconverged areas 2 Dynamic Convergence Adjustment Preparation Before starting this adjustment adjust the horizontal static convergence and the vertical static convergence RB TLV YCH B R on DY YCH TLV ...

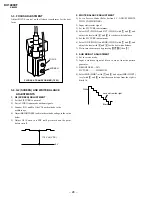
Page 24: ... 7 Write into the memory by pressing MUTING then 0 3 SUB BRIGHT ADJUSTMENT 1 Set to service mode 2 Input a staircase signal of black to white from the pattern generator 3 BRIGHTNESS 50 PICTURE MINIMUM 4 Select SBR WHB7 with 1 and 4 and adjust SBR WHB7 level with 3 and 6 so that the second stripe from the right is dimly lit White second from the right Black 0 V 175 V 2 VDC FOCUS SCREEN 3 4 G2 SCREE...

Page 25: ...me Item No Software version Suffix No OEM Code Total Power On time hours p Marking of virgin NVM GEO 1 0C 59 7F 000A 0 601S Device Name 50 TV 1 2 3 4 6 7 8 9 0 5 JUMP SOUND MODE FAVORITE PROGR Á RM 952 b METHOD OF CANCELLATION FROM SERVICE MODE Set the standby condition Press POWER button on the commander then press POWER button again hereupon it becomes TV mode c METHOD OF WRITE INTO MEMORY 1 Set...

Page 26: ...RVICE Use the same method for all Items Use 1 and 4 to select the adjustment item use 3 and 6 to adjust write with MUTING then execute the write with Note 1 In WRITE the data for all items are written into memory together 2 For adjustment items that have different standard data between 50Hz or 60Hz be sure to use the respective input signal after adjustment 1F SERVICE 50 HPS Adjusted with 3 and 6 ...

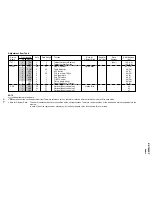
Page 27: ...e DYNAMIC others 0A 7 2 90 7 2 2 BDR 1F 3F B Drive DYNAMIC others 0B 7 2 91 7 2 3 RCT 7 0F R Cutoff SECAM others 07 3 0 93 3 0 4 GCT 7 0F G Cutoff SECAM others 08 7 4 94 7 4 5 BCT 7 0F B Cutoff SECAM others 08 3 0 94 3 0 6 BMN 15 1F Brightness Minimum Data 97 7 SBR 28 3F Sub Brightness Control 98 SAJ 0 PMX 37 3F Picture Maximum Data CXA2130S 88H 96 1 SHU 8 0F Sub Hue Control TV Video 99 2 SSH 3 0F...

Page 28: ...H2 0 3 Phase 2 Register Selection 76 3 2 4 PH3 0 3 Phase 3 Register Selection 76 5 4 5 PH4 0 3 Phase 4 Register Selection 76 7 6 6 BCS 2 3 Bass Center Shift 4 3 0 1A8 1 0 7 TCS 2 3 Treble Center Shift 5 3 0 1A9 1 0 8 TRF 2 3 RF Treble Offset 5 3 0 1A9 5 4 MSP 0 WST 15 FF W G Stereo Threshold MSP3415D 84H 157 7 0 1 WBT EC FF W G Bilingual Threshold 158 7 0 2 WLL 5 FF W G Monaural Threshold 159 7 0 ...

Page 29: ... 6 RFB 0 3 C BPF Control A5 5 4 7 TV0 0 7 Tilt to V Angle offset A5 2 0 8 DBL 0 1 Disable Blueback Function A4 2 OPB 0 OP1 FF FF Optional Bits 1 see below Option Bits 45 1 OP2 03 FF Optional Bits 2 see below 46 2 OP3 0 FF Optional Bits 3 see below 47 NOTE shaded items are fixed data Standard data listed on the Adjustment Item Table are reference values therefore it may be different for each model ...

Page 30: ... SECAM 1 XTAL 3 58 1 XTAL 4 43 1 ITEM INFORMATION No OPB0 OP1 No OPB1 OP2 No OPB2 OP3 Color SW 0 11 KEY 0 AV Mono 1 US ST 0 Auto TV sys 0 Auto PIC 1 2199 Cune 0 Pic Rot 0 AV Input Item KV 1499XF 0 1 DVD Input 0 Dis Fav 0 Thai Bil 0 HDEV 0 NICAM 0 TOP 0 Item KV 1499XF ...

Page 31: ...G of the commander to write the data VB1 VB2 VB3 VB4 VB1 VB2 VB3 VB4 BELL FILTER ADJUSTMENT 1 Input SECAM color bar signal 2 Connect the dual trace oscilloscope to the pin 9 R Y of CN303 not mounted 3 Adjust SERVICE MODE ITEMS SBF as shown below 4 4 A BOARD ADJUSTMENT AFTER IC003 MEMORY REPLACEMENT When replacing IC003 MEMORY be sure to change IC001 µ COM to the following new IC at the same time I...

Page 32: ...00 0B GEO 0 HSH H POSITION GEO 1 HSZ H SIZE GEO 2 PAP PIN AMP GEO 5 VSZ V SIZE GEO 7 VLN V LINEARITY GEO 4 VSH V POSITION GEO 6 SCR VERTICAL S Correction GEO 8 VBOW AFC BOW GEO 9 AGL AFC ANGLE GEO 3 TILT TRAPEZIUM GEO 0A UCP UPPER CORNER PIN GEO 0B LCP LOWER CORNER PIN ...

Page 33: ... 33 KV 1499XF RM 952 MEMO ...

Page 34: ... 34 KV 1499XF RM 952 MEMO ...

Page 35: ...t B out 22 23 24 21 19 18 11 13 14 IK in H DRIVE H PULSE E W VD VD H OUT Q511 2SC4927 V OUT IC503 TDA8172 HDT T501 H DRIVE Q506 2SD774 34 PIN CONT IC502 NJM2903M PIN OUT Q505 IRF614 PMC L509 HLC L510 FBT T503 NX 1748 B Audio Front Vcc 9V 11V 7V 5V 5V REG RESET IC002 MM1319AF 9V REC IC603 5V REC IC604 STB TRANS T604 SRT T603 Additional Color Matrix SYSTEM Ucom IC001 CXP86449 RECEIVER SBX1981 51 IC9...

Page 36: ...AM NTSC 3 58 NTSC 4 43 Readings are taken with a 10 MΩ digital multimeter Voltage are dc with respect to ground unless otherwise noted Voltage variations may be noted due to normal production tolerances All voltages are in V Cannot be measured Circled numbers are waveform references B bus B bus signal path Reference information RESISTOR RN METAL FILM RC SOLID FPRD NONFLAMMABLE CARBON FUSE NONFLAMM...

Page 37: ...WM7 PWM0 PWM5 I2 C BUS INTERFACE UNIT 8 BIT PWM 8CH 6CH 14BIT PWM 1CH ON SCREEN DISPLAY 8 BIT TIMER COUNTER 0 SERIAL INTERFACE UNIT REMOCON FIFO A D CONVERTER 6CH SPC700 CPU CORE ROM 12K 16K 24K 32K 40K 48K 60K BYTES PRESCALER TIME BASE TIMER WATCHDOG TMER 32kHZ TIMER COUNTER RAM 352 704 1536 BYTES CLOCK GENERATOR SYSTEM CONTROL INTERRUPT CONTROLLER 8 BIT TIMER 1 HSYNC COUNTER 1 HSYNC COUNTER 0 8 ...

Page 38: ...B MA111 TX RD10S B RD5 1SB T2 RD9 1S B UDZS TE17 6 8B 1SS355TE 17 5P6M DA204K 59 CATHODE ANODE CATHODE ANODE DIODE AK04V0 AU 01Z V1 EL1Z GP08D RD33EB3T RGP02 17EL 6433 D4SB60L ERC04 06SE ERC06 15S RN4Z RU4AM T3 31DQ06 FC5 ERA22 08 ON3171 R CATHODE ANODE CATHODE ANODE 2 1 3 4 1 4 3 CATHODE ANODE CATHODE ANODE GATE 3 1 2 1 3 2 LED CATHODE ANODE GRN ANODE GRN E C B 2SC4927 01 2SD774 34 IRF614 2SK2845...

Page 39: ...TTON POWER 4 4 036 405 11 SPRING COMPRESSION 5 4 067 196 01 BUTTON MULTI 6 4 067 197 01 GUIDE LIGHT 7 1 504 305 11 SPEAKER 5X12 CM 8 4 054 981 01 SCREW STEP TAPPING 9 4 365 808 01 SCREW 5 TAPPING 10 4 046 600 11 SPACER DY 11 3 704 372 11 HOLDER HV CABLE 12 8 735 570 05 PICTURE TUBE A34LRG70X 13 8 451 401 11 DEFLECTION YOKE Y14RSA S 14 A 1331 968 A C3 BOARD MOUNTED 15 4 369 318 61 SRING TENSION 16 ...

Page 40: ...F 20 50V C502 1 163 275 11 CERAMIC CHIP 0 001MF 5 50V C506 1 107 638 11 ELECT 33MF 20 160V C507 1 161 830 00 CERAMIC 0 0047MF 500V C510 1 102 112 00 CERAMIC 330PF 10 50V C512 1 163 989 11 CERAMIC CHIP 0 033MF 10 25V C513 1 163 263 11 CERAMIC CHIP 330PF 5 50V C514 1 106 383 00 MYLAR 0 047MF 10 200V C517 1 164 182 11 CERAMIC CHIP 0 0033MF 10 50V C518 1 104 665 11 ELECT 100MF 20 10V C519 1 102 212 00...

Page 41: ...7 IC NJM2903M IC503 8 759 980 58 IC TDA8172 IC601 8 749 013 75 IC STR F6654 IC602 8 749 920 61 IC SE 135N IC603 8 759 701 59 IC NJM78M09FA IC604 8 759 231 53 IC TA7805S IC901 8 742 014 11 HYB IC SBX1981 51 JACK J401 1 779 849 11 JACK BLOCK PIN 4P J901 1 770 786 21 JACK J902 1 779 205 11 JACK PIN 2P CHIP CONDUCTOR JR002 1 216 295 91 SHORT 0 JR003 1 216 295 91 SHORT 0 JR004 1 216 295 91 SHORT 0 JR00...

Page 42: ...30 49 TRANSISTOR 2SC2712 YG Q901 8 729 421 19 TRANSISTOR UN2213 Q902 8 729 421 19 TRANSISTOR UN2213 RESISTOR R001 1 414 233 22 INDUCTOR CHIP 0UH R002 1 216 025 91 RES CHIP 100 5 1 10W R003 1 216 073 00 RES CHIP 10K 5 1 10W R004 1 216 025 91 RES CHIP 100 5 1 10W R005 1 216 025 91 RES CHIP 100 5 1 10W R007 1 216 295 91 SHORT 0 R008 1 216 065 91 RES CHIP 4 7K 5 1 10W R010 1 216 065 91 RES CHIP 4 7K 5...

Page 43: ...22 5 2W F R535 1 216 067 00 RES CHIP 5 6K 5 1 10W R536 1 216 067 00 RES CHIP 5 6K 5 1 10W R537 1 216 687 11 METAL CHIP 33K 0 50 1 10W R540 1 216 065 91 RES CHIP 4 7K 5 1 10W R541 1 216 065 91 RES CHIP 4 7K 5 1 10W R205 1 216 073 00 RES CHIP 10K 5 1 10W R206 1 216 057 00 RES CHIP 2 2K 5 1 10W R207 1 216 053 00 RES CHIP 1 5K 5 1 10W R208 1 216 073 00 RES CHIP 10K 5 1 10W R209 1 216 073 00 RES CHIP 1...

Page 44: ... R612 1 216 045 00 RES CHIP 680 5 1 10W R614 1 216 041 00 RES CHIP 470 5 1 10W R615 1 216 353 00 METAL OXIDE 2 2 5 1W F R616 1 260 302 51 CARBON 6 8 5 1 2W F R617 1 247 791 91 CARBON 22 5 1 4W R619 1 260 128 11 CARBON 270K 5 1 2W R620 1 215 915 11 METAL OXIDE 470 5 3W F R622 1 216 400 11 METAL OXIDE 8 2 5 3W F R623 1 216 095 00 RES CHIP 82K 5 1 10W R624 1 216 089 91 RES CHIP 47K 5 1 10W R626 1 216...

Page 45: ...0V C746 1 102 114 00 CERAMIC 470PF 10 50V CONNECTOR CN701 1 508 765 00 PIN CONNECTOR 5MM PITCH 3P CN702 1 695 915 11 TAB CONTACT CN703 1 564 509 11 PLUG CONNECTOR 6P CN704 1 695 915 11 TAB CONTACT DIODE D701 8 719 911 19 DIODE 1SS119 25 D702 8 719 911 19 DIODE 1SS119 25 D703 8 719 911 19 DIODE 1SS119 25 D707 8 719 911 19 DIODE 1SS119 25 D708 8 719 911 19 DIODE 1SS119 25 D709 8 719 911 19 DIODE 1SS...

Page 46: ...4602 1 104 708 51 FILM 0 47MF 20 250V CONNECTOR CN4601 1 580 843 11 PIN CONNECTOR POWER CN4602 1 580 843 11 PIN CONNECTOR POWER CN4603 1 695 915 11 TAB CONTACT FUSE F4601 1 532 237 11 FUSE TIME LAG BET 3 15A 250V RESISTOR R4601 1 202 719 91 SOLID 1M 10 1 2W TRANSFORMER T4601 1 424 682 11 TRANSFORMER LINE FILTER T4602 1 424 682 11 TRANSFORMER LINE FILTER VARISTOR VDR461 1 801 073 31 VARISTOR TNR14V...

Reviews: