Getting Started
Getting Started
5
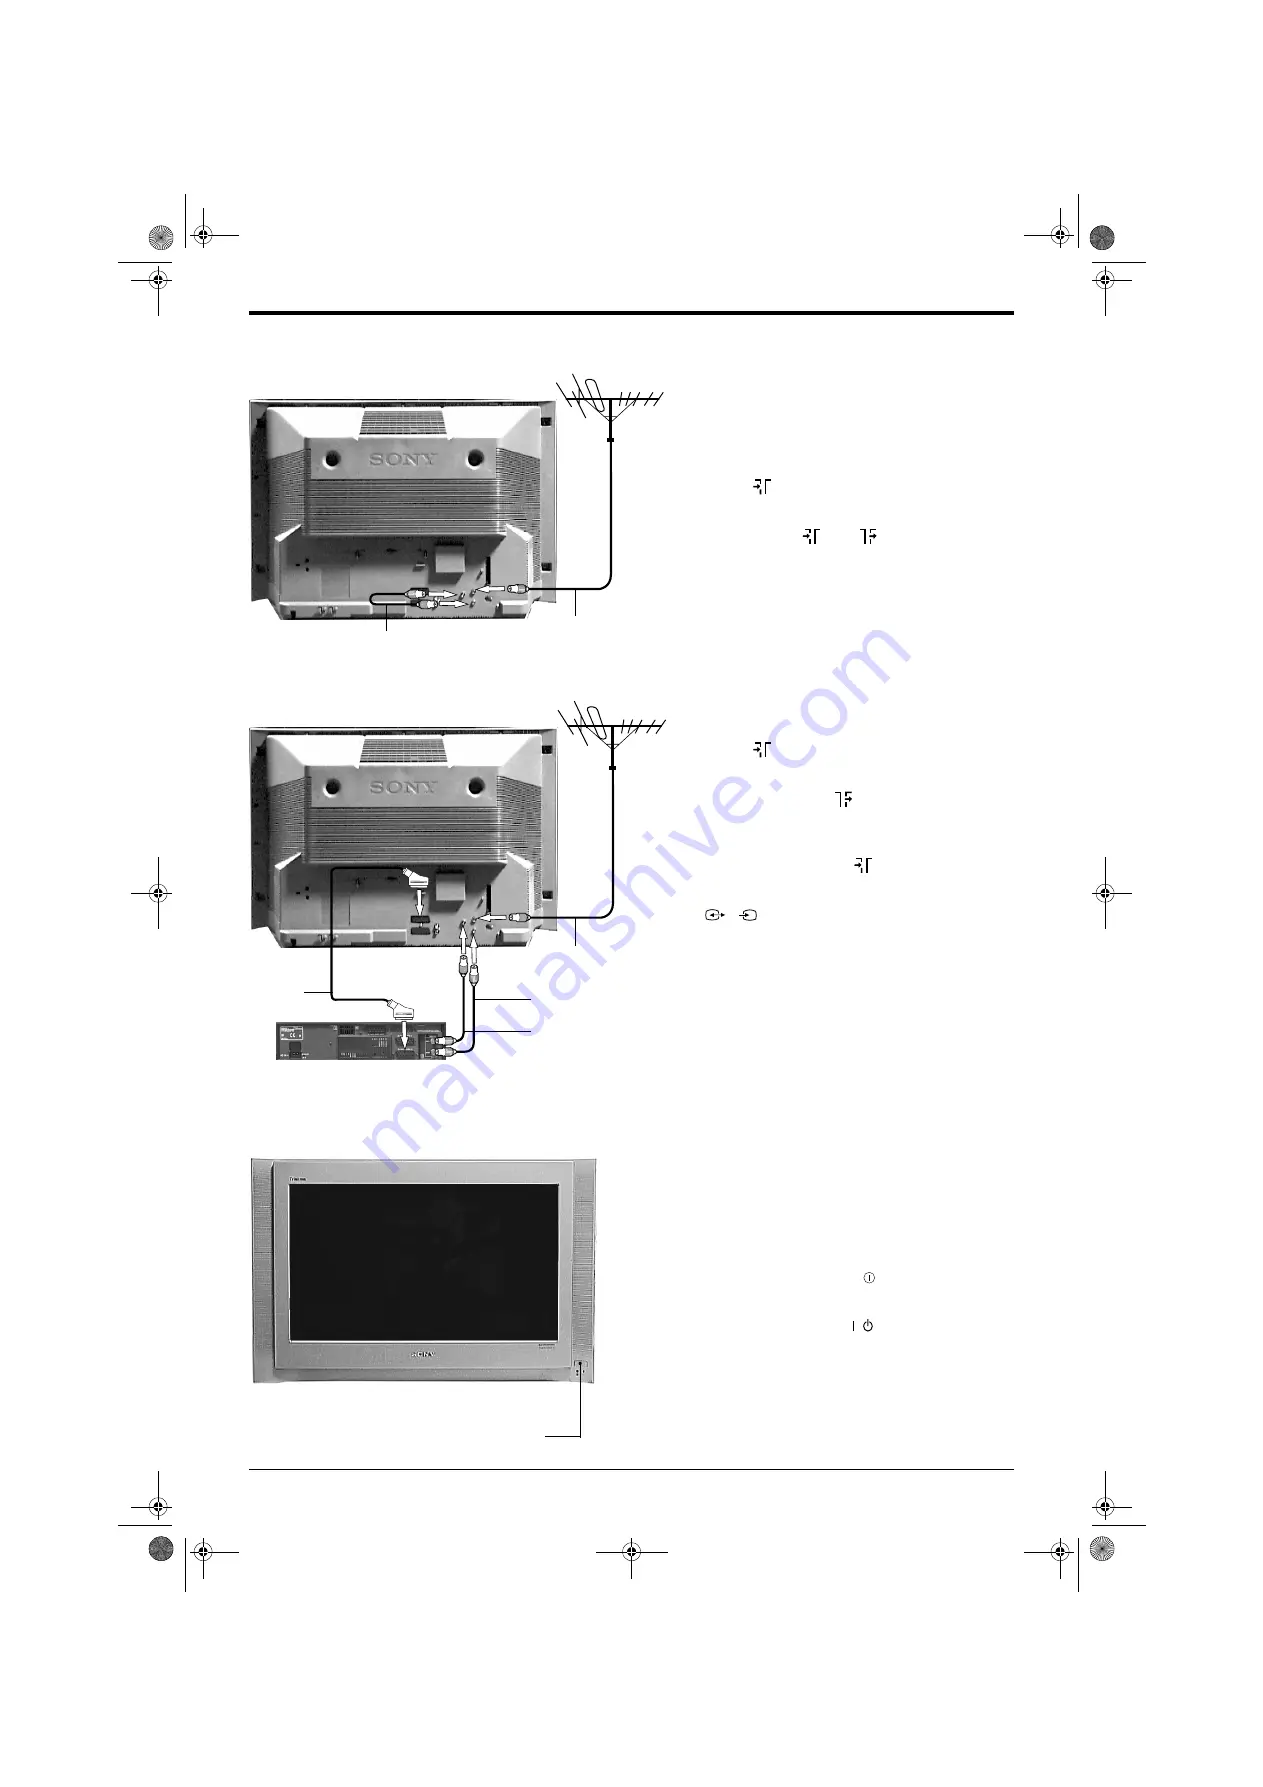
3. Connecting an aerial and a VCR
1
Connect your existing aerial lead to the upper socket
marked
1 on the rear of the TV as shown.
2
Connect the supplied RF loopthrough cable to the
sockets marked
2 and
as shown.
1
Connect your existing aerial lead to the upper socket
marked
1 on the rear of the TV as shown.
2
Connect the supplied RF loopthrough cable from the
aerial socket marked
on the TV to the RF input
socket of your VCR.
3
Connect an RF lead from the RF output of your VCR
to the TV socket marked
2.
4
Connect a scart lead from the scart socket marked
on the rear of the TV to a scart socket on
your VCR (Refer to the VCR instructions).
5
Connect the VCR to the mains socket and switch on.
6
Insert a pre-recorded tape into the VCR and press
the ‘PLAY’ button. This enables the TV set to locate
and store the video channel during the ‘Automatically
tuning the TV’ procedure.
2/
s
4. Switching on the TV
On/Off button
1
Connect the TV plug to your mains socket (220 -
240V AC, 50 Hz) and switch on.
2
Push in the On/Off button (
) on the front of the TV.
If the red standby mode indicator on the front of the
TV is lit, press the TV
button on the remote
control to switch on the TV set. Please be patient as
the picture may take a few moments to appear on the
TV screen.
/
Existing aerial lead
RF Loopthrough
cable (supplied)
Connecting an aerial only
Scart lead
(not supplied)
Rear of VCR
RF Loopthrough
cable (supplied)
Existing aerial lead
Connecting an aerial and a VCR
RF Lead
(not supplied)
DX40 Pages 1-10.fm Page 5 Wednesday, August 22, 2001 12:06 PM


