background image

28

EN

Surr

ound Function

Adjusting the Sound

4

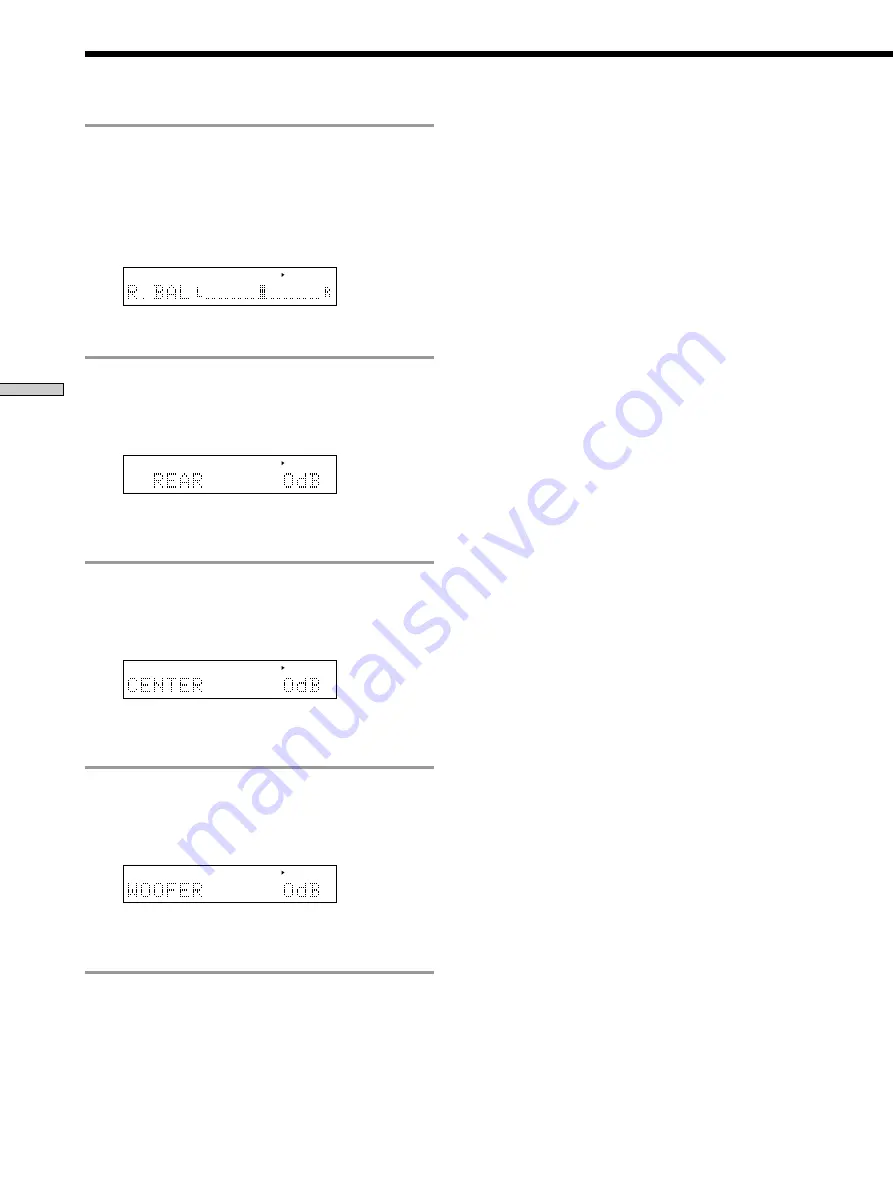
Adjust the rear speaker balance.

Adjust the balance so that sound can be heard at the
same level from the left (L) and right (R) rear speakers.

1

Press CURSOR 

V

/

v

 repeatedly until “R.BAL”

appears in the display.

2

Press CURSOR 

B

/

b

 to adjust the L/R balance.

CURSOR

LEVEL

*

You can adjust the balance up to 8 steps either to the left
(L) or right (R) from the center.

5

Adjust the rear speaker volume.

1

Press CURSOR 

V

/

v

 repeatedly until “REAR”

appears in the display.

2

Press CURSOR 

B

/

b

 to adjust the volume.

CURSOR

LEVEL

*

You can adjust the volume in 1 dB steps within the
range of –20 dB to +10 dB. Increasing the value raises
the volume.

6

Adjust the center speaker volume.

1

Press CURSOR 

V

/

v

 repeatedly until “CENTER”

appears in the display.

2

Press CURSOR 

B

/

b

 to adjust the volume.

CURSOR

LEVEL

*

You can adjust the volume in 1 dB steps within the
range of –20 dB to +10 dB. Increasing the value raises
the volume.

7

Adjust the sub woofer volume.

1

Press CURSOR 

V

/

v

 repeatedly until “WOOFER”

appears in the display.

2

Press CURSOR 

B

/

b

 to adjust the volume.

CURSOR

LEVEL

*

You can adjust the volume in 1 dB steps within the
range of –20 dB to +10 dB. Increasing the value raises
the volume.

Notes

• You cannot adjust the speakers or the sub woofer if the

connection status is set to “NO” by the speaker or sub woofer
settings (see page 12 or page 20).

• If you feel the rear and center speaker volumes are not

balanced with the front speaker volume even after the
adjustment, perform the TEST TONE adjustment again to
achieve the proper volume balance for each speaker.

z

Customized surround mode sounds are stored in the memory

for about 1 week even if you unplug the power cord of the
processing amplifier.

To change a customized surround mode, select and adjust the
respective surround mode again. To return to the original sound,
set the initial values.

Summary of Contents for TAD-M30

Page 1: ...3 862 889 11 1 Digital Processing Amplifier 1998 by Sony Corporation TAD M30 Operating Instructions C EN ES P œ Œª Æ ...

Page 2: ...ull the cord AC power cord must be changed only at the qualified service shop The voltage selector is located at the bottom of the apparatus On placement Do not install the appliance in a confined space such as a bookcase or built in cabinet Place the processing amplifier in a location with adequate ventilation to prevent heat buildup and prolong the life of the processing amplifier Do not place t...

Page 3: ...s and Setup for 5 1ch Surround Hooking Up the System 6 Connecting the Speakers and the Sub Woofer 10 Speaker and Sub Woofer Set Up 12 Connections and Setup for 3ch Surround Hooking Up the System 16 Connecting the Speakers and the Sub Woofer 18 Speaker and Sub Woofer Set Up 20 Surround Function Applying Surround Effects 23 Surround Modes and Effects 25 Adjusting the Sound 27 Reinforcing the bass fr...

Page 4: ...s shown in the battery compartment When using the remote point it at the remote sensor g on the processing amplifier z When to replace the batteries Under normal use the batteries should last for about 6 months When the remote no longer operates the processing amplifier replace both batteries with new ones Notes Do not leave the remote in an extremely hot or humid place Do not use a new battery wi...

Page 5: ...woofer reinforces the bass sound You can enjoy satisfactory surround effects even without a sub woofer but using a sub woofer lets you obtain heavier bass sounds for more realistic surround effects To enjoy 5 1ch surround sound You can enjoy 5 1ch surround sound by using the processing amplifier together with any of the following stereo systems or stereo amplifiers See Connections and Setup for 5 ...

Page 6: ...ained by the audio bus cord connection so these items do not need to be reset For connection type B the volume control of the connected stereo system or stereo amplifier changes only the front speaker volume disrupting the volume balance set by the TEST TONE function To return each speaker to the original volume balance adjust the volume control of the connected component so that the front volume ...

Page 7: ... optical cable and the coaxial digital connecting cable press OPTICAL optical digital or COAXIAL coaxial digital on the processing amplifier to select the sound you want to listen to during playback π Audio cord supplied 1 This sends the front speaker sound from the FRONT OUT jacks of the processing amplifier to the front speakers through the stereo system or stereo amplifier White L White L Red R...

Page 8: ...onnect the DVD player with the optical cable or the coaxial digital connecting cable For better sound quality we recommend using the coaxial digital connecting cable Notes Do not stack the DVD player on top of the processing amplifier as the heat emitted from the processing amplifier may cause the DVD player to malfunction This processing amplifier does not support 96 kHz or 24 bit discs Connectin...

Page 9: ...external components on the connected component and the FRONT OUT jacks on the processing amplifier Match the color of the plugs and the jacks and insert the plugs firmly pushing them in all the way Not pushed in all the way Insert completely 4 Type A only Connect the audio bus cord Connect the audio bus cord to the AU BUS connectors on the DHC MD717 stereo system tuner and the processing amplifier...

Page 10: ... within the range a in the illustration below Place the rear speakers symmetrically to the right and left within the range b in the illustration below C S W 1 5 m 4 5 m R L RS LS a b 4 5 m L Front speaker left LS Rear speaker left R Front speaker right RS Rear speaker right C Center speaker S W Sub woofer Note When placing the rear speakers slightly behind the listening position and using the VIRT...

Page 11: ...17 ONLY 5 Connect the sub woofer Connect the audio cord to the left L channel of the line input jack on the sub woofer and the WOOFER OUT jack on the processing amplifier Insert the plugs firmly pushing them in all the way Not pushed in all the way Insert completely Connecting the power cord to an AC outlet When you have finished all the connections plug the power cord of the processing amplifier ...

Page 12: ...e display 4 Set the center speaker connection status 1 Press CURSOR V v repeatedly until CENTER LARGE appears in the display 2 Press CURSOR B b to select the center speaker connection status Center speaker connection status Setting None NO Connected Normal LARGE If the sound is distorted SMALL The last setting is stored in the memory so SMALL or NO may appear instead 5 Set the rear speaker connect...

Page 13: ...ote that LARGE should be normally selected to obtain satisfactory surround effects Note If you do not press CURSOR to start the setting operations within approximately 8 seconds after pressing SET UP the SET UP button goes off Setting the distance to the speakers SET UP Set the distance from the listening position to the speakers to enjoy more accurate surround effects 2 3 4 1 1 Press SET UP The S...

Page 14: ... 1 5 m R L RS LS a a 4 Set the distance to the rear speakers 1 Press CURSOR V v repeatedly until REAR 5 0 meter appears in the display The value set last is displayed 2 Press CURSOR B b to set the distance from the listening position to the rear speakers You can set the distance in 0 1 m 10 cm steps up to 4 5 m starting from the front speaker position set in step 2 For example if you placed the fr...

Page 15: ...the test tone can be heard at the same level from all speakers Press To adjust REAR the rear speaker volume within the range of 20 dB to 10 dB 1 dB steps CENTER the center speaker volume within the range of 20 dB to 10 dB 1 dB steps When using components other than the DHC MD717 If the front speaker volume is still too low even after lowering the volume of the rear and center speakers to 20 dB or ...

Page 16: ... is used to connect a DVD player This cable is not necessary when connecting the DVD player with the coaxial digital connecting cable π Coaxial digital connecting cable 1 This is used to connect a DVD player This cable provides better sound quality than connection with the optical cable z When you connect both the optical cable and the coaxial digital connecting cable press OPTICAL optical digital...

Page 17: ...processing amplifier is set to the local power line voltage If not set the voltage selector to the correct position using a screwdriver before connecting 2 Connect the DVD player Connect the DVD player with the optical cable or the coaxial digital connecting cable For better sound quality we recommend using the coaxial digital connecting cable Connecting the optical cable Connect the cable plugs t...

Page 18: ...r the following points to obtain the best possible surround sound Use the highest performance speakers possible We recommend the SS T505 etc Place the front speakers symmetrically to the right and left of the listening position Place the center speaker within the range a in the illustration below C S W 1 5 m R L a L Front speaker left R Front speaker right C Center speaker S W Sub woofer What cord...

Page 19: ...R SPEAKER SELECTOR FRONT REAR MD717 ONLY 5 Connect the sub woofer Connect the audio cord to the left L channel of the line input jack on the sub woofer and the WOOFER OUT jack on the processing amplifier Insert the plugs firmly pushing them in all the way Not pushed in all the way Insert completely Connecting the power cord to an AC outlet When you have finished all the connections plug the power ...

Page 20: ...eatedly until CENTER LARGE appears in the display 2 Press CURSOR B b to select the center speaker connection status Center speaker connection status Setting None NO Connected Normal LARGE If the sound is distorted SMALL The last setting is stored in the memory so SMALL or NO may appear instead 5 Set the sub woofer connection status 1 Press CURSOR V v repeatedly until WOOFER YES appears in the disp...

Page 21: ...CENTER 5 0 meter appears in the display The value set last is displayed 2 Press CURSOR B b to set the distance from the listening position to the center speaker You can set the distance in 0 1 m 10 cm steps up to 1 5 m starting from the front speaker position set in step 2 For example if you placed the front speakers at a position of 6 0 m you can place the center speaker within the range of 4 5 t...

Page 22: ...sequence If the test tone is not heard from a speaker Press TEST TONE to turn off the test tone then check the following two points Is the speaker connected correctly See page 18 Is the speaker connection setting correct See page 20 After checking these points press TEST TONE again 5 Press CENTER on the remote to adjust the volume so that the test tone can be heard at the same level from all speak...

Page 23: ... Turn on all of the components 2 If you have connected the processing amplifier to a stereo system or stereo amplifier switch the function of the stereo system or stereo amplifier to the jack to which the processing amplifier is connected Switch the function to LD DVD for the DHC MD717 3 When playing Dolby Digital DVD software set the audio digital output on the DVD player to Dolby Digital PCM Whe...

Page 24: ...stereo system or stereo amplifier only the volume heard from the front speakers changes However since this disrupts the balance with the other speaker volumes adjusted by the TEST TONE function see page 15 be sure to adjust the DVD volume using MASTER VOLUME on the processing amplifier If the speaker volume balance has been lost turn the volume control of the stereo system or stereo amplifier so t...

Page 25: ...ded with surround effects by processing with Pro Logic to extract the center and rear sound components from each channel Audio tracks are encoded separately for the front R L 2ch channels However this audio is not processed with Dolby Surround so surround effects are realized by sound field processing adjusting the three elements of direct sound early reflections and reverberation Only the front 1...

Page 26: ...lace the rear speakers closer than the front speakers The shifted position differs according to the rear speaker position setting see the SET UP menu A When the rear speaker position setting is SIDE B When the rear speaker position setting is BEHIND See page 12 for the rear speaker position setting Creates an array of virtual rear speakers from a single pair L R of rear speakers The virtual speake...

Page 27: ... of the connected speakers Item Adjustment contents Initial value F BAL Front speaker L R volume balance Center R BAL Rear speaker L R volume balance Center REAR Rear speaker volume 0 dB CENTER Center speaker volume 0 dB WOOFER Woofer volume with respect to the 0 dB other speakers 3 7 2 1 Select the desired surround mode see page 24 and play the DVD 2 Press CURSOR MODE repeatedly until LEVEL ADJUS...

Page 28: ... adjust the volume in 1 dB steps within the range of 20 dB to 10 dB Increasing the value raises the volume 7 Adjust the sub woofer volume 1 Press CURSOR V v repeatedly until WOOFER appears in the display 2 Press CURSOR B b to adjust the volume CURSOR LEVEL You can adjust the volume in 1 dB steps within the range of 20 dB to 10 dB Increasing the value raises the volume Notes You cannot adjust the s...

Page 29: ...ars and B BOOST goes off see page 27 Adjust WOOFER in the LEVELADJUST menu to reduce the sub woofer volume see page 28 Adjust BASS GAIN in the EQUALIZER menu see page 31 Item Adjustment contents Initial value LFE MIX Signal input mixing level Value indicating the amount of bass mixed into the overall volume Valid only when playing a DVD encoded with LFE signals 3 4 2 1 Select the desired surround ...

Page 30: ...ODE repeatedly until LEVEL ADJUST appears in the display CURSOR z LEVEL lights in the display 3 Press CURSOR V v repeatedly until D RANGE COMP appears in the display 4 Press CURSOR B b to select the desired compression ratio CURSOR LEVEL Volume difference Encoded volume difference Minimum Setting value OFF 0 1 0 2 0 3 0 8 0 9 STD MAX Setting Effect OFF Encoded volume difference 0 1 to 0 9 The volu...

Page 31: ...s CURSOR V v repeatedly until BASS FREQ appears in the display 2 Press CURSOR B b to select the frequency you want to adjust CURSOR EQ 3 Press CURSOR V v repeatedly until BASS GAIN appears in the display 4 Press CURSOR B b to adjust the level CURSOR EQ You can adjust the level in 1 dB steps within the range of 10 dB 4 Adjust the treble frequencies 1 0 to 8 6 kHz 1 Press CURSOR V v repeatedly until...

Page 32: ...z SURR lights in the display 3 Adjust the surround effects 1 Press CURSOR V v repeatedly until EFFECT appears in the display 2 Press CURSOR B b to adjust the surround effects CURSOR SURR You can adjust the surround effects in 5 steps within the range of 0 no surround effects to 100 Note If you set a high EFFECT value while the KARAOKE surround mode is selected see page 24 you may be unable to redu...

Page 33: ...the rear panel is set to REAR see page 11 The sound is too loud when using the DHC MD717 Check that the SPEAKER SELECTOR switch on the rear panel is set to MD717 ONLY see page 11 The left and right sounds are unbalanced or reversed Check that the speakers and components are connected correctly Adjust the L R balance see page 27 Severe hum or noise is heard Check that the speakers and components ar...

Page 34: ...ameter to SMALL see pages 12 and 20 Set a smaller LFE MIX value see page 29 Surround effects cannot be obtained Set a surround mode see page 23 Increase the surround effect value at the SURROUND menu see page 32 There s only sound from the front speakers When playing 5 1ch 3ch or other multi channel DVD software The audio digital output of the DVD player is set to PCM See the instruction manual su...

Page 35: ... and reverberation Setting a high level produces a live feeling lots of reverberation while setting a low level produces a dead feeling little reverberation Sound Field Sound pattern that creates a single or multiple sound sources in a particular environment using direct sound reflected sound and the acoustics of where you hear the sound This processing amplifier incorporates several pre programme...

Page 36: ...round you should have one pair of front speakers one center speaker and one pair of rear speakers The rear speaker output is monaural Dolby Digital AC 3 Movie sound format developed for theaters by further expanding Dolby Pro Logic Dolby Digital AC 3 provides stereo rear output an increased frequency bandwidth and an independent sub woofer for the bass frequencies The sub woofer output activates o...

Page 37: ...usts the volume 8 DISPLAY Switches the display between the currently selected surround mode and the input signal OPTICAL or COAXIAL each time it is pressed 9 BASS BOOST Reinforces the bass sound 0 COAXIAL Press to listen to the audio from the component connected to the DIGITAL COAXIAL IN jack OPTICAL Press to listen to the audio from the component connected to the DIGITAL OPTICAL IN jack Display S...

Page 38: ...d low volumes and an audio signal encoded by the Dolby Digital AC 3 method is input to the processing amplifier 4 B BOOST Lights when BASS BOOST on the front panel of the processing amplifier is pressed to reinforce the bass sound see page 27 5 Cursor modes These light to indicate the CURSOR MODE status They go off when performing SET UP operations i e setting the speaker connection status EQ Appe...

Page 39: ...re 3 AU BUS Connects the DHC MD717 stereo system to the processing amplifier 4 SPEAKER SELECTOR FRONT REAR MD717 ONLY Set to REAR or MD717 ONLY when using the DHC MD717 during 5 1ch surround or to FRONT during 3ch surround 5 CENTER SPEAKER Connects the center speaker 6 DIGITAL COAXIAL IN Connects a DVD player to the processing amplifier using a coaxial digital connecting cable 7 FRONT OUT Connects...

Page 40: ...einforces the bass sound 8 1 u Turns on the power 9 OPTICAL Press to listen to the audio from the component connected to the DIGITAL OPTICAL IN jack 0 COAXIAL Press to listen to the audio from the component connected to the DIGITAL COAXIAL IN jack SURROUND UP DOWN Selects the surround mode CURSOR MODE Selects the LEVEL ADJUST EQUALIZER or SURROUND menu SUB WOOFER Adjusts the sub woofer volume VOL ...

Page 41: ...R menu 31 F Front panel 37 G Glossary 35 H I J K Hookups See Connecting L M LEVEL ADJUST menu 27 LFE MIX menu 29 N O Name and function of each part 37 P Q Precautions 2 R Rear panel 39 Reinforcing the bass frequencies 27 Remote commander remote 4 40 S SET UP menu 12 13 20 21 Sound field 35 Speakers balance adjustment 27 connecting 10 18 connection status setting 12 20 distance setting 13 21 placem...

Page 42: ...Sony Corporation Printed in Japan ...

Reviews: