background image

Other Operations

21

GB

Other Operations

Indexing Preset Stations and
Programme Sources

You can enter a name of up to 8 characters for preset
stations (station index) and programme sources. These
index names (for example, “VHS”) appear in the
receiver's display when a station or programme source
is selected. This function is useful for distinguishing
components of the same kind. It is also handy for
identifying components connected to jacks meant for
another type of component, for example, a second CD
player connected to the MD/TAPE jacks.

Notes

• Not more than one name can be entered for each preset

station or programme source.

• You cannot index components connected to the 5.1 CH/

DVD jacks.

1

To index a preset station.
Tune to the preset station you want to name.

To index a programme source.
Select the programme source (component) to be
named, then go to Step 2.

2

Press NAME.
The cursor blinks in the display.

3

Use + or – to select the character you desire.

4

Press MENU < or > to move the cursor into
position for the next character or previous
character.

5

Repeat Steps 3 and 4 to enter up to 8 characters.

6

Press ENTER to store the names.

If you make a mistake

Press MENU < or > repeatedly so that the character
you want to change blinks in the display, then use + or
– to select the desired character.

To assign index names to other stations

Repeat Steps 2 to 4.

To clear programme source name

Press NAME and then press the same programme
source button. Press ENTER to delete the name (except
TUNER).

Recording

This receiver makes it easy to record to and from the
components connected to the receiver. You don’t have
to connect playback and recording components
directly: once you select a programme source on the
receiver, you can record and edit as you normally
would using the controls on each component.
Before you begin, make sure you’ve connected all
components properly.

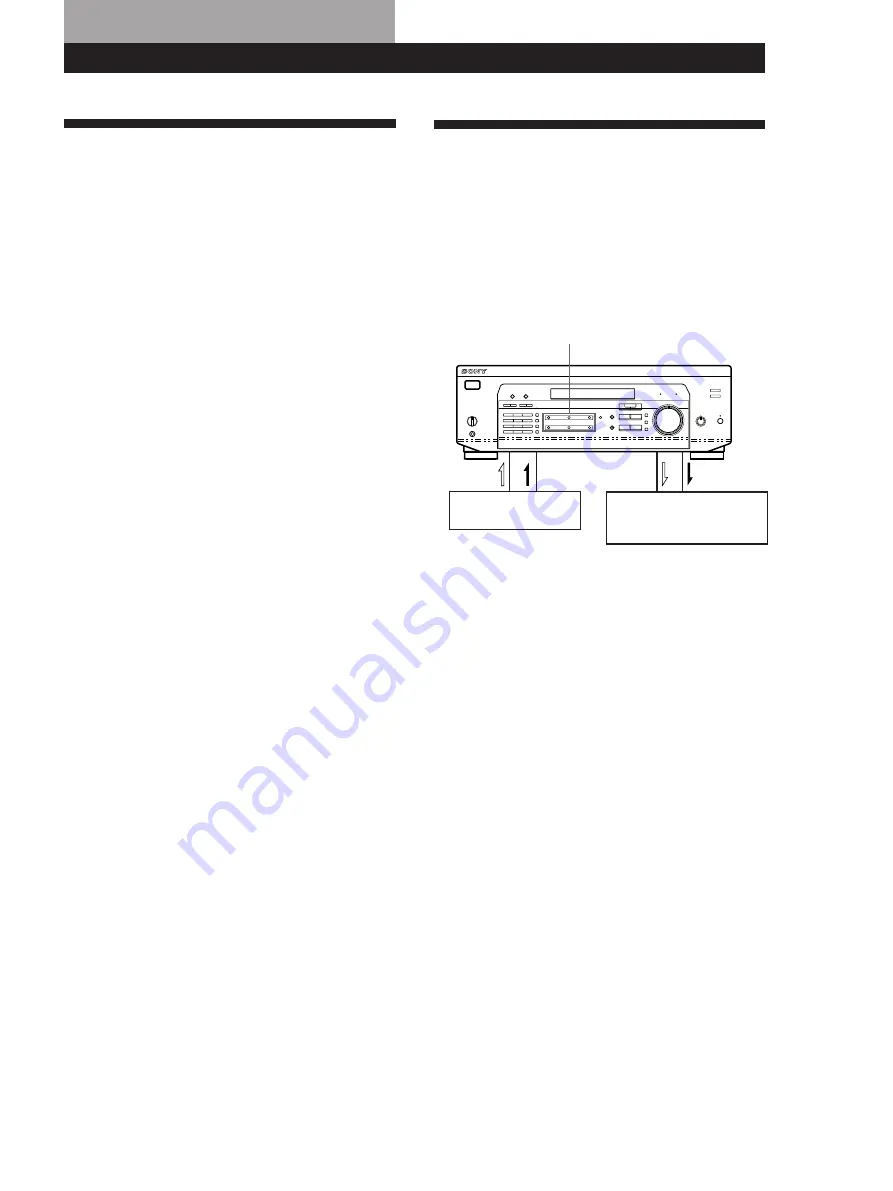
ç

:  Audio signal flow

c

:  Video signal flow

Recording on a MiniDisc or audio tape

You can record on a MiniDisc or cassette tape using the
receiver. See the instruction manual of your MD
recorder or tape deck if you need help.

1

Press one of the function buttons to select the
programme source.

2

Set the component to be ready for playing.
For example, insert a CD into the CD player.

3

Insert a blank disc or tape into the recording deck
and adjust the recording level, if necessary.

4

Start recording on the recording deck and then
start playing the component.

Playback component

(programme source)

Function buttons

Recording component
(MD deck, Tape deck,
VCR)

(continued)

Summary of Contents for STR-V424

Page 1: ......

Page 2: ...re not going to use the receiver for a long time be sure to disconnect the receiver from the wall outlet To disconnect the AC power cord grasp the plug itself never pull the cord Should the AC power cord need to be changed have it done at a qualified service shop only On placement Place the receiver in a location with adequate ventilation to prevent heat build up and prolong the life of the receiv...

Page 3: ...tips for making the task easier This receiver contains a Dolby Pro Logic Surround decoder Manufactured under license from Dolby Laboratories Licensing Corporation Dolby Pro Logic and the double D a symbol are trademarks of Dolby Laboratories Licensing Corporation GB Model Feature PHONO CONTROL A1 II V424 V525 TABLE OF CONTENTS Getting Started Unpacking 4 Hookup Overview 4 Aerial Hookups 5 Audio Co...

Page 4: ...oing so may cause a malfunction If you don t use the remote for an extended period of time remove the batteries to avoid possible damage from battery leakage and corrosion Hookup Overview The receiver allows you to connect and control the following audio video components Follow the hookup procedures for the components that you want to connect to the receiver on the pages specified To learn the loc...

Page 5: ... go next If you want to connect other components go on to the next section If you re only planning to use the receiver to listen to the radio go to Speaker System Hookups on pages 7 and 8 Audio Component Hookups Overview This section describes how to connect your audio components to the receiver If you want to use the receiver as an amplifier complete these connections For specific locations of th...

Page 6: ...njoy surround sound when watching listening to TV programmes or video tapes Receiver CD player CD AUDIO IN L R OUTPUT LINE L R Receiver Turntable PHONO AUDIO IN L R OUTPUT LINE L R MD deck or Tape deck Receiver IN OUTPUT LINE INPUT LINE L R MD TAPE REC OUT L R Receiver CD player MD deck or Tape deck CTRL A1 II CTRL A1 II Video Component Hookups Overview This section describes how to connect video ...

Page 7: ...ver VCR AUDIO IN VIDEO VIDEO IN AUDIO OUTPUT VIDEO AUDIO INPUT VIDEO AUDIO OUT L R VIDEO OUT L R Yellow Yellow White L Red R White L Red R Black Black Receiver Dolby Digital AC 3 decoder etc 5 1 C H D V D FRONT FRONT REAR REAR CENTER L R CENTER WOOFER WOOFER VIDEO IN VIDEO PRE OUT Speaker System Hookups Overview This section describes how to connect your speakers to the receiver To enjoy surround ...

Page 8: ...Pro Logic Surround sound see page 10 Where do I go next To complete your system go to AC Hookups on page 9 Selecting the impedance Set the IMPEDANCE SELECTOR for the front speakers as indicated in the table below Check the instruction manual of your speakers if you re not sure of the impedance This information is usually printed on a label on the back of the speaker Note Be sure to connect the fro...

Page 9: ...receiver s memory do the procedure below 1 Turn off the receiver 2 Press 1 u power for more than 4 seconds ALL CLEAR appears in the display and the items including the following are reset or cleared All preset stations are reset to their factory settings All sound field parameters are reset to their factory settings All index names of preset stations and program sources are cleared All adjustments...

Page 10: ... LOGIC NORMAL WIDE So that The sound of the centre channel is output from the front speakers The sound of the rear channel is output from the front speakers The bass sound of the centre channel is output from the front speakers because a small speaker cannot produce enough bass The centre channel fully reproduces the entire audio spectrum Dolby Surround Setup Dolby Pro Logic Surround is a system f...

Page 11: ...following two ways When NORMAL WIDE or 3 STEREO mode is selected The test tone is output from the front L left centre front R right and rear speakers except for 3 STEREO mode in succession When PHANTOM mode is selected The test tone is output from the front and the rear speakers alternately See the table on page 20 for information on the output of the test tone for sound fields other than PRO LOGI...

Page 12: ... TAPE CD TUNER PHONO except STR V424 5 1 CH DVD 3 5 1 CH DVD button Press to select the component connected to the 5 1 CH DVD jacks The 5 1 CH DVD indicator lights up when the component is selected 4 MASTER VOLUME control After turning on the component you selected rotate to adjust the volume 5 MUTING button Press to mute the sound The MUTING indicator lights up when the sound is muted 6 BALANCE c...

Page 13: ... buttons the adjusted tone will be produced whenever you turn on the tone effect BASS BOOST button Press to increase the bass of the front speakers The BASS BOOST indicator lights up when the function is turned on TONE indicator Lights up while the tone effect is turned on BASS BOOST indicator Lights up while the bass boost is turned on When you want to enjoy high quality sound Do the procedure be...

Page 14: ...pecific settings see pages 19 and 21 º ª SET UP button Press this button once and use MENU buttons to select any of the following indications The selected indication appears in the display and you will be able to make various settings using the cursor buttons When you ve displayed CTR MODE REAR GAIN AUTO FUNCTION 2WAY SETUP STR V525 only Press the following buttons to name preset stations or progr...

Page 15: ...ress this button again If you cannot tune in a station and the entered numbers are flashing Make sure you ve entered the right frequency If not press DIRECT and re enter the frequency you want If the entered numbers still flash the frequency is not used in your area To watch FM simulcast TV programmes Make sure that you tune in the simulcast programme both on the TV or the VCR and on the receiver ...

Page 16: ...ons You can store the stations on preset numbers combining 3 characters A B C and numbers 0 9 For example you can store a station as preset number A1 B6 or C9 etc 1 Press TUNER The last received station is tuned in 2 Tune in the station you want If you are not familiar with how to tune in a station see Receiving Broadcasts on the previous page 3 Press MEMORY MEMORY appears for a few seconds Do ste...

Page 17: ...the CINEMA type are designed to add more reverberation effects by incorporating Digital Cinema Sound technology When you select these sound fields the receiver adds the reflection and reverberation effects that are typical in movie theaters to the decoded Dolby Pro Logic Surround sound You can enjoy the sound that you would experience in the movie theater Another type is VIRTUAL Virtual mode allow...

Page 18: ...ed on the package Note When using sound fields do not select both speakers A B with the SPEAKERS selector Description of sound fields Type MODE sound field Effects CINEMA PRO LOGIC Decodes programmes processed with Dolby Pro Logic Surround C inema STUDIO Reproduces the sound characteristics of a movie theater Good for watching standard movies N ight THEATER Adjust the tone for watching a movie at ...

Page 19: ...elds are reset at once Customizing Sound Fields By adjusting some of the sound parameters you can customize sound fields to suit your particular listening situation Once you customize a sound field the changes are stored in memory indefinitely unless the receiver is unplugged for about one week You can change a customized sound field any time by making new adjustments to the parameters See the tab...

Page 20: ...me source MODE PRO LOGIC C STUDIO N THEATER MONO MOVIE V DOLBY HALL JAZZ CLUB DISCO CHURCH LIVE HOUSE STADIUM GAME Test tone output No sound Depends on centre mode see page 10 From the front and the rear speakers alternately No sound From the front and the rear speakers alternately Parameters DELAY EFFECT REAR CENTER TONE r r ra rb r r ra rb r r r r r r r r r r r r r r r r r r r r r r r r r r r r ...

Page 21: ... MENU or repeatedly so that the character you want to change blinks in the display then use or to select the desired character To assign index names to other stations Repeat Steps 2 to 4 To clear programme source name Press NAME and then press the same programme source button Press ENTER to delete the name except TUNER Recording This receiver makes it easy to record to and from the components conn...

Page 22: ...corded over the original audio To resume recording the original sound press the TV LD function button Note You cannot record the audio and video signal during 5 1 CH DVD mode Press SLEEP on the remote while the power is on Each time you press SLEEP the time changes as shown below The display dims after you specify the time You can freely specify the time Press SLEEP on the remote first then specif...

Page 23: ...atible with the 2 way remote control system be sure to perform the following operation to limit response to signals sent from the remote controls To use with the TA E9000ES Perform the following steps to turn OFF this unit s 2 way remote control system Also be sure the TA E9000ES is turned on when using this unit To use with other components that have the logo Turn OFF the other component s 2 way ...

Page 24: ...olume appropriately see page 10 No sound or only a very low level sound is heard from the rear speakers Select the appropriate centre mode see page 10 Adjust the speaker volume appropriately see page 10 Make sure you turn on the sound field surround mode function Radio stations cannot be tuned in Check that the antennas are connected securely Adjust the antennas and connect an outdoor aerial if ne...

Page 25: ...x 430 x 157 x 366 mm STR V525 11 1 kg 24 lb 6 oz STR V424 10 8 kg 23 lb 12 oz See page 4 General Outputs Muting BASS BOOST TONE Tuning range Antenna terminals Intermediate frequency Sensitivity Usable sensitivity S N Harmonic distortion at 1 kHz Separation Frequency response Selectivity Tuning range Antenna Intermediate frequency Usable sensitivity S N Harmonic distortion Selectivity 0 5 2 Tuner s...

Page 26: ...s output stereo sound with an expanded frequency range and a subwoofer channel for deep bass is independently provided This format is also called 5 1 because the subwoofer channel is counted as 0 1 channel since it functions only when a deep bass effect is needed All six channels in this format are recorded separately to realize superior channel separation Furthermore since all the signals are pro...

Page 27: ...e 10 tone 19 volume 12 Antenna hookups 5 Audio component hookups 5 6 Automatic tuning 15 C Centre mode 10 26 NORMAL mode 10 26 PHANTOM mode 10 26 3 STEREO mode 10 26 WIDE mode 10 26 Connecting See Hookups D Delay time 19 25 Direct tuning 15 Dolby Pro Logic Surround 10 17 centre mode 10 26 Dubbing See Recording E F G Editing See Recording Effect level 19 S Scanning preset stations 16 radio stations...

Page 28: ...STR V525 only 3 PHONO STR V525 only 4 CD 5 MD TAPE 6 TV LD SPEAKERS REAR SPEAKERS CENTER Mains lead SWITCHED AC OUTLET SPEAKERS FRONT A B IMPEDANCE SELECTOR 7 VIDEO 8 5 1 CH DVD 9 MONITOR º CTRL A1 II STR V525 only WOOFER STR V525 2 pins STR V424 1 pin 1 8 9 º 2 34 5 6 7 ...

Page 29: ...ncoded movie Receiving Preset Stations Example Receiving the station number A7 Scanning Radio Stations automatic tuning Example Scanning FM stations Scanning Preset Stations Turn on the CD player Start playing Turn on the VCR Start playing CD VIDEO Select FM 1 0 2 5 0 TUNER FM DIRECT Select A Tune in the station you want TUNER MEMORY SHIFT 7 Select FM To continue scanning TUNING TUNING FM TUNER TU...

Reviews: