6-7
d. ACE HEAD POSITION (X-POINT) ADJUSTMENT
1) Playback the alignment tape (Color bar)
2) Intermittently short-circuit the two Test Points on Main PCB . (See Fig. 6-2)
3) Press the “0, 5” remote control buttons, then adjustment is operates automatically. (See Fig. 6-1)
4) Connect the CH-1 probe to “Envelope” the CH-2 probe to “H’D switching pulse” and then trigger to CH-1.
5) Insert the (-) driver into the X-Point adjustment hole and adjust it so that envelope waveform is maximum.
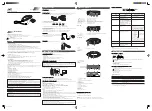
Test point
: TP2 (Audio Output)
TP3 (Envelope)
TP4 (H’D S/W -Trigger)
TP5 (Control Pulse)
Fig. 6-8 Location of Test point (VCR Main PCB-Top View)
AUDIO OUTPUT
ENVELOPE
HEAD SWITCHING
CONTROL PULSE
Summary of Contents for SLV-D360P Operating Instructions (For SLV-D360P DVD Player)
Page 10: ... 10 MEMO ...
Page 42: ...1 32E MEMO ...
Page 70: ...3 4E MEMO ...
Page 72: ...4 4 4 3 4 1 VCR MAIN FUNCTION TIMER COMPONENT SIDE ...
Page 73: ...4 6 4 5 CONDUCTOR SIDE ...
Page 74: ...4 8 4 7 4 2 DVD MAIN COMPONENT SIDE ...
Page 75: ...4 10 4 9 CONDUCTOR SIDE ...
Page 76: ...4 12E 4 11 4 3 DIAL TIMER SLV D560P Only COMPONENT SIDE CONDUCTOR SIDE ...
Page 78: ...5 4 5 3 BLOCK IDENTIFICATION OF MAIN PCB Component Side Conductor Side VCR MAIN PCB ...
Page 79: ...5 6 5 5 5 1 S M P S ...
Page 80: ...5 8 5 7 5 2 POWER DRIVE ...
Page 81: ...5 10 5 9 5 3 LOGIC FUNCTION TIMER ...
Page 82: ...5 12 5 11 5 4 A V ...
Page 83: ...5 14 5 13 5 5 Hi Fi MTS ...
Page 84: ...5 16 5 15 5 6 INPUT OUTPUT ...
Page 85: ...5 18 5 17 5 7 DVD A V DECODER ...
Page 86: ...5 20E 5 19 5 8 DVD SUB ...
Page 114: ...7 18E MEMO ...


