– 20 –
SDM-P234 (E)
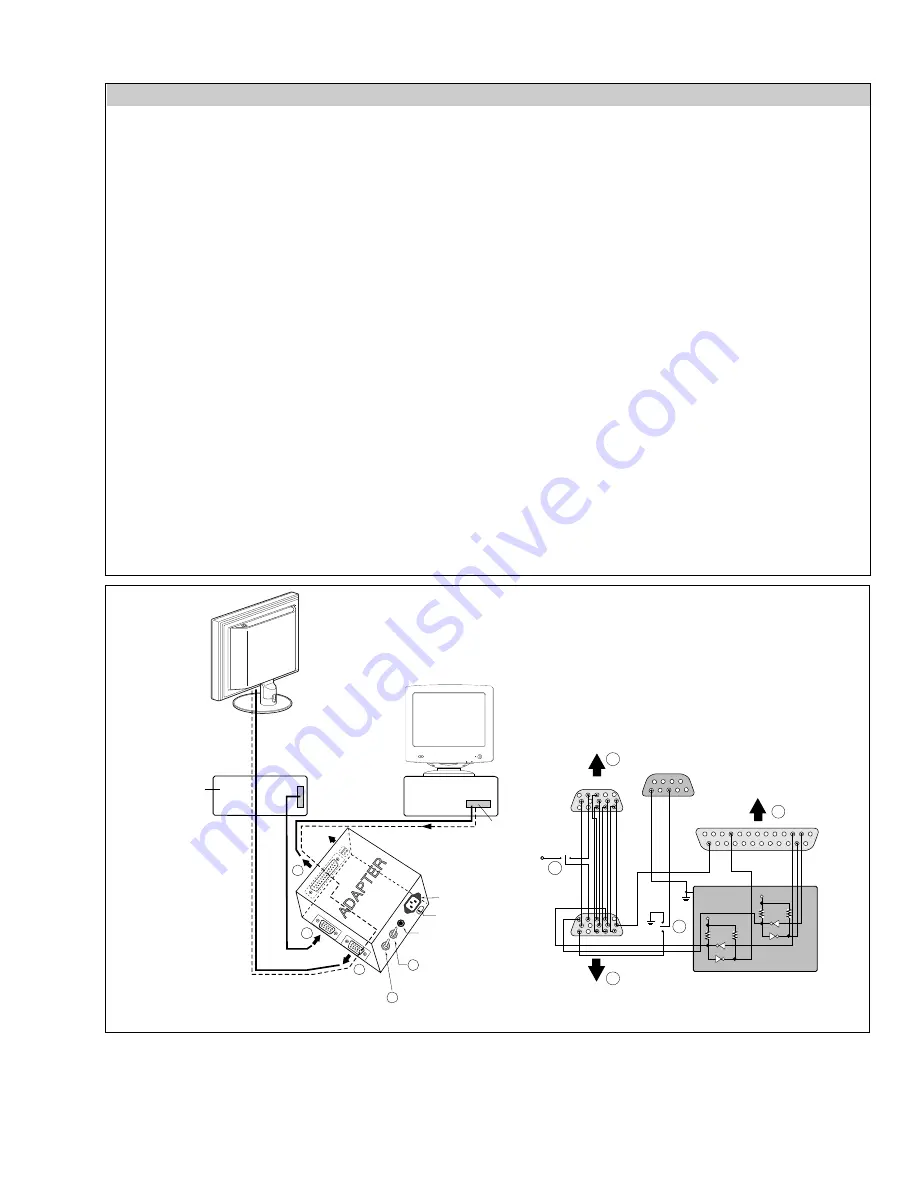
Figure 1. Cable Connection
220
IBM
Compatible PC
PARALLEL PORT
Power inlet (required)
Power LED
ST Switch
Power Select Switch
(110V/220V)
Control Line
Not used
RS232C
PARALLEL
V-S
YN
C
PO
W
ER
ST
VG
S
M
ON
IT
OR
E
E
V-Sync On/Off Switch
(Switch must be ON.)
F
F
A
A
B
B
C
C
15
10
5
5
6
9
1
1
1
14
13
25
6
5V
5V
5V
4.7K
4.7K
4.7K
74LS06
74LS06
OFF
ON
OFF
ON
11
Video Signal
Generator
SERVICE OSD
To enter service OSD menu,
1) Turn off the power switch button.
2) Press UP,DOWN, and then POWER key.
3) Shows the service OSD menu. That menu is located in down side of main menu.
4) The service OSD menu contains additional menus as described below.
a) COLOR TEMP: Adjust R/G/B color values of contrast and brightness in 9300K, 6500K, 5000K and sRGB.
sRGB BRT: Adjust Backlight of sRGB.
b) INITIAL EEPROM: Initialize the EEPROM values(24C08).
c) CLEAR ETI: Initialize the used time of monitor.
d) AGING: Select aging mode.(On/Off)
e) WHITE BALANCE
AUTO : Allows you to set the R/G/B offset and gain value automatically.
MANUAL: Allows you to set the R/G/B offset and gain value manually.
f) DEFAULT TIMING: Select the resolution timing of the signal.
1ST Menu is 1152x870.
Sub menus are 1152x864(VESA standard timing) and 1152x870(MAC computer timing).
2ND Menu is 1920x1200.
Sub menus are 1920x1200(1080i Video timing) and 1728x1080.
g) LIGHT SENSOR
When ECO Auto mode, the BACKLIGHT is changed as Light sensor Input.
X : Light Sensor Input, Y : Backlight Value Setting
h) COPY EDID
EDID DATA at DDC2B EEPROM is saved System Memory.
Process : No cable condition at Input1 & Input2, Signal Input at Input3(DVI-D).
--> Enter SVC mode --> Copy EDID --> Mode Information OSD appears


