Sony SAT-A4 Operating Instructions  (primary manual) Operating Instructions Manual Download Page 71

71

Setting Up the Remote Control (SAT-A4 Only)

The Set Up Remote screens let you set up the Digital Satellite Receiver 
to accept IR (infrared) or RF (radio frequency) signals from the remote 
control and to change the RF security code for the Digital Satellite 
Receiver. 

You can also use this screen to display a list of codes you can use to 
program the remote control to operate other components, such as TVs 
and cable boxes.

Selecting IR/RF Transmission
(SAT-A4 Only)

In addition to having IR remote control capability, your DirecTV 
System includes an RF feature, which enables the remote control to 
operate the Digital Satellite Receiver even if the receiver is located in 
another room or is placed behind a cabinet door. In other words, with 
the RF feature, the remote control does not require a direct line-of-sight 
to the front panel of the Digital Satellite Receiver. 

Note

You must set up the RF antenna to take advantage of the RF feature. See 
“Setting up the RF Antenna (SAT-A4 Only)” on page 19 for details.

The Digital Satellite Receiver is shipped with IR transmission enabled 
and RF transmission disabled. To use the RF feature, you must change 
the factory setting (IR ONLY) to the RF setting (RF ONLY).

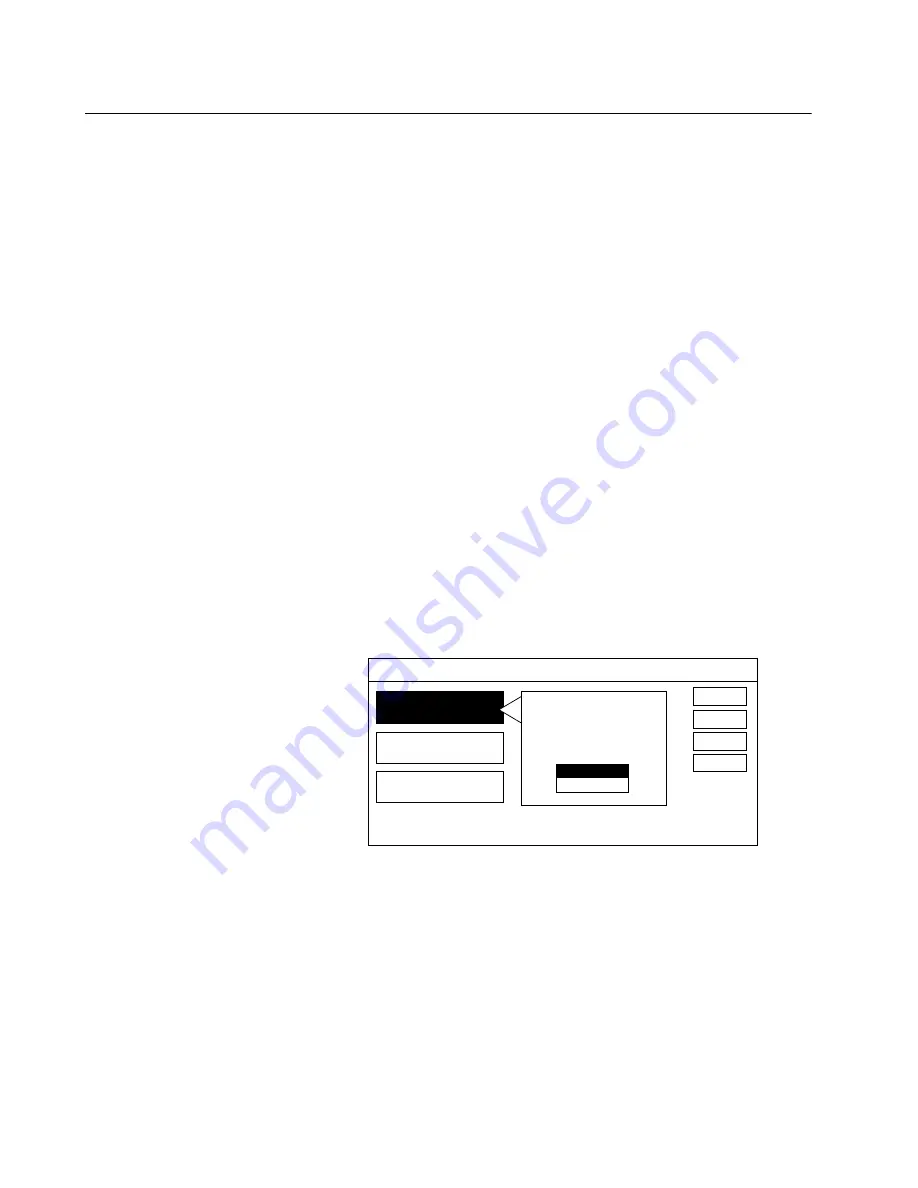
To select IR or RF transmission:

1

Select REMOTE CONTROL from the Setup Menu.

2

Select REMOTE SIGNAL and select a transmission type (IR or RF).

3

Select OK to save your selections and return to the Setup Menu. 

SET UP REMOTE

REMOTE CODES

RF SECURITY CODE

OK

CANCEL

IDENTIFY

HELP

REMOTE CODES

REMOTE SIGNAL
Select IR or RF 
transmission for the 
Digital Satellite Receiver.

RF ONLY

IR ONLY

Summary of Contents for SAT-A4 Operating Instructions (primary manual)

Page 1: ...For more information see page 22 SAT A4 MODEL ONLY RF ANTENNA The digital satellite receiver is shipped with IR reception enabled and RF reception disabled To use the RF feature and the antenna you must change the factory setting IR ONLY to the RF setting RF ONLY using the on screen displays as described in this manual 1998 by Sony Electronics Inc Reproduction in whole or in part without written p...

Page 2: ...e numbers in the space provided below Refer to these numbers whenever you need to call your sales or service representative regarding this product Model Number ___________________________________________ Serial Number _____________________________________________ Access Card Number _______________________________________ Customer Support For Programming For subscription information or to resolve p...

Page 3: ...ecting a Different Category Guide or List 33 Using the Station Index 35 Setting Up the Timer 37 Using the Favorite Station Guides 40 Displaying the Program Banner 41 Using the DISPLAY Feature Chapter 5 Using the Options Menu 43 Overview 44 Displaying the Options Menu 45 Checking and Cancelling PPV Purchases 46 Setting Display Options 48 Using the Jump Loop Feature 49 Setting Locks and Limits 54 Se...

Page 4: ...rround sound Convenience and Ease of Use q Order premium pay per view PPV movies PPV programs start as often as every 30 minutes so you can watch programs when you want to see them q Sony s Express Navigator on screen display system guides you through all the system features and functions q Select from a variety of program guides that are sorted by program categories including Sports Movies News a...

Page 5: ... shown on page 8 If you are missing items contact the dealer from whom you purchased the Digital Satellite Receiver Note Keep the original carton and packing materials to safely transport the system in the future MU TIN G TV PO WE R CA BLE SLE EP SAT 0 1 2 8 3 4 5 6 7 9 ME NU EN TER GU IDE TV SAT TV VID EO SAT TV CA BLE DIS PLA Y FUN CTI ON EXI T JUM P FAV OR ITE CH OF F AU DIO PO SIT ION SW AP PI...

Page 6: ...lied Be sure to match the and marks on the batteries with the and marks in the battery compartment Notes on Batteries q When the batteries become weak the Function button indicator flashes If the remote control does not operate properly the batteries might be weak When replacing batteries replace both batteries with new ones Do not mix different types of batteries together q When you remove the ba...

Page 7: ...ress to display the Custom Guide SAT POWER Button Turns the Digital Satellite Receiver on and off 0 9 and ENTER Buttons Pressing the 0 9 buttons and then the ENTER button selects a station number directly CATEGORY Button Press to display the Category Guide INDEX Button Press to display the Station Index FUNCTION Buttons Selects the component SAT TV CABLE that you want to operate These buttons flas...

Page 8: ... 9 and ENTER Buttons Pressing the 0 9 buttons and then the ENTER button selects a station number directly FUNCTION Buttons Selects the component SAT TV VTR that you want to operate These buttons flash to indicate which component the remote control is set to operate To control your TV or VTR VCR you must first program the remote control as described on page 85 CH PAGE Buttons Change the channel Whe...

Page 9: ...ll Ellen All Day Ticket DTV 109 The Postman lbx DTV 112 Mouse Hunt Switchback 8 00 PM 8 30 PM 9 00 PM WED DTV 110 Spice World All Day Ticket Moving Around In a Program Guide To Do This Use This Button Go to other stations in the guide one station at a time SAT A4 Move the joystick up and down SAT B3 Press the and buttons You can also change the look of the program guide by pressing the DISPLAY but...

Page 10: ... the button to tune to the program that s highlighted INDEX Your Station Index may not look exactly like this The stations displayed depend on the programming you ve ordered 100 STATION INDEX Sports Center 101 102 103 104 105 106 107 108 109 110 111 112 113 114 115 116 117 118 119 120 Moving Around In the Station Index To Do This Use This Button Go to other stations in the guide one station at a t...

Page 11: ...Digital Satellite Receiver into a home entertainment configuration to take advantage of your hi fi system s audio capabilities q If your TV has an S VIDEO jack use it to connect your TV to the Digital Satellite Receiver An S Video connection provides a better picture than A V or RF connections q If your TV does not have an S VIDEO jack use your TV s A V connectors to connect your components An A V...

Page 12: ... extension Since these devices typically do not support high data rates connecting to one may result in very slow operation or may even prevent connection with your program provider 4 Connect one end of the AC power cord to the Digital Satellite Receiver s AC IN jack Connect the plug end to an AC outlet Optional Connections q If you have a cable input cable box or a terrestrial TV antenna connect ...

Page 13: ... of the AC power cord to the Digital Satellite Receiver s AC IN jack Connect the plug end to an AC outlet Optional Connections Your VHF UHF IN jack may be labeled as RF IN q If you have a cable input cable box or a terrestrial TV antenna connect it to the TV s VHF UHF IN jack q Best Connection If your TV has an S VIDEO jack use an S VIDEO cable to connect the Digital Satellite Receiver s S VIDEO j...

Page 14: ...lite Receiver s TEL LINE jack Connect the other end to your home s modular telephone outlet Do not connect to a wireless telephone extension Since these devices typically do not support high data rates connecting to one may result in very slow operation or may even prevent connection with your program provider 5 Connect one end of the AC power cord to the Digital Satellite Receiver s AC IN jack Co...

Page 15: ...IGITAL OUT OPTICAL SATELLITE IN RF REMOTE R L MONO VIDEO OUT AUDIO VIDEO S VIDEO CH3 CH4 1 2 VHF UHF IN VHF SAT UHF OUT TEL LINE AC IN Digital Satellite Receiver 1 2 2 SAT A4 receiver is pictured but connections are identical for SAT B3 2 4 5 3 ...

Page 16: ... in very slow operation or may even prevent connection with your program provider 7 Connect one end of the AC power cord to the Digital Satellite Receiver s AC IN jack Connect the plug end to an AC outlet Optional Connections Your VHF UHF IN jack may be labeled as RF IN q If you have a cable input cable box or a terrestrial TV antenna connect it to the VCR s VHF UHF IN jack q Best Connection If yo...

Page 17: ...17 Digital Satellite Receiver 5 7 6 2 3 1 2 4 ...

Page 18: ...This must be done for the IR Blaster to function properly If the IR Blaster doesn t seem to be working correctly first check that the IR Blaster is positioned directly below the VCR s IR receiving area and that the VCR s line input is set to the Digital Satellite Receiver If it s still not working try this procedure again using the other codes listed for your VCR on page 86 3 To use the IR Blaster...

Page 19: ...one foot away from the Digital Satellite Receiver 3 Use the on screen displays to set up the Digital Satellite Receiver to accept RF transmission RF ONLY See Setting Up the Remote Control on page 71 for details The Digital Satellite Receiver is shipped with IR transmission enabled and RF transmission disabled To use the RF feature you must first change the factory setting IR ONLY to the RF setting...

Page 20: ...ellite Programs While Watching Cable or Off Air Programs The following instructions apply only if you connected your cable TV or terrestrial antenna to your Digital Satellite Receiver 1 Turn on the TV and then q If you have a cable box turn it on and then tune the TV to the output channel of your cable box usually channel 3 or 4 q If you do not have a cable box tune your TV to the station you want...

Page 21: ...tely set up and ready to be used page 22 q Using Highlight and Select the simple two step process for operating the on screen displays page 23 q Displaying and navigating through the program guide page 24 q Selecting subscription and pay per view programs from the program guides page 28 q Using the program list page 29 q Selecting other program guides that are sorted by category and subcategory pa...

Page 22: ...en connect the Digital Satellite Receiver to your television and telephone line See Chapter 3 Note Your phone line must be connected to the Digital Satellite Receiver in order for you to purchase a pay per view program with the remote control 3 Make sure the access card is inserted into the Digital Satellite Receiver See page 68 for details on inserting the access card 4 Call your program provider...

Page 23: ...y pressing the button Example Highlight and Select 1 In the sample menu that follows moving the joystick up SAT A4 or pressing the button SAT B3 moves the highlight from ITEM 5 to ITEM 2 2 Pressing the button selects ITEM 2 You can apply this basic operation of highlighting and selecting to perform any of the system s functions highlight ITEM 2 ITEM 5 ITEM 1 ITEM 4 ITEM 7 ITEM 8 ITEM 3 ITEM 6 ITEM...

Page 24: ...U button to bring up the Main Menu Then highlight and select MASTER GUIDE from the menu Note To bring up the Custom Guide press the GUIDE button on the remote control See Setting Up a List of Custom Stations on page 54 for details Features of the program guide are discussed in more detail on the following pages MASTER GUIDE 2 Shortcut You can select menu items directly by pressing the correspondin...

Page 25: ...Order on page 47 for details q Time slots These appear left to right with the current time s programming in the leftmost position q Page indicator This shows you approximately which page you re on relative to all the pages in the guide The size of the indicator is proportional to the overall size of the entire program guide First Knight DTV 111 DTV 112 Mouse Hunt Switchback First Knight 8 00 PM 10...

Page 26: ... Vertically Through the Stations To page use the PAGE buttons to move through the guide one page at a time This allows you to move through the guide more quickly than scrolling To page through the guide q Press the PAGE or PAGE buttons The PAGE button pages in the up direction The PAGE button pages in the down direction Paging Through Later Program Start Times To display future time slots in the g...

Page 27: ... DISPLAY button repeatedly See Using the DISPLAY Feature on page 41 for details Exiting the Guide There are two ways to exit the program guide q Select a program from the guide by pressing the button See Selecting a Program from the Guide on page 28 for details OR q Press the EXIT button on the remote You will be returned to the last program you were watching before the program guide was displayed...

Page 28: ... you the option of adding the program to the Timer list returning to the program guide or tuning to the current program on that station See Setting Up the Timer on page 35 for details on using the Timer To watch a PPV program you ve purchased in advance just tune to the station when the program is about to start Your program providers will bill you automatically About Copy Protection Some PPV prog...

Page 29: ...variations of lists q Press the DISPLAY button repeatedly See Using the DISPLAY Feature on page 41 for details To exit the list q Select a program from the list by pressing the button Or q Press the EXIT button on the remote You will be returned to the last program you were watching before the list was displayed The buttons that appear for each program indicate start times For example in this samp...

Page 30: ...ntain groups of stations with similar subjects for example special promotions or pay per view programs To select a guide type 1 Select GUIDE from the Category Guide screen 2 Select the type of guide you want to display 3 Select OK to display the selected program guide or select different options for time category or subcategory OK The GUIDE and TIME options are not available when you select CATEGO...

Page 31: ...ategories To select a program guide category 1 Select CATEGORY from the Category Guide screen 2 Select the program category you want to display 3 Select OK to display the selected program guide or select different options for guide time or subcategory CATEGORY GUIDE GUIDE TIME CATEGORY SUBCATEGORY OK RETURN RESET SELECT TIME SAT 5 00 PM SAT 9 30 PM SUN 2 00 AM SUN 6 30 AM SUN 11 00 AM CURRENT HELP...

Page 32: ...remote control How CATEGORY GUIDE and CATEGORY LIST Change the Main Menu The selections you make using CATEGORY GUIDE and CATEGORY LIST affect the program categories displayed in the Main Menu The category you select using CATEGORY GUIDE changes button 4 of the Main Menu The category you select using CATEGORY LIST changes button 6 of the Main Menu This feature allows you to recall the last program...

Page 33: ... at the top Moving Through the Station Index To move through the Station Index q Move the joystick SAT A4 or press the arrow buttons SAT B3 to move one station at a time q Press the PAGE or PAGE buttons to page move up or down several rows at a time q Enter the station number using the 0 9 buttons and press ENTER INDEX Your Station Index may not look exactly like this The stations displayed depend...

Page 34: ...s the DISPLAY button repeatedly See Using the DISPLAY Feature on page 41 for details Selecting a Program from the Station Index To select a program q Press the button to tune to the highlighted station The Station Index disappears To exit the Station Index without changing stations q Press the EXIT button The Station Index disappears and you return to the station you were watching before displayin...

Page 35: ... appears 4 Set the day start time stop time and station number as follows q To set each item day time etc move the joystick up or down SAT A4 or press up or down arrow buttons SAT B3 q To move to the next or previous item move the joystick right or left SAT A4 or press the right or left arrow buttons SAT B3 Note You can set the timer up to 30 days in advance You can also set the timer for every da...

Page 36: ...ER indicator on the front panel lights up indicating that the timer has been set q To use the timer to record a PPV program you must first purchase it in advance of its showing See Ordering Pay Per View Programs on page 28 q Use the MON FRI option only if you do not plan to EXIT during your timer event If you think you may want to EXIT during your timer event set each day of the week individually ...

Page 37: ...avorite Station buttons are blank 2 Highlight a Favorite Station button that you want to set Then press and hold the button The Favorite Station Guide switches to edit mode The station list appears the selected Favorite Station button flashes and the highlight moves to the current station in the station list FAVORITE STATION GUIDE FAVORITE 1TITLE 1 2 3 4 5 6 7 EXIT TO CURRENT STATION Before you ca...

Page 38: ...ess the button The station list disappears and the Favorite Station Guide reappears with the stations you ve set up EDIT FAVORITE STATION GUIDE FAVORITE 1 2 3 4 6 7 EXIT TO PRIOR STATION To clear a Favorite Station button that is already assigned select CLEAR STATION 5 DIRECT TICKET PREVIEWS 1 100 CLEAR STATION 100 101 102 103 104 105 106 107 108 109 FAVORITE STATION GUIDE FAVORITE 1 6 7 EXIT TO P...

Page 39: ...ct Exit to Current Station which appears in the bottom right corner of the Favorite Station Guide or press the EXIT button Creating a Custom Favorite Station Guide Title To create a custom title for the Favorite Station Guide 1 Select TITLE from the Favorite Station Guide The Set Favorite Guide Title screen appears 2 To edit the title move the joystick up or down SAT A4 or press the up or down arr...

Page 40: ...ime start and end times rating and program description It may also include any of the following indicators To clear the program banner q Press the DISPLAY or EXIT button or wait a few seconds except some music channels for it to automatically disappear First Knight 8 00 PM 10 00 PM PG 13 MON JUNE 24 1996 DOLBY DIGITAL IN ENGLISH Act Adv 1995 Richard Gere Sean Connery Julia Ormond Thrilling romance...

Page 41: ...9 Shogun 212 The Natural 980 Philadelphia 198 Biography 256 Tom and Jerry 233 Exit to Current Station 967 DISPLAY DISPLAY DISPLAY First Knight Act Adv 1995 Richard Gere Sean Connery Julia Ormond Thrilling romance results when rogue knight Lancelot becomes torn between his loyalty to King Arthur and his love for Queen Guinevere CC ST A V MASTER GUIDE WED OCT 5 8 45 PM First Knight DTV 111 DTV 108 E...

Page 42: ...42 ...

Page 43: ...stations are displayed page 46 q Setting up and using the Jump Loop feature pages 47 48 q Set system locks and limits which allow you to control program viewing by ratings spending amount and station page 49 q Create a Custom Guide by selecting stations from the Master Guide that you want to skip page 54 q Select an audio track for the program you re currently watching set a default language for t...

Page 44: ...u appears The following pages describe how to use the Options Menu to alter your system s setup MASTER GUIDE 2 CATEGORY GUIDE MOVIE GUIDE 4 OPTIONS MENU 7 EXIT 5 TIMER SETUP 8 CATEGORY LIST 3 MOVIE LIST 6 SETUP MENU 9 MAIN MENU CUSTOM STATIONS 8 DATA SERVICES 7 LOCKS AND LIMITS 6 EXIT 5 DISPLAY OPTIONS 4 MESSAGES 3 PURCHASES 2 AUDIO 1 OPTIONS MENU ...

Page 45: ...Review Cancel Purchases screen appears which lists the programs purchased and canceled 2 To review the details of a pay per view program you ve purchased q Select the program you want to review Then select REVIEW To cancel a pay per view program you ve ordered q Select the program you want to cancel Then select CANCEL PPV 3 Select RETURN to return to the Options Menu Note Once you tune to a purcha...

Page 46: ...ge the color palette of the on screen displays The default color is EMERALD 1 Select COLORS from the Set Display Options screen The Set Colors screen appears 2 To preview a color move the highlight The Set Colors screen automatically changes to reflect the color that s highlighted 3 To change the color select a different color and then select OK to return to the Set Display Options screen 4 Select...

Page 47: ...Loop which sets the JUMP button to jump among as many as 5 preset stations see Using the Jump Loop Feature on page 48 for details on presetting stations To set the Jump Mode 1 Select JUMP from the Set Display Options screen 2 Select STANDARD JUMP or JUMP LOOP 3 Select RETURN to return to the Options Menu RETURN SET DISPLAY OPTIONS COLORS STATION ORDER JUMP HELP ALPHABETICAL station order defines t...

Page 48: ... stations while a program guide menu etc is being displayed 3 Press and hold the JUMP button A message appears indicating that the station has been assigned to the Jump Loop 4 To set additional jump stations repeat steps 2 and 3 of this procedure Note If you set more than 5 jump stations the sixth jump station automatically overwrites the first jump station in the loop and so on To jump through th...

Page 49: ... PER VIEW STATION LOCKS 10 00 R UNLOCKED 0 STATIONS CURRENTLY LOCKED LOCK HELP If your system is locked the padlock symbol appears and you must first unlock it before you can make any changes to the locks and limits settings See Unlocking Your System on page 53 for details Spending Limit Lets you set a maximum spending limit for a single pay per view program When the system is locked you cannot pu...

Page 50: ... 1 Select RATINGS LIMIT from the Set Locks and Limits screen 2 Select a rating beyond which programs cannot be watched 3 Select another lock or limit to set or go to step 4 4 Lock your system as described in Locking Your System on page 52 SET LOCKS AND LIMITS SPENDING LIMIT RATINGS LIMIT PAY PER VIEW STATION LOCKS None UNLOCKED 0 STATIONS CURRENTLY LOCKED RETURN LOCK HELP SET SPENDING LIMIT Enter ...

Page 51: ...n just select it again The key disappears 3 Select OK to return to the Set Locks and Limits screen 4 Select another lock or limit to set or go to step 5 5 Lock your system as described in Locking Your System on page 52 SET LOCKS AND LIMITS SPENDING LIMIT RATINGS LIMIT PAY PER VIEW STATION LOCKS RETURN LOCK HELP SET PPV LOCK Select pay per view lock status LOCKED UNLOCKED OK CANCEL ALL NONE SET STA...

Page 52: ...passcode For example if you try to watch a program on a locked station a message identifies the lock or limit exceeded After you press the button the Temporary Unlock window appears By entering the passcode and then selecting when you want the system to automatically relock you can temporarily unlock the system Note If you override the system lock you can reset the lock by turning the power off an...

Page 53: ...isk which keeps your passcode secret Your system is now unlocked and all locks and limits previously set are no longer in effect Determining the Status of the System Lock While you re watching programs you can check the status of the system lock by pressing the DISPLAY button to bring up the Program Banner which includes the following lock symbols UNLOCK SET LOCKS AND LIMITS SPENDING LIMIT RATINGS...

Page 54: ...tions 203 208 and 213 are set to be skipped To set a station so that it is not skipped just select it again The checkmark ü disappears Note Use the PAGE and PAGE buttons to quickly move through the rows of stations You can also use the 0 9 buttons to enter the three digit station number directly 3 Select OK when you re finished setting skipped stations To see the results of your Custom Stations se...

Page 55: ...s not skip pay per view stations To use the AUTO Skip feature 1 Select CUSTOM STATIONS from the Options Menu 2 Select the AUTO button The Digital Satellite Receiver begins to evaluate all the stations in the Master Guide and displays a status bar similar to the following Note This process may take a few minutes to complete When the Digital Satellite Receiver is finished scanning the station list r...

Page 56: ...e audio symbol this indicates that multiple audio tracks are available for that program If the Program Banner includes the Double D symbol this indicates that Dolby Digital sound is available for that program Selecting an Audio Track Using the on screen menus 1 Press the MENU button to bring up the Main Menu 2 Select OPTIONS MENU 3 Select AUDIO The Set Audio screen appears which lists only the aud...

Page 57: ...or programs broadcast in multiple languages To set a default language 1 Select DEFAULT from the Set Audio screen 2 Select a default language 3 Select RETURN to return to the Options Menu Note If the default language you select is not available for a program that you tune to you will not hear the default language Instead you ll hear one of the languages available for that program usually English Fo...

Page 58: ...oder or Dolby Digital A V receiver To set Dolby Digital 1 Select DOLBY DIGITAL from the Set Audio screen 2 Select the Dolby Digital option you want Select OFF if you do not have a Dolby Digital decoder or Dolby Digital A V receiver Select AUTO SELECT to allow Dolby Digital signals to be output to your Dolby Digital decoder or Dolby Digital receiver when those signals are available RETURN ENGLISH 1...

Page 59: ...ital Satellite Receiver front panel MESSAGE indicator lights up q An envelope appears in the Program Banner accessed by pressing the DISPLAY button q An envelope appears in menu item 7 Options Menu of the Main Menu Displaying Your Messages To display your messages 1 Press the MENU button to bring up the Main Menu 2 Select OPTIONS MENU 3 Select MESSAGES The date of the message along with the first ...

Page 60: ... To erase a message after you ve read it select ERASE To keep a message after you ve read it select RETURN Note Your mailbox can hold about 50 messages before exhausting the Digital Satellite Receiver s memory MESSAGES READ 11 6 Sign up now for our special 11 8 Welcome to USSB 11 23 Happy Thanksgiving RETURN HELP ü RETURN READ MESSAGE ERASE HELP 11 23 Happy Thanksgiving from everyone at DIRECTV ü ...

Page 61: ...icates that data services are available for that specific station Selecting a Data Service To select a data service 1 Select DATA SERVICES from the Options Menu 2 The Data Services screen appears which lists only the data services that are available for the station you are currently tuned to DATA SERVICES appears only when the station you ve tuned to includes data services CUSTOM STATIONS 8 DATA S...

Page 62: ...only Select the data service and then select RETURN Change the data service for all stations Select DEFAULT then see Changing the Default Data Service below Change the baud rate for the Digital Satellite Receiver s wide band data port Select BAUD then see Setting the Baud Rate below The titles of the data services may be different based on the service being provided DATA 8 DATA 1 DATA 2 DATA 3 DAT...

Page 63: ...lace your access card page 68 q Change the aspect ratio of the Digital Satellite Receiver to match your TV screen standard or widescreen page 70 q SAT A4 Only Change the Digital Satellite Receiver to receive RF radio frequency remote control signals or IR infrared remote control signals page 71 q Display a list of programmable codes for other components you may want to operate using the remote con...

Page 64: ...up Menu appears The following pages describe how to use the Setup Menu to set up your system CATEGORY GUIDE 1 MOVIES GUIDE 4 OPTIONS MENU 7 MASTER GUIDE 2 EXIT 5 TIMER SETUP 8 CATEGORY LIST 3 MOVIES LIST 6 SETUP MENU 9 MAIN MENU SYSTEM TEST 8 REMOTE CONTROL 1 ANTENNA 4 TROUBLE SHOOTING 7 ACCESS CARD 2 EXIT 5 VCR RECORDING 3 ASPECT RATIO 6 TIPS AND SHORTCUTS 9 SETUP MENU ...

Page 65: ...for the Satellite Antenna select ZIP CODE or LAT LONG q ZIP CODE uses your five digit zip code to determine the elevation and azimuth settings q LAT LONG uses your location s latitude and longitude to determine the azimuth and elevation settings q The Signal Strength Meter indicates the current signal strength of the Satellite Antenna q The Transponder option allows you to select a transponder num...

Page 66: ...re that all of your VCR functions are working properly 1 Select VCR RECORDING from the Setup Menu 2 When the VCR RECORDING test screen appears select MANUFACTURER and select the manufacturer name for your VCR VCR RECORDING Manufacturer Code Test OK HELP Sony 3 CANCEL VCR RECORDING Manufacturer Code Test 3 VCR MANUFACTURERS Select your VCR s Manufacturer Manufacturer Admiral Aiwa Audio Dynamic Bell...

Page 67: ... your Digital Satellite Receiver make sure the correct video input is selected and or try a different code VCR RECORDING Manufacturer Model Test 0 SONY CODE Select the code for your Sony VCR Code 2 3 4 1 OK HELP CANCEL Note You will need to reenter the Manufacturer and Code each time you enter the VCR RECORDING screen VCR RECORDING Manufacturer Code Test BEFORE TESTING 1 Put a tape in your VCR xx ...

Page 68: ...SS CARD from the Setup Menu 2 When the Replace Access Card screen appears insert your old access card if you removed it as follows q Slide the access card arrow side up into the slot located in the rear of the Digital Satellite Receiver as shown in the illustration SYSTEM TEST 8 REMOTE CONTROL 1 ANTENNA 4 TROUBLE SHOOTING 7 ACCESS CARD 2 EXIT 5 VCR RECORDING 3 ASPECT RATIO 6 TIPS AND SHORTCUTS 9 S...

Page 69: ...Procedure Complete appears select OK to return to the Setup Menu RETURN REPLACE ACCESS CARD Please insert OLD access card and select OK to initialize NEW card CAUTION After you select OK you cannot stop this process and your OLD access card will no longer be valid OK HELP Selecting RETURN returns you to the Setup Menu without starting the initialization process ...

Page 70: ... Select ASPECT RATIO from the Setup Menu 2 Select one of the options based on the type of TV you have q If you have a standard TV select 4 3 q If you have a wide screen TV select 16 9 3 Select OK to return to the Setup Menu Selecting CANCEL returns you to the Setup Menu without saving your selection SET ASPECT RATIO STANDARD WIDE CANCEL OK HELP 4 3 ü 16 9 ...

Page 71: ...placed behind a cabinet door In other words with the RF feature the remote control does not require a direct line of sight to the front panel of the Digital Satellite Receiver Note You must set up the RF antenna to take advantage of the RF feature See Setting up the RF Antenna SAT A4 Only on page 19 for details The Digital Satellite Receiver is shipped with IR transmission enabled and RF transmiss...

Page 72: ...te Receiver s security code step 2 is changing the remote control s security code Both the Digital Satellite Receiver and the remote control must use the same three digit security code Step 1 Select the Digital Satellite Receiver s RF Security Code 1 Select REMOTE CONTROL from the Setup Menu 2 Select RF SECURITY CODE and then select a different security code 3 Select OK to save your changes and re...

Page 73: ... Set Up Remote screen 1 Bring up the Set Up Remote screen as described on page 71 2 Select IDENTIFY 3 When the message Press the joystick within 5 seconds appears press the joystick before the 5 seconds expire The current RF security code for the remote control appears Note If the message Security code could not be identified appears check to make sure that RF is enabled and that the RF antenna is...

Page 74: ...t that appears to find the remote codes for the manufacturer of your component Press the button to return to the Set Up Remote screen 4 To program the remote control select INSTRUCTIONS and follow the on screen instructions 5 Select OK to return to the Setup Menu SET UP REMOTE REMOTE SIGNAL RF SECURITY CODE IR ONLY OK CANCEL IDENTIFY HELP REMOTE CODES REMOTE CODES Select the category of manufactur...

Page 75: ...n to the Setup Menu If The System Test Reports Any Problems Check your system for any of the following q Check that all cables are connected properly to the Digital Satellite Receiver q Check that the Satellite Antenna is installed correctly and that the signal has been optimized See the manual that came with the Satellite Antenna for details q Check that the phone line connected to the Digital Sa...

Page 76: ...Information To display tips and shortcut information 1 Select TIPS AND SHORTCUTS from the Setup Menu 2 Select the topic for which you want information Details of that topic are displayed 3 Press the button to return to the Tips and Shortcuts screen 4 Select RETURN to return to the Setup Menu SYSTEM TEST 8 REMOTE CONTROL 1 ANTENNA 4 TROUBLE SHOOTING 7 ACCESS CARD 2 EXIT 5 VCR RECORDING 3 ASPECT RAT...

Page 77: ... on the front and back panels of the Digital Satellite Receiver page 78 q Remote control button descriptions page 81 q Programming the remote to operate your TV and other video components page 85 q Troubleshooting information page 87 q Precautions page 90 q FCC Information page 91 q Limited warranty page 92 q Specifications page 93 q Index page 94 ...

Page 78: ...de The arrow buttons highlight items in the on screen displays program guides menus etc The button selects highlighted items Power Indicator Indicates whether the Digital Satellite Receiver is on or off Timer Indicator Indicates that the Timer is set Message Indicator Indicates that you have an unread message DIGITAL SATELLITE RECEIVER SAT A4 MENU GUIDE POWER TIMER MESSAGE POWER 32 BIT MICRO PROCE...

Page 79: ... audio or video component Audio 2 RCA type VIDEO OUT Connects your Digital Satellite Receiver to your TV or VCR s video input Video RCA type S VIDEO OUT Allows you to connect your Digital Satellite Receiver directly to your TV if your TV has S VIDEO IN S Video 4 pin mini DIN CH3 CH4 Switch When you use an RF connection this setting determines the TV channel on which programs from the Digital Satel...

Page 80: ...ts your Digital Satellite Receiver to your TV or VCR s video input Video RCA type S VIDEO OUT Allows you to connect your Digital Satellite Receiver directly to your TV if your TV has S VIDEO IN S Video 4 pin mini DIN CH3 CH4 Switch When you use an RF connection this setting determines the TV channel on which programs from the Digital Satellite Receiver can be viewed VHF UHF IN Allows you to connec...

Page 81: ...uctions on programming the remote MUTING TV POWER CABLE SLEEP SAT 0 1 2 8 3 4 5 6 7 9 MENU ENTER GUIDE TV SAT TV VIDEO SAT TV CABLE DISPLAY FUNCTION EXIT JUMP FAVORITE CH OFF AUDIO POSITION SWAP PIP SATELLITE RECEIVER S CATEGORY INDEX PAGE RM Y800 CH VOL Button Operates Description TV Mutes the volume Press again to restore the volume TV Automatically turns off the TV after the time period that yo...

Page 82: ...g the DISPLAY Feature on page 41 for details SAT TV Cable box Used with 0 9 buttons to change stations without any delay in tuning SAT Brings up the Index SAT Brings up the Category Guide SAT Brings up the Custom Guide If you re already in a program guide pressing GUIDE repeatedly brings up future time slots in the guide SAT TV When moved forward back left right and diagonally highlights items in ...

Page 83: ...off VCR AMP Changes the VHF UHF output of the VCR Changes the input of the amp VCR DVD Stop VCR DVD Pause VCR Record VCR Changes the channel SAT Used for programming the remote to operate your TV cable box VCR DVD or amp Also used to change the RF security code AMP Changes the audio volume on the amp VTR 3 AMP VTR 2 DVD POWER TV VTR CH CODE SET VTR 3 AMP VTR 2 DVD SAT CABLE POWER TV VTR CODE SET A...

Page 84: ...reens used to enter numerical values such as a spending limit or passcode SAT TV Toggles through the different displays of on screen guides SAT or other display TV See Using the DISPLAY Feature on page 41 for details SAT Brings up the Station Index SAT Brings up the Category Guide SAT TV Clears all on screen displays including program guides menus etc If you press EXIT before you complete your sel...

Page 85: ...ress the FUNCTION button VTR SAT or TV for the component you re setting up SAT A4 Only To set up a VCR or laserdisc player set the slide switch to any position VTR3 VTR2 DVD AMP You must perform step 4 within 10 seconds of step 3 or you must start again from step 2 To cancel the operation press the ENTER button 4 Enter the three digit code number 5 Press the ENTER button To Check if the Code Numbe...

Page 86: ...ic 317 319 Canon 309 308 Citizen 332 Craig 315 302 332 Curtis Mathis 304 338 309 Daewoo 341 312 309 DBX 314 336 337 Dimensia 304 Emerson 319 320 316 317 318 341 Fisher 330 334 335 333 Funai 338 General Electric 329 304 309 Go Video 322 339 340 Goldstar 332 Hitachi 306 304 305 338 HQ 315 Instant Replay 309 308 JC Penney 309 305 304 330 314 336 337 JVC 314 336 337 Kenwood 314 336 332 337 LXI Sears 3...

Page 87: ...short in the RG 6 cable and you will need to replace it q In rare cases the picture may be distorted if you connected a terrestrial TV antenna to the UHF VHF IN jack of the Digital Satellite Receiver This distortion could occur if the channel selector on the back of the Digital Satellite Receiver is set to a channel that is normally received on channel 3 or 4 of your TV For example you can receive...

Page 88: ...e If you ve lost or forgotten your passcode call your program provider See Customer Support on page 2 Audio track is not available q Not all programs offer audio tracks See page 56 Language of audio track is incorrect q Check default language setting The program provider may not make available all the languages displayed in the Set Default Language screen See page 57 Check the audio track setting ...

Page 89: ...rate q Check to make sure the batteries are inserted correctly and that the batteries are not dead See page 6 q SAT A4 Only If you are having problems with the RF function check that the RF antenna is connected properly and that you are using the remote control within operating range of the Digital Satellite Receiver see Setting Up the RF Antenna SAT A4 Only on page 19 Make sure that RF transmissi...

Page 90: ...d will fit into the wall outlet only one way If you are unable to insert the plug fully into the outlet contact your dealer q If the AC power cord gets damaged and needs to be replaced have it done at a qualified service shop only On Placement q Place the Digital Satellite Receiver in a location with adequate ventilation to prevent heat build up in the Digital Satellite Receiver and prolong the li...

Page 91: ...n is subject to the following two conditions 1 This device may not cause harmful interference and 2 this device must accept any interference received including interference that may cause undesired operation Radio Interference Information This equipment has been tested and found to comply with the limits for a Class B digital device pursuant to Part 15 of the FCC Rules These limits are designed to...

Page 92: ...e in the form of a bill of sale or receipted invoice which is evidence that the unit is within the Warranty period must be presented to obtain warranty service REPAIR OR REPLACEMENT AS PROVIDED UNDER THIS WARRANTY IS THE EXCLUSIVE REMEDY OF THE CONSUMER SONY SHALL NOT BE LIABLE FOR ANY INCIDENTAL OR CONSEQUENTIAL DAMAGES FOR BREACH OF ANY EXPRESS OR IMPLIED WARRANTY ON THIS PRODUCT IN NO EVENT SHA...

Page 93: ... x 66 5 x 228 5 mm 11 x 2 5 8 x 9 inches Weight Set 2 7 kg 6 0 lbs SAT A4 2 5 kg 5 4 lbs SAT B3 Unit 1 6 kg 3 6 lbs SAT A4 1 5 kg 3 4 lbs SAT B3 Note Design and specifications are subject to change without notice Supplied Accessories Remote Control RM Y800 SAT A4 RM Y139 SAT B3 Size AA Batteries 2 Access Card 1 Audio Video Cable 1 S VIDEO Cable 1 SAT A4 RF Antenna 1 SAT A4 RF Cable 1 Telephone Lin...

Page 94: ...0 59 82 84 Dolby Digital 11 56 57 79 Dolby Digital button 56 57 Eject button 83 elevation 65 ENTER button 7 8 82 EXIT button 9 10 29 34 82 84 Express Navigator 4 F Fast forward button 83 FAVORITE button 34 37 82 84 Favorite Station Guide changing the title 39 clearing a station 39 displaying and setting up 37 displaying different Favorite Station Guides 39 exiting 39 using DISPLAY button with 41 f...

Page 95: ...on descriptions 84 setting IR and RF 71 troubleshooting 89 Rewind button 83 RF antenna 19 S satellite antenna setting 65 scrolling 8 26 SELECT button 7 8 23 78 82 84 Setup Menu displaying 64 SLEEP button 81 spending limit explained 49 setting 50 Station Index displaying 7 8 10 33 displaying favorite stations in 34 exiting 34 selecting programs in 10 34 using DISPLAY button with 41 station locks se...

Page 96: ...96 Printed in the U S A ...

Reviews: