


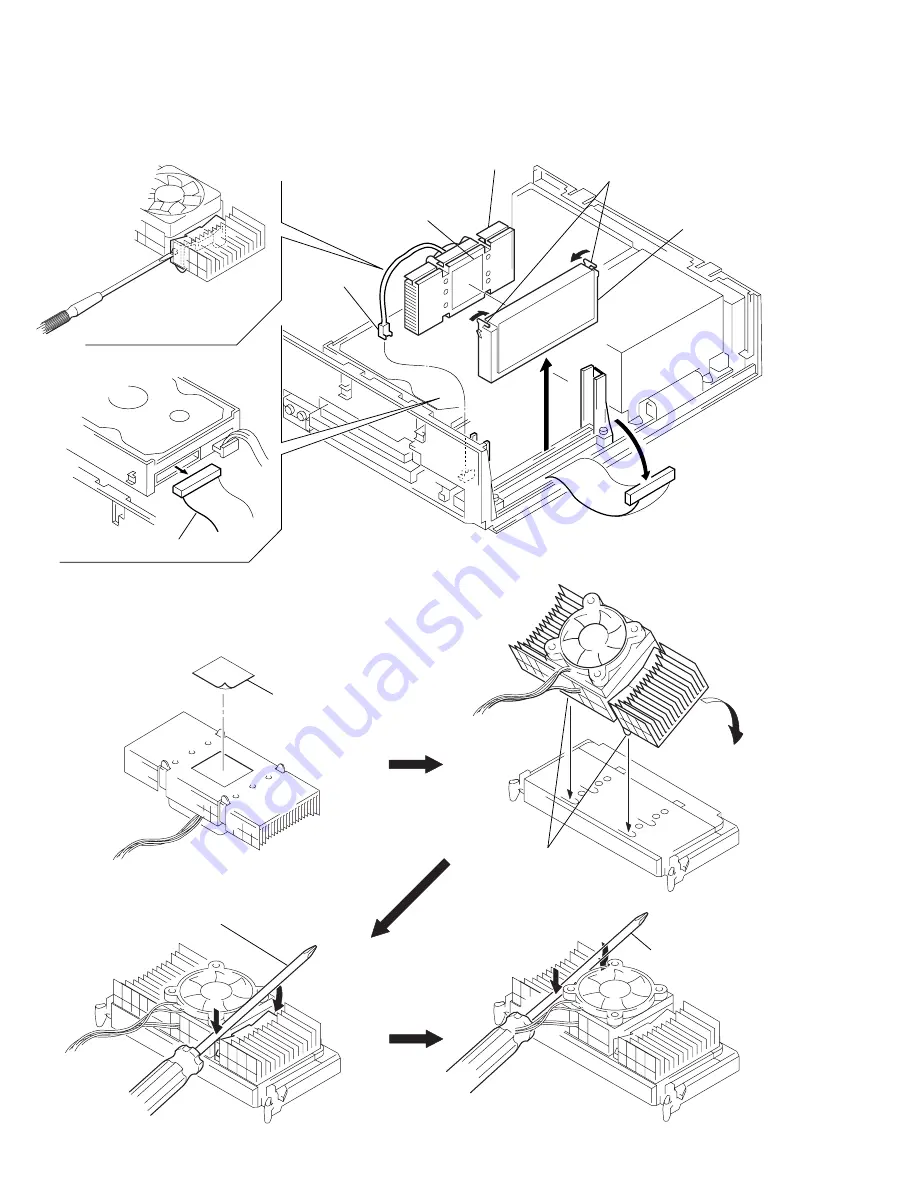
2-6
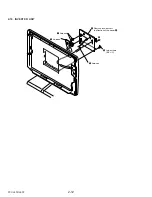
PCV-L400/L600
B
C
2
Remove two hooks.
3
Push the clips in the order of
arrows
B
and
C
using a screwdriver.
1
Remove a strippig paper.
5
Remove four claws.
6
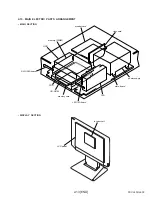
heatsink
3
CPU
E
it is also fixed with a thermal
tape stuck to the heatsink.
2
Tilt toward the arrow
A
,
meeting the clows
of clips at two places.
A
D
4
Push the clips in the order
of arrows
D
and
E
using a screwdriver.
4
harness
1
harness
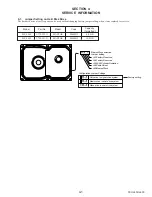
• HEAT SINK INSTALLATION
2-9.
CPU AND HEAT SINK (L400 ONLY)
Summary of Contents for PCV-L400 - Vaio Slimtop Computer
Page 1: ...SERVICE MANUAL PCV L400 L600 US Model Specifications PERSONAL COMPUTER VAIO 9 928 306 11 ...
Page 2: ...PCV L400 L600 US 9 928 306 11 99C204 1 ...
Page 3: ... 2 PCV L400 L600 ...
Page 5: ...1 1 PCV L400 L600 SECTION 1 OPERATION Reproduced from User Guide 3 866 380 01 ...
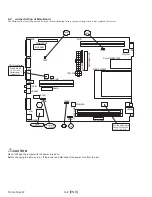
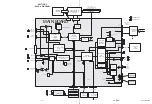
Page 19: ...3 1 PCV L400 L600 SECTION 3 MOTHERBOARD DESCRIPTION ...
Page 20: ...3 2 PCV L400 L600 ...
Page 21: ...3 3 PCV L400 L600 3 3 END ...
Page 25: ...6 1 PCV L400 L600 SECTION 6 FRAME HARNESS 6 1 Connector List ...
Page 26: ...6 2 PCV L400 L600 ...
Page 27: ...6 3 PCV L400 L600 ...
Page 28: ...6 4 PCV L400 L600 ...
Page 29: ...6 5 PCV L400 L600 ...
Page 30: ...6 6 PCV L400 L600 ...