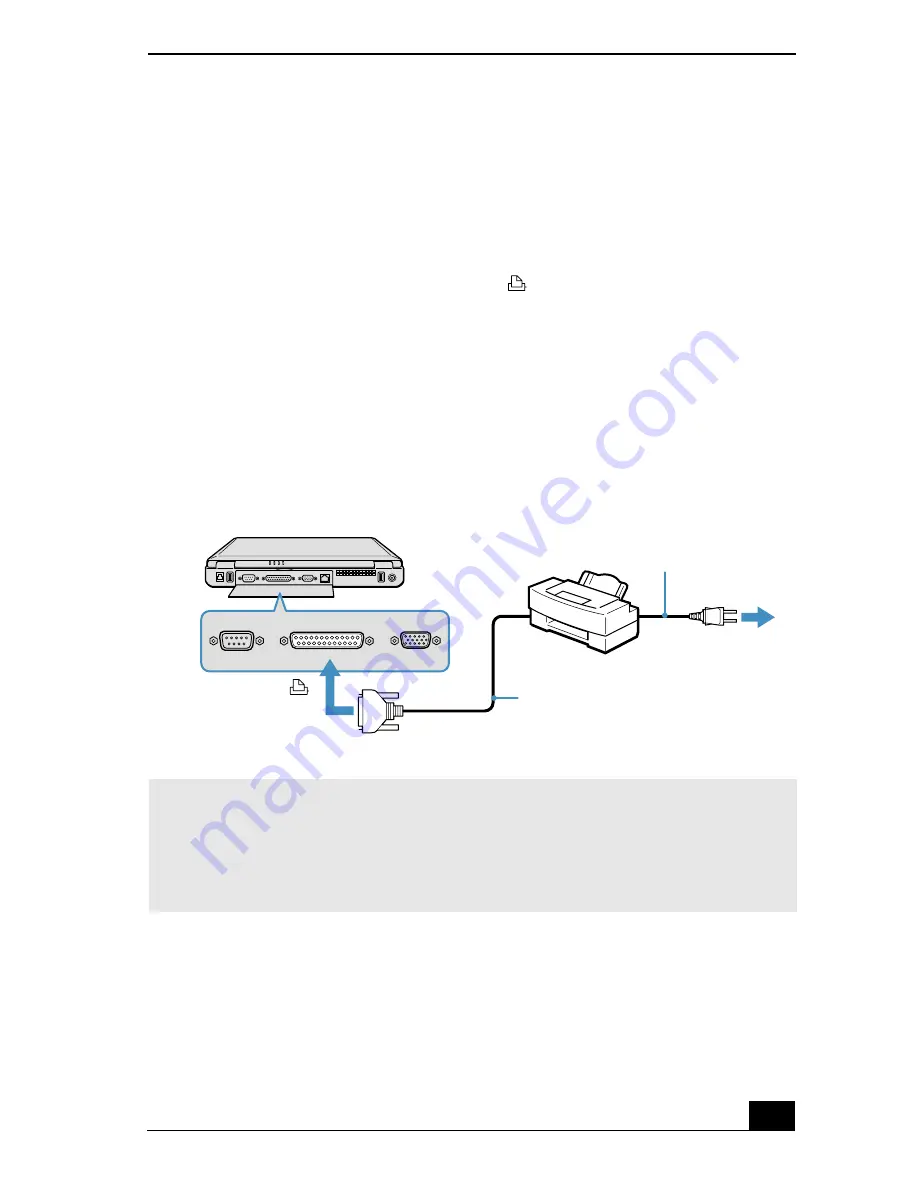
Connecting a Parallel Port Printer
51
Connecting a Parallel Port Printer
You can connect a Windows® compatible printer to your notebook to print
documents.
To connect a printer
1
Locate the Printer port identified by the
symbol.
2
Plug the printer cable (supplied with the printer) into this port on the
notebook.
3
See the manual supplied with your printer for more information on its
installation and use.
Printer port
✍
Before using the printer, you may need to change the Printer setting in the Sony
Notebook Setup software. See “Displaying the Sony Notebook Setup Screen” for more
information.
If your printer stops functioning after resuming from a power-saving mode, see
“Troubleshooting the Printer” for more information.
Printer
Power cord
Printer cable
(supplied with the printer)
to
Printer
Summary of Contents for PCGA-UMS1 Primary
Page 8: ...Change text in this variable definition to document title 8 ...
Page 43: ...Connecting to a LAN 43 4 Follow the step by step instructions that appear on the screen ...
Page 44: ...Change text in this variable definition to document title 44 ...
Page 80: ...Change text in this variable definition to document title 80 ...
Page 104: ...Change text in this variable definition to document title 104 ...
Page 122: ...Change text in this variable definition to document title 122 ...
Page 134: ...Change text in this variable definition to document title 134 Wireless LAN Access Point 65 ...
Page 135: ...Index 135 ...
Page 136: ...Change text in this variable definition to document title 136 ...


