background image

NW-E001 / E002 / E003 / E005 / E001F / E002F / E003F / E005F.GB.2-678-177-11(1)

37


37


Formatting Memory 

(Format)

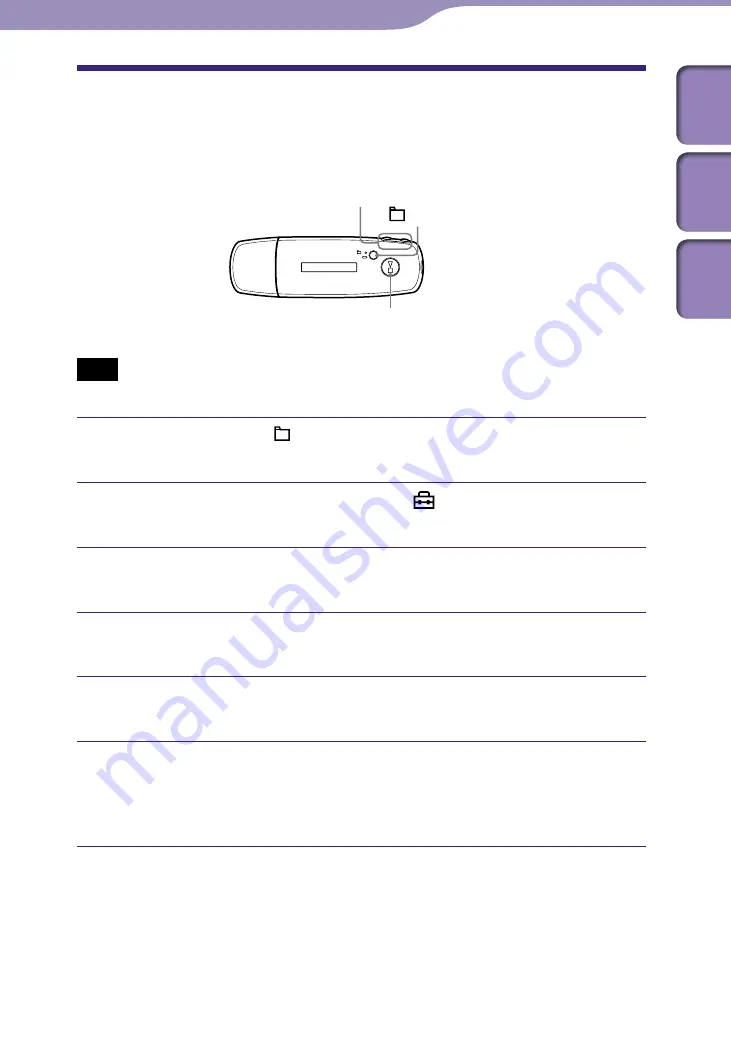
You can format the built-in flash memory of the player.
If the memory’s formatted, all the music data and the other data stored will be 
erased. Be sure to verify the data stored in the memory prior to formatting.

HOME

/

 button



 button

/HOME button

Note

•  Only available while in stop mode.

  Press and hold the  /HOME button in stop mode until the 

HOME screen appears.

  Press the 

/

 button to select   (MENU) and press the 



 button to confirm.

  Press the 

/

 button to select “Advanced Menu>” and 

press the 



 button to confirm.

  Press the 

/

 button to select “Initialize>” and press the 



 button to confirm.

  Press the 

/

 button to select “Format>” and press the 



 button to confirm.

  Press the 

/

 button to select “Ok” and press the 




button to confirm.

“FORMATTING...” appears and formatting starts.
When formatting is complete, “COMPLETE” appears.

Continued 

Settings

Table of 

Contents


Index


Menu

Summary of Contents for NW-E002BLUE - Network Walkman

Page 1: ... 2006 Sony Corporation 2 678 177 11 1 Operation Guide NW E002F E003F E005F E002 E003 E005 Table of Contents Index Menu ...

Page 2: ...o jump to Table of Contents Home Menu List or Index Jumps to the table of contents Find what you are looking for from a list of topics in the manual Jumps to the home menu list Find what you are looking for from a list of the option items in the player s menu Jumps to the index Find what you are looking for from a list of key words mentioned in the manual Hints You can jump to the indicated page b...

Page 3: ...re displayed side by side with each pair part of a continuous roll of pages When you scroll the previous and next pairs of pages scroll up or down continuously Facing Two pages are displayed side by side When you scroll the display changes to previous or succeeding pairs of pages Using SonicStage Help Refer to SonicStage Help for details about using SonicStage such as importing songs to your compu...

Page 4: ...ality Preset Custom 27 Adjusting the Volume Level Dynamic Normalizer 28 Limiting the Volume AVLS 29 Turning Off the Beep Sound Beep 30 Adjusting the Current Time Setting Set Date Time 31 Setting the Date Format Date Disp Type 33 Setting the Time Format Time Disp Type 34 Displaying the Player Information Information 35 Resetting to Factory Settings Reset All Setting 36 Formatting Memory Format 37 C...

Page 5: ...thout Pauses 53 How is Song Information Imported to the Player 54 Storing Data Other Than Audio Files 55 Upgrading the Player s Firmware 56 Troubleshooting Troubleshooting 57 Messages 63 Uninstalling SonicStage 67 Additional Information Precautions 71 On Copyrights 75 Specifications 76 Index 79 Table of Contents Index Menu ...

Page 6: ...ide 1 Do not attempt to play this CD ROM in an audio CD player About the serial number The serial number provided for this player is required for the customer registration The number is on the label on the rear of the player Do not remove the label You can also check the serial number on this player See page 35 for detail Table of Contents Index Menu ...

Page 7: ...en appears and you can operate the following function ALL SONGS 11 FM 43 PLAYLIST 12 MENU Play Mode 16 Sports Timer 18 Sort 19 Scan Sens 48 Mono Auto 49 FM Auto Preset 44 Display Mode 21 Advanced Menu Sound Volume Mode 23 Preset Custom 27 AVLS 29 Beep 30 D Normalizer 28 Date Time Set Date Time 31 Date Disp Type 33 Time Disp Type 34 Information 35 Initialize Reset All Setting 36 Format 37 USB Power...

Page 8: ...skips to the beginning of the song In Folder control mode the player skips to the beginning of the album artist Press and hold this button to display the HOME screen In FM tuner screen NW E002F E003F E005F only you can switch between manual preset tuning modes Display For details on the display and icons see page 10 button Starts song playback When starting playback appears at the top left of the ...

Page 9: ...ning battery indication appear in the display If you slide the HOLD switch to a direction opposite to it the HOLD function is released Strap hole This is used to attach a strap USB cap Remove the USB cap and connect the USB connector to a USB port on your computer directly To remove the USB cap Remove the USB cap as shown below H o m e USB connector RESET button Resets the player page 57 VOL butto...

Page 10: ...mode proceed to the Display Mode menu page 21 Switch the display to Power Save mode when you do not operate the unit for a while Play mode indication Play Mode Displays the current play mode icon page 17 If the play mode is set to Normal no icon appears M N O K L SHUF Song1 Display Playing status indication Displays the current playback mode playback stop fast rewinds fast forwards skips to the be...

Page 11: ...rder through the last song and then stops To skip to the beginning of the song By pressing the button while in play or stop mode the player skips to the beginning of the current or next song By pressing the HOME button and then pressing the button while in play or stop mode the player skips to the beginning of the current or next album artist Hints You can change the playing mode to random repeat ...

Page 12: ...starts playback If you do not play any song playback starts from the first song of the first playlist Playback continues in order through the last song and then stops To skip to the beginning of the song By pressing the button while in play or stop mode the player skips to the beginning of the current or next song By pressing the HOME button and then pressing the button while in play or stop mode ...

Page 13: ...ARCH and press the button to confirm Press the button to select Song and press the button to confirm All songs on the player appear Press the button to select a song and press the button to confirm The song you selected starts playback Playback continues in the order through the last song and then stops Hint The repeat play mode set in the Play Mode menu page 16 does not change when a Search is activ...

Page 14: ... to confirm The album lists for the selected artist appear Press the button to select the desired album and press the button to confirm The song lists for the selected album appear Press the button to select a song and press the button to confirm The song you selected starts playback Playback continues in the order through the last song and then stops Hint The repeat play mode set in the Play Mode me...

Page 15: ...ress the button to select the desired album and press the button to confirm The song lists for the selected album appear Press the button to select a song and press the button to confirm The song you selected starts playback Playback continues in the order through the last song and then stops Hint The repeat play mode set in the Play Mode menu page 16 does not change when a Search is activated Playi...

Page 16: ...s and hold the HOME button until the HOME screen appears Press the button to select MENU and press the button to confirm Press the button to select Play Mode and press the button to confirm Press the button to select a play mode page 17 and press the button to confirm To return to the previous menu Press the HOME button Continued Playing Songs Table of Contents Index Menu ...

Page 17: ...g the current song are played repeatedly Repeat 1 Song one song repeat 1 The current song is played repeatedly Repeat Shuffle All all song shuffle repeat SHUF The current song is played and then all the songs are played in random order Repeat Shuffle Folder folder shuffle repeat SHUF The current song is played and then all songs of the album or artist including the current song are played in rando...

Page 18: ...firm The screen to select the playback time appears Press the button to select the time and press the button to confirm The selected playback time appears and playback starts in the setting order of Play Mode page 16 Remaining time appears while playing the song To return to the previous menu Press the HOME button To return to the normal play mode While playing back a song or in stop mode in Sports ...

Page 19: ...utton until the HOME screen appears Press the button to select MENU and press the button to confirm Press the button to select Sort and press the button to confirm Press the button to select a song order page 20 and press the button to confirm SHUF Song1 Sorting status indication To return to the previous menu Press the HOME button Continued Settings Table of Contents Index Menu ...

Page 20: ...um is set by default Artist Artist order Songs appear in artist order The same artist s songs appear in song name order In folder control mode songs are skipped by artist Artist Album Albums by artist order Songs appear in album order by artist In the album songs appear in song number order In folder control mode songs are skipped by album Settings Changing the Song Order Table of Contents Index M...

Page 21: ...ME button until the HOME screen appears Press the button to select MENU and press the button to confirm Press the button to select Display Mode and press the button to confirm Press the button to select a display mode page 22 and press the button to confirm To return to the previous menu Press the HOME button Continued Settings Table of Contents Index Menu ...

Page 22: ...und quality setting Equalizer 0120 ATRAC 256kbps 0200 01 35 C Clock Displays the day of the week month date and current time For information on setting the time see Adjusting the Current Time Setting Set Date Time page 31 Wind bell Displays animations Hint Set the power save setting page 41 to off to show the screen constantly Note When the sound quality setting Equalizer page 26 is set Off it doe...

Page 23: ...reset levels Low Mid or Hi HOME button button HOME button Setting a volume level for preset mode Preset Press and hold the HOME button until the HOME screen appears Press the button to select MENU and press the button to confirm Press the button to select Advanced Menu and press the button to confirm Press the button to select Sound and press the button to confirm Press the button to select Volume Mo...

Page 24: ... appears in order Low Mid and Hi With this setting you can select the volume level Low Mid or Hi by pressing the VOL button To return to the previous menu Press the HOME button Note If AVLS page 29 is set the actual volume may be lower than the settings Releasing AVLS returns the volume to the preset level Continued Settings Setting the Volume Using the Preset Volume Function Table of Contents Ind...

Page 25: ...m Press the button to select Sound and press the button to confirm Press the button to select Volume Mode and press the button to confirm Press the button to select Manual and press the button to confirm With this setting you can adjust the volume level from 0 to 30 by pressing the VOL button To return to the previous menu Press the HOME button Settings Setting the Volume Using the Preset Volume Func...

Page 26: ... the HOME button List of sound quality settings Setting Description Off Sound quality setting is not activated Default setting Heavy Emphasizes high and low ranges for a powerful sound Pop Stresses the middle range audio ideal for vocals Jazz Emphasizes high and low ranges for a lively sound Custom User customizable sound settings See page 27 for setting Notes If the sound quality setting you choo...

Page 27: ...n to select MENU and press the button to confirm Press the button to select Advanced Menu and press the button to confirm Press the button to select Sound and press the button to confirm Press the button to select Preset Custom and press the button to confirm A line appears above and below the lowest band Press the button to set the level for each band and press the button to confirm Sound quality orde...

Page 28: ...and hold the HOME button until the HOME screen appears Press the button to select MENU and press the button to confirm Press the button to select Advanced Menu and press the button to confirm Press the button to select Sound and press the button to confirm Press the button to select D Normalizer and press the button to confirm Press the button to select On and press the button to confirm To set to off ...

Page 29: ... to select MENU and press the button to confirm Press the to select Advanced Menu and press the button to confirm Press the button to select Sound and press the button to confirm Press the button to select AVLS and press the button to confirm Press the button to select On and press the button to confirm The volume is kept at a moderate level To set to off Select Off in step To return to the previous me...

Page 30: ... the button to confirm Press the button to select Advanced Menu and press the button to confirm Press the button to select Sound and press the button to confirm Press the button to select Beep and press the button to confirm Press the button to select Off and press the button to confirm To change the setting to on Select On in step To return to the previous menu Press the HOME button Settings Table of ...

Page 31: ...nfirm Press the button to select Date Time and press the button to confirm Press the button to select Set Date Time and press the button to confirm A line appears above and below the year digit Press the button to adjust the year setting and press the button to confirm A line appears above and below the month digit As you did in step adjust the settings for month date hour and minute After pressing th...

Page 32: ...ore you can select either a 12 or 24 hour display See Setting the Date Format Date Disp Type page 33 or Setting the Time Format Time Disp Type page 34 Notes If the player is not used for a long time your settings for date and time may need to be reset If the current time is not set appears in the Clock screen page 22 Furthermore when you press buttons while the HOLD function is activated the date ...

Page 33: ...tton to confirm Press the button to select Advanced Menu and press the button to confirm Press the button to select Date Time and press the button to confirm Press the button to select Date Disp Type and press the button to confirm Press the button to select the date format and press the button to confirm mm dd The date format appears month day Default setting dd mm The date format appears day month To...

Page 34: ...ess the button to select MENU and press the button to confirm Press the button to select Advanced Menu and press the button to confirm Press the button to select Date Time and press the button to confirm Press the button to select Time Disp Type and press the button to confirm Press the button to select 12h or 24h and press the button to confirm To return to the previous menu Press the HOME button Sett...

Page 35: ...NU and press the button to confirm Press the button to select Advanced Menu and press the button to confirm Press the button to select Information and press the button to confirm Press the button to show the following information 1 product name 2 built in flash memory capacity 3 serial number 4 version information for the player s firmware Press and hold the HOME button until the display changes To r...

Page 36: ...ton to select MENU and press the button to confirm Press the button to select Advanced Menu and press the button to confirm Press the button to select Initialize and press the button to confirm Press the button to select Reset All Setting and press the button to confirm Press the button to select Ok and press the button to confirm When resetting is completed COMPLETE appears To return to the previous m...

Page 37: ...d the HOME button in stop mode until the HOME screen appears Press the button to select MENU and press the button to confirm Press the button to select Advanced Menu and press the button to confirm Press the button to select Initialize and press the button to confirm Press the button to select Format and press the button to confirm Press the button to select Ok and press the button to confirm FORMATTIN...

Page 38: ... menu Press the HOME button To cancel formatting Select Cancel in step and press the button to confirm Note Do not format the built in flash memory of the player on the computer Settings Formatting Memory Table of Contents Index Menu ...

Page 39: ...ress and hold the HOME button until the HOME screen appears Press the button to select MENU and press the button to confirm Press the button to select Advanced Menu and press the button to confirm Press the button to select USB Power and press the button to confirm Press the button to select 100mA or 500mA and press the button to confirm To return to the previous menu Press the HOME button Hints When ...

Page 40: ...ess the button to confirm Press the button to select Rotation and press the button to confirm Press the button to select R Hand or L Hand and press the button to confirm R Hand You can set the display on the left with the buttons on the right Default setting L Hand You can set the display on the right with the buttons on the left To return to the previous menu Press the HOME button Hint If you change...

Page 41: ...button HOME button Press and hold the HOME button until the HOME screen appears Press the button to select MENU and press the button to confirm Press the button to select Advanced Menu and press the button to confirm Press the button to select Power Save and press the button to confirm Press the button to select the power save setting page 42 and press the button to confirm Continued Settings Table of...

Page 42: ...al Animation appears while playing back a song or receiving an FM signal Power Save display NW E002F E003F E005F only On Normal is set by default On Super Nothing appears in the display This setting uses the least battery consumption Off Screen appears constantly Settings Saving Power Consumption Table of Contents Index Menu ...

Page 43: ... button button HOME button Press and hold the HOME button until the HOME screen appears Press the button to select FM and press the button to confirm The FM tuner screen appears ST FM AND SCAN BY NO MO 90 01 0 MHz FM tuner screen Preset number Frequency Tuning mode The illustrated FM tuner screen may be different from your model Continued Listening to FM Tuner NW E002F E003F E005F only Table of Con...

Page 44: ...ency is selected At that time the sound is not output regardless of the VOL button 2 Presetting broadcast stations automatically FM Auto Preset You can preset receivable broadcast stations up to 30 stations in your area automatically by selecting FM Auto Preset This is convenient when you use the FM tuner for the first time or when you change to a new area Note The FM Auto Preset operation will de...

Page 45: ... too sensitive change the reception setting page 48 to Low 3 Selecting broadcast stations There are 2 ways manual or preset tuning to select broadcast stations HOME button HOME button Press the HOME button to enter manual tuning mode Press the HOME button again if you want to change the setting from manual tuning mode to preset tuning mode Manual Tuning In manual tuning mode you can select broadca...

Page 46: ...reception is too sensitive change the reception setting page 48 to Low If you press and hold the button in Sleep mode the frequency decreases or increases and the previous or next broadcast station is not found and sound is not output Preset Tuning preset number and frequency appear on the FM tuner screen from the left in order To Operation Select the previous preset number Press the button Select...

Page 47: ...ncy Hint You can preset up to 30 stations P01 to P30 Note The preset number is always sorted from low to high frequency order To delete preset broadcast stations Select the desired frequency s preset number Press and hold the button Press the button to select Ok and press the button to confirm The preset broadcast station is deleted and the next one appears To cancel deletion of the preset broadcas...

Page 48: ... button HOME button Press and hold the HOME button until the HOME screen appears Press the button to select MENU and press the button to confirm Press the button to select Scan Sens and press the button to confirm Press the button to select Low and press the button to confirm To set back the reception Select High in step To return to the previous menu Press the HOME button Listening to FM Tuner NW E0...

Page 49: ...OME button Press and hold the HOME button until the HOME screen appears Press the button to select MENU and press the button to confirm Press the button to select Mono Auto and press the button to confirm Press the button to select Mono and press the button to confirm To return to the automatic setting Select Auto in step To return to the previous menu Press the HOME button Listening to FM Tuner NW E...

Page 50: ...ou transfer audio file s to the player while charging On the remaining battery indication The battery icon in the display page 10 changes as shown below See page 77 on battery duration The battery power gets low as shown in the battery icon If LOW BATTERY appears you cannot play back with the player In this case charge the battery by connecting to your computer Notes Charge the battery in an ambie...

Page 51: ...rs of playing time for songs in ATRAC format at 48 kbps but only about 19 hours for songs in WMA format at 128 kbps The exact playing time available from a full charge varies with the operating conditions and environment of the player Do not let your computer sleep when the player is connected If the computer enters a power saving mode such as the system suspend sleep or hibernation while the play...

Page 52: ...atisfies the demand for both high sound quality and high compression rates ATRAC3 can compress audio files to about 1 10 the size of standard CD audio tracks ATRAC3plus a more advanced version of ATRAC3 can compress audio files to about 1 20 the size of standard CD audio tracks What is bit rate Bit rate refers to the amount of data used to store each second of audio Generally higher bit rates prov...

Page 53: ...he songs For example an album that includes a long recording of a live performance with no pauses between songs can be played continuously without pauses after the songs are imported to SonicStage in ATRAC format and then transferred to the player Note For songs to be played without pauses you must import all the songs to SonicStage as a single album in the same ATRAC format Table of Contents Inde...

Page 54: ...charge When songs are transferred to the player this song information is transferred along with the songs Having this information attached to your songs makes possible various advanced searching features of the player Note Song information of some CDs may not be able to retrieved from the Internet For songs that are not in the Internet database you can manually enter and edit song information in S...

Page 55: ...Explorer to interact with the built in flash memory of the player Always use SonicStage to transfer audio files that you want to play to the player Audio files transferred with Windows Explorer cannot be played by the player Do not disconnect the player from the computer while transferring data because the data being transferred could be damaged Do not format the built in flash memory using Window...

Page 56: ...alkman com For customers in Latin America http www sony latin com pa info For customers in other countries or areas http www css ap sony com For customers who purchased the overseas models http www sony co jp overseas support Download Digital Player Software Update tool to your computer from the web site Connect the player to your computer and then start up Digital Player Software Update tool Foll...

Page 57: ...or customers in Europe visit http www support nwwalkman com For customers in Latin America visit http www sony latin com pa info For customers in other countries or areas visit http www css ap sony com For customers who purchased the overseas models visit http www sony co jp overseas support 5 If the approaches listed above fail to resolve the issue consult your nearest Sony dealer Operation Sympt...

Page 58: ...ta is being transferred Transfer usable files back to your computer and format the built in flash memory using the Format menu of the player page 37 The volume is not loud enough AVLS is enabled Disable AVLS page 29 There is no sound from either right or left channel of the headphones The headphone jack is not fully inserted Connect the headphones into the jack until it clicks page 8 Playback has ...

Page 59: ...ing an error may occur This is especially true for programs that require significant system resources such as virus protection software There is not enough free space on the hard disk of your computer You need 200 MB or more of free space Delete any unnecessary files on your computer You are not logged on as an Administrator If you are not logged on as an Administrator the installation of SonicSta...

Page 60: ... The player USB connection USB Power is set to 500mA Set the USB Power to 100mA page 39 The installation of the SonicStage software was not successful Disconnect the player from your computer and reinstall the software using the supplied CD ROM Quick Start Guide Audio songs registered with the earlier installation will be available with the new SonicStage installation The player is not recognized ...

Page 61: ...e in the built in flash memory Transfer any unnecessary songs back to your computer to increase free space Non audio data is stored in the built in flash memory Move non audio data to the computer to increase free space Audio data cannot be transferred back to your computer from the player The computer you are trying to transfer songs to is not the same computer from which the songs were originall...

Page 62: ...headphone cord does not extend enough The headphone cord functions as an antenna Extend the headphone cord as far as possible The FM broadcast is affected by interference An apparatus emitting radio signals such as a mobile phone is being used near the player When using such apparatus as mobile phones keep them away from the player Other Symptom Cause Remedy There is no beep sound when the player ...

Page 63: ... To delete abnormal data from the built in flash memory page 66 CHARGE ERROR The power supply is abnormal Try using another computer DATA ACCESS Accessing the built in flash memory Please wait for access to complete This message appears while the built in flash memory is being accessed DRM ERROR An unauthorized distribution file is detected for copyright protection Transfer the normal audio file b...

Page 64: ...tion page 9 LOW BATTERY The battery is low You must charge the battery page 50 MEMORY ERROR There is a problem with the built in flash memory Format the player using the Format menu For details refer to To delete abnormal data from the built in flash memory page 66 If this message still appears consult your nearest Sony dealer NO DATA There are no audio files in the built in flash memory If there ...

Page 65: ...here is a problem with the hardware Consult your nearest Sony dealer UPDATE ERROR When the player fails to update the firmware or while the player updates the firmware USB connection is disconnected Be sure to connect the USB connector properly or recharge the player fully If this message still appears reset the player page 57 USB CONNECT The player is connected to a computer This is not a malfunc...

Page 66: ...e procedure below to erase data you cannot play 1 Connect the player to the computer and start SonicStage 2 If you have already specified the data with problems erase the data using SonicStage 3 If the problem persists transfer all data without problems back to the computer using SonicStage while the player is connected to the computer 4 Disconnect the player from the computer and then format the ...

Page 67: ...he uninstallation is completed when the computer has restarted 1 Settings Control Panel in the case of Windows 2000 Professional Windows Millennium Edition Windows 98 Second Edition 2 Change Remove in the case of Windows 2000 Professional Add Remove in the case of Windows Millennium Edition Windows 98 Second Edition Note When you install SonicStage OpenMG Secure Module is installed at the same tim...

Page 68: ...CC Rules These limits are designed to provide reasonable protection against harmful interference in a residential installation This equipment generates uses and can radiate radio frequency energy and if not installed and used in accordance with the instructions may cause harmful interference to radio communications However there is no guarantee that interference will not occur in a particular inst...

Page 69: ...Y Model No NW E002F E003F E005F Responsible Party Sony Electronics Inc Address 16530 Via Esprillo San Diego CA 92127 U S A Telephone Number 858 942 2230 This device complies with Part 15 of the FCC Rules Operation is subject to the following two conditions 1 This device may not cause harmful interference and 2 this device must accept any interference received including interference that may cause ...

Page 70: ...roduct or on its packaging indicates that this product shall not be treated as household waste Instead it shall be handed over to the applicable collection point for the recycling of electrical and electronic equipment By ensuring this product is disposed of correctly you will help prevent potential negative consequences for the environment and human health which could otherwise be caused by inapp...

Page 71: ...ime On the headphones Road safety Do not use headphones while driving cycling or operating any motorized vehicle It may create a traffic hazard and is illegal in many areas It can also be potentially dangerous to play at a high volume while walking especially at pedestrian crossings You should exercise extreme caution or discontinue use in potentially hazardous situations Preventing hearing damage...

Page 72: ...htly moistened with water or a mild detergent solution Do not use any type of abrasive pad scouring powder or solvent such as alcohol or benzene as it may mar the finish of the case Clean the headphone plug periodically Be careful not to let water get into the player from the opening near the connector If you have any questions or problems concerning the player please consult your nearest Sony dea...

Page 73: ...e to continued efforts to improve quality the software specifications may be changed without notice Operation of this player with software other than that provided is not covered by the warranty The ability to display the languages on your SonicStage will depend on the installed OS on your PC For better results please ensure that the installed OS is compatible with the desired language you want to...

Page 74: ...city of the connected player The player is not functioning normally The ID3 TAG information for the song is written in the language or the character that is not supported by the player About the customer support Web site If you have any questions about or issue with this product visit the following web sites For customers in the USA http www sony com walkmansupport For customers in Canada http www...

Page 75: ...osh is a trademark of Apple Computer Inc Pentium is a trademark or a registered trademark of Intel Corporation CD and music related data from Gracenote Inc copyright 2000 2004 Gracenote Gracenote CDDB Client Software copyright 2000 2004 Gracenote This product and service may practice one or more of the following U S Patents 5 987 525 6 061 680 6 154 773 6 161 132 6 230 192 6 230 207 6 240 459 6 33...

Page 76: ...min 170 11 hr 20 min 256 kbps 64 4 hr 10 min 130 8 hr 40 min 320 kbps 51 3 hr 20 min 100 6 hr 40 min 352 kbps 46 3 hr 00 min 94 6 hr 10 min NW E005F E005 Bit rate Songs Time 48 kbps 1 350 90 hr 00 min 64 kbps 1 000 66 hr 40 min 96 kbps 690 46 hr 00 min 128 kbps 520 34 hr 40 min 132 kbps 500 33 hr 20 min 160 kbps 415 27 hr 40 min 192 kbps 345 23 hr 00 min 256 kbps 260 17 hr 20 min 320 kbps 205 13 h...

Page 77: ...5 F Power source Built in rechargeable lithium ion battery USB power from a computer through the USB connector of the player Battery life continuous playback ATRAC format Approximately 28 hours Playback at 132 kbps ATRAC format Approximately 25 hours Playback at 128 kbps ATRAC format Approximately 27 hours Playback at 48 kbps MP3 format Approximately 27 hours Playback at 128 kbps WMA format Approx...

Page 78: ...lution 800 600 pixels or higher recommended 1024 768 or higher Colors High Color 16 bit or higher SonicStage may not operate properly at color settings at or below 256 colors CD ROM drive supporting Digital Music CD playback capabilities using WDM To create original CDs or to back up audio CDs a CD R RW drive is required Sound board USB port Internet connection is required to use the CD Data Base ...

Page 79: ... Messages 63 Mono Auto 49 MP3 52 76 Index Additional Information Continued Symbols Album 20 Artist 20 Artist Album 20 Folder 17 1 Repeat 1 Song 17 Repeat All 17 Repeat Folder 17 SHUF Repeat Shuffle All 17 SHUF Repeat Shuffle Folder 17 A Accessories 6 Adobe Reader 3 Album 15 ALL SONGS 11 Artist 14 ATRAC 52 76 AVLS Limiting the volume 29 B Battery 50 51 Beep Beep sound 30 Bit rate 52 C Charge the ba...

Page 80: ...tist 14 by song name 13 Searching for Songs 13 Serial Number 35 Set Date Time 31 Set the current time 31 Shuffle 17 Skip to the beginning of a song 8 Song Information 54 Song order 19 SonicStage 3 67 Sort 19 Sound 23 27 28 29 30 Sound quality 26 27 Sports Timer 18 T Time Disp Type 34 Transferring 3 Troubleshooting 57 Tuner 43 U Uninstalling 67 USB Power USB connection setting 39 V Volume 9 23 28 V...

Reviews: