55
Step 9: Creating Backup Data
Step 9: Creating Backup
Data
After checking that each device is installed and configured
correctly in
“Step 8: Checking System Settings and Device
Connections (Checklist)” (page 49)
, it is recommended
that you create and save backup data just in case the NSM
server fails.
Windows Server 2012 Backup
Function
A full backup of NSM server data can be acquired using
the backup function provided in Windows Server 2012.
If an NIC is replaced due to PC failure or other cause, it is
necessary to reconfigure the IP address, obtain a new
license, and activate the license after PC recovery from
backup data. For details about configuration, see
and
System Manager License” (page 26)
. However, these
steps are not required if replacing the hard disk only.
Acquiring Backup Data
This section describes how to create a full backup of the
NSM server and save the backup data to a hard disk.
Individual files and folders cannot be recovered from
backup data created using this procedure. The backup data
created can be used for total system recovery only.
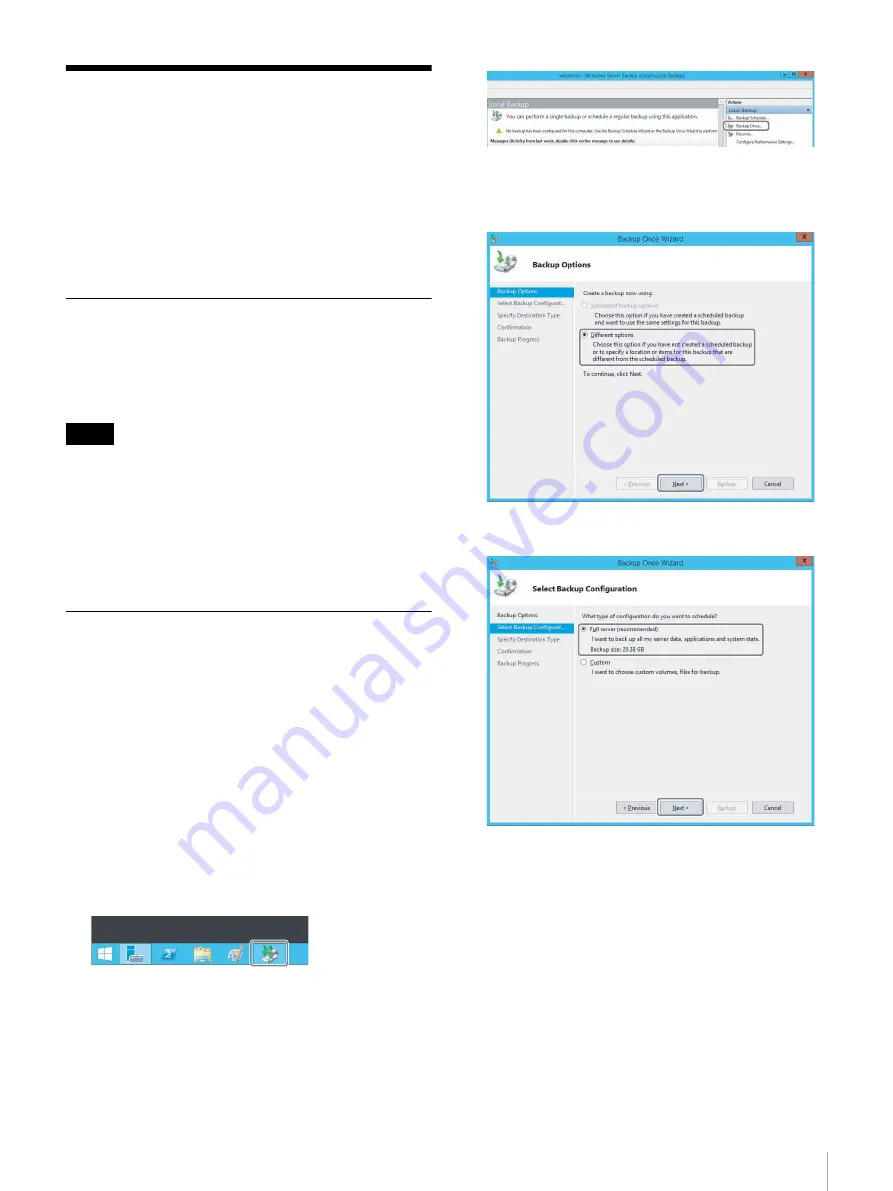
Use the following procedure to create backup data and to
save the backup data to a hard disk.
1
Select the [Windows Server Backup] icon in the
desktop taskbar.
If the [Windows Server Backup] icon is not displayed,
open [Server Manager] and select [Windows Server
Backup] from the [Tools] menu.
The [wbadmin] screen appears.
2
Click [Backup Once] in the [Actions] pane.
The [Backup Once Wizard] dialog appears.
3
Select [Different options], and click the [Next] button.
4
Select [Full server], and click the [Next] button.
5
Select [Local drives], and click the [Next] button.
Note


