background image

18

nN

X
x

. >

m M

VOL +/–

TAPE A/B

x

X

VOLUME

. >

VOLUME

MHz

kHz

ALL DISCS

ß

m

M

3

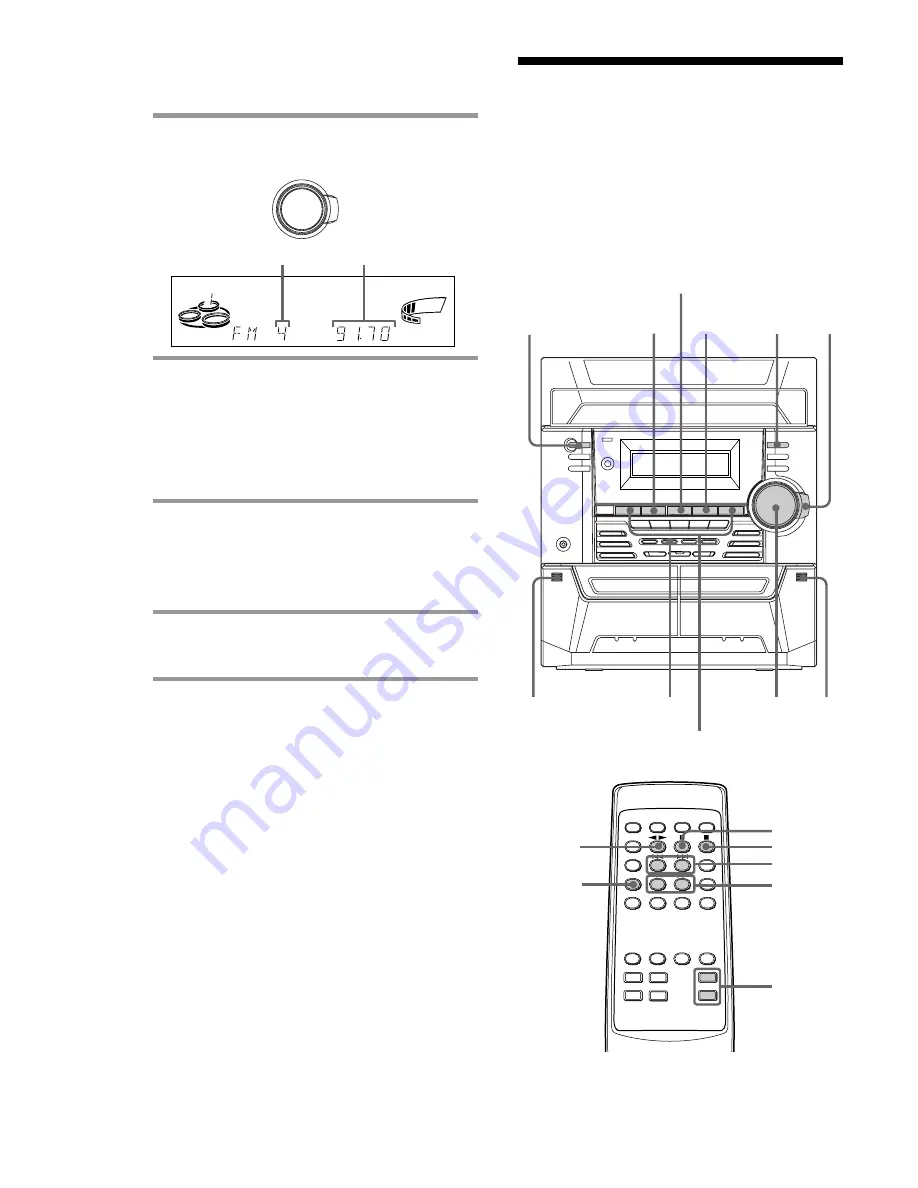
Turn the shuttle until it clicks to
tune in a preset station.

4

Press REC.

Deck B stands by to record in the
direction of the indicator on 

hH

 (the

right indicator lights to record on the
forward side and the left indicator lights
to record on the reverse side).

5

Press DIRECTION repeatedly to
select 

G

 to record on one side.

Select 

j

 (or RELAY) to record on

both sides.

6

Press REC PAUSE.

Recording starts.

To stop recording

Press 

x

.

Tips

• If you want to record from the reverse side, press

TAPE A/B repeatedly to select deck B after step 1.
Press 

hH

 to start playback of the reverse side,

then press 

x

 where you want to start recording.

• When you record on both sides, be sure to start

from the front side. If you start from the reverse
side, recording stops at the end of the reverse side.

• To record non-preset stations, use + and – in step 3

to tune in the desired station manually.

• If noise is heard while recording from the radio,

move the respective antenna to reduce the noise.

Playing a tape

You can use a TYPE I (normal) tape. You can
also use 

./>

 to quickly search for songs

you want to hear (AMS* function). To select
either deck A or B, press TAPE A/B
repeatedly.

* AMS (Automatic Music Sensor)

1

2

3

2

?/1

(Power)

Turn clockwise
for higher
preset numbers.

Turn counter-
clockwise for
lower preset
numbers.

Preset number

Frequency

4

Shuttle

Recording from the radio
(continued)

Summary of Contents for MHC-BX6AV

Page 1: ...7 084 12 1 MHC BX6AV DX6AV Owner s Record The model and serial numbers are located on the rear panel Record the serial number in the space provided below Refer to them whenever you call upon your Sony dealer regarding this product Model No _______________ Serial No _______________ ...

Page 2: ...the equipment into an outlet on a circuit different from that to which the receiver is connected Consult the dealer or an experienced radio TV technician for help CAUTION You are cautioned that any changes or modifications not expressly approved in this manual could void your authority to operate this equipment NOTICE FOR THE CUSTOMERS IN CANADA CAUTION TO PREVENT ELECTRIC SHOCK DO NOT USE THIS PO...

Page 3: ...ing the CD tracks 24 The Tape Deck Recording on a tape manually 26 Recording a CD by specifying track order 27 Sound Adjustment Adjusting the sound 29 Selecting the audio emphasis 29 Changing the spectrum analyzer display 30 Selecting surround effects 30 Enjoying Dolby Pro Logic Surround sound 31 Other Features Using the Radio Data System RDS 32 Falling asleep to music 34 Waking up to music 35 Tim...

Page 4: ...ft Front speaker Right Rear surround speaker Left Rear surround speaker Right 1 Connect the front speakers Connect the speaker cords to the FRONT SPEAKER jacks as below Insert only the stripped portion Black Stripe Red Solid 3 Notes Keep the speaker cords away from the antennas to prevent noise The type of speakers supplied vary according to the model you purchased see Specifications on page 46 FM...

Page 5: ...akers on top of a TV This may cause color distortion in the TV screen Be sure to connect both left and right rear surround speakers Otherwise the sound will not be heard 3 Connect the center surround speaker Connect the speaker cords to the CENTER SPEAKER jacks Note Keep the speaker cords away from the antennas to prevent noise Insert only the stripped portion Black Stripe Red Solid 3 Extend the F...

Page 6: ... DISPLAY once MHC DX6AV or twice MHC BX6AV while the system is off Tip You can reinforce the bass sound by connecting an optional super woofer to the super woofer connector To attach the speaker pads Attach the supplied speaker pads to the bottom of the speakers to stabilize the speakers and prevent them from slipping Center surround speaker Inserting two size AAA R03 batteries into the remote Tip...

Page 7: ...urround speaker L Rear surround speaker R 45 Step 2 Setting up your speakers Connecting the supplied rear and center surround speakers enables you to fully enjoy Dolby Pro Logic Surround sound Dolby Pro Logic Surround is a decoding system standardized in TV programs and movies Dolby Pro Logic Surround improves the sound image by using four separate channels These channels manipulate the sound to b...

Page 8: ...aker become the same 4 Press T TONE when you are done adjusting The test tone turns off Tip If you turn VOLUME or press VOL on the remote all the speaker volumes change Note The test tone feature works only for Dolby Pro Logic Surround sound Step 2 Setting up your speakers continued Adjusting the speaker volume To enjoy Dolby Pro Logic Surround sound turn on the Dolby Pro Logic mode then adjust th...

Page 9: ... 4 Press or repeatedly to set the minute 5 Press ENTER The clock starts working Tip If you make a mistake start over from step 1 To change the time The previous explanation shows how to set the time while the power is off To change the time while the power is on do the following 1 Press CLOCK TIMER SET 2 Press or repeatedly to select SET CLOCK 3 Press ENTER 4 Perform steps 2 through 5 above Notes ...

Page 10: ...n starts to change then release Scanning stops automatically when a station is tuned in TUNED and STEREO for a stereo program appear in the display 3 Press TUNER MEMORY A preset number appears in the display The stations are stored from preset number 1 Preset number Step 4 Presetting radio stations You can store a total of 30 preset stations 20 for FM and 10 for AM 2 3 4 1 1 Power Shuttle ...

Page 11: ...cks to select the preset number you want to erase Select ALL ERASE when you want to erase all the preset stations 3 Press ENTER COMPLETE appears in the display When you erase a preset number the preset number decreases by one and all preset numbers following the erased one are renumbered To change the AM tuning interval Except for the European and Middle Eastern models The AM tuning interval is fa...

Page 12: ...wer is off Each time you press the button the system switches as follows t Demonstration t Clock Power Saving Mode T The system is turned on off by pressing 1 Tips 1 indicator and timer indicator when the timer is set light even in the Power Saving Mode The timer functions in the Power Saving Mode To cancel the Power Saving Mode Press DISPLAY once to show the demonstration twice to show the clock ...

Page 13: ...CD is selected as the function and the disc tray is closed playback starts from the CD loaded on the tray whose number is displayed Playing a CD Normal Play Basic Operations You can play up to three CDs in a row Place with the label side up When you play a CD single 8 cm CD place it on the inner circle of the tray 2 1 Disc tray number Playing time Track number 1 Power Shuttle continued nN CD X x m...

Page 14: ...r in stop mode DISC SKIP EX CHANGE or DISC SKIP on the remote Play only the Press PLAY MODE CD you have repeatedly until 1 DISC selected appears Play all CDs Press PLAY MODE repeatedly until ALL DISCS appears Remove the CD Press Z OPEN CLOSE Exchange other Press DISC SKIP CDs while EX CHANGE playing Adjust the Turn VOLUME or press VOL volume on the remote Tips You can switch from another source to...

Page 15: ...d on both sides 6 Press REC PAUSE Recording starts To stop recording Press x Tips If you want to record from the reverse side press TAPE A B repeatedly to select deck B after step 1 Press hH to start playback of the reverse side then press x where you want to start recording When you record on both sides be sure to start from the front side If you start from the reverse side recording stops at the...

Page 16: ...e desired preset station When only one station is preset ONE PRESET appears in the display Listening to the radio Preset Tuning Preset radio stations in the system s memory first see Step 4 Presetting radio stations on page 10 2 1 Preset number Frequency 1 Power Turn counter clockwise or press PRESET on the remote for lower preset numbers Turn clockwise or press PRESET on the remote for higher pre...

Page 17: ...e remote To listen to non preset radio stations Use manual or automatic tuning in step 2 For manual tuning press or or TUNING on the remote repeatedly For automatic tuning press and hold or or TUNING on the remote Tips You can switch from another source to the radio just by pressing TUNER BAND Automatic Source Selection When an FM program is noisy press STEREO MONO so that MONO appears in the disp...

Page 18: ...ss hH to start playback of the reverse side then press x where you want to start recording When you record on both sides be sure to start from the front side If you start from the reverse side recording stops at the end of the reverse side To record non preset stations use and in step 3 to tune in the desired station manually If noise is heard while recording from the radio move the respective ant...

Page 19: ...r the beginning of the current or the next track AMS To go forward Press during playback when the right indicator on hH lights TAPE A or TAPE B 1 appears Press during playback when the left indicator on hH lights TAPE A or TAPE B 1 appears To go back Press during playback when the right indicator on hH lights TAPE A or TAPE B 1 appears Press during playback when the left indicator on hH lights TAP...

Page 20: ...side and the left indicator lights to record on the reverse side Recording from a tape 4 Press REC PAUSE Recording starts 5 Press hH To stop recording Press x Tip If you want to record from the reverse side press TAPE A B repeatedly to select deck B after step 2 Press hH to start playback of the reverse side then press x where you want to start recording You can use a TYPE I normal tape With the s...

Page 21: ...the current track and PLAY x Clock display for ten seconds x Effect status When playback is stopped During Program Play mode when there is a program The last track number of the program and the total playing time x The last track number of the program and the total number of programmed tracks x Clock display for ten seconds x Effect status In other conditions The current disc number x Total number...

Page 22: ...repeatedly until REPEAT or REPEAT 1 disappears from the display To repeat Press All the tracks on PLAY MODE repeatedly the current CD until 1 DISC appears up to five times in the display All the tracks on PLAY MODE repeatedly all CDs up to five until ALL DISCS times 1 appears in the display Only one track 2 REPEAT repeatedly until REPEAT 1 appears in the display while playing the track you want to...

Page 23: ...les all the CDs in the player 1 DISC SHUFFLE shuffles tracks on the CD whose disc number is lit 3 Press hH All the tracks play in random order To cancel Shuffle Play Press PLAY MODE repeatedly until SHUFFLE or PROGRAM disappears from the display The tracks continue playing in their original order To select a desired CD Press DISC 1 3 Tips You can start Shuffle Play during Normal Play by pressing P...

Page 24: ...by the total playing time 6 To program additional tracks repeat steps 3 to 5 Skip step 3 to select tracks from the same disc 7 Press hH All the tracks play in the order you selected SHUFFLE REPEAT1 ALL 1DISCS PROGRAM STEP VOLUME SYNC ß nN CD x CHECK CLEAR p Programming the CD tracks Program Play You can make a program of up to 32 tracks from all the CDs in the order you want them to be played Disc...

Page 25: ...3 button 2 Select the track by pressing 3 Press ENTER Clear the entire x once in stop mode or program twice during playback Tips The program you made remains in the system s memory even after it has been played back Press CD then press hH to play the same program again If appears instead of the total playing time during programming this means you have programmed a track number which exceeds 20 the...

Page 26: ... lights to record on the reverse side x Recording on a tape manually 4 Press DIRECTION repeatedly to select g to record on one side Select j or RELAY to record on both sides 5 Press REC PAUSE Recording starts 6 Press hH to start playing the source to be recorded To Press Stop recording x Pause recording REC PAUSE Tips If you want to record from the reverse side press TAPE A B repeatedly to select ...

Page 27: ...R The track is programmed The program step number appears followed by the total playing time 7 To program additional tracks repeat steps 4 to 6 Skip step 4 to select tracks from the same disc Recording a CD by specifying track order Program Edit 1 2 4 6 8 You can record tracks from all the CDs in the order you want When programming make sure the playing times for each side do not exceed the length...

Page 28: ...it Press PLAY MODE repeatedly until PROGRAM or SHUFFLE disappears from the display Selecting tape length automatically Tape Select Edit You can check the most suitable tape length for recording a CD Note that you cannot use Tape Select Edit for discs containing over 20 tracks 1 Place a CD 2 Press CD 3 Press EDIT once so that EDIT flashes The required tape length for the currently selected CD appea...

Page 29: ... Feedback To listen through the headphones Connect the headphones to PHONES jack No sound will come from the speakers FILE SELECT GROOVE PHONES Press FILE SELECT repeatedly until the effect you desire ROCK POP JAZZ or GAME appears in the display To cancel the effect Press FILE SELECT repeatedly until FLAT appears in the display Tip SUR appears if you select an effect with surround effects Adjustin...

Page 30: ...ED THEATER Reproduces the acoustics of a large movie theater DSP OFF Turns off the DSP mode The indicator on the front panel s DSP button lights up Note When you choose other sound effects the surround effects will be canceled DSP SPECTRUM Changing the spectrum analyzer display You can enjoy changing the display while listening to the music Press SPECTRUM Each time you press the button the display...

Page 31: ...m source The indicator on the front panel s DOLBY PRO LOGIC button lights up PRO LOGIC DOLBY PRO LOGIC To cancel the Dolby Pro Logic Surround sound Press DOLBY PRO LOGIC or PRO LOGIC on the remote again to turn off the indicator on the front panel s DOLBY PRO LOGIC button Notes You cannot use both Dolby Pro Logic Surround sound and the DSP surround effects at the same time When recording the sound...

Page 32: ... radio stations for details on RDS services in your area Receiving RDS broadcasts Simply select a station from the FM band When you tune in a station that provides RDS services the station name appears in the display Using the Radio Data System RDS European model only What is the Radio Data System 1 3 5 1 Power 2 4 To check the RDS information Each time you press DISPLAY the display changes as fol...

Page 33: ...ice SPORT Sports programs EDUCATE Educational programs such as how to programs and advice DRAMA Radio plays and serials CULTURE Programs about national or regional culture language and social concerns SCIENCE Programs about the natural sciences VARIED Programs containing celebrity interviews panel games and comedy POP M Popular music programs ROCK M Rock music programs EASY M Easy listening middle...

Page 34: ... SLEEP repeatedly until the time you want appears To cancel the Sleep Timer function Press SLEEP repeatedly until SLEEP OFF appears TRAVEL Programs about travel Not for announcements that are located TP TA LEISURE Programs on recreational activities such as gardening fishing cooking etc JAZZ Jazz programs COUNTRY Country music programs NATION M Programs featuring the popular music of the country o...

Page 35: ...ing to the radio on page 16 2 Adjust the volume 3 Press CLOCK TIMER SET SET DAILY 1 appears Waking up to music Daily Timer 2 4 5 8 3 4 5 7 9 continued 4 Press or repeatedly to select DAILY 1 or 2 then press ENTER ON appears and the hour indication flashes in the display 5 Set the time to start playback Press or repeatedly to set the hour then press ENTER The minute indication starts flashing Press...

Page 36: ...d by the start time stop time and the music source appear then the original display appears 9 Turn off the power To check the setting Press CLOCK TIMER SELECT and press or repeatedly to select the respective mode DAILY 1 or DAILY 2 then press ENTER To change the setting start over from step 1 To cancel the timer operation Press CLOCK TIMER SELECT and press or repeatedly to select TIMER OFF then pr...

Page 37: ...the preset radio station to be recorded e g TUNER FM 5 appear then the original display appears 6 Insert a recordable tape 7 Turn off the power When the recording starts the volume level is set to the minimum To check the setting Press CLOCK TIMER SELECT and press or repeatedly to select REC then press ENTER To change the setting start over from step 1 To cancel the timer operation Press CLOCK TIM...

Page 38: ...o components continued Note If you cannot select MD when you press MD VIDEO press 1 while pressing MD VIDEO when the power is turned off VIDEO will be switched to MD To return to VIDEO do the same procedure However you cannot switch from MD to VIDEO or from VIDEO to MD when the system is in the Power Saving Mode see page 12 To super woofer Connecting a super woofer speaker You can connect an optio...

Page 39: ...VIDEO or from VIDEO to MD when the system is in the Power Saving Mode see page 12 To return to MD press 1 while pressing MD VIDEO again when the power is turned off When you connect a VIDEO CD deck set to MD Connecting a DVD player When your DVD player has 5 1 channel analog outputs Be sure to match the color of the plugs and the connectors To listen to the sound from the connected DVD player pres...

Page 40: ...our DVD player to the FRONT jacks of DVD INPUT with the audio connecting cable To listen to the sound from the connected DVD player press DVD 5 1CH to turn off the indicator on the button Notes Each time you press DVD 5 1CH the function changes as follows DVD 5 1CH y DVD 2 channel indicator on indicator off You cannot enjoy the 5 1 channel surround sound if you connect a DVD player which does not ...

Page 41: ...1 AM antenna Connect a 6 to 15 meter insulated wire to the AM antenna terminal Leave the supplied AM loop antenna connected Jack type A Jack type B Insulated wire not supplied Insulated wire not supplied ...

Page 42: ... is not to be used for an extended period of time To disconnect the cord mains lead pull it out by the plug Never pull the cord itself Should any solid object or liquid fall into the component unplug the stereo system and have the component checked by qualified personnel before operating it any further The AC power cord must be changed only at a qualified service shop On placement Place the stereo...

Page 43: ... the stripped portion of the speaker cord into the SPEAKER jack Inserting the vinyl portion of the speaker cord will obstruct the speaker connections There is no audio output during timer recording Before placing a cassette in the tape deck Take up any slack in the tape Otherwise the tape may get entangled in the parts of the tape deck and become damaged When using a tape longer than 90 minutes Th...

Page 44: ...tes If the color irregularity still persists place the speakers farther away from the TV set Speakers Sound comes from one channel or unbalanced left and right volume Check the speaker connection and speaker placement The sound comes from the center speaker only The source being played back is monaural Press DOLBY PRO LOGIC to turn off the Pro Logic mode There is no sound from the center speaker S...

Page 45: ... high frequencies are erased The record playback heads are magnetized Demagnetize them see Demagnetizing the tape heads on page 43 After pressing hH or A there is a mechanical noise EJECT appears in the display and the unit enters standby mode automatically The cassette tape was not inserted correctly Eject the tape and turn the power back on Tuner There is severe hum or noise TUNED or STEREO flas...

Page 46: ... power output rated 30 watts 6 ohms at 1 kHz DIN Continuous RMS power output reference 40 watts 8 ohms at 1 kHz 10 THD Rear Speaker DIN power output rated 30 30 watts 6 ohms at 1 kHz DIN Continuous RMS power output reference 40 40 watts 6 ohms at 1 kHz 10 THD AUDIO POWER SPECIFICATIONS MHC BX6AV U S A model only POWER OUTPUT AND TOTAL HARMONIC DISTORTION with 6 ohm loads both channels driven from ...

Page 47: ... mV phono jacks impedance 47 kilohms DVD INPUT FRONT IN voltage 450 mV phono jacks impedance 47 kilohms REAR IN voltage 450 mV phono jacks impedance 47 kilohms CENTER IN voltage 450 mV phono jacks impedance 47 kilohms WOOFER IN voltage 450 mV phono jacks impedance 47 kilohms Outputs PHONES accepts headphones of stereo mini jack 8 ohms or more FRONT SPEAKER accepts impedance of 6 to 16 ohms REAR SP...

Page 48: ... speaker North American model SS BX6AV for MHC BX6AV Speaker system 2 way bass reflex type magnetically shielded type Speaker units Woofer 14 cm cone type Tweeter 5 cm cone type Nominal impedance 6 ohms Dimensions w h d Approx 220 x 325 x 230 mm Mass Approx 3 4 kg net per speaker European model SS BX6AV for MHC BX6AV Speaker system 2 way bass reflex type magnetically shielded type Speaker units Wo...

Page 49: ...49 ...

Page 50: ...50 ...

Page 51: ...51 ...

Page 52: ...5 S Saving recordings 42 Selecting the audio emphasis 29 Setting the time 9 Shuffle Play 23 Sleep Timer 34 Sound adjustment 29 Speakers 7 Station name 32 T U V W X Y Z Tape Select Edit 28 Timer falling asleep to music 34 timer recording 36 waking up to music 35 Troubleshooting 43 45 Tuner 10 16 32 34 Tuning interval 11 A Adjusting the sound 29 the volume 8 14 17 19 Antennas 5 40 B Batteries 6 C CD...

Reviews: