background image

19

US03MD-U.fm

masterpage:Right

MDX-CA680X

3-227-351-11 (1)

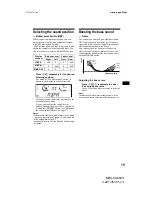
Selecting the sound position

— My Best sound Position (MBP)

When you drive without passengers, you can 
enjoy the most comfortable sound environment 
with “My Best sound Position.”
“My Best sound Position” has two presets, which 
adjust the sound level of balance and fader. You 
can select one very easily with the MBP button.

Press 

(MBP)

 repeatedly for the desired 

listening position.

The mode of “My Best sound Position” is 
shown in the display in order of the table.

After one second, the display goes back to the 
normal playback mode.
If you want to adjust the sound level of 
balance and fader more precisely, you can do 
it using the 

(SOUND)

 button (see “Adjusting 

the sound characteristics” on page 17).

Notes
• When the BAL (balance) or FAD (fader) in “Adjusting 

the sound characteristics” (page 17) is adjusted, the 
MBP setting returns to OFF.

• When MBP is set to OFF, the BAL and FAD setting is 

activated.

Boosting the bass sound

— D-bass

You can enjoy a clear and powerful bass sound. 
The D-bass function boosts the low frequency 
signal and high frequency signal with a sharper 
curve than conventional bass boost.
You can hear the bass line more clearly even 
while the vocal volume remains the same. You 
can emphasize and adjust the bass sound easily 
with the D-BASS button.

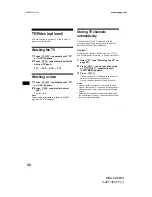
Adjusting the bass curve

Press 

(D-BASS)

 repeatedly to select 

the desired bass curve.

As the D-BASS number increases so does the 
effect.

Note
The bass sound may distort at same volume. If the 
bass sound distorts, select less effective bass curve.

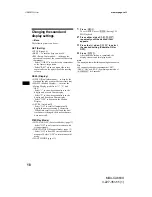
Display 

window

Balance Level

Fader Level

Right

Left Front

Rear 

MBP-A

– 4dB

0

0

– 4dB

MBP-B

0

– 4dB

0

– 4dB

MBP-OFF

0

0

0

0

0dB

D.BASS-3

D.BASS-2

D.BASS-1

D.BASS-3

D.BASS-2

D.BASS-1

Frequency (Hz)

L

evel

Summary of Contents for MDX-CA680X

Page 1: ... these numbers in the space provided below Refer to these numbers whenever you call upon your Sony dealer regarding this product Model No MDX CA680X Serial No MDX CA680X For installation and connections see the supplied installation connections manual 2001 Sony Corporation 3 227 351 12 1 US FM AM MiniDisc Player ...

Page 2: ...er is connected Consult the dealer or an experienced radio TV technician for help You are cautioned that any changes or modifications not expressly approved in this manual could void your authority to operate this equipment CAUTION The use of optical instruments with this product will increase eye hazard Welcome Thank you for purchasing this Sony MiniDisc Player You can enjoy its various features ...

Page 3: ...stations 13 Storing only the desired stations 14 Storing station names Station Memo 14 Tuning in a station through a list List up 15 Other Functions Using the rotary commander 16 Adjusting the sound characteristics 17 Quickly attenuating the sound 17 Changing the sound and display settings Menu 18 Selecting the sound position My Best sound Position MBP 19 Boosting the bass sound D bass 19 TV Video...

Page 4: ...1 15 21 22 l D BASS button 19 m RESET button located on the front side of the unit behind the front panel 7 n Number buttons 3 REP 10 6 SHUF 10 13 14 21 o MODE button 9 11 13 14 20 p SOUND button 17 19 q OFF Stop Power off button 7 9 23 r ENTER button 11 15 8 10 11 12 13 14 15 18 20 22 23 Warning when installing in a car without an ACC accessory position on the ignition switch After turning off th...

Page 5: ...FF for 2 seconds it cannot be operated with the card remote commander unless SOURCE on the unit is pressed or a disc is inserted to activate the unit first Tip Refer to Replacing the lithium battery for details on how to replace the batteries page 24 OFF D S MENU LIST SOUND ENTER DISC PRESET SEEK SEEK DISPLAY OPEN SCROLL SEEK to select leftwards SEEK to select rightwards DISC PRESET to select upwa...

Page 6: ...isplay of the unit Should this occur the unit will not operate properly In such a case remove the disc and wait for about an hour until the moisture has evaporated To maintain high sound quality Be careful not to splash juice or other soft drinks onto the unit or discs Notes on MDs Do not open the shutter of the cartridge to expose the MD Close immediately if the shutter opens Never touch the surf...

Page 7: ...not use the built in amplifier the beep sound will be deactivated 1 Press OFF MD CD playback or radio reception stops the key illumination and display remain on If your car has no ACC position on the ignition switch be sure to turn the unit off by pressing OFF for 2 seconds to avoid car battery drain 2 Press OPEN then slide the front panel to the right and gently pull out the left end of the front...

Page 8: ... a 12 hour digital indication Example To set the clock to 10 08 1 Press MENU then press either side of DISC PRESET repeatedly until CLOCK appears 1Press ENTER The hour indication flashes 2Press either side of DISC PRESET to set the hour 3Press the side of SEEK The minute indication flashes 4Press either side of DISC PRESET to set the minute 2 Press ENTER The clock starts After the clock setting is...

Page 9: ...t With optional unit 1 Press SOURCE repeatedly to select CD or MD 2 Press MODE repeatedly until the desired unit appears Playback starts Display items When the disc track changes any prerecorded title 1 of the new disc track is automatically displayed if the Auto Scroll function is set to ON names exceeding 8 characters will be scrolled page 18 1 NO NAME indicates there is no Disc Memo page 10 or ...

Page 10: ...l CD MD units are connected 2 Available only when one or more optional MD units or two or more optional CD units are connected During playback press 6 SHUF repeatedly until the desired setting appears in the display Shuffle Play starts To return to normal play mode select SHUF OFF Note SHUF ALL will not shuffle tracks between CD units and MD units Labeling a CD Disc Memo For a CD unit with the CUS...

Page 11: ... side of DISC PRESET repeatedly to select the disc name you want to erase The stored names will appear from the earliest ones entered 6 Press ENTER for 2 seconds The name is erased Repeat steps 5 and 6 if you want to erase other names 7 Press MENU twice The unit returns to normal CD play mode Notes When the Disc Memo for a CD TEXT disc is erased the original CD TEXT information is displayed If you...

Page 12: ...ect PLAY or SKIP 5 Repeat step 4 to set PLAY or SKIP for all the tracks 6 Press MENU twice The unit returns to normal CD play mode Notes You can set PLAY and SKIP for up to 24 tracks You cannot set SKIP for all the tracks on a CD Playing specific tracks only You can select BANK ON to play the tracks with the PLAY setting BANK INV Inverse to play the tracks with the SKIP setting 1 During playback p...

Page 13: ...receive the stations in the order they are stored in the memory Preset Search function If preset tuning does not work Press either side of SEEK to search for the station automatic tuning Scanning stops when the unit receives a station Repeat until the desired station is received Tips If automatic tuning stops too frequently turn on the Local Seek to limit seek to stations with stronger signals see...

Page 14: ...ring station names Station Memo You can assign a name to each radio station and store it in memory The name of the station currently tuned in appears in the display You can assign a name using up to 8 characters for a station Storing the station names 1 Tune in a station whose name you want to store 2 Press MENU then press either side of DISC PRESET repeatedly until NAMEEDIT appears 3 Press ENTER ...

Page 15: ...ESET repeatedly to select the station whose name you want to erase 4 Press ENTER for 2 seconds The name is erased Repeat steps 3 to 4 if you want to erase other names 5 Press MENU twice The unit returns to normal radio reception mode Note If you have already erased all of the station names NO DATA appears in step 4 Tuning in a station through a list List up 1 During radio reception press LIST mome...

Page 16: ...the clock indication after turning off the ignition By rotating the control Rotate and release to Skip tracks Tune in stations automatically Rotate hold and release to Fast forward reverse a track Find a station manually By pushing in and rotating the control Push in and rotate the control to Receive preset stations Change the disc When an optional CD MD unit is connected Press To SOURCE Change so...

Page 17: ...ce 1 Select the item you want to adjust by pressing SOUND repeatedly Each time you press SOUND the item changes as follows BAS bass t TRE treble t BAL left right t FAD front rear 2 Adjust the selected item by pressing either side of SEEK When adjusting with the rotary commander press SOUND and rotate the VOL control Note Adjust within 3 seconds after selecting the item Quickly attenuating the soun...

Page 18: ...ct OFF to deactivate the Motion Display A SCRL Auto Scroll Select ON to scroll all automatically displayed names exceeding 8 characters When Auto scroll is set to off and the disc track name is changed the disc track name does not scroll P M Play Mode LOCAL ON OFF Local seek mode page 13 Select ON to only tune into stations with stronger signals MONO ON OFF Monaural mode page 13 Select ON to hear ...

Page 19: ...ce or FAD fader in Adjusting the sound characteristics page 17 is adjusted the MBP setting returns to OFF When MBP is set to OFF the BAL and FAD setting is activated Boosting the bass sound D bass You can enjoy a clear and powerful bass sound The D bass function boosts the low frequency signal and high frequency signal with a sharper curve than conventional bass boost You can hear the bass line mo...

Page 20: ...hannels with the strongest signals and assigns them to number buttons in order of their frequency Caution If tuning in a station while driving use AUTO MEM Automatic Memory to prevent accidents 1 Select TV see Watching the TV on page 20 2 Press MENU then press either side of DISC PRESET repeatedly until AUTO MEM appears 3 Press ENTER The unit assigns TV channels to the number buttons in order of t...

Page 21: ...ssigned channel will be erased Storing the TV channel names Follow the steps in Storing station names page 14 Displaying the TV or radio station names Press LIST during TV or radio reception Example When receiving the FM1 band 1 Preset numbers 2 Stored station names 3 Frequencies If the name of a station is not assigned to number buttons the frequency of that station will be displayed instead To t...

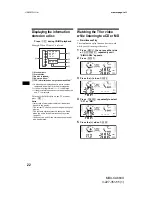
Page 22: ...LIST Notes It may take a few moments before all indications appear in the display The current TV channel does not appear during list display The contents of preset memory cannot be listed when the unit is in the Simultaneous Play mode page 22 If the source is an MD the stored track names will also be displayed Watching the TV or video while listening to a CD or MD Simultaneous Play The simultaneou...

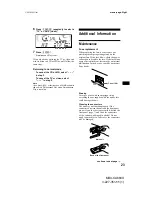
Page 23: ...e sure to use one matching the amperage rating stated on the original fuse If the fuse blows check the power connection and replace the fuse If the fuse blows again after replacement there may be an internal malfunction In such a case consult your nearest Sony dealer Warning Never use a fuse with an amperage rating exceeding the one supplied with the unit as this could damage the unit Cleaning the...

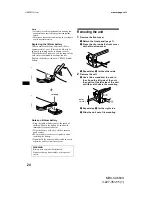
Page 24: ...e reach of children Should the battery be swallowed immediately consult a doctor Wipe the battery with a dry cloth to assure a good contact Be sure to observe the correct polarity when installing the battery Do not hold the battery with metallic tweezers otherwise a short circuit may occur Removing the unit 1 Remove the front cover 1Detach the front panel page 7 2Press the clip inside the front co...

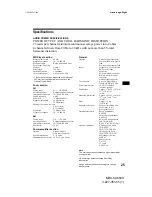
Page 25: ... frequency 10 7 MHz 450 kHz Sensitivity 30 µV Power amplifier section Outputs Speaker outputs sure seal connectors Speaker impedance 4 8 ohms Maximum power output 50 W 4 at 4 ohms General Outputs Audio outputs front rear Power antenna relay control lead Power amplifier control lead Inputs Telephone ATT control lead BUS control input connector BUS audio input connector Remote controller input conne...

Page 26: ...e fuse The car does not have an ACC position tPress SOURCE or insert a disc to turn on the unit The power is continuously supplied to the unit The car does not have an ACC position The power antenna does not extend The power antenna does not have a relay box The operation buttons do not function Press the RESET button Cannot turn off the indication You entered the name edit mode t Press LIST for 2...

Page 27: ...bout 5 seconds and an alarm sound will be heard BLANK 1 No tracks have been recorded on an MD 2 tPlay an MD with recorded tracks on it ERROR 1 A CD is dirty or inserted upside down 2 t Clean or insert the CD correctly A CD MD cannot play because of some problem 2 t Insert another CD MD HI TEMP The ambient temperature is more than 50 C 122 F tWait until the temperature goes down below 50 C 122 F NO...

Page 28: ...Sony Corporation Printed in Thailand ...

Reviews: