background image

Recording on MDs

22

GB

Recording on an MD Using a
Timer

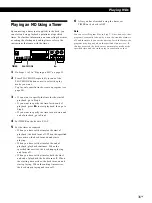
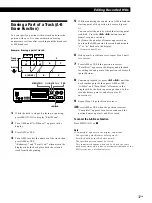
By connecting a timer (not supplied) to the deck, you
can start and stop recording operations at specified
times.  For further information on connecting the timer
and setting the starting and ending times, refer to the
instructions that came with the timer.

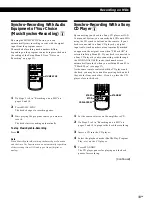
1

Do Steps 1 to 10 in “Recording on an MD” on
pages 9 and 10.

2

• If you want to specify the time for the start of

recording, press 

p

.

• If you want to specify the time for the end of

recording, do Steps 11 and 12 in “Recording on
an MD” on page 10.

• If you want to specify the time for both start and

end of recording, press 

p

.

3

Set TIMER on the deck to REC.

4

Set the timer as required.
• When you have set the time for the start of

recording, the deck turns off.  When the
specified time arrives, the deck turns on and
starts recording.

• When you have set the time for the end of

recording, recording continues.  When the
specified time arrives, the deck stops recording
and turns off.

• When you have set the time for both the start

and end of recording, the deck turns off.  When
the starting time arrives, the deck turns on and
starts recording.  When the ending time arrives,
the deck stops recording and turns off.

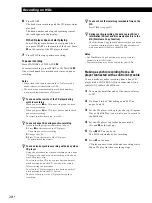
5

After you have finished using the timer, set
TIMER on the deck to OFF.  Then place the deck
in standby status by plugging the AC power cord
of the deck into a wall outlet or set the timer to
continuous operation.
• If TIMER is left at REC, the deck will

automatically start recording the next time you
turn the deck on.

• If you do not change the deck to standby status

for more than a week after timer recording has
finished, the recorded contents may disappear.

Make sure to change the deck to standby status
within a week after timer recording is completed

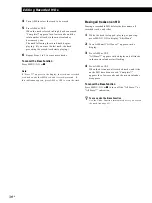
The TOC on the MD is updated and recorded contents
are written to the MD when you turn the deck on.  If
the recorded contents have disappeared, “Initialize”
flashes when you turn the deck on.

Notes

• It may take about 30 seconds after the deck is turned on

until recording starts. When recording at a specified time
using the timer, be sure to take this time into account
when setting the recording start time.

• During timer recording, new material is recorded from the

end of the recorded portion on the MD.

• Material recorded during timer recording will be saved to

the disc the next time you turn the deck on.  “TOC” will
flash in the display at that time.  Do not move the deck or
pull out the AC power cord while “TOC” is flashing.

• Timer recording will stop if the disc becomes full.

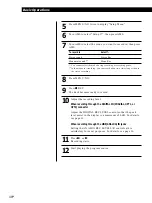
r

p

P

(

§

0 )

p

TIMER

Summary of Contents for MDS-JA555ES - Md Player

Page 1: ... 1999 by Sony Corporation 3 866 900 13 1 EN Operating Instructions Mode d emploi FR GB MDS JA555ES MiniDisc Deck ...

Page 2: ...ate radio frequency energy and if not installed and used in accordance with the instructions may cause harmful interference to radio communications However there is no guarantee that interference will not occur in a particular installation If this equipment does cause harmful interference to radio or television reception which can be determined by turning the equipment off and on the user is encou...

Page 3: ...e System 4 About the CONTROL A1 Control System 6 Basic Functions of the CONTROL A1 Control System 7 Setting the Clock 7 Recording on an MD 9 Playing an MD 12 Recording on MDs Notes on Recording 13 Useful Tips for Recording 14 Adjusting the Recording Level 16 Marking Track Numbers While Recording Track Marking 17 Starting Recording With 6 Seconds of Prestored Audio Data Time Machine Recording 18 Sy...

Page 4: ... at the remote sensor g on the deck z When to replace batteries With normal use the batteries should last for about six months When the remote no longer operates the deck replace all the batteries with new ones Notes Do not leave the remote near an extremely hot or humid place Do not drop any foreign object into the remote casing particularly when replacing the batteries Do not expose the remote s...

Page 5: ...onnecting cable ç ç ç ç ç Signal flow z If Din Unlock and C71 appear in the display Make sure the optical cable or the coaxial digital connecting cable is connected properly z Automatic conversion of digital sampling rates during recording A built in sampling rate converter automatically converts the sampling frequency of various digital sources to the 44 1 kHz sampling rate of your MD deck This a...

Page 6: ...NTROL A1 jacks and components with CONTROL A1 jacks the number of functions that can be controlled may be limited depending on the component For detailed information refer to the operating instructions supplied with the component s Connecting the CONTROL A1 Control System Connect monaural 2P mini plug cables in series to the CONTROL A1 jacks on the back of each component You can connect up to ten ...

Page 7: ...Press P on the deck The source component is released from the pause mode and recording begins shortly thereafter When the playback ends from the source component recording stops Notes Do not set more than one component to the pause mode This MD deck is equipped with a special synchronized recording function that uses the CONTROL A1 Control System see Making a synchro recording from a CD player con...

Page 8: ...lize will flash in the display the next time you plug in and turn on the deck If this happens reset the clock Displaying the current date and time Z Press DATE PRESENT Each press of the button changes the display as follows n Current display n Date n Time Changing the clock setting s 1 Do steps 1 and 2 above 2 Press AMS or 0 repeatedly until the setting you want to change flashes 3 Turn AMS to cha...

Page 9: ...lly start recording from the end of the last recorded track 4 Set INPUT to the corresponding input connector To record through Set INPUT to DIGITAL IN OPT1 OPT1 DIGITAL IN OPT2 OPT2 DIGITAL IN COAXIAL COAX LINE ANALOG IN ANALOG Continued With the label side up With the arrow pointing this way OFF REC PLAY STANDBY TIMER PHONES PHONE LEVEL INPUT PUSH ENTER CLEAR MENU NO YES OPEN CLOSE REC LEVEL R L ...

Page 10: ...about two times longer than in the stereo recording 8 Press MENU NO 9 Press r REC The deck becomes ready to record 10 Adjust the recording level When recording through the DIGITAL IN COAXIAL OPT1 or OPT2 connector Adjust the DIGITAL REC LEVEL control so that the peak level meter in the display is a maximum of 0 dB For details see page 16 When recording through the LINE ANALOG IN jacks Setting the ...

Page 11: ...ck to standby by pressing 1 u TOC Writing will flash in the display at this time After TOC Writing stops flashing and goes out you can pull out the AC power cord To Press Stop recording p Pause recording P Press the button again or press to resume recording Take out the MD OPEN CLOSE after stopping Whenever you pause recording the track number increases by one For example if you paused recording w...

Page 12: ... preceding track remote Take out the MD Press OPEN CLOSE after stopping playing z You can locate and play back a track while the deck is stopped 1 Turn AMS or press or until the number of the track you want to play appears 2 Press AMS or z To use headphones Connect them to PHONES jack Use PHONE LEVEL to adjust the volume z You can change the MD playback speed See Changing the Pitch on page 32 With...

Page 13: ... source is not connected as you set with the INPUT in Step 4 on page 9 To continue connect the program source properly The program source is not on Turn on the program source Depending on the menu settings and source being recorded track numbers are marked in following ways When recording from a CD or MD with the INPUT set at COAX OPT1 or OPT2 and the source connected through the respective digita...

Page 14: ...t at OPT1 OPT2 or COAX After passing through the sampling rate converter the digital signal input through the respective DIGITAL IN connector is output to the respective DIGITAL OUT connector and after D A conversion to the LINE ANALOG OUT jacks and PHONES jack 3 Press r REC If the INPUT is set at ANALOG AD DA appears in the display If the INPUT is set at OPT1 OPT2 or COAX DA appears in the displa...

Page 15: ...mponents connected to the digital input connector 1 While the deck is stopped press MENU NO twice to display Setup Menu 2 Turn AMS to select Setup 12 then press AMS 3 Turn AMS to select the desired bit length then press AMS 4 Press MENU NO Notes This function operates only for the digital signal input through the digital input connector The bit length is normally set to 20 bits but you can select ...

Page 16: ...recording level to maximum 4 Stop playing the program source 5 To start recording do the procedure starting from Step 11 in Recording on an MD on page 10 Adjusting the Recording Level You can adjust the recording level before starting recording Adjusting the digital recording level You do not normally need to adjust the digital recording level The level is adjusted mainly when the level of the sou...

Page 17: ...ified level To select T Mark Off or T Mark LSyn in Setup Menu 02 do the procedure below 1 While the deck is stopped press MENU NO twice to display Setup Menu 2 Turn AMS to select Setup 02 then press AMS 3 Turn AMS to select T Mark Off or T Mark LSyn then press AMS L SYNC lights up when you select T Mark LSyn 4 Press MENU NO z You can set the reference level that must pass before a rise marks a new...

Page 18: ...ng the program source you want to record The most recent 6 seconds of audio data is stored in the buffer memory 3 Press AMS or T REC to start Time Machine Recording Recording of the program source starts with the 6 seconds of audio data stored in the buffer memory To stop Time Machine Recording Press p Note The deck starts storing audio data when the deck is in recording pause and you start playin...

Page 19: ...l input cable track numbers are automatically marked as appear on the original even when T Mark Off is selected in Setup Menu 02 If your deck is connected to a Sony CD player by audio connecting cords through the LINE ANALOG IN jacks track numbers are automatically marked when you set Setup Menu 02 to T Mark LSyn see page 17 As the same remote controls both the CD player and the deck you may have ...

Page 20: ...cording with a Sony CD player you can do synchro recording with a Sony video CD player also To select the video CD player press button number 2 while pressing down the 1 u switch on the remote before starting the procedure To select the CD player again press button number 1 while pressing down the 1 u switch The deck is factory set to a CD player for synchro recording z You can check the remaining...

Page 21: ...n Fade z 3 2s flashes and the deck performs the fade out recording until the counter reaches 0 0s The deck changes to recording pause when fade out recording finishes z You can set the duration of fade in and fade out recording independently 1 While the deck is stopped press MENU NO twice to display Setup Menu 2 To set the duration of fade in recording Turn AMS to select Setup 08 then press AMS To...

Page 22: ... stops recording and turns off 5 After you have finished using the timer set TIMER on the deck to OFF Then place the deck in standby status by plugging the AC power cord of the deck into a wall outlet or set the timer to continuous operation If TIMER is left at REC the deck will automatically start recording the next time you turn the deck on If you do not change the deck to standby status for mor...

Page 23: ... Checking the playing time remaining time and track number Each time you press TIME while playing an MD you can change the display as shown below The track numbers in the music calendar disappear after they are played Continued Playing MDs Using the Display You can use the display to check disc and track information such as the total track number total playing time of the tracks remaining recordab...

Page 24: ... clock has been set the deck automatically records the recording date and time of all recordings You can then check the recording date and time of a track 1 Locate the track for which you want to check the recording date and time When the deck is Press stopped or playing or on play pause or number buttons 2 Press DATE RECORDED No Date appears if the internal clock has not been set or the track was...

Page 25: ...a Specific Track You can quickly locate any track while playing a disc by using the AMS Automatic Music Sensor control and buttons number buttons or M SCAN button on the remote z When you directly locate a track with a number over 25 Z You must press 25 first before entering the corresponding digits Press 25 once if it is a 2 digit track number and twice if it is a 3 digit track number To enter 0 ...

Page 26: ...e deck is stopped the deck repeats the next track to be played Locating a Particular Point in a Track You can also use the 0 and buttons to locate a particular point in a track during playback or playback pause To locate a point Press z If Over appears while you are pressing during playback pause The disc has reached to its end Press 0 or or turn AMS counterclockwise to go back Notes If the disc r...

Page 27: ... portion to be played repeatedly REPEAT A appears and B flashes in the display 2 Continue playing the track or press until you reach the ending point point B then press A B again REPEAT A B lights continuously The deck starts to play the specified portion repeatedly To cancel A B Repeat Press REPEAT CLEAR or p Setting new starting and ending points You can repeat the portion immediately after the ...

Page 28: ...amming press YES Complete appears and programming is completed 6 Press PLAY MODE repeatedly or PROGRAM once until PROGRAM appears in the display 7 Press to start Program Play To cancel Program Play Press PLAY MODE repeatedly or CONTINUE once when the deck is stopped until PROGRAM disappears z The program remains even after Program Play ends When you press you can play the same program again Notes ...

Page 29: ...r symphony blank spaces will be inserted within the selection whenever the track number changes Continued Checking the track order While the deck is stopped and PROGRAM is on press DISPLAY CHAR or DISPLAY several times The track numbers appear in the order they were programmed as follow 3 5 8 1 2 To check the rest of the track order Turn AMS You can scroll the display to check all the track number...

Page 30: ...l output to the LINE ANALOG OUT jacks and the PHONES jack at the beginning of a playback fade in playback or gradually decrease the playback level at the end of a playback fade out playback This function is convenient when for example you want to start or end playback in the middle of the track Fade in playback During playback pause press FADER at the position where you want fade in playback to st...

Page 31: ...et TIMER on the deck to PLAY 5 Set the timer as required When you have set the time for the start of playback the deck turns off When the specified time arrives the deck turns on and starts playing When you have set the time for the end of playback playback continues When the specified time arrives the deck stops playing and turns off When you have set the time for both the start and end of playba...

Page 32: ...yback speed pitch The tone rises at higher pitches and falls at lower pitches When you ve set the pitch to a value other than the factory setting the PITCH CONTROL button lights amber during play Setting the pitch automatically in steps Auto Step Control Function You can increase the pitch by up to 2 steps or lower the pitch by up to 48 steps One octave equals 12 steps 1 While the deck is playing ...

Page 33: ...nges the other Setting the MD Deck Output Switching the bit length You can improve the output sound quality by switching the bit length to match the MD deck DAT deck or other digital components connected to the digital output connector 1 While the deck is stopped press MENU NO twice to display Setup Menu 2 Turn AMS to select Setup 13 then press AMS 3 Turn AMS to select the desired bit length then ...

Page 34: ...LTER 1 A sound that is clearly positioned and smooth FILTER 2 A fresh and powerful sound FILTER 3 A resonant and mellow sound The FILTER button lights green when a setting other than FILTER STD is selected in DF digital filter display z You can use the remote to select the filter Z Press FILTER repeatedly until the filter you want appears in the display z What is a V C Variable Coefficient filter ...

Page 35: ...he following functions Erase Function allows you to erase recorded tracks simply by specifying the corresponding track number A B Erase Function allows you to specify a portion within a track to erase it Divide Function allows you to divide tracks at specified points so that you can quickly locate those points afterwards using the AMS function Combine Function allows you to combine two tracks into...

Page 36: ...ted If this indication appears press AMS or YES to erase the track Erasing all tracks on an MD Erasing a recordable MD deletes the disc name all recorded tracks and titles 1 While the deck is stopped playing or pausing press MENU NO to display Edit Menu 2 Turn AMS until All Erase appears in the display 3 Press AMS or YES All Erase appears in the display and all tracks in the music calendar start f...

Page 37: ... Complete appears for a few seconds and the portion between point A and B is erased To cancel the A B Erase Function Press MENU NO or p Note If Impossible appears in the display this means You specified point B comes before point A Point B should be specified after point A The specified portion cannot be erased This sometimes happens when you ve edited the same track many times and is due to a tec...

Page 38: ... position you selected 2 To make fine adjustment on the dividing position do Step 4 in Dividing a track after selecting the track on this page 3 Press YES Complete appears for a few seconds and the newly created track begins playing To cancel the Divide Function Press AMS MENU NO or p Dividing Recorded Tracks Divide Function With the Divide Function you can mark a track number at places that you w...

Page 39: ...ot be combined This sometimes happens when you ve edited the same track many times and is due to a technical limitation of the MD system not a mechanical error Combining Recorded Tracks Combine Function Use the Combine Function to combine tracks on a recorded MD The two tracks to be combined need not to be consecutive and the latter track to be combined can be the track which comes before the form...

Page 40: ... is stopped playing or pausing press MENU NO to display Edit Menu 2 Turn AMS until Move appears in the display 3 Press AMS or YES 4 Turn AMS to select the track to be moved and press AMS or YES 5 Turn AMS until the new track position appears 6 Press AMS or YES Complete appears for a few seconds and the moved track begins playing back To cancel the Move Function Press MENU NO or p New track positio...

Page 41: ...ss MENU NO to display Edit Menu 2 Turn AMS until Name appears in the display and press AMS or YES Skip this step while recording 3 Turn AMS until Nm In appears in the display then press AMS or YES 4 Turn AMS to select Disc to label an MD or to specify the track to label While recording go to Step 6 5 Press AMS or YES A flashing cursor appears in the display 6 Press DISPLAY CHAR to select the chara...

Page 42: ... You can copy a track or disc title to use it as a title of another track or the disc title within a disc 1 Press MENU NO to display Edit Menu 2 Turn AMS until Name appears in the display and press AMS or YES 3 Turn AMS until Nm Copy appears in the display 4 Press AMS or YES 5 Turn AMS to select Disc to copy the disc title or the track whose title you want to copy and press AMS or YES If No Name a...

Page 43: ...y until Selected 12 appears in the display 3 Press an alphabet number button to enter a character After you enter a character the cursor shifts rightward and waits for the input of the next character You can change the character type at any time during Step 3 see Step 2 4 Repeat Step 3 until you have entered the entire title If you entered the wrong character Press 0 or until the character to be c...

Page 44: ...cel Name Erase Function Press MENU NO or p Erasing all titles on a disc Name All Erase Use this function to erase all titles on an MD simultaneously 1 While the deck is stopped playing or pausing press MENU NO to display Edit Menu 2 Turn AMS until Name appears in the display and press AMS or YES 3 Turn AMS until Nm AllErs appears in the display and press AMS or YES Nm AllErs appears in the display...

Page 45: ...ber appearing in the display press MENU NO to display Edit Menu 2 Turn AMS until Undo appears in the display Undo does not appear if no editing has been done 3 Press AMS or YES One of the following messages appears in the display depending on the type of editing to be undone Editing done Message Erasing a single track Erasing all tracks on an MD Erase Undo Erasing a part of a track Dividing a trac...

Page 46: ... contents recorded may thus be shorter than the maximum recording capacity Disc space may also be further reduced by scratches Tracks created through editing may exhibit sound dropout during search operations Track numbers are not recorded correctly Incorrect assignment or recording of track numbers may result when CD tracks are divided into several smaller tracks during digital recording Also whe...

Page 47: ...D is inserted in the wrong direction Slide the MD into the disc slot with the label side up and the arrow pointing towards the opening The MD may not be recorded the music calendar does not appear Replace the disc with one that has been recorded The deck does not record The MD is record protected Protected alternates with C11 in the display Close the record protect slot see page 11 The deck is not...

Page 48: ...uirements Continental Europe and UK 220 230 V AC 50 60 Hz U S A and Canada 120 V AC 60 Hz Power consumption 24 W Dimensions approx w h d incl projecting parts and controls 430 125 5 375 5 mm 17 5 13 3 4 in Mass approx 15 3 kg 33 lb 11 oz Supplied accessories See page 4 US and foreign patents licensed from Dolby Laboratories Licensing Corporation Design and specifications are subject to change with...

Page 49: ...MD is possible only through the analog input jack on the DAT or MD deck Note however that on some BS CS tuners second generation digital copying may not be possible Continued MD deck DAT deck CD player Digital output jack Digital input jack DAT deck or MD deck First generation DAT tape or MD recorded via digital to digital connection DAT or MD DAT deck or MD deck Digital output jack Line analog ou...

Page 50: ...ons 7 CONTROL A1 control system 6 hooking up 6 synchro recording on an MD 7 20 D Digital filter 34 Display messages 46 Dividing after selecting the dividing point 38 after selecting the track 38 E Erasing all titles 44 all tracks 36 a part of a track 37 a single track 35 a title 44 F G Fade in playback 30 recording 21 Fade out playback 30 recording 21 MD deck CD player Tuner Turntable Cassette dec...

Page 51: ...nual track marking 17 Troubleshooting 47 U V W X Y Z Undoing the last edit 45 Names of controls Buttons A B 27 Alphabet Number 23 25 28 43 A SPACE 29 CD PLAYER P 19 CD PLAYER CHAR 43 CLEAR 27 28 41 43 CONTINUE 27 28 DATE PRESENT 7 DATE RECORDED 23 DIGITAL REC LEVEL ANALOG OUT LEVEL 16 33 DISPLAY 23 28 DISPLAY CHAR 14 23 28 41 FADER 21 30 FILTER 34 MENU NO 10 14 16 17 28 29 32 33 35 37 to 41 45 M S...

Page 52: ...ages 29 and 30 05 Turns the Smart Space and Auto Cut Functions on and off S Space Off S Space On S Space On page 15 06 Turns the Peak Hold Function on and off for the peak level meters P Hold On P Hold Off P Hold Off page 16 07 Sets the playing time during music scan M Scan 6 to 20s M Scan 6s page 25 08 Sets the duration of fade in recording and playback F in 1 0 to 15 0s F in 5 0s page 21 09 Sets...

Page 53: ... a stable place and repeat the recording procedure The inserted MD is dirty with smudges fingerprints etc scratched or not up to standards Replace the disc and repeat the recording procedure C13 Disc Error The deck could not read the TOC of the MD properly Take out the MD and insert it again C14 Disc Error The deck could not read the TOC of the MD properly Insert another disc If possible erase all...

Page 54: ...peuvent être remplacées par celles de la télécommande si elles ont le même nom mais elles seront indiquées entre crochets si le nom est différent Les symboles suivants sont utilisés dans ce mode d emploi ZIndique que vous pouvez aussi utiliser la télécommande z Indique des suggestions et conseils qui simplifient une opération AVERTISSEMENT POUR LES UTILISATEURS AU CANADA ATTENTION POUR PREVENIR LE...

Page 55: ...une plage 26 Lecture répétée de plages 26 Lecture des plages dans un ordre aléatoire Lecture aléatoire 27 Création d un programme Lecture programmée 28 Conseils utiles pour l enregistrement d un MD sur une cassette 29 Entrée et sortie en fondu Fondu 30 Lecture programmée d un MD 31 Pour vous endormir en musique 32 Changement de la vitesse fonction de réglage de vitesse 32 Réglage de la sortie de l...

Page 56: ...trouvent dans l emballage Cordons de liaison audio 2 Télécommande infrarouge RM D39M 1 Piles R6 format AA 2 Mise en place des piles dans la télécommande Vous pouvez piloter la platine avec la télécommande fournie Insérez deux piles R6 format AA en faisant correspondre les pôles et des piles Quand vous utilisez la télécommande dirigez la vers le détecteur de télécommande g sur la platine z Quand fa...

Page 57: ... qu elles se verrouillent avec un déclic Ne pliez pas les câbles optiques et ne les attachez pas ensemble ç ç ç ç ç Sens du signal Quand vous utilisez un câble coaxial de liaison numérique ç ç ç ç ç Sens du signal z Din Unlock et C71 s affichent Assurez vous que le câble optique ou le câble coaxial de liaison numérique est correctement connecté z Conversion automatique de la fréquence d échantillo...

Page 58: ...ertains éléments à prises CONTROL A1 à des éléments à prises CONTROL A1 il se peut que le nombre de fonctions commandées soit limité Pour plus d informations consultez le mode d emploi de l élément concerné Raccordement du système de commande CONTROL A1 Raccordez les cordons à mini fiches mono 2 pôles en série aux prises CONTROL A1 situées au dos de chaque appareil Vous pouvez relier entre eux dix...

Page 59: ...Si vous appuyez sur touche de lecture de la platine MD alors que vous écoutez un CD le sélecteur de fonction de l amplificateur passe automatiquement de CD à MD Remarques Cette fonction ne peut être utilisée que si les éléments sont raccordés aux entrées de l amplificateur ou ampli tuner correspondant aux noms des touches de fonction Certains ampli tuners vous permettent de changer les noms des to...

Page 60: ...te débranché pendant longtemps les réglages mémorisés seront effacés et Initialize clignotera quand vous rebrancherez la platine et la mettrez sous tension Le cas échéant vous devez remettre l horloge à l heure Affichage de la date et de l heure Z Appuyez sur DATE PRESENT A chaque pression sur la touche l affichage change de la façon suivante n Affichage actuel n Date n Heure Comment changer la da...

Page 61: ...r 2 Appuyez sur 1 u Le témoin STANDBY s éteint 3 Appuyez sur OPEN CLOSE pour ouvrir le plateau de disque insérez un minidisque enregistrable puis appuyez une nouvelle fois sur la touche pour fermer le plateau Si le minidisque contient un enregistrement l enregistrement commencera automatiquement à partir de la fin de la dernière plage enregistrée 4 Réglez INPUT en fonction de la prise d entrée uti...

Page 62: ...strement deux fois plus long environ qu en mode stéréo 8 Appuyez sur MEMU NO 9 Appuyez sur r REC La platine est maintenant prête pour l enregistrement 10 Réglez le niveau d enregistrement Quand vous enregistrez par le connecteur DIGITAL IN COAXIAL OPT1 ou OPT2 Réglez la commande DIGITAL REC LEVEL de manière á ce que l indication du décibelmètre ne dépasse pas 0 dB sur l afficheur Pour plus d infor...

Page 63: ...mente d une unité Si par exemple vous faites une pause pendant l enregistrement de la plage 4 le numéro de plage augmente d une unité et l enregistrement se poursuit sur une nouvelle plage Pour protéger un MD contre un effacement accidentel Pour rendre tout enregistrement impossible sur un minidisque poussez le taquet de protection dans le sens de la flèche afin d ouvrir la fente Pour permettre l ...

Page 64: ...de la télécommande Enlever le MD Appuyer sur OPEN CLOSE après avoir arrêté la lecture avec la face imprimée vers le haut avec la flèche dirigée dans ce sens z Vous pouvez localiser une plage pour la reproduire quand la platine est à l arrêt 1 Tournez AMS ou appuyez sur ou jusqu à ce que le numéro de la plage souhaitée apparaisse 2 Appuyez sur AMS ou z Pour utiliser un casque Branchez le sur la pri...

Page 65: ...entrée voir page 14 Remarques sur l enregistrement Si Protected et C11 apparaissent alternativement dans l afficheur Le minidisque est protégé contre tout enregistrement Fermez la fente pour enregistrer voir Pour protéger un MD contre un effacement accidentel à la page 11 Si Din Unlock et C71 apparaissent alternativement dans l afficheur La source de programme numérique ne correspond pas au réglag...

Page 66: ... à la prise PHONES après conversion D A Quand INPUT est réglé sur OPT1 OPT2 ou COAX Après être passé par le convertisseur de fréquence d échantillonnage le signal numérique fourni par le connecteur DIGITAL IN appropriée est transmis au connecteur DIGITAL OUT appropriée et après conversion D A aux prises LINE ANALOG OUT et à la prise PHONES 3 Appuyez sur r REC Si INPUT est réglé sur ANALOG AD DA ap...

Page 67: ...tine en mode d arrêt appuyez deux fois sur MENU NO pour afficher Setup Menu 2 Tournez AMS pour sélectionner Setup 12 puis appuyez sur AMS 3 Tournez AMS pour sélectionner le nombre de bits désiré puis appuyez sur AMS 4 Appuyez sur MENU NO Remarques Cette fonction ne peut être utilisée que pour une entrée de signaux numériques par le connecteur d entrée numérique Le nombre de bits est normalement fi...

Page 68: ...ez à partir de l étape 11 les opérations mentionnées dans Enregistrement sur un MD à la page 10 z La fonction Peak Hold immobilise le décibelmètre au niveau le plus élevé atteint par le signal d entrée Pour activer la fonction Peak Hold avec l option 06 de Setup Menu 1 Appuyez deux fois sur MENU NO avec la platine arrêtée pour afficher Setup Menu 2 Tournez AMS pour sélectionner Setup 06 puis appuy...

Page 69: ...uis revient à un niveau donné Pour sélectionner T Mark Off ou T Mark LSyn dans le menu Setup 02 effectuez les opérations suivantes 1 Appuyez deux fois sur MENU NO avec la platine arrêtée pour afficher Setup Menu 2 Tournez AMS pour afficher le menu Setup 02 puis appuyez sur AMS 3 Tournez AMS pour sélectionner T Mark Off ou T Mark LSyn puis appuyez sur AMS L SYNC s allume quand vous sélectionnez T M...

Page 70: ...ondes déjà stockées dans la mémoire tampon ce qui peut être illustré de la façon suivante 1 Effectuez les étapes 1 à 9 de Enregistrement sur un MD aux pages 9 à 10 La platine se met en pause d enregistrement 2 Démarrez la source de programme que vous voulez enregistrer Les 6 dernières secondes de données audio sont stockées dans la mémoire tampon 3 Appuyez sur AMS ou T REC pour démarrer l enregist...

Page 71: ... CD Sony ou une chaîne Hi Fi vous pourrez copier facilement des CD sur des minidisques Pour cela utilisez les touches de synchronisation CD de la télécommande Si votre platine est reliée à un lecteur CD Sony par un câble d entrée numérique les numéros de plage sont automatiquement inscrits dans le même ordre que l original même si T Mark Off est sélectionné sur le menu Setup 02 Si votre platine es...

Page 72: ...ur l enregistrement synchronisé à partir d un lecteur CD Sony vous pouvez aussi faire un enregistrement synchronisé avec un lecteur vidéo CD Sony Pour sélectionner le lecteur vidéo CD appuyez sur la touche numérique 2 tout en tenant 1 ude la télé commande enfoncé pour commencer l enregistrement Pour revenir au lecteur CD appuyez sur la touche numérique 1 tout en tenant 1 uenfoncé La platine a été ...

Page 73: ... un fondu jusqu à ce que le compteur atteigne 0 0s Sortie en fondu de l enregistrement Pendant l enregistrement appuyez sur FADER à l endroit où l enregistrement doit sortir en fondu de Fade 3 2s clignote et la platine effectue un fondu jusqu à ce que le compteur atteigne 0 0s La platine se met en pause d enregistrement quand le fondu est terminé z Vous pouvez régler séparément la durée de l entré...

Page 74: ...l enregistrement s arrête et la platine s éteint 5 Quand vous n utilisez plus la minuterie réglez TIMER de la platine sur OFF Mettez ensuite la platine en veille en branchant son cordon sur une prise murale ou réglez la minuterie sur le fonctionnement continu Si vous laissez TIMER sur REC l enregistrement se déclenchera automatiquement la prochaine fois que vous mettrez la platine sous tension Si ...

Page 75: ...e Chaque fois que vous appuyez sur la touche TIME pendant la lecture d un minidisque l affichage change comme suit Les numéros dans le répertoire disparaissent au fur et à mesure que les plages sont reproduites voir page suivante Utilisation de l affichage Vous pouvez vérifier dans l afficheur les informations concernant un minidisque ou une plage telles que le nombre de plages total le temps de l...

Page 76: ...rloge interne la platine inscrit automatiquement la date et l heure d enregistrement des plages Pour afficher ces informations pendant la lecture procédez comme suit 1 Localisez la plage dont vous voulez vérifier la date et l heure d enregistrement Si la platine est Appuyez sur à l arrêt ou en cours de lecture ou en pause ou sur le clavier numérique 2 Appuyez sur DATE RECORDED No Date apparaît si ...

Page 77: ...ut d une plage Tournez AMS ou appuyez sur ou après avoir mis la lecture en pause z Pour aller rapidement au début de la dernière plage Tournez AMS vers la gauche ou appuyez sur quand l affichage indique le nombre de plages total le temps de lecture total ou le temps restant sur le minidisque pour l enregistrement disque enregistrable seulement ou le titre du disque voir page 23 Localisation d une ...

Page 78: ...nez REPEAT 1 avec la platine arrêtée la platine répétera la prochaine plage qui sera lue Localisation d un point donné sur une plage Vous pouvez aussi utiliser les touches 0 et pour localiser un point donné sur une plage pendant la lecture ou la pause z Si Over apparaît dans l afficheur quand vous appuyez sur pendant la pause de lecture Vous avez atteint la fin du minidisque Appuyez sur 0 ou ou to...

Page 79: ...en cours tournez AMS vers la gauche ou appuyez sur Vous ne pouvez pas utiliser la commande AMS ou pour revenir sur des plages que vous avez déjà écoutées Répétition d un passage donné Répétition A B Z Vous pouvez écouter un passage particulier d une plage de façon répétée Cette fonction est pratique si vous voulez apprendre un texte Le passage répété doit cependant faire partie d une seule plage 1...

Page 80: ...PLAY MODE ou une fois sur PROGRAM jusqu à ce que PROGRAM apparaisse dans l afficheur 7 Appuyez sur pour démarrer la lecture programmée Pour annuler la lecture programmée Appuyez de façon répétée sur PLAY MODE ou une fois sur CONTINUE quand la platine est à l arrêt jusqu à ce que PROGRAM disparaisse z Le programme reste mémorisé même quand la lecture programmée est terminée Quand vous appuyez sur v...

Page 81: ...squ à ce que le numéro de plage que l on désire changer clignote 2 Effectuez les opérations 3 à 5 de la page 28 Conseils utiles pour l enregistrement d un MD sur une cassette Insertion d espaces blancs pendant l enregistrement sur une cassette Espacement automatique La fonction Auto Space sert à insérer un espace blanc de 3 secondes entre les plages pendant la copie d un MD sur une cassette et vou...

Page 82: ...rque Si vous éteignez la platine ou débranchez le cordon d alimentation secteur les derniers réglages des fonctions Auto Space et Auto Pause seront rappelés à la prochaine mise sous tension de la platine Entrée et sortie en fondu Fondu Le niveau du signal fourni par les prises LINE ANALOG OUT et la prise PHONES peut être progressivement augmenté entrée en fondu de la lecture au début de la lecture...

Page 83: ...MER de la platine sur PLAY 5 Réglez la minuterie comme nécessaire Si vous avez réglé l heure de début de lecture la platine s éteint A l heure préréglée la platine se met sous tension et la lecture commence Si vous avez réglé l heure de fin de lecture la lecture continue A l heure préréglée elle s arrête et la platine s éteint Si vous avez réglé l heure de début et de fin de lecture la platine s a...

Page 84: ...e de lecture du MD pitch La hauteur tonale augmente et diminue avec la vitesse Si vous réglez la vitesse de lecture à une valeur autre que le réglage d usine la touche PITCH CONTROL s allume en couleur ambre pendant la lecture Réglage automatique de la vitesse de lecture par pas fonction Auto Step Control Vous pouvez augmenter la hauteur tonale de 2 pas ou la diminuer de 48 pas Une octave équivaut...

Page 85: ...l Vous pouvez régler finement la vitesse de lecture par pas de 0 1 entre 98 5 et 12 5 1 Quand la platine est en mode de lecture appuyez plusieurs fois sur PITCH CONTROL jusqu à ce que Pfine s affiche 2 Tournez AMS jusqu à ce que la valeur de pas désirée s affiche Pour rappeler le réglage d usine Appuyez sur CLEAR tout en réglant la valeur Remarques Lorsque vous changez la valeur de réglage fin le ...

Page 86: ... son vif et puissant FILTER 3 un son résonnant et doux La touche FILTER s allume en couleur vert lorsque vous sélectionnez une option autre que FILTER STD sur l affichage DF filtre numérique z Vous pouvez utiliser la télécommande pour sélectionner le filtre Z Appuyez plusieurs fois sur FILTER jusqu à ce que le filtre désiré soit indiqué sur l afficheur r p P 0 FILTER z Qu est ce qu un filtre numér...

Page 87: ...ntage de MD enregistrés Remarques sur le montage Vous pouvez effectuer des montages après l enregistrement en utilisant les fonctions suivantes La fonction Erase permet d effacer des plages enregistrées en désignant simplement le numéro de la plage La fonction A B Erase permet de désigner un passage d une plage pour l effacer La fonction Divide permet de diviser des plages à des points précis pour...

Page 88: ...ndication apparaît appuyez sur AMS ou YES et effacez la plage Effacement de toutes les plages d un MD Quand vous effacez un MD enregistrable le titre du disque les plages enregistrées et leurs titres sont effacés 1 Alors que la platine est en mode d arrêt de lecture ou de pause appuyez sur MENU NO pour afficher Edit Menu 2 Tournez AMS jusqu à ce que All Erase apparaisse dans l afficheur 3 Appuyez ...

Page 89: ... correcte Complete apparaît pendant quelques secondes et le passage entre les points A et B est effacé Pour annuler la fonction A B Erase Appuyez sur MENU NO ou p Remarque Si Impossible apparaît dans l afficheur cela signifie que Vous avez spécifié le point B avant le point A Le point B doit être spécifié après le point A Le passage désigné ne peut pas être effacé Ceci se produit parfois si vous a...

Page 90: ...la touche 0 ou pour sélectionner les cadres secondes ou minutes Pour les cadres le nombre de cadres apparaît quand vous tournez la commande AMS pour les secondes et minutes s ou m clignote dans l afficheur 5 Appuyez sur AMS ou YES quand la position est correcte Complete apparaît pendant quelques secondes et la nouvelle plage créée est reproduite Cette plage n est pas titrée même si la plage origin...

Page 91: ... appuyez sur AMS ou YES L affichage pour la sélection de la deuxième plage apparaît et le passage où les deux plages vont se rejoindre fin de la première et début de la plage suivante est répété 5 Tournez AMS pour sélectionner la seconde plage des deux plages à combiner et appuyez sur AMS ou YES Complete apparaît dans l afficheur pendant quelques secondes et le nombre de plages total dans le réper...

Page 92: ...er Edit Menu 2 Tournez AMS jusqu à ce que Move apparaisse dans l afficheur 3 Appuyez sur AMS ou YES 4 Tournez AMS pour sélectionner la plage que vous voulez déplacer et appuyez sur AMS ou YES 5 Tournez AMS jusqu à ce que la nouvelle position apparaisse 1 2 3 4 1 Numéro de plage A B C D A C B D 2 Déplace ment La plage C est déplacée vers la position 2 Nouvelle position de la plage Numéro de la plag...

Page 93: ...fres ou des symboles et un maximum de 1 700 caractères par minidisque apparaissent dans l afficheur quand la platine MD fonctionne Vous pouvez également utiliser la télécommande pour titrer une plage ou un MD voir Titrage d une plage et d un MD avec la télécommande à la page 43 Procédez comme suit pour titrer une plage ou un disque Vous pouvez titrer une plage quand la platine est en mode de lectu...

Page 94: ...sur AMS ou YES Complete apparaît pendant quelques secondes pour indiquer que la copie est terminée Si Overwrite apparaît dans l afficheur Le disque ou la plage que vous avez sélectionnés à l étape 6 ci dessus ont un titre Pour continuer la copie du titre appuyez sur AMS ou YES Pour annuler la copie d un titre Appuyez sur MENU NO ou p 9 Répétez les étapes 7 et 8 jusqu à ce que tout le titre soit en...

Page 95: ...nu sur CLEAR jusqu à ce que le titre actuel soit effacé 3 Entrez le nouveau titre Effectuez les opérations 6 à 9 de Titrage d un enregistrement aux pages 41 et 42 ou les opérations 2 à 4 de Titrage d une plage et d un MD avec la télécommande sur cette page 4 Appuyez sur NAME voir page suivante Titrage d une plage et d un MD avec la télécommande Z 1 Appuyez de façon répétée sur NAME jusqu à ce que ...

Page 96: ...sur MENU NO ou p Effacement de tous les titres d un minidisque Name All Erase Cette fonction vous permet d effacer simultanément tous les titres inscrits sur un minidisque 1 Alors que la platine est en mode d arrêt de lecture ou de pause appuyez sur MENU NO pour afficher Edit Menu 2 Tournez AMS jusqu à ce que Name apparaisse dans l afficheur et appuyez sur AMS ou YES 3 Tournez AMS jusqu à ce que N...

Page 97: ...Edit Menu 2 Tournez AMS jusqu à ce que Undo apparaisse dans l afficheur Undo n apparaît pas si vous n avez pas effectué de montage 3 Appuyez sur AMS ou YES Un des messages suivants apparaît dans l afficheur selon le type de montage que vous voulez annuler Montage effectué Message Effacement d un seul passage Effacement de toutes les plages d un MD Erase Undo Effacement d un passage d une plage Div...

Page 98: ...gistrement maximum du minidisque ne soit atteint Si vous avez enregistré 255 plages sur le minidisque Disc Full s allume quel que soit le temps d enregistrement total Vous ne pouvez pas enregistrer plus de 255 plages sur le minidisque Pour continuer l enregistrement effacez les plages inutiles ou utilisez un autre minidisque enregistrable Disc Full s allume avant que le nombre maximum de plages ne...

Page 99: ...est inséré dans le mauvais sens Insérez le minidisque dans la fente avec la face étiquetée tournée vers le haut et la flèche dirigée vers l ouverture Le minidisque n est peut être pas enregistré le répertoire musical n apparaît pas Remplacez le par un minidisque enregistré L enregistrement est impossible Le minidisque est protégé Protected et C11 apparaissent alternativement dans l afficheur Ferme...

Page 100: ...n Europe continentale et UK Secteur 220 230 V 50 60 Hz Étas Unis et Canada Secteur 120 V 60 Hz Consommation 24 W Dimensions approx l h p pièces saillantes et commandes 430 125 5 375 5 mm 17 5 13 3 4 po Poids approx 15 3 kg 33 li 11 on Accessoires fournis Voir page 4 Dolby Laboratories Licensing Corporation autorise une license d exploitation de ses brevets d invention américains et étrangers La co...

Page 101: ... pouvez cependant pas recopier la cassette DAT ou le minidisque enregistré sur une cassette DAT ou un autre minidisque enregistrable par la prise d entrée numérique de la platine DAT ou MD Platine MD Platine DAT Lecteur CD Prise de sortie numérique Prise d entrée numérique Platine DAT ou MD Première génération de cassette DAT ou MD enregistré via la liaison numérique à numérique DAT ou MD Platine ...

Page 102: ...trée de ligne analogique Cassette DAT ou MD enregistré via la liaison analogique à numérique DAT ou MD Index A Accessoires fournis 4 AMS Recherche automatique de plage 25 Annulation du dernier montage 45 Auto Cut coupure automatique 14 B Balayage des plages 25 C Câble coaxial de liaison numérique 4 5 49 50 Câble optique 4 5 49 50 Changement d un titre existant 43 de l affichage 24 de l ordre des p...

Page 103: ...Z Vérification de l ordre des plages programmées 29 du nombre de plages 23 du nombre total de plages 23 du temps de lecture 23 du temps restant 14 23 Nomenclature Touches A B 27 A SPACE 29 Alphanumériques 23 25 28 43 CD PLAYER P 19 CD PLAYER CHAR 43 CLEAR 27 28 41 43 CONTINUE 27 28 DATE PRESENT 7 DATE RECORDED 23 DIGITAL REC LEVEL ANALOG OUT LEVEL 16 33 DISPLAY 23 28 DISPLAY CHAR 14 23 28 41 FADER...

Page 104: ...o de menu Fonction 01 Création d un programme 02 Validation de l inscription des numéros de plage 03 Réglage du niveau de référence du signal d entrée quand T Mark LSyn est sélectionné sur le menu Setup 02 04 Mise en et hors service de l espacement automatique et de la pause automatique 05 Mise en et hors service de la réduction d espace et de coupure automatique 06 07 Réglage du temps du balayage...

Page 105: ...13 REC Error L enregistrement ne s est pas effectué correctement Placez la platine dans un endroit stable et recommencez l enregistrement Le MD dans la platine est sale avec des taches traces de doigts etc rayé ou non conforme Remplacez le disque et recommencez l enregistrement C13 Disc Error La platine n a pas pu lire correctement la TOC du MD Retirez le MD puis réinsérez le C14 Disc Error La pla...

Page 106: ......

Page 107: ......

Page 108: ...Sony Corporation Printed in Japan ...

Reviews: