

Sony LSPX-A1 4-732-086-11(1)
Sony LSPX-A1 4-732-086-11(1)
7
GB
2
Attach the center stand cover.
Draw the AC power cord and other connected
cables out through the bottom notch of the stand
cover.
Notch
Note
When attaching the mesh cover and stand cover, make sure
that the cables are not caught by the covers.
Placing the projector
parallel to the
projecting surface
Place the projector parallel to the projecting
surface.
For details on the distance between the projector and
the projection surface (projection distance) and the
size of the projected image, see “Installation distance
and projected image size” (page 15).
Note
When moving the projector, note the following.
• Only lift the projector with four or more people. Firmly grasp
the handles located at the bottom of the projector with both
hands.
• Do not drag the projector when moving it.
• Do not step on the cables when moving the projector.
• Do not place the projector on top of the cables.
• Be careful not to get caught in the cables.
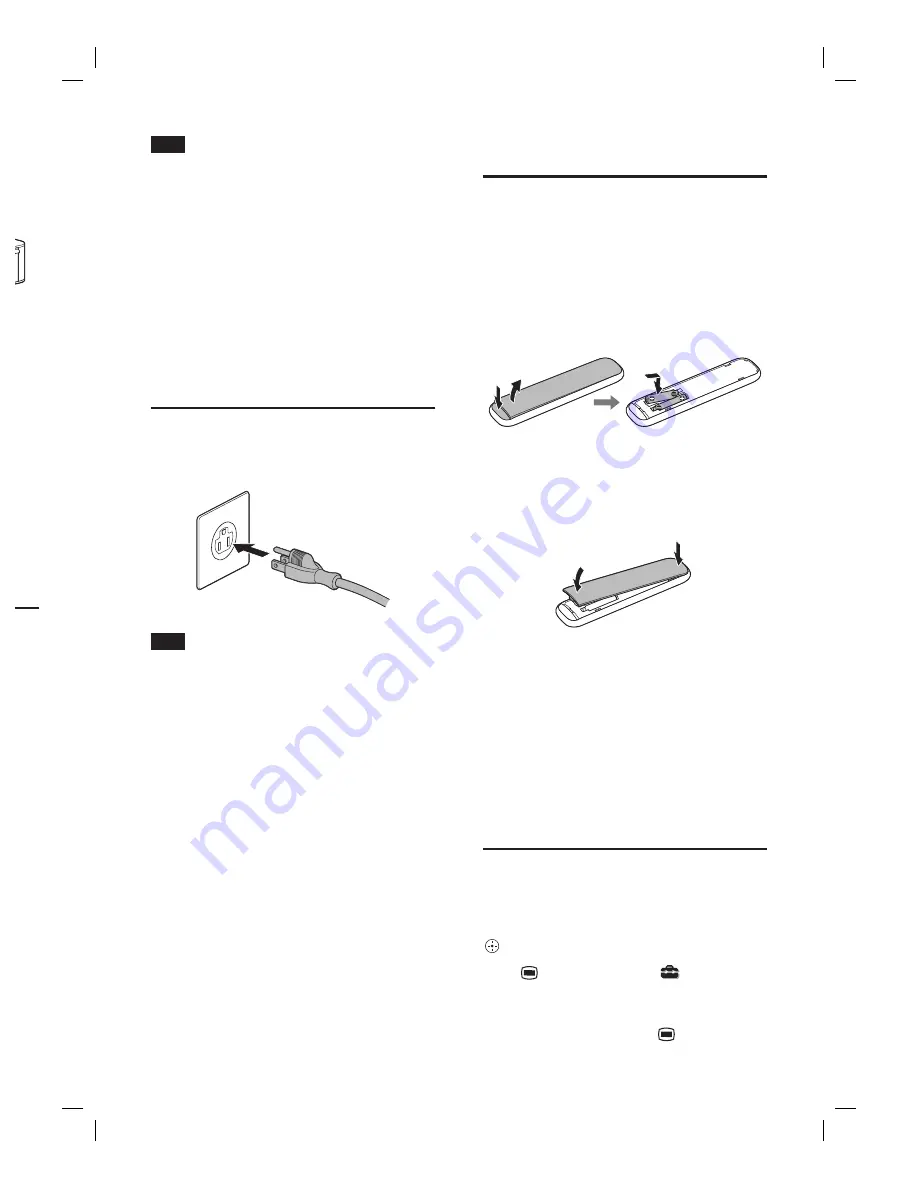
Connecting the AC
power cord to a power
source
Connect the AC power cord to a wall outlet
(wall socket).
Note
The type of AC power cord and the shape of the wall outlet
(wall socket) depend on the country or region of use.
Turning the power on
1
Insert two size AAA (R03) batteries
(supplied) into the remote control.
Push in the button (
) at the bottom of the back
of the remote control and lift up the battery cover
(
) to remove it. Confirm the
and
ends of the
two size AAA (R03) batteries, and insert them into
the remote control in the correct positions.
When you close the battery cover, align the
projections on the cover with the remote control,
and first push in the top part of the cover until it
clicks (
). Then, push in the bottom part of the
cover (
) while holding the top part of the remote
control.
2
Press
(power) on the remote control
to turn the power on.
An image (black) will be projected onto the
projection surface.
Selecting the display
language
You can set the language for menu items or messages
displayed on the screen from the menu.
Use the control key (up/down/left/right) on the
remote control to select a menu item, and press
(enter) to confirm the selection.
Press
(menu) and select
[Setup]
– [Language] – desired language setting.
The display language will be set.
To close the menu window, press
(menu) again.


