background image

25

Additional Information

Here are some simple solutions to problems which may affect the picture and sound.

If you continue to have these problems, have your TV serviced by qualified personnel.

NEVER open the casing yourself.

Troubleshooting

Problem

Suggested remedy

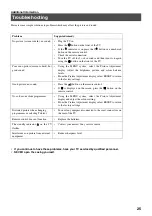
No picture (screen is dark), no sound.

Plug the TV in.

Press the 

 button on the front of the TV.

If the 

 indicator is on press the 

 button or a numbered

button on the remote control.

Check the aerial connection.

Turn the TV off for 3 or 4 seconds and then turn it on again

using the 

 button on the front of the TV.

Poor or no picture (screen is dark), but
good sound.

Using the MENU system, select the Picture Adjustment
display. Adjust the brightness, picture and colour balance
levels.

From the Picture Adjustment display select RESET to return
to the factory settings.

Good picture, no sound.

Press the 

 button on the remote control.

If 

 is displayed on the screen, press the 

 button on the

remote control.

No colour on colour programmes.

Using the MENU system, select the Picture Adjustment
display and adjust the colour setting.

From the Picture Adjustment display select RESET to return
to the factory settings. 

Distorted picture when changing 
programmes or selecting Teletext.

Turn off any equipment connected to the scart connectors on
the rear of the TV.

Remote control does not function.

Replace the batteries.

The standby indicator 

 on the TV

flashes.

Contact your nearest Sony service centre.

Interference on picture from external
equipment.

Reduce sharpness level.

/
Summary of Contents for KV-32FX65B

Page 1: ...R 4 205 753 41 02 Trinitron Colour Television Operating Instructions KV 32FX65 B 2000 Sony Corporation GB 420575341 ...

Page 2: ......

Page 3: ...1 GB ...

Page 4: ...fe Operation Do not operate the TV set on anything other than a 220 240V AC 50Hz supply Do not operate the TV if any liquid or solid objects fall in through the ventilation slots Have it checked immediately For environmental and safety reasons it is recommended that the TV set is not left in standby mode when not in use Switch off at the mains Do not disconnect the TV by pulling on the power cable...

Page 5: ...and sound Using the Features menu Re arranging the TV channels Manually tuning the TV Naming a channel Skipping programme positions Using the Further Programme Preset feature Adjusting the picture rotation Adjusting the picture geometry for an RGB source Inputting your personal ID Presetting and naming input signals 8 9 10 12 14 14 16 17 17 18 18 19 20 20 21 21 Additional Equipment Connecting addi...

Page 6: ... Installation 1 Checking the accessories supplied 2 Inserting batteries into the remote control Batteries Always observe the correct polarity when inserting batteries Always remember to dispose of used batteries in an environmentally friendly way Remote control ...

Page 7: ... the RF OUT socket on the back of the VCR to the aerial socket on the back of the TV as shown 3 Connect the scart lead if used to the AV2 socket on the rear of the TV set 4 Connect the VCR set to the mains and switch on 5 Insert a pre recorded tape into the VCR and press the PLAY button This enables the TV set to locate and store the video channel during the Tuning your TV procedure on page 7 If y...

Page 8: ... in the on off button on the front of the TV 4 Switching on the TV I O I If the standby mode indicator on the front of the TV is lit press the TV button on the remote control to switch on the TV set Please be patient as the picture may take a few moments to appear on the TV screen ...

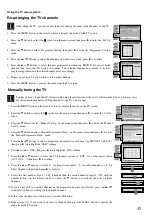
Page 9: ...on your TV If you wish to change the channel order press the v or V buttons to select the channel you want to move then press B Press the v or V buttons to select the new programme number position for your selected channel then press the OK button to confirm The selected channel now moves to its new programme position and the other channels move accordingly Repeat this procedure if you wish to sor...

Page 10: ...to select TV channels Master Reset button Press to return the picture and sound levels to factory settings The Sony logo will appear on the screen followed by the Autotune screen If you do not wish to retune your TV press the b button on your remote control Press the door flap as shown The control panel appears p 4 MONO 4 L G S I R D D D s 4 p 4 MONO 4 L G S I R D D D s 4 Advanced Digital 100Hz Pl...

Page 11: ...nu system of this TV To select Electronic Programme Guide EPG Press to switch EPG on and off To change screen format Press to change the format of the screen See Changing the screen size section of this manual for details Fastext keys See Teletext section of manual for details To select channels Press to select channels To mute sound Press to mute TV sound Press again to restore the sound To revea...

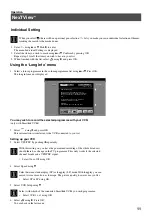
Page 12: ...n as all data is available When you later change the channel you can still select this NexTView service NexTView Index full list of selection personal selection news broadcasts movies sports entertainment children return to last menu depending on availability of service Operation using the Sony navigation 1 Press to switch NexTView on and off 2 Use the remote control buttons as follows a while in ...

Page 13: ...Select Speed using V 5 Select VCR Setup using V 6 Select using B Press OK You are back in the last menu 07 Tue 12 38 Address Mapping The position of the addresses in the OSDA is shown in the following diagram The position values of the DPW are set to 0 If other values are set the complete combination will be scrolled Example if the DPWC is set to 63 the char Speed Timer Prog VPS PDC SP VCR1 On Thi...

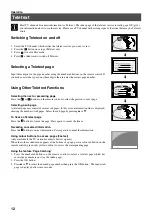
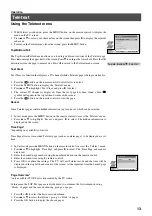
Page 14: ...ist of several sub pages In this case an information line is displayed showing the number of subpages Select the sub page by pressing v or V To freeze a Teletext page Press the button to freeze the page Press again to cancel the freeze Revealing concealed information Press the button to reveal information Press again to conceal the information Using colour buttons to access pages Fastext only avai...

Page 15: ...u 3 Press v or V to highlight Text Clear and press B to select 4 The current TV channel is displayed Once the text page has been found a blue symbol will appear in the top left hand corner of the screen 5 Press the button on the remote control to view the page 1 In text mode press the MENU button on the remote control to access the Teletext menu 2 Press v or V to highlight Reveal and press B to se...

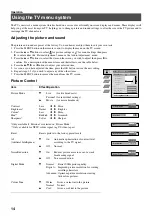
Page 16: ... to confirm For a description of the menu items and their effects see the table below 4 Press the v V B or b buttons to adjust your selected item 5 As soon as you have adjusted the item press the OK button to store the new setting 6 Repeat steps 3 5 if you wish to adjust any of the other items 7 Press the MENU button to remove the menu from the TV screen Picture Control Item Effect Operation Pictu...

Page 17: ...djustment If you want to store the new setting you need to set the Equaliser mode to Personal Personal mode permanently stores the setting all other modes Vocal Jazz Rock Pop store only until the next mode change Balance b More left B More right Loudness V Off Normal v On For music broadcasts Space V Off Normal v On Special acoustic effect Auto Vol Control V Off Volume level changes according to t...

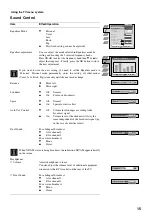
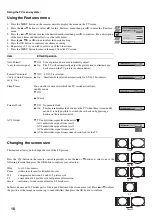
Page 18: ...hen press B to enter the Features menu 3 Press the v or V buttons to select the desired menu item then press B to confirm For a description of the menu items and their effects see the table below 4 Press the v V B or b buttons to select the desired setting 5 Press the OK button to confirm your choice of setting 6 Repeat steps 3 5 if you wish to select any of the other items 7 Press the MENU button...

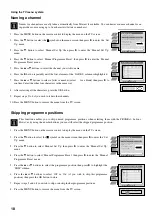
Page 19: ...ss B to enter the Set Up menu 3 Press the V button to select Manual Set Up on the menu screen then press B to enter the Manual Set Up menu 4 Press the V button to select Manual Programme Preset on the menu screen then press B to enter the Manual Programme Preset menu 5 Press the v or V buttons to select a programme number for your channel eg PROGR 1 for BBC1 then press B to highlight the SKIP colu...

Page 20: ...utton on the remote control to display the menu on the TV screen 2 Press the V button to select the symbol on the menu screen then press B to enter the Set Up menu 3 Press the V button to select Manual Set Up then press B to enter the Manual Set Up menu 4 Press the V button to select Manual Programme Preset then press B to enter the Manual Programme Preset menu 5 Press the v or V buttons to select...

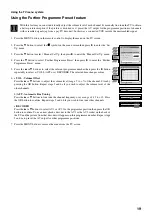
Page 21: ...menu 3 Press the V button to select Manual Set Up then press B to enter the Manual Set Up menu 4 Press the V button to select Further Programme Preset then press B to enter the Further Programme Preset menu 5 Press the v or V buttons to select the relevant programme number then press the B button repeatedly to select a VOL b AFT or c DECODER The selected item changes colour 6 a VOL Volume Offset P...

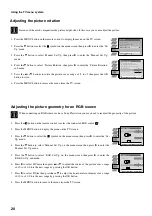
Page 22: ...on 7 Press B to select H Size then press v or V to adjust the horizontal coordinates over a range of 10 to 10 Store the new range by pressing the OK button 8 Press the MENU button to remove the menu from the TV screen 1 Adjusting the picture rotation Because of the earth s magnetism the picture might slant In this case you can readjust the picture 1 Press the MENU button on the remote control to d...

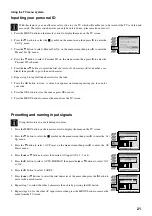
Page 23: ...ing this feature you can label input sources Manual Set Up Select A Z 0 9 Store OK Language Country Manual Programme Preset Further Programme Preset RGB Set Up Picture Rotation Personal ID AV Preset Select Enter AV 1 AV 2 AV 3 AV 4 AV 1 AV 2 AV 3 AV 4 INPUT LABEL AV Preset Select Confirm OK AUTO FORMAT On On On On AV 1 AV 2 AV 3 AV 4 INPUT LABEL AUTO FORMAT AV Preset Select A Z 0 9 Confirm OK AV 1...

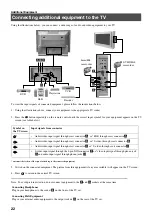
Page 24: ...r on the TV screen 4 Press to return to the normal TV screen Note To avoid picture distortion do not connect equipment to the F and G sockets at the same time Symbol on the TV screen Input signals from connector Audio video input signal through scart connector A or RGB through scart connector A Audio video input signal through scart connector B or S video through scart connector B Audio video inpu...

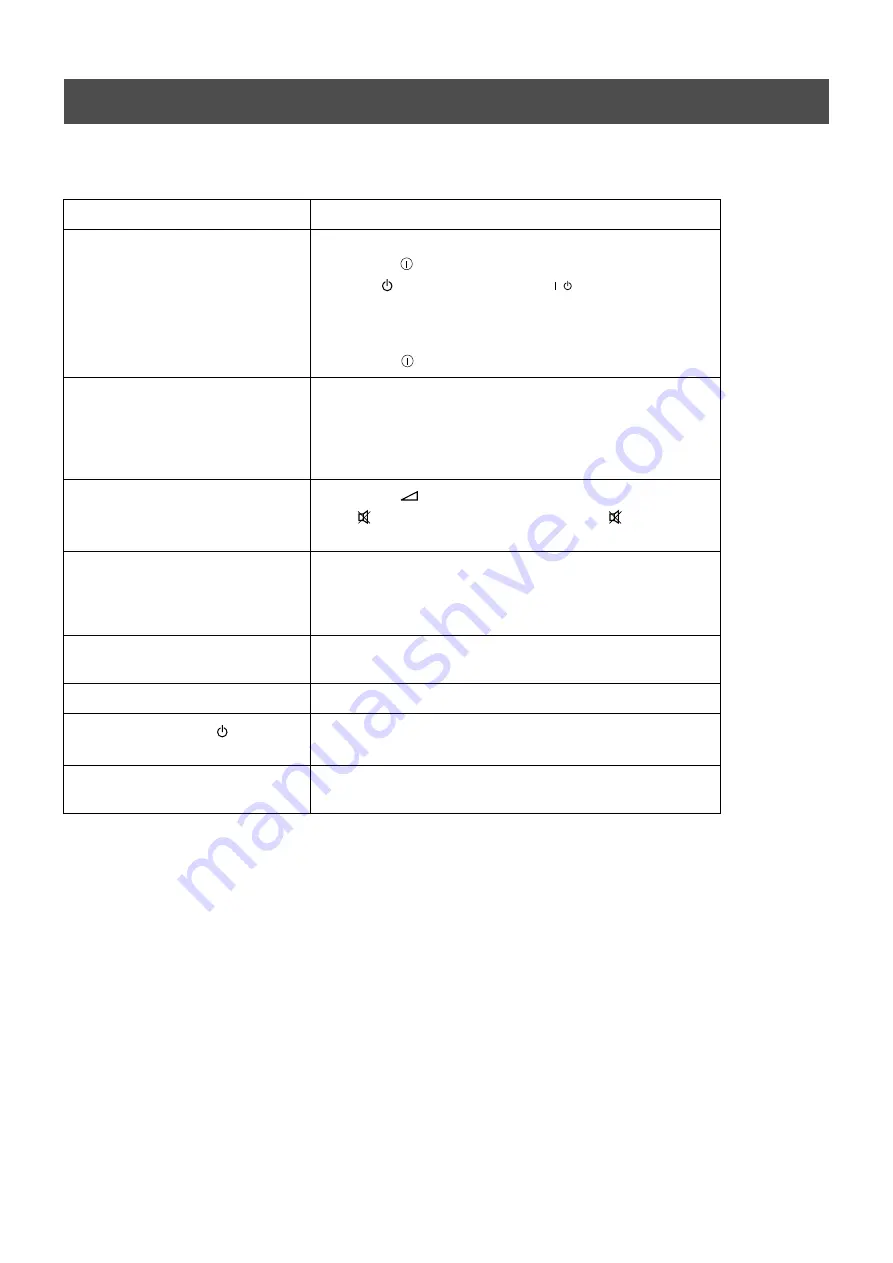
Page 25: ... this manual Additional information when connecting equipment 2 s 2 Smartlink is a direct link between your TV and VCR For Smartlink you need A VCR which supports Smartlink NexTView Link Easy Link or Megalogic A fully wired 21 pin scart cable to connect your VCR to scart 2 connector The features of Smartlink are Tuning information such as the channel overview are downloaded from the TV set to the ...

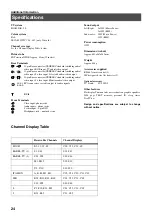
Page 26: ...no jacks S video input 4 pin DIN Headphones jack minijack stereo 1 1 2 s 2 3 s 3 4 4 s 4 Sound output Left Right 2x20W Music Power 2x10W RMS Sub woofer 30W Music Power 15W RMS Power consumption 122W Dimensions wxhxd Approx 883x567x562mm Weight Approx 64kg Accessories supplied RM 887 remote control 1 IEC designated size AA batteries 2 Optional accessory TV Stand SU 32FX2 Other features Flat display...

Page 27: ...Picture Adjustment display Adjust the brightness picture and colour balance levels From the Picture Adjustment display select RESET to return to the factory settings Good picture no sound Press the button on the remote control If is displayed on the screen press the button on the remote control No colour on colour programmes Using the MENU system select the Picture Adjustment display and adjust th...

Page 28: ...26 ...

Page 29: ...27 ...

Page 30: ...28 ...

Page 31: ......

Page 32: ...Sony España S A IMPRESO EN ESPAÑA ...

Reviews: