24
Installing the Camera
Installing the
Camera
Place the camera on a flat surface.
If you have to place the camera on an
inclined surface, make sure that the
inclination is less than ±15 degrees, so that
the pan/tilt performance is guaranteed.
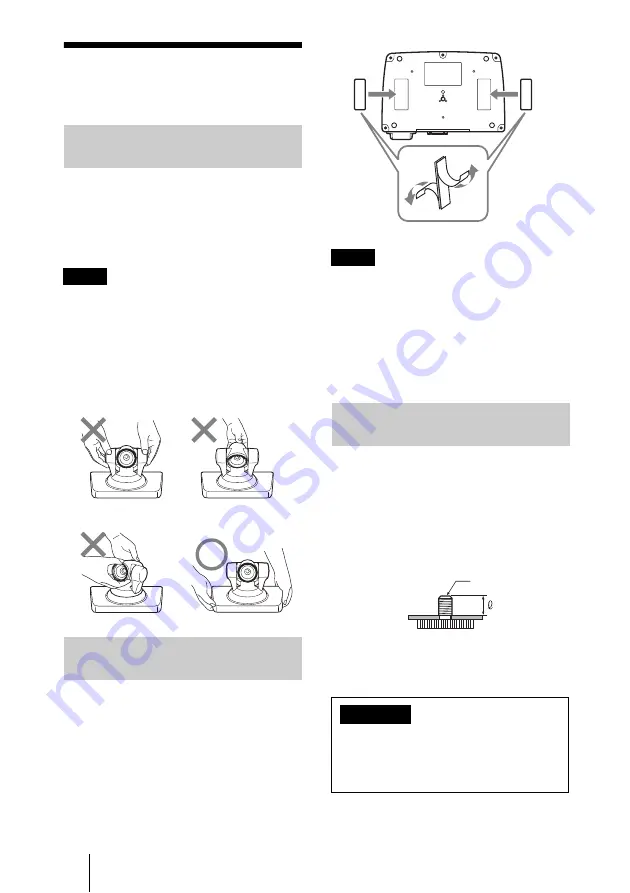
• You should take an appropriate
countermeasure to prevent the camera from
falling.
• Do not grasp the camera head when carrying
the camera.
• Do not turn the camera head by hand. Doing
so may result in a camera malfunction.
You can secure the camera to the installation
location using the supplied two sets of hook-
and-loop pads.
Stick the hook-and-loop pads to the
attachment locations on the bottom of the
camera and the other pads to the installation
location, and press both sets of pads to each
other until they snap together.
The supplied hook-and-loop pads are attached
to prevent the camera from falling down or
falling from an installation location. Do not use
them for attaching the camera to the HD Visual
Communication System. Doing so and only
holding the camera may cause the
Communication System to fall or result in
damage to the connecting cable.
Attach a tripod to the screw hole used for
attaching a tripod on the bottom of the
camera.
The tripod must be set up on a flat surface
and its screws tightened firmly by hand.
Use a tripod with screws of the following
specifications.
Installing the Camera on a
Desk
Notes
Using the Supplied Hook-
and-Loop Pads
Note
Attaching the Camera to a
Tripod
Installation of the camera using the
tripod screws and screw holes should not
be done for installation on a ceiling or a
shelf, etc., in a high position.
4
= 5 – 7 mm
4
= 7/32 – 9/32 inches
1/4 - 20UNC
Caution


