background image

55

GB


En
jo

yi

n

g

 Surr

ou
nd
 So

un
d

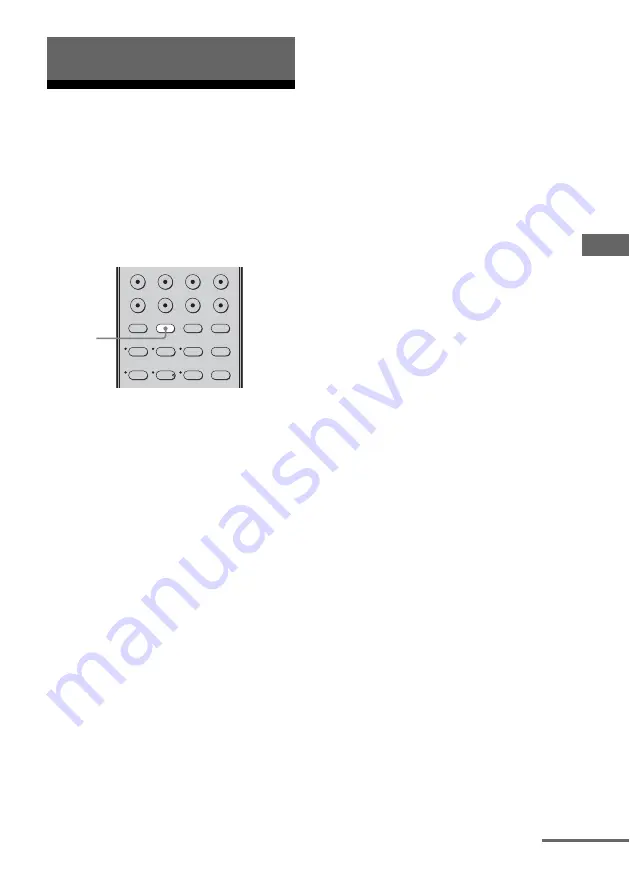
Enjoying Dolby Digital 
and DTS Surround sound 

(AUTO FORMAT DIRECT)

The Auto Format Direct (A.F.D.) mode allows 
you to listen to higher fidelity sound and select 
the decoding mode for listening to a 2 channel 
stereo sound as multi channel sound.

Press A.F.D. repeatedly to select 
the sound field you want.

For details, see “Types of A.F.D. mode” (page 
56).

Enjoying Surround Sound

1

2

3

4

6

VIDEO1

VIDEO2

BD

DVD

2CH

A.F.D.

MOVIE

MUSIC

DVD/BD

MENU

AUTO CAL

THEATRE

SAT

TV

SA-CD/CD TUNER

5

A.F.D.

continued

Summary of Contents for HT-DDW7500

Page 1: ... 2009 Sony Corporation 4 138 609 15 1 Home Theatre System Operating Instructions HT DDW8500 HT DDW7500 ...

Page 2: ...ality in the unit disconnect the main plug from the AC outlet immediately Do not expose batteries or apparatus with battery installed to excessive heat such as sunshine fire or the like The unit is not disconnected from the mains as long as it is connected to the AC outlet even if the unit itself has been turned off Excessive sound pressure from earphones and headphones can cause hearing loss For ...

Page 3: ... Logic and the double D symbol are trademarks of Dolby Laboratories Manufactured under license under U S Patent s 5 451 942 5 956 674 5 974 380 5 978 762 6 226 616 6 487 535 7 003 467 7 212 872 other U S and worldwide patents issued pending DTS DTS Digital Surround ES and Neo 6 are registered trademarks and the DTS logos Symbol and DTS 96 24 are trademarks of DTS Inc 1996 2008 DTS Inc All Rights R...

Page 4: ...STEM menu 52 Calibrating the appropriate settings automatically A CAL menu 54 Enjoying Surround Sound Enjoying Dolby Digital and DTS Surround sound AUTO FORMAT DIRECT 55 Selecting a pre programmed sound field 57 Using only the front speakers and the subwoofers 2CH STEREO 59 Enjoying the surround effect at low volume levels NIGHT MODE 60 Resetting sound fields to the initial settings 60 Tuner Opera...

Page 5: ...5GB Using the Remote Changing button assignments 75 Additional Information Glossary 76 Precautions 78 Troubleshooting 79 Specifications 83 Index 87 ...

Page 6: ...of parts Receiver Power amplifier Front panel MULTI STEREO GAME NIGHT MODE PHONES MOVIE A F D AUTO CAL MIC VIDEO L AUDIO R VIDEO 2 IN MASTER VOLUME INPUT SELECTOR MUSIC 1 7 9 8 6 0 1 3 4 5 2 qs qa ILLUMINATION VOLUME ON OFF MIN qd ...

Page 7: ...rder or video game page 30 36 G AUTO CAL MIC jack Connects to the supplied optimizer microphone for the Auto Calibration function page 34 H A F D Press to select a sound field page 55 MOVIE MUSIC GAME MULTI STEREO MULTI STEREO lamp Lights up when multi stereo sound field is activated I NIGHT MODE Press to enjoy sound effectsforwatchingmovie at night page 45 51 60 NIGHT MODE lamp Lights up when NIG...

Page 8: ...OPT Light up to indicate the current input Lights up when the receiver recognizes a component connected via an HDMI IN jack Lights up when INPUT MODE is set to AUTO and the source signal is a digital signal is input through the COAXIAL jack or when INPUT MODE is set to COAX However NO INPUT appears on the display when INPUT MODE is set to COAX and no digital signal is input through the COAXIAL jac...

Page 9: ...when the receiver is decoding the corresponding Dolby Digital format signals Dolby Digital Dolby Digital Surround EX Note When playing a Dolby Digital format disc be sure that you have made digital connections and that INPUT MODE is not set to ANALOG page 69 Name Function J Tuning indicators MEM FM AM ST Lights up when the receiver tunes in radio stations Lights up when a memory function such as P...

Page 10: ...URROUND FRONT L L R R L R SPEAKERS DCSV 50mA MAX OUT OUT SYSTEM CONTROL UDIO OUT VIDEO 1 AUDIO IN VIDEO IN SAT AUDIO OUT VIDEO OUT VIDEO OUT AUDIO IN VIDEO IN MONITOR AUDIO IN VIDEO IN BD 7 4 5 AUDIO IN SUBWOOFER ONLY FOR SS WP7500 SUBWOOFER IN SYSTEM CONTROL SUBWOOFER SPEAKERS A DMPORT DMPORT jack Connects to a DIGITAL MEDIA PORTadapter page 71 B ANTENNA section FM ANTENNA jack Connects to the su...

Page 11: ...cts to the power amplifier page 20 SYSTEM CONTROL IN jack Connects to the receiver page 20 E SPEAKERS section Connects to the speakers page 18 F VIDEO AUDIO INPUT OUTPUT section AUDIO IN OUT jacks Connects to a VCR Blu ray disc player etc page 22 30 VIDEO IN OUT jacks DCSV 50mA MAX OUT OUT SYSTEM CONTROL IN SYSTEM CONTROL White L Red R Yellow G AUDIO INPUT OUTPUT section AUDIO IN OUT jacks Connect...

Page 12: ...OL DVD BD MENU AUTO CAL D TUNING D SKIP THEATRE SAT TV SA CD CD TUNER 1 H m M X x O 5 10 qh qk qj ql w wa qg 1 3 2 5 6 7 8 qa q 9 qf qs 4 qd TV 1 AV 1 MEMORY MENU HOME TOOLS OPTIONS 1 2 3 4 6 7 8 0 10 ENTER 9 SYSTEM STANDBY TV INPUT SLEEP DMPORT VIDEO1 VIDEO2 BD DVD 2CH A F D TV CH PRESET TV CH PRESET TUNING TV TUNING FM MODE MOVIE MUSIC CLEAR DISPLAY TV VOL MASTER VOL DVD BD MENU AUTO CAL D TUNIN...

Page 13: ...his button will only function if your TV is compatible with Theatre Mode Refer to the operating instructions supplied with the TV for details THEATRE RM AAU023 only Name Function F DVD BD MENU Press to display the menu of the DVD or Blu ray disc on the TV screen Then use V v B b and Q to perform menu operations AUTO CAL Press to activate the Auto Calibration function G D TUNING Press to enter dire...

Page 14: ...o select preset TV channels PRESET Press to select preset stations preset channels of the VCR or satellite tuner TUNING Press to scan a station FM MODE Press to select the FM monaural or stereo reception Name Function O TV Press TV and the button with orange printing at the same time to enable TV operation P RETURN EXIT O Press to return to the previous menu exit the menu while the menu or on scre...

Page 15: ... numbers of the Digital CATV terminal Press z and TV O at the same time to input the decimal point for the channel numbers of the TV RM AAU023 only Press to select the channel entry mode either one or two digits of the VCR Press and TV O at the same time to select the channel entry mode either one or two digits of the TV 10 Press to select the track numbers over 10 of the CD player CLEAR Press to ...

Page 16: ...nd speaker right FSurround back speaker left GSurround back speaker right HSubwoofer ISubwoofer HT DDW8500 only This receiver allows you to use a 7 channel speaker with 4 subwoofer system Example of a 7 channel speaker with 4 subwoofer system configuration AFront speaker left BFront speaker right CCenter speaker DSurround speaker left ESurround speaker right FSurround back speaker left GSurround b...

Page 17: ...at are suitable for the wall material and strength As a plaster board wall is especially fragile attach the screws securely to a beam and fasten them to the wall Install the speakers on a vertical and flat wall where reinforcement is applied Contact a screw shop or installer regarding the wall material or screws to be used Sony is not responsible for accident or damage caused by improper installat...

Page 18: ...peaker cords to connect the surround and surround back speakers and the short speaker cords to connect the front speakers b Connect the cord attached with the CENTER label to the center speaker Connecting the speakers DIGITAL ASSIGNABLE SAT IN DVD IN BD IN OUT AM VIDEO 1 TV AUDIO OUT AUDIO OUT VIDEO OUT VIDEO OUT IN OPTICAL AUDIO IN VIDEO IN SUBWOOFER MONITOR SAT IN DVD IN DCSV OUT OUT OPTICAL COA...

Page 19: ...ers The center speaker and subwoofers do not have any character on the speaker label For details on the speaker type see page 3 Tip Use the supplied speakers to optimize the system s performance Character on speaker label Speaker type L Front left R Front right SL Surround left SR Surround right SBL Surround back left SBR Surround back right ...

Page 20: ...er terminal Connecting the subwoofers SUBWOOFER ONLY FOR SS WP7500 SUBWOOFER AUDIO IN SUBWOOFER L R DIGITAL ASSIGNABLE DC5V 0 7A MAX DMPORT SAT IN SAT IN DVD IN BD IN OUT AM Y PB CB COMPONENT VIDEO OUT IN PR CR DVD IN VIDEO 1 IN MONITOR OUT SA CD CD CD R VIDEO 1 IN TV TV AUDIO IN VIDEO IN SAT AUDIO OUT AUDIO OUT VIDEO OUT VIDEO OUT IN OPTICAL AUDIO IN VIDEO IN MONITOR AUDIO IN VIDEO IN BD SAT IN D...

Page 21: ... R DIGITAL ASSIGNABLE DC5V 0 7A MAX DMPORT SAT IN SAT IN DVD IN BD IN OUT AM Y PB CB COMPONENT VIDEO OUT IN PR CR DVD IN VIDEO 1 IN MONITOR OUT SA CD CD CD R VIDEO 1 IN TV TV AUDIO IN VIDEO IN SAT AUDIO OUT AUDIO OUT VIDEO OUT VIDEO OUT IN OPTICAL AUDIO IN VIDEO IN MONITOR AUDIO IN VIDEO IN BD SAT IN DVD IN DCSV 50mA MAX OUT OUT OPTICAL COAXIAL CENTER SURROUND BACK SURROUND FRONT L L R R L R HDMI ...

Page 22: ...T VIDEO OUT IN PR CR IN MONITOR OUT SA CD CD CD R VIDEO 1 IN TV TV AUDIO IN VIDEO IN SAT AUDIO OUT AUDIO OUT VIDEO OUT VIDEO OUT IN OPTICAL AUDIO IN VIDEO IN SUBWOOFER MONITOR AUDIO IN VIDEO IN BD SAT IN DVD IN DCSV 50mA MAX OUT OUT OPTICAL COAXIAL CENTER SURROUND BACK SURROUND FRONT L L R R L R HDMI ANTENNA SPEAKERS SYSTEM CONTROL SAT DVD VIDEO 1 IN OUT TV B C D AComponent video cord not supplied...

Page 23: ...ll the digital audio jacks are compatible with 32 kHz 44 1 kHz 48 kHz and 96 kHz sampling frequencies 4a Connecting the audio components The following illustration shows how to connect a Super Audio CD player CD player or CD recorder Before connecting the cords be sure to disconnect the AC power cord mains lead After connecting your audio component proceed to 4b Connecting the video components pag...

Page 24: ...to digital sound from other inputs DIGITAL ASSIGN page 70 The image quality depends on the connecting jack Refer to the illustration that follows Select the connection according to the jacks on your components Note Be sure to turn on the receiver when the video and audio signals of a playback component are being output to a TV via the receiver Unless the power is turned on neither video nor audio ...

Page 25: ... button depending on the remote supplied with this receiver The factory setting for the remote is shown in the table below To change the factory setting of the DVD input button on the remote see Changing button assignments page 75 Remote Factory setting RM AAU021 DVD player Change the factory setting if you connect a DVD recorder RM AAU023 DVD recorder Change the factory setting if you connect a D...

Page 26: ...ecting components with HDMI jacks L R DIGITAL ASSIGNABLE DC5V 0 7A MAX DMPORT SAT IN OUT AM Y PB CB COMPONENT VIDEO OUT IN PR CR DVD IN VIDEO 1 IN MONITOR OUT SA CD CD CD R VIDEO 1 IN TV TV AUDIO IN VIDEO IN SAT AUDIO OUT AUDIO OUT VIDEO OUT VIDEO OUT IN AUDIO IN VIDEO IN SUBWOOFER MONITOR AUDIO IN VIDEO IN BD SAT IN DVD IN DCSV 50mA MAX OUT OUT OPTICAL COAXIAL CENTER SURROUND BACK SURROUND FRONT ...

Page 27: ...n HDMI jack may be suppressed by the connected component Check the setup of the connected component if an image is poor or the sound does not come out of a component connected via the HDMI cable Sound may be interrupted when the sampling frequency the number of channels or the audio format of the audio output signals from the playback component is switched When the connected component is not compa...

Page 28: ...necting a DVD player Blu ray disc player L R DIGITAL ASSIGNABLE DC5V 0 7A MAX DMPORT SAT IN SAT IN DVD IN BD IN OUT AM Y PB CB COMPONENT VIDEO OUT IN PR CR T SA CD CD CD R VIDEO 1 IN TV TV AUDIO IN VIDEO IN SAT AUDIO OUT AUDIO OUT VIDEO OUT VIDEO OUT IN OPTICAL AUDIO IN VIDEO IN SUBWOOFER MONITOR AUDIO IN VIDEO IN T DVD IN DCSV 50mA MAX OUT OUT OPTICAL COAXIAL CENTER SURROUND BACK SURROUND FRONT L...

Page 29: ...s Connecting a satellite tuner Set top box L R DIGITAL ASSIGNABLE DC5V 0 7A MAX DMPORT SAT IN DVD IN BD IN OUT AM Y PB CB COMPONENT VIDEO OUT IN PR CR MONITOR OUT SA CD CD CD R VIDEO 1 IN TV TV AUDIO IN VIDEO IN AUDIO OUT AUDIO OUT VIDEO OUT VIDEO OUT OPTICAL AUDIO IN VIDEO IN SUBWOOFER MONITOR AUDIO IN VIDEO IN BD SAT IN DVD IN DCSV 50mA MAX OUT OUT OPTICAL COAXIAL CENTER SURROUND BACK SURROUND F...

Page 30: ...IN OUT AM Y PB CB COMPONENT VIDEO OUT IN PR CR MONITOR OUT SA CD CD CD R IN TV TV AUDIO IN VIDEO IN SAT AUDIO OUT AUDIO OUT VIDEO OUT IN OPTICAL AUDIO IN MONITOR AUDIO IN VIDEO IN BD SAT IN DVD IN DCSV 50mA MAX OUT OUT OPTICAL COAXIAL CENTER SURROUND BACK SURROUND FRONT L L R R L R HDMI ANTENNA SPEAKERS SYSTEM CONTROL VIDEO 1 T VIDEO 1 IN IN IN A VD D S VIDEO OUT VIDEO IN SUBWOOFER DVD recorder VC...

Page 31: ...isconnect the AC power cord mains lead The shape of the connector varies depending on the area code of this receiver Notes To prevent noise pickup keep the AM loop antenna aerial away from the receiver and other components Be sure to fully extend the FM wire antenna aerial After connecting the FM wire antenna aerial keep it as horizontal as possible L R DIGIT DC5V 0 7A MAX DMPORT SAT IN AM Y PB CB...

Page 32: ...C power cord mains lead to a wall outlet Before using the receiver for the first time initialize the receiver by performing the following procedure This procedure can also be used to return settings you have made to their factory defaults Be sure to use the buttons on the receiver for this operation 1 Press 1 to turn off the receiver Setting the voltage selector VOLTAGE SELECTOR 240Vb 220V 120Va V...

Page 33: ...l Cinema Auto Calibration function allows you to perform automatic calibration such as Checking the connection between each speaker and the receiver Adjusting the speaker level Measuring the distance of each speaker from your listening position The DCAC is designed to obtain proper sound balance in your room However you can adjust the speaker levels and balance manually according to your preferenc...

Page 34: ...ess AMP MENU 2 Press AUTO CAL Measurement starts in 5 seconds and the display changes as follows A CAL 5 t A CAL 4 t A CAL 3 t A CAL 2 t A CAL 1 While the time is counting down stand away from the measurement area to avoid measurement error MULTI STEREO GAME NIGHT MODE PHONES MOVIE A F D AUTO CAL MIC VIDEO L AUDIO R VIDEO 2 IN MASTER VOLUME INPUT SELECTOR MUSIC 1 AUTO CAL MIC 1 Optimizer microphon...

Page 35: ...o get a more accurate measurement The Auto Calibration function will be canceled when you do the following during the measurement process Press 1 or MUTING Press the input buttons or turn the INPUT SELECTOR on the receiver Change the volume level Connect the headphones Press AUTO CAL again When error codes appear When an error is detected during Auto Calibration an error code will appear on the di...

Page 36: ...kers connection ERROR 21 Only one surround speaker is detected Check the surround speakers connection ERROR 22 The surround back speaker is connected only to the SPEAKERS SURROUND BACK R terminals When you connect only one surround back speaker connect it to the SPEAKERS SURROUND BACK L terminals ERROR 23 Surround back speaker is detected but surround speakers are not connected Be sure to connect ...

Page 37: ...Reposition your center speaker d WARN 73 The surround left speaker distance is out of range Reposition your surround left speaker d WARN 74 The surround right speaker distance is out of range Reposition your surround right speaker d WARN 75 The surround back left speaker distance is out of range Reposition your surround back left speaker d WARN 76 The surround back right speaker distance is out of...

Page 38: ...one sounds the same from each speaker For details see Adjusting the level LEVEL menu page 47 Tips To adjust the level of all speakers at the same time press MASTER VOL You can also use MASTER VOLUME on the receiver The adjusted value is shown on the display during adjustment 7 Repeat steps 1 to 5 to select T TONE N You can also press any input buttons The test tone turns off When a test tone is no...

Page 39: ... subwoofer volume to maximum extraneous noise may be heard depending on the source you are playing Playback Selected input Display Components that can be played back DMPORT DMPORT DIGITALMEDIAPORT adapter connected to the DMPORT jack VIDEO 1 VIDEO 1 DVD recorder VCR etc connected to the VIDEO 1 jack VIDEO 2 VIDEO 2 Camcorder video game etc connected to the VIDEO 2 IN jack BD BD Blu ray disc player...

Page 40: ...t 7 SYSTEM 4 Press or b to enter the menu 5 Press V v to select NAME IN 6 Press or b to enter the parameter The cursor flashes and you can select a character 7 Press V v to select a character then press B b to move the cursor to the next position If you made a mistake Press B b until the character you want to change flashes then press V v to select the correct character Tips You can select the cha...

Page 41: ... described for a Sony Super Audio CD player Refer to the operating instructions supplied with the Super Audio CD player or CD player Tips You can select the sound field to suit the music Refer to page 57 for details Recommended sound fields Classical HALL Jazz JAZZ Live concert CONCERT You can listen to the sound that was recorded in the 2 channel format from all speakers multi channel Refer to pa...

Page 42: ...gital connection Be sure the digital audio output of the DVD player Blu ray disc player is set up properly Tips Select the sound format of the disc to be played if necessary You can select the sound field to suit the movie music Refer to page 57 for details Recommended sound fields Movie C ST EX Music CONCERT 1 Turn on the TV and DVD player Blu ray disc player 2 Turn on the receiver 3 Press DVD to...

Page 43: ... parameter 6 Press V v repeatedly to select the setting you want The setting is entered automatically To return to the previous display Press B To exit the menu Press AMP MENU Note Some parameters and settings may appear dimmed on the display This means that they are either unavailable or fixed and unchangeable Amplifier Operations 1 2 3 4 6 7 8 0 10 ENTER 9 RETURN EXIT TV CH PRESET TV CH PRESET R...

Page 44: ...nd back right speaker level SBR LVL SBR 10 dB to SBR 10 dB 1 dB step SBR 0 dB Subwoofer level SW LVL SW 10 dB to SW 10 dB 1 dB step SW 0 dB Dynamic range compressora D RANGE COMP OFF COMP STD COMP MAX COMP OFF TONE 2 TONE page 48 Front speaker bass levela BASS LVL BASS 6 dB to BASS 6 dB 1 dB step BASS 0 dB Front speaker treble levela TRE LVL TRE 6 dB to TRE 6 dB 1 dB step TRE 0 dB SUR 3 SUR page 4...

Page 45: ...STEM 7 SYSTEM page 52 Front speaker distancea c FRT DIST DIST 1 0 m to DIST 7 0 m DIST 3 ft to DIST 23 ft 0 1 m 1 ft step DIST 3 0 m DIST 10 ft Center speaker distancea c CNT DIST DIST 1 0 m to DIST 7 0 m DIST 3 ft to DIST 23 ft 0 1 m 1 ft step DIST 3 0 m DIST 10 ft Surround left speaker distancea c SL DIST DIST 1 0 m to DIST 7 0 m DIST 3 ft to DIST 23 ft 0 1 m 1 ft step DIST 3 0 m DIST 10 ft Surr...

Page 46: ...r is not available for models of area code EA c The default setting for model of area code CA is ft and for models of other area code is m Menu Display Parameters Display Settings Initial setting A CAL 8 A CAL page 54 Auto Calibrationa AUTO CAL A CAL NO A CAL YES A CAL NO ...

Page 47: ...nd back left speaker level x SBR LVL Surround back right speaker level x SW LVL Subwoofer level x D RANGE Dynamic range compressor Lets you compress the dynamic range of the sound track This may be useful when you want to watch movies at low volumes late at night Dynamic range compression is possible with Dolby Digital sources only COMP OFF The dynamic range is not compressed COMP STD The dynamic ...

Page 48: ... menus For details on adjusting the parameters see Navigating through menus page 43 and Overview of the menus page 44 SUR menu parameters x S F SELCT Sound field selection Lets you select the sound field you want For details see Enjoying Surround Sound page 55 Note The receiver lets you apply the last selected sound field to an input whenever it is selected Sound Field Link For example if you sele...

Page 49: ...ls to 6 1 discrete channels Discrete 6 1 channel signals are DVD specific signals not used in movie theaters e When two surround back speakers are connected the output channel will be 7 1 channel x SB ON The surround back decoding is applied to 5 1 channel and 6 1 channel decoding in the input stream Notes This function does not work in the following cases The sound field for music or movies is se...

Page 50: ...ings for the audio AUDIO menu You can use the AUDIO menu to make settings for the audio to suit your preference Select 5 AUDIO in the amplifier menus For details on adjusting the parameters see Navigating through menus page 43 and Overview of the menus page 44 AUDIO menu parameters x DEC PRI Digital audio input decoding priority Lets you specify the input mode for the digital signal input to the D...

Page 51: ...ut and visual display is minimized Notes This parameter is useful when you use a large LCD or plasma TV or a projector This parameter is valid only when you use a sound field selected with the 2CH or A F D buttons This parameter is not valid when signals with a sampling frequency of more than 48 kHz is input the multi channel Linear PCM signals are received via an HDMI IN jack x D ASSIGN Digital a...

Page 52: ...TV even if you play back multi channel source When you connect the receiver to a video component projector etc sound may not be output from the receiver In this case select AMP x CTRL HDMI Control for HDMI Lets you turn the Control for HDMI function on or off For details see BRAVIA Sync Features page 64 Settings for the system SYSTEM menu You can use the SYSTEM menu to set the size and distance of...

Page 53: ... closer than the length of A Example Adjust the distance C to 1 5 meters 5 feet or more when the distance A is 6 meters 20 feet This is important because incorrect speaker placement is not conductive to the enjoyment of surround sound Please note that placing the speakers closer than the required will cause a delay in the output of the sound from that speaker In other words the speaker will sound ...

Page 54: ...ts become unclear unless set to SIDE LO or SIDE HI Nevertheless each listening environment has many variables such as wall reflections and you may obtain better results using BEHD HI if your speakers are located high above the listening position even if they are located to the immediate left and right Therefore although it may result in a setting contrary to the above explanation we recommend that...

Page 55: ...r fidelity sound and select the decoding mode for listening to a 2 channel stereo sound as multi channel sound Press A F D repeatedly to select the sound field you want For details see Types of A F D mode page 56 Enjoying Surround Sound 1 2 3 4 6 VIDEO1 VIDEO2 BD DVD 2CH A F D MOVIE MUSIC DVD BD MENU AUTO CAL THEATRE SAT TV SA CD CD TUNER 5 A F D continued ...

Page 56: ...ode can reproduce sound in 5 1 channel for watching videos of overdubbed or old movies PRO LOGIC II MUSIC PLII MS 5 channel Performs Dolby Pro Logic II Music mode decoding This setting is ideal for normal stereo sources such as CDs PRO LOGIC II GAME PLII GM 5 channel Performs Dolby Pro Logic II Game mode decoding This setting is ideal for game softwares PRO LOGIC IIx MOVIE PLIIX MV 7 channel Perfo...

Page 57: ...he exciting and powerful sound of movie theaters and concert halls into your home Press MOVIE repeatedly to select a sound field for movies or press MUSIC repeatedly to select a sound field for music For details see Types of sound field available page 58 1 2 3 4 6 7 8 9 2CH A F D MOVIE MUSIC DVD BD MENU AUTO CAL D TUNING D SKIP THEATRE SAT TV SA CD CD TUNER 5 MUSIC MOVIE 2CH A F D continued ...

Page 58: ...ertainment scoring stage This mode is ideal for watching musicals or films where orchestra music is featured in the soundtrack GAME GAME Reproduces the sound processing of video games for better gaming experience Music HALL HALL Reproduces the acoustics of a classical concert hall JAZZ CLUB JAZZ Reproduces the acoustics of a jazz club LIVE CONCERT CONCERT Reproduces the acoustics of a 300 seat liv...

Page 59: ...ware etc by looking at the logo on the package Sound fields with D C S mark use DCS technology See Glossary page 76 To turn off the surround effect for movie music Press 2CH to select 2CH ST or press A F D repeatedly to select A F D AUTO Using only the front speakers and the subwoofers 2CH STEREO In this mode the receiver outputs the sound from the front left right speakers and the subwoofers When...

Page 60: ...nction does not work when PCM signals with a sampling frequency of more than 96 kHz are being received Resetting sound fields to the initial settings Be sure to use the buttons on the receiver for this operation 1 Press 1 to turn off the power 2 While holding down A F D press 1 S F CLR appears on the display and all sound fields are reset to their initial setting MULTI STEREO GAME NIGHT MODE PHONE...

Page 61: ...or FM stereo reception If the FM stereo reception is poor and ST flashes on the display select monaural audio so that the sound will be less distorted Press FM MODE repeatedly until the FM MONO appears on the display To return to stereo mode press FM MODE repeatedly until the FM AUTO appears on the display Tuner Operations Area code FM AM CA 100 kHz 10 kHz E51 50 kHz 10 kHz AU SA 50 kHz 9 kHz EA 5...

Page 62: ...ke sure you have entered the right frequency If not repeat steps 2 to 4 If you still cannot tune in a station the frequency is not used in your area Except for models of area code EA only You can change the AM tuning scale to either 9 kHz or 10 kHz 1 Press TUNER repeatedly to select AM 2 Press AMP MENU 1 LEVEL appears on the display 3 Press V v repeatedly to select 4 TUNER 4 Press or b to enter th...

Page 63: ... from step 3 5 Press ENTER The station is stored as the selected preset number If MEM goes out before you press ENTER start again from step 3 6 Repeat steps 1 to 5 to preset another station 1 Press TUNER repeatedly to select the FM or AM band 2 Press PRESET or PRESET repeatedly to select the preset station you want Each time you press the button you can select a preset station as follows You can a...

Page 64: ...trol for HDMI function By connecting Sony components that are compatible with the BRAVIA Sync with an HDMI cable not supplied operation is simplified as follows One Touch Play When you play back a component such as a DVD Blu ray disc player the receiver and the TV will switch to the appropriate HDMI input automatically In case the receiver or and the TV is in standby mode they will be turned on au...

Page 65: ...nction of the receiver can be turned on simultaneously by turning the Control for HDMI function of the TV on 1 Make sure that the receiver TV and playback components are connected using an HDMI cable not supplied The respective components must be compatible with the Control for HDMI function 2 Turn on the receiver TV and playback components 3 Turn the Control for HDMI function of the TV on The Con...

Page 66: ...For details on setting the TV and connected components refer to the operating instructions of the respective components Notes When you unplug the HDMI cable or change the connection perform the steps given in When your TV is compatible with the Control for HDMI Easy Setting function page 65 or When your TV is not compatible with the Control for HDMI Easy Setting function page 66 You cannot perform...

Page 67: ...rned on the receiver will turns on and switches to the appropriate input automatically TV sound is output from the speakers connected to the receiver and the volume of the TV is minimized simultaneously You can also use the System Audio Control function as follows If you turn on the receiver while the TV is turned on the System Audio Control function will automatically be set to on and the TV soun...

Page 68: ...ing the System Power Off function For details refer to the operating instructions of the TV Depending on the status the connected components may not be turned off For details refer to the operating instructions of the connected components 1 2 3 4 6 7 8 0 10 ENTER 9 SYSTEM STANDBY TV INPUT SLEEP DMPORT VIDEO1 VIDEO2 BD DVD 2CH A F D RETURN EXIT TV CH PRESET TV CH PRESET TUNING TV TUNING FM MODE REP...

Page 69: ...r b to enter the parameter 7 Press V v repeatedly to select the audio input mode The selected audio input mode appears on the display Audio input modes AUTO Gives priority to digital audio signals when there are both digital and analog connections If there are more than one digital connection HDMI audio signals have priority over COAXIAL and OPTICAL audio signals If there are no digital audio sign...

Page 70: ...y to select the input SAT DVD in the example you want to assign to the digital audio input jack selected in step 6 When DVD input is selected the sound of the DVD player will become a digital sound through the OPTICAL SAT IN jack The input you can assign varies for each audio input For details see the following Assignable inputs for digital audio input Assignable inputs for digital audio input The...

Page 71: ...n Depending on the DIGITAL MEDIA PORT adapter video output may not be possible The DIGITAL MEDIA PORT adapters are available for purchase depending on the area You can listen to the sound and view the images from the component connected through the DIGITAL MEDIA PORT adapter to the DMPORT jack on the receiver To detach the DIGITAL MEDIA PORT adapter from DMPORT jack Press and hold both sides of th...

Page 72: ...f the connected component The sound is played back on the receiver and the image appears on the TV For details refer to the operating instructions supplied with the DIGITAL MEDIA PORT adapter Notes Depending on the type of DIGITAL MEDIA PORT adapter you can operate the connected component by using the remote For details on the remote button operation see page 12 Be sure you have connected the MONI...

Page 73: ...preset station page 40 64 Index name does not appear when only blank spaces have been entered or it is the same as the input name Note Character or marks may not be displayed for some languages Using the Sleep Timer You can set the receiver to turn off automatically at a specified time Press SLEEP repeatedly while the power is on Each time you press SLEEP the display changes cyclically as follows ...

Page 74: ...he recording level 4 Start recording on the recording component then start playback on the playback component Note Sound adjustments do not affect the signal output from the SA CD CD CD R OUT jacks 1 Press one of the input buttons to select the playback component You can also use INPUT SELECTOR on the receiver 2 Prepare the playback component for playing For example insert the video tape you want ...

Page 75: ...a VTR 2 or VTR 3 setting which corresponds to 8 mm and VHS respectively b Sony DVD recorders are operated with a DVD1 or DVD3 setting For details refer to the operating instructions supplied with the DVD recorders c For details on the BD1 or BD3 setting refer to the operating instructions supplied with the Blu ray disc player or Blu ray disc recorder To clear all remote button assignments While ho...

Page 76: ...nal information The luminance signal Y and chrominance signal C are combined and transmitted together x Digital Cinema Sound DCS A unique sound reproduction technology for home theater developed by Sony in cooperationwithSonyPictures Entertainment for enjoying the exciting and powerful sound of movie theaters at home With this Digital Cinema Sound developed by integrating a DSP Digital Signal Proc...

Page 77: ...round channels It is ideal for playback of motion picture soundtracks x DTS Neo 6 This technology converts 2 channel stereo recorded audio for 6 1 channel playback There are two modes to select according to the playback source or your preference CINEMA for movies and MUSIC for stereo sources such as music x HDMI High Definition Multimedia Interface HDMI High Definition Multimedia Interface is an i...

Page 78: ...ement Place the receiver in a location with adequate ventilation to prevent heat buildup and prolong the life of the receiver Do not place the receiver near heat sources or in a place subject to direct sunlight excessive dust or mechanical shock Do not place anything on top of the cabinet that might block the ventilation holes and cause malfunctions Do not place the receiver near equipment such as...

Page 79: ...e is no sound from one of the front speakers Connect a pair of headphones to the PHONES jack to verify that sound is output from the headphones If only one channel is output from the headphones the component may not be connected to the receiver correctly Check that all the cords are fully inserted into the jacks on both the receiver and the component If both channels are output from the headphones...

Page 80: ...securely page 18 Check that the system control cable supplied is fully inserted into the SYSTEM CONTROL jack page 18 Check that the SUBWOOFER VOLUME on the power amplifier is not set to MIN The surround effect cannot be obtained Make sure the sound field function is on press MOVIE or MUSIC Sound fields do not function for signals with a sampling frequency of more than 48 kHz Dolby Digital or DTS m...

Page 81: ... HDMI connection page 26 Make sure CTRL HDMI is set to CTRL ON in HDMI menu Make sure the connected component is compatible with the Control for HDMI function Check the Control for HDMI settings on the connected component See the operating instructions of the connected component If you change the HDMI connection connect disconnect the AC power cord or there is a power failure repeat the procedures...

Page 82: ...epeatedly so that the frequency appears on the display The remote does not function Point the remote at the remote sensor on the receiver Remove any obstacles in the path between the remote and the receiver Replace all the batteries in the remote with new ones if they are weak Make sure you select the correct input on the remote If there is a malfunction the display shows a message You can check t...

Page 83: ...NP7500 SURROUND 185 W per channel1 with SS SRP7500 SURROUND BACK 185 W per channel1 with SS SRP7500 Power amplifier TA KMSW500 RMS output 6 ohms 80 Hz THD 10 200 W per channel1 Input LINE IN input pin jacks 1 Measured under the following conditions 2 Reference power output for front center surround and surround back speakers Depending on the sound field settings and the source there may be no soun...

Page 84: ...System Control output DC OUT 5 V 50mA MAX Power consumption STR KM7500 TA KMSW500 Power consumption during standby mode 0 3 W when CTRL HDMI in HDMI menu is set to CTRL OFF Dimensions width height depth including projecting parts and controls Approx Receiver 430 158 342 mm 17 6 1 4 13 1 2 in Power amplifier 430 158 332 mm 17 6 1 4 13 1 8 in Mass Approx Receiver 8 0 kg 17 lb 11 oz Power amplifier 6...

Page 85: ...S SRP7500 Speaker system Full range Bass reflex Speaker unit Woofer 100 mm 4 in cone type Rated Impedance 6 ohms Dimensions width height depth Approx 174 220 180 mm 6 7 8 8 3 4 7 1 8 in with foot Mass Approx 1 6 kg 3 lb 9 oz Subwoofer SS WP7500 Speaker system Bass reflex Magnetically shielded Speaker unit 250 mm 10 in cone type Rated Impedance 6 ohms Dimensions width height depth Approx 335 420 33...

Page 86: ... RM AAU021 1 Model of area code CA only RM AAU023 1 Model of area code AU E51 SA EA only R6 size AA batteries 2 Design and specifications are subject to change without notice For details on the area code of the component you are using see page 3 Halogenated flame retardants are not used in the certain printed wiring boards ...

Page 87: ...52 I Initial setup 32 INPUT MODE 69 M Menu A CAL 54 AUDIO 50 HDMI 52 LEVEL 47 SUR 48 SYSTEM 52 TONE 48 TUNER 50 Muting 39 N Naming 40 64 NIGHT MODE 45 51 60 O One Touch Play 67 R Recording onto a CD R 74 onto a recording media 74 Remote commander 12 S Satellite tuner connecting 29 SB DEC 49 Selecting component 39 sound field 57 Set top box connecting 29 Sleep Timer 73 Sound fields resetting 60 sel...

Page 88: ...Sony Corporation Printed in Malaysia 1 ...

Reviews: