MHC-GN800 4-244-569-
13
(3)
6
GB
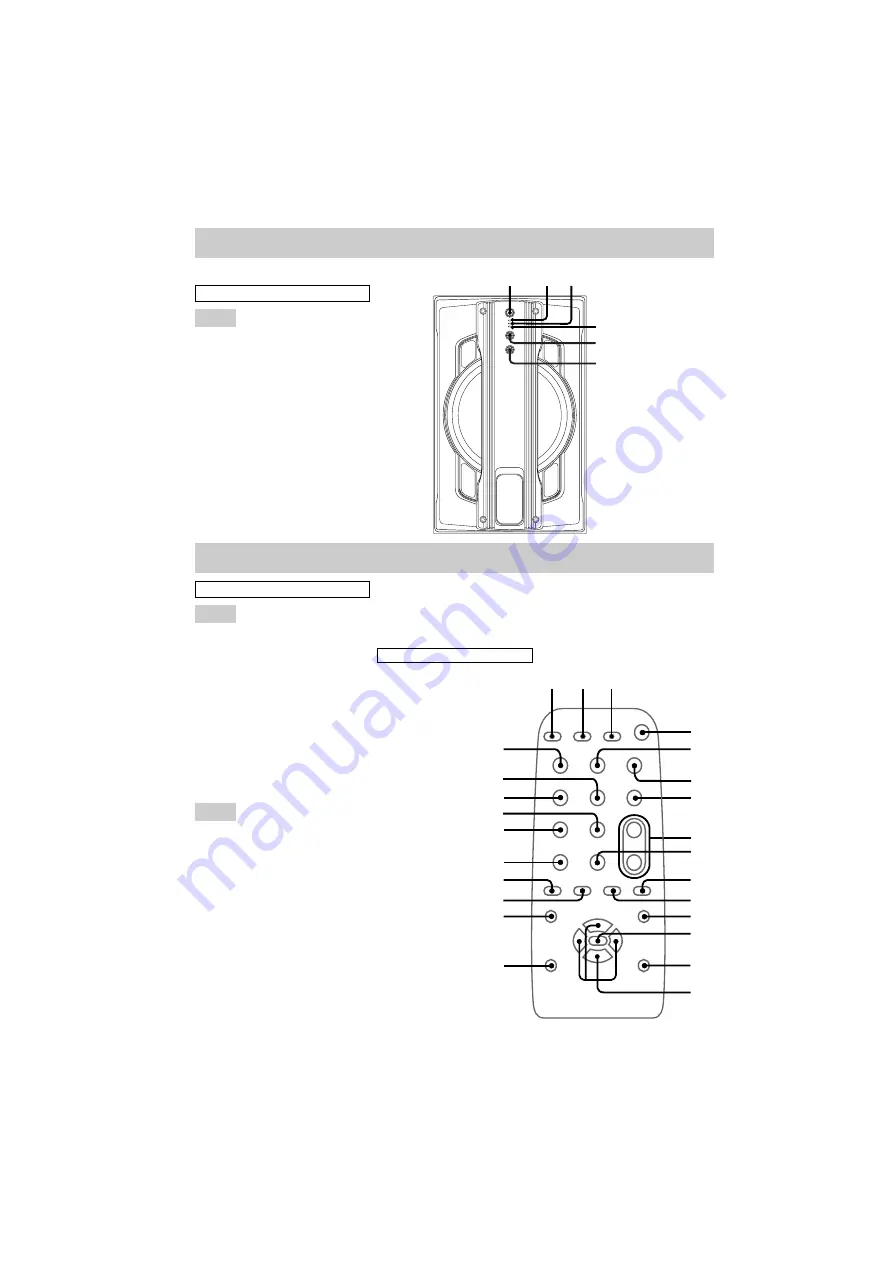
Remote Control
D
E
R
S
T
U
V
A B C
Y
X
W
qh
qj
qa
qs
qd
qf
7
q;
qg
8
9
6
CD
ql
(9–13, 17, 18)
CLEAR
7
(13, 18)
CLOCK/TIMER SELECT
2
(19, 27)
CLOCK/TIMER SET
3
(9, 18, 26,
30)
D.SKIP
9
(10, 12)
ENTER
qd
(9, 14, 18, 19, 21, 22,
23, 26, 27)
EFFECT ON/OFF
qf
(21)
GAME
w;
(25, 29)
MD (VIDEO)
q;
(29, 30)
PRESET –
wd
(14, 15)
wf
(14, 15)
PRESET EQ
qj
(21)
P FILE
qh
(21, 22)
SURROUND (MHC-GN900/
GN600 only)
qs
(22)
SURROUND SPEAKER MODE
(except for MHC-GN900/
GN600)
qs
(20)
SLEEP
1
(26)
TAPE A/B
qa
(16, 17)
TUNER/BAND
qk
(14, 15)
TUNING –
wa
(14, 15)
ws
(14, 15)
VOL +/–
8
(20)
SYMBOLS
@/1
(power)
4
nN
(play)
wg
X
(pause)
5
x
(stop)
6
.
(go backward)
wd
>
(go forward)
wf
m
(rewind)
wa
M
(fast forward)
ws
M
/
m
/
<
/
,
qg
A - M
P - Z
ALPHABETICAL ORDER
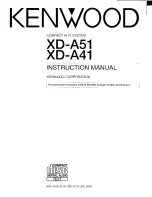
Subwoofer
LINK (indicator)
2
(20)
MATRIX SURR 1 (indicator)
3
(20)
MATRIX SURR 2 (indicator)
4
(20)
SUBWOOFER LEVEL
6
(20)
SUBWOOFER ON/OFF
1
(20)
SURROUND SPEAKER MODE
5
(20)
A - Z
A
B
6
E
D
C
ALPHABETICAL ORDER
(MHC-GN800 only)