


85
E:\SONY\2661355111\01US08COM.fm
HDR-HC3
2-661-355-
11
(1)
Us
in
g a C
o
m
p
u
te
r
• Do not connect your camcorder to the computer
at this point.
• The computer may not recognize the camcorder
if you connect them with the USB cable before
turning on your camcorder.
• Refer to page 87 for the recommended
connection.
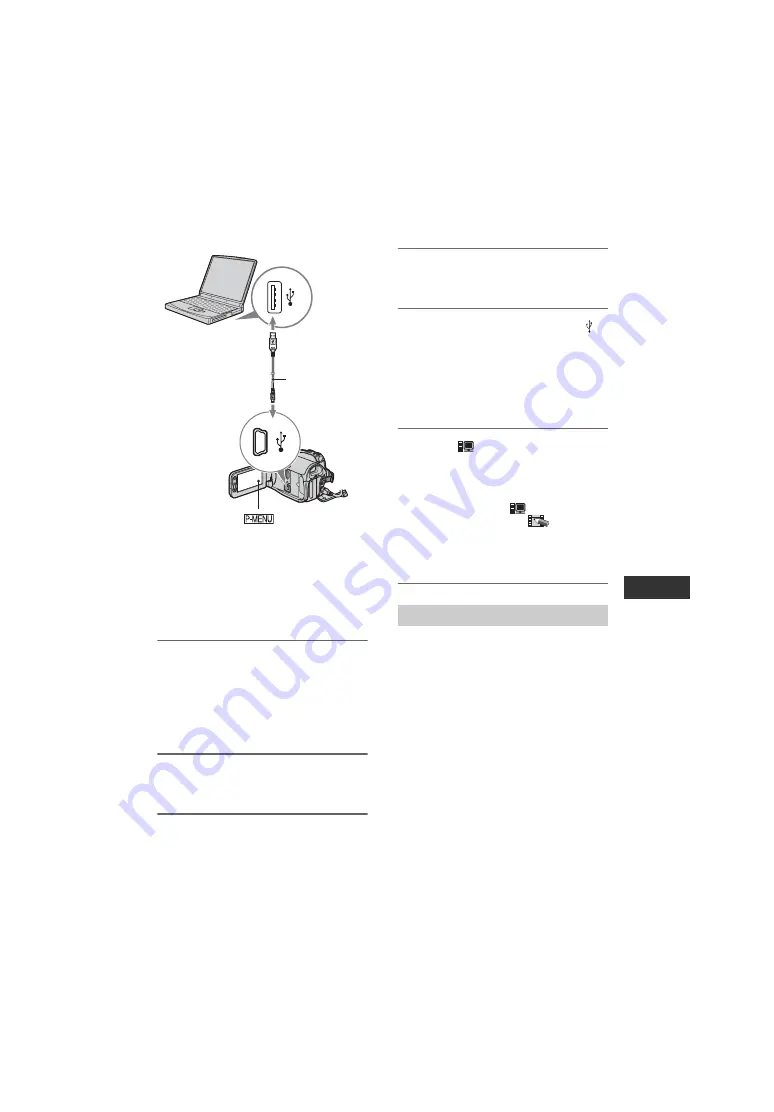
1
Turn on the computer.
Close down all applications running on
the computer.
For Windows 2000/Windows XP
Log on as an Administrator.
2
Insert a “Memory Stick Duo” into
your camcorder.
3
Prepare the power source for
your camcorder.
Use the supplied AC Adaptor as the
power source (p. 15).
4
Slide the POWER switch to turn
on the PLAY/EDIT lamp.
5
Connect the USB cable to the
(USB) jack on your camcorder
and the USB jack on your
computer.
[USB SELECT] appears on the LCD
screen of your camcorder.
6
Touch [
Memory Stick].
It may take some time for the computer
to recognize the camcorder when you
connect the USB cable for the first time.
• You can also select [
Memory Stick]
from [USB SELECT] of
(PICT.APPLI).
• During the Easy Handycam operation, you
can set by connecting the USB cable.
For Windows users
Double-click the [Removable Disk] icon
displayed in [My Computer]. Then, drag
and drop a picture in the folder onto the
hard disk drive of your computer.
To USB jack
USB cable
(supplied)
To USB jack
Copying the pictures
Continued
,
Summary of Contents for Handycam HDR-HC3
Page 11: ...11 E SONY 2661355111 01US00BOOKTOC fm HDR HC3 2 661 355 11 1 ...
Page 47: ...47 HDR HC3 2 661 355 11 1 E SONY 2661355111 01US05BAS fm Recording Playback ...
Page 134: ...HDR HC3 2 661 355 11 1 E SONY 2661355111 01US00BOOKIX fm ...
Page 135: ...HDR HC3 2 661 355 11 1 E SONY 2661355111 01US00BOOKIX fm ...


