background image

GB

Notes on installation

If the “PlayMemories Home” software is 

already installed on your computer, connect the 

camcorder to your computer. Functions that 

can be used with this camcorder will then be 

available.

If the “PMB (Picture Motion Browser)” 

software is installed on your computer, it will 

be overwritten by the “PlayMemories Home” 

software. In this case, you cannot use some 

functions that were available with “PMB” with 

this “PlayMemories Home” software.

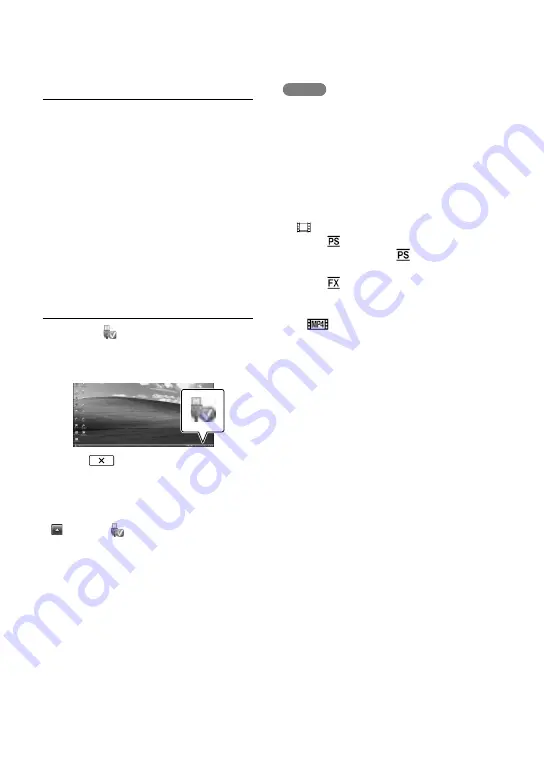
To disconnect your camcorder from 
the computer

Click the   icon at the bottom right of 
the desktop of the computer 

 [Safely 

remove USB Mass Storage Device].

Select 


 [Yes] on the camcorder 

screen.

Disconnect the USB cable.

If you are using Windows 7 or Windows 8, click 

, then click  .

Notes

When you access the camcorder from the 

computer, use the “PlayMemories Home” 

software. Operation is not guaranteed if you 

operate the data using software other than 

the “PlayMemories Home” software or you 

directly manipulate files and the folders from 

a computer.

Images cannot be saved to some discs 

depending on the configuration selected in  

[

REC Mode]. Movies recorded in [60p 

Quality 

] (HDR-GW66V/GWP88/

GWP88V)/[50p Quality 

] (HDR-GW66E/

GW66VE/GWP88E/GWP88VE) or [Highest 

Quality 

] mode can only be saved to a 

Blu-ray disc.

You cannot create a disc with movies recorded 

in [

MP4] mode.

The camcorder automatically divides an image 

file that exceeds 2 GB and saves the parts as 

separate files. Files will play back properly 

on the camcorder, however image files may 

be shown as separate files on a computer  

when inputting to or playing back with the 

“PlayMemories Home” software.

Summary of Contents for Handycam HDR-GW66E

Page 1: ...erating Guide 4 466 075 11 1 Table of contents Getting started Recording Playback Advanced operations Editing Saving movies and photos with a computer Saving images on an external media device Customizing your camcorder Others Index Please also refer to http www sony net SonyInfo Support ...

Page 2: ...rush and do not expose the battery pack to any shock or force such as hammering dropping or stepping on it Do not short circuit and do not allow metal objects to come into contact with the battery terminals Do not expose to high temperature above 60 C 140 F such as in direct sunlight or in a car parked in the sun Do not incinerate or dispose of in fire Do not handle damaged or leaking lithium ion ...

Page 3: ...For details please access the following URL http www compliance sony de Notice for the customers in the countries applying EU Directives This product has been manufactured by or on behalf of Sony Corporation 1 7 1 Konan Minato ku Tokyo 108 0075 Japan Inquiries related to product compliance based on European Union legislation shall be addressed to the authorized representative Sony Deutschland GmbH...

Page 4: ...u will help prevent potentially negative consequences for the environment and human health which could otherwise be caused by inappropriate waste handling of the battery The recycling of the materials will help to conserve natural resources In case of products that for safety performance or data integrity reasons require a permanent connection with an incorporated battery this battery should be re...

Page 5: ...k or vibration to the camcorder when the access lamp p 22 is lit or flashing When the camcorder is connected to other devices through a USB connection and the power of the camcorder is turned on do not close the LCD panel The image data that has been recorded may be lost Use the camcorder in accordance with local regulations The GPS function of the camcorder is activated when GPS Setting p 34 is s...

Page 6: ... Recording media Projector HDR GW66E Memory card only HDR GW66V HDR GW66VE HDR GWP88 Internal memory 16 GB memory card HDR GWP88E HDR GWP88V HDR GWP88VE The model with is equipped with a GPS function Learning more about the camcorder Handycam User Guide Handycam User Guide is an on line manual Refer to it for in depth instructions on the many functions of the camcorder 1 Access the Sony support pa...

Page 7: ... We recommend the camcorder be inspected at an authorized repair shop for a fee Accessories supplied do not meet water proof dust proof and shock proof specifications Notes before using the camcorder under near water Make sure that no foreign matter such as sand hair or dirt gets inside the battery memory card jack cover Even a small amount of foreign matter may lead to water entering the camcorde...

Page 8: ...to clean away any salt sand or other matter lodged around the buttons After rinsing wipe away water drops with a soft cloth Allow the camcorder to dry completely in a shady location with good ventilation Do not blow dry with a hair dryer as there is a risk of deformation and or degraded water proof performance Wipe away water drops or dust on the battery memory card jack cover with a soft dry clot...

Page 9: ... after you replace or charge the battery or you set Scene Selection to Beach Underwater or Snow This does not indicate a malfunction of the camcorder It displays a message that you should confirm before use to maintain the waterproof performances Touch the area the message is displayed in order to erase the message ...

Page 10: ...ging the language setting 21 Preparing the recording media 22 Selecting a recording medium HDR GWP88 GWP88E GWP88V GWP88VE 22 Inserting a memory card 22 Recording Playback Recording 24 Recording movies 24 Shooting photos 25 Playback 29 Advanced operations Recording images with various settings 32 Selecting the image quality of movies Recording mode 32 Capturing smiles automatically Smile Shutter 3...

Page 11: ...he PlayMemories Home software 43 Saving images on an external media device Creating a standard definition image quality STD disc with a recorder 44 Customizing your camcorder Using menus 45 Menu lists 47 Others Index Troubleshooting 50 Self diagnosis display Warning indicators 51 Recording time of movies number of recordable photos 53 Expected time of recording and playback with each battery pack ...

Page 12: ...REC button Loop for the Wrist strap HDR GWP88 GWP88E GWP88V GWP88VE LCD screen Touch panel 20 21 If you rotate the LCD panel 180 degrees you can close the LCD panel with the LCD screen facing out This is convenient during playback operations PROJECTOR FOCUS lever 36 HDR GWP88 GWP88E GWP88V GWP88VE Projector lens 36 HDR GWP88 GWP88E GWP88V GWP88VE ...

Page 13: ...der is reading or writing data Memory card slot 22 CHG charge lamp 16 Multi Micro USB Terminal 16 34 44 Supports Micro USB compatible devices HDMI OUT jack 34 Stand 36 Speaker Tripod receptacle Attach a tripod sold separately the length of the screw must be less than 5 5 mm 7 32 in Depending on the specifications of the tripod your camcorder may not attach in the proper direction Cover lock lever ...

Page 14: ... NP BX1 1 Operating Guide This manual 1 For customers in the USA and Canada AC Adaptor AC UD11 1 For customers in countries regions other than the USA and Canada AC Adaptor AC UD10 1 Power cord Mains lead 1 Notes The PlayMemories Home software and PlayMemories Home Help Guide can be downloaded from the Sony website p 41 To attach theWrist strap Loop for the Wrist strap ...

Page 15: ... jack cover Slide the cover lock lever to slide back the battery memory card jack cover Then open the battery memory card jack cover 3 Insert the battery Insert the battery while pressing and holding the battery release lever Battery memory card jack cover Cover lock lever Battery release lever Battery ...

Page 16: ... Close the battery memory card jack cover Flip the battery memory card jack cover back then slide and close the cover firmly until the yellow mark of the cover lock lever is hidden Notes You cannot insert any battery pack other than an NP BX1 supplied into your camcorder You cannot use a Sony CP AH2R CP AL or AC UP100 portable power supply device sold separately to charge the camcorder In the defa...

Page 17: ...ery memory card jack cover Slide the cover lock lever to slide back the battery memory card jack cover Then open the battery memory card jack cover 3 Connect the camcorder to a running computer using the USB cable Battery memory card jack cover Cover lock lever USB cable To the wall outlet wall socket ...

Page 18: ...ply You can connect the USB cable to an AC Adaptor that is connected to a wall outlet wall socket so that the power can be supplied to the camcorder You can also connect your camcorder to a computer using the USB cable so that the power will be supplied from the computer then you do not have to worry about the amount of power remaining in the battery while copying images from the camcorder etc Ins...

Page 19: ... minutes using the InfoLITHIUM battery Notes on the AC Adaptor Do not short circuit the USB jack or the battery terminal with a metallic object while the USB cable and the AC Adaptor are connected This may cause a malfunction When you disconnect the AC Adaptor from the power supply hold both the camcorder and the USB plug firmly and then disconnect the USB cable Recording time Playing time p 53 Ch...

Page 20: ...red geographical area with then select Next 4 Set Daylight Savings or Summer Time select the date format and the date and time If you set Daylight Savings or Summer Time to On the clock advances 1 hour When you select the date and time select one of the items and adjust the value with When you select the date and time setting operation is complete Touch the button on the LCD screen ...

Page 21: ...nates HDR GW66V GW66VE GWP88V GWP88VE are recorded automatically on the recording media They are not displayed during recording However you can check them as Data Code during playback To display them select Setup Playback Settings Data Code Date Time Once the clock is set the clock time is automatically adjusted with Auto Clock ADJ and Auto Area ADJ set to On The clock may not be adjusted to the c...

Page 22: ... Select the desired medium Inserting a memory card Open the battery memory card jack cover and insert the memory card until it clicks Memory Stick Micro M2 media Insert the memory card straight in the direction shown in figure A until it clicks microSD memory card Insert the memory card straight in the direction shown in figure B until it clicks The Preparing image database file Please wait screen...

Page 23: ...t only one memory card Types of memory card you can use with your camcorder Capacity operation verified SD Speed Class Described in this manual Memory Stick Micro Mark2 media Up to 16 GB Memory Stick Micro media microSD memory card Up to 32 GB Class 4 or faster microSD card microSDHC memory card microSDXC memory card Up to 64 GB Operation with all memory cards is not assured Notes The camcorder is...

Page 24: ...order stops recording Do not touch the built in microphone while recording The maximum continuous recordable time of movies is about 13 hours When a movie file exceeds 2 GB the next movie file is created automatically You may not be able to shoot photos depending on the setting in REC Mode and Frame Rate The flash does not work while the camera is in the Movie mode The following states will be ind...

Page 25: ...id Line set to On and using the outer frame of Grid Line p 48 as a guide Recording time p 53 Recordable time remaining capacity Media Info p 48 Media Select p 22 Shooting photos 1 Open the LCD screen and select MODE Photo 2 Press PHOTO lightly to adjust the focus then press it fully When the focus is adjusted properly AE AF lock indicator appears on the LCD screen Recordable number of photos p 54 ...

Page 26: ... Screen indicators during recording Described here are icons for both movie recording and photo recording modes Refer to the page in for details Zoom button W Wide T Telephoto START STOP button in movie recording mode PHOTO button in photo recording mode MENU button 45 Status detected by Intelligent Auto Recording status STBY REC AE AF automatic exposure automatic focus lock 25 Touch pad deactivat...

Page 27: ...o 17 times Extended Zoom the original size with the power zoom lever Move the power zoom lever slightly for a slower zoom Move it further for a faster zoom Be sure to keep your finger on the power zoom lever If you move your finger off the power zoom lever the operation sound of the power zoom lever may also be recorded You cannot change the zoom speed with the button on the LCD screen The minimum...

Page 28: ... mirror mode when the LCD panel is rotated 270 degrees to the lens side because SELF REC Button is set to Front facingLCD only in the default setting You can change the setting of the SELF REC button to keep the button always activated Movies are recorded when the Movie mode is selected and photos are recorded when the Photo mode is selected Using Self portrait 1 Person or Self portrait 2 People o...

Page 29: ... playback mode You can display the Event View when the LCD screen is folded with the reverse screen side facing out 2 Select to move the desired event to the center and then select it The camcorder displays recorded images as an event automatically based on the date and time 3 Select the image The camcorder plays from the selected image to the last image in the event 4 Select the appropriate butto...

Page 30: ...Image Type button Screen display on the Event View screen HDR GW66V GW66VE GWP88V GWP88VE Reduced size images which enable you to view many images at the same time on an index screen are called thumbnails To the MENU screen Event name To the previous event Change to the movie photo recording mode To the Map View screen Events To the next event Time line bar Change Event Scale button To play back s...

Page 31: ...by touching Agree on the screen after agreeing to the terms of the license agreement p 62 You cannot use the map data if you touch Not Agree However when you try to use the map data for the second time the same message will appear on the screen and you can use the map data by touching Agree To play back images with other devices You may not be able to play back normally images recorded on your cam...

Page 32: ... HDR GW66V GWP88 GWP88V 50p HDR GW66E GW66VE GWP88E GWP88VE 2 HDR GWP88 GWP88E GWP88V GWP88VE Capturing smiles automatically Smile Shutter A photo is recorded automatically when the camcorder detects the smile of a person during movie recording p 47 Dual Capture is the default setting Notes When set to the following you cannot use the Smile Shutter function REC Mode Highest Quality Frame Rate 60p ...

Page 33: ...setting Horizontal 4 912 1 080 Vertical 3 424 1 920 Wide Horizontal 7 152 1 080 Vertical 4 912 1 920 Tips on shooting panoramic photos Sweep the camcorder around you at a slow and steady speed about 5 seconds for 180 degrees A message will alert you if the speed is too fast or too slow It is recommended that you practice the sweeping movement in advance before you take a panoramic photo For taking...

Page 34: ...ion If you do not want to record location information Select Setup General Settings GPS Setting Off Notes It may take a while before the camcorder starts triangulating Use the GPS function outdoors and in open areas as the radio signals can best be received in such areas The map always displays the north at the top Playing images on a TV If you connect the camcorder to the HDMI input jack of a TV ...

Page 35: ...type of cable to output images HDMI output takes priority When your TV is monaural When your TV has only one audio input jack Connect the yellow plug of an AV Cable sold separately to the video input jack and connect the white left channel or red right channel plug to the audio input jack of your TV or VCR When connecting to your TV via a VCR Connect your camcorder to the LINE IN input on the VCR ...

Page 36: ... operating guide screen appears select Project This screen appears the first time you use the built in projector after the camcorder is turned on 4 Adjust the focus of the projected image using the PROJECTOR FOCUS lever The projected image is larger when the distance between your camcorder and the reflecting surface increase It is recommended that you place the camcorder about 0 5 m 1 6 feet or fu...

Page 37: ...the eyes Make sure not to touch the projector lens The LCD screen and the projector lens become hot while in use Using the projector shortens battery life using the supplied AC Adaptor is recommended The following operations are unavailable while you are using the projector Map operation HDR GWP88V GWP88VE Output of Highlight Playback to a device such as a TV Operation of the camcorder with the LC...

Page 38: ...mory card If you delete or divide movies photos that are included in saved scenarios the scenarios will also be deleted Deleting movies and photos 1 Select Edit HDR GW66E GW66V GW66VE or Edit Copy HDR GWP88 GWP88E GWP88V GWP88VE Delete 2 Select Multiple Images and then select the type of image you want to delete 3 Add check marks to the movies or photos to be deleted and select To delete all movie...

Page 39: ... image quality levels the image size will be set as shown below High definition image quality HD or MP4 2 1 M 16 9 Wide aspect ratio 16 9 with standard definition image quality STD 0 2 M 16 9 4 3 aspect ratio with standard definition image quality STD VGA 0 3 M 4 3 Notes You cannot save captured images to the memory card HDR GWP88E GWP88VE On recording date and time of captured photos The recordin...

Page 40: ...o install PlayMemories Home An Internet connection is required to use PlayMemories Online and other online services The services may not be available in some countries regions Software for Mac The PlayMemories Home software is not supported with Mac computers To import images from the camcorder to your Mac and play them use the appropriate software on your Mac For details visit the following URL h...

Page 41: ...installation is required Operation is not assured if the OS has been upgraded or in a multi boot environment 2 64 bit editions and Starter Edition are not supported Windows Image Mastering API IMAPI Ver 2 0 or newer is required to use disc creation function etc 3 Starter Edition is not supported 4 Faster processor is recommended Notes Operation with all computer environments is not assured Install...

Page 42: ...s 7 or Windows 8 click then click Notes When you access the camcorder from the computer use the PlayMemories Home software Operation is not guaranteed if you operate the data using software other than the PlayMemories Home software or you directly manipulate files and the folders from a computer Images cannot be saved to some discs depending on the configuration selected in REC Mode Movies recorde...

Page 43: ...ies Home Help Guide short cut icon on the computer screen to see how to use PlayMemories Home When using Windows 8 select PlayMemories Home Help Guide from the help menu of PlayMemories Home If the icon is not displayed on the computer screen click Start All Programs PlayMemories Home the desired item For details on PlayMemories Home select PlayMemories Home Help Guide on the software or visit the...

Page 44: ...recording device with an AV Cable sold separately Connect your camcorder to the input jacks of the recording device 3 Start playback on your camcorder and record it on the recording device 4 When dubbing is finished stop the recording device and then your camcorder Notes You cannot copy images to recorders connected with an HDMI cable Since copying is performed via analog data transfer the image q...

Page 45: ... p 47 Image Quality Size Items for setting up image quality or size p 48 Playback Function Items for playback p 48 Edit HDR GW66E GW66V GW66VE or Edit Copy HDR GWP88 GWP88E GWP88V GWP88VE Items for editing images such as protect p 48 Setup Other setup items p 48 1 Select 2 Select a category 3 Select your desired menu item Notes Select to finish setting the menu or to return to the previous menu sc...

Page 46: ...splays the list of menus in the sub category selected When you cannot select a menu item Grayed out menu items or settings are not available When you select the grayed out menu item your camcorder displays the reason why you cannot select the menu item or the instruction of under which condition you can set the menu item Sub category icons ...

Page 47: ... for a distant subject Low Lux Records bright color images in the dim Camera Settings Scene Selection Selects an appropriate recording setting according to the type of scene such as night view or beach Fader Fades scenes in or out Self Timer Sets the self timer when your camcorder is in photo recording mode Tele Macro Focuses on the subject with its background blurred SteadyShot Automatically corr...

Page 48: ...with a TV which is compliant with x v Color Image Size Sets the photo size Playback Function Event View Starts playing images from the Event View display Map View 1 Starts playing the images from the Map View display Highlight Movie Starts playing Highlight Playback scenes or Highlight Scenarios saved with standard definition image quality STD Scenario Starts playing the scenarios that were saved ...

Page 49: ...nctions General Settings Beep Sets whether the camcorder sounds operation beeps or not LCD Brightness Adjusts the brightness of the LCD screen SELF REC Button Sets the SELF REC button s function Your Location 1 Displays the current location on a map Airplane Mode 1 Settings to be used when you are on board an airplane GPS Setting 1 Receives the GPS signal p 34 Language Setting Sets the display lan...

Page 50: ...yMemories Home Help Guide p 43 on connecting your camcorder to a computer The power does not turn on Attach a charged battery pack to the camcorder p 15 The plug of the AC Adaptor has been disconnected from the wall outlet wall socket Connect it to the wall outlet wall socket p 16 The camcorder does not operate even when the power is set to on It takes a few seconds for your camcorder to be ready ...

Page 51: ...ool place No memory card is inserted p 22 When the indicator flashes there are not enough free spaces for recording images Total number of movie scenes or photos exceeds the recordable capacity of your camcorder p 53 Delete unnecessary images p 38 The camcorder stops operating The camcorder may stop recording if the camcorder is subject to continuous vibration PlayMemories Home cannot be installed...

Page 52: ...ient so camera shake easily occurs Use the flash The camcorder is unsteady so camera shake easily occurs Hold the camcorder steady with both hands and record images However note that the camera shake warning indicator does not disappear The recording medium is full Photos cannot be recorded during processing Wait for a while then record When set to the following you cannot shoot photos during movi...

Page 53: ...to 86 F is recommended The recording and playback time will be shorter when you use your camcorder in low temperatures The recording and playback time will be shorter depending on the conditions under which you use your camcorder Playing time Approximate time available when you use a fully charged battery pack unit minute Battery pack Image quality HD MP4 STD NP BX1 supplied 210 210 230 Expected r...

Page 54: ... image quality HD unit minute Recording mode 16 GB 32 GB 64 GB 50p Quality 60p Quality 75 75 150 150 305 305 Highest Quality 90 90 180 180 360 360 High Quality 120 120 245 245 495 495 Standard 215 165 440 330 880 665 Long Time 380 310 770 630 1545 1260 MP4 unit minute 16 GB 32 GB 64 GB 320 320 650 650 1305 1305 Standard definition image quality STD unit minute Recording mode 16 GB 32 GB 64 GB Stan...

Page 55: ...2 1 944 dots 4 3 1 920 1 080 dots 16 9 640 480 dots 4 3 iSweep Panorama 4 912 1 080 dots Standard horizontal 3 424 1 920 dots Standard vertical 7 152 1 080 dots Wide horizontal 4 912 1 920 dots Wide vertical Capturing a photo from a movie 1 920 1 080 dots 16 9 640 360 dots 16 9 640 480 dots 4 3 About handling of your camcorder On use and care Do not hold the camcorder by the following parts LCD Sc...

Page 56: ...te for a long time turn it on and let it run by recording and playing back images about once a month Use up the battery pack completely before storing it Note on the camcorder battery pack temperature When the temperature of the camcorder or battery pack becomes extremely high or extremely low you may not be able to record or play back on the camcorder due to the protection features of the camcord...

Page 57: ...using your camcorder the back of the LCD screen may heat up This is not a malfunction To clean the casing and the projector lens HDR GWP88 GWP88E GWP88V GWP88VE Wipe the casing and the lens gently with a soft cloth such as a cleaning cloth or eyeglass cleaning cloth If the casing and the projector lens is very dirty clean the camcorder casing and the lens with a soft cloth lightly moistened with w...

Page 58: ... your camcorder to a wall outlet wall socket using the supplied AC Adaptor and leave it with the LCD screen closed for more than 24 hours Note on disposal transfer of the camcorder HDR GWP88 GWP88E GWP88V GWP88VE Even if you delete all movies and still images or perform Format p 48 data on the internal memory may not be completely erased It is recommended that you select Setup Media Settings Forma...

Page 59: ...xels 4 Gross Approx 5 430 000 pixels Effective movie 16 9 5 Approx 5 020 000 pixels Effective photo 16 9 Approx 5 020 000 pixels Effective photo 4 3 Approx 3 760 000 pixels Lens G lens 10 Optical 5 17 Extended while recording movies 6 120 Digital F1 8 F3 4 Focal length f 3 2 mm 32 0 mm 5 32 in 1 5 16 in When converted to a 35 mm still camera For movies 5 29 8 mm 298 0 mm 1 3 16 in 11 3 4 in 16 9 F...

Page 60: ...ly 215 g 7 6 oz including the supplied rechargeable battery pack HDR GWP88 GWP88E GWP88V GWP88VE 210 g 7 4 oz main unit only 235 g 8 3 oz including the supplied rechargeable battery pack Water proof dust proof performance Equivalent to IEC60529 IP58 the camcorder is operable up to a waterdepth of 10 m for 60 minutes Shock proof performance Meeting MIL STD 810F Method 516 5 Shock standards this pro...

Page 61: ...s Mac and Mac OS are registered trademarks of Apple Inc in the U S and other countries Intel Intel Core and Pentium are trademarks or registered trademarks of Intel Corporation or its subsidiaries in the United States and other countries and PlayStation are registered trademarks of Sony Computer Entertainment Inc Adobe the Adobe logo and Adobe Acrobat are either registered trademarks or trademarks...

Page 62: ...ons of such rights in such case the above restrictions may not apply to you Limitation on Reverse Engineering Decompilation and Disassembly You may not i extract the SOFTWARE from the PRODUCT ii reproduce copy modify port translate or create derivative works of the SOFTWARE in whole or in part or iii reverse engineer decompile disassemble the SOFTWARE by any means whatsoever in whole or in part fo...

Page 63: ...OF IMPLIED WARRANTIES IN SUCH CASE THE ABOVE EXCLUSIONS MAY NOT APPLY TO YOU You expressly understand that the data in the SOFTWARE may contain inaccurate or incomplete information due to the passage of time changing circumstances sources used and the nature of collecting comprehensive geographic data any of which may lead to incorrect results LIMITATION OF LIABILITY IN THIS SECTION SONY ITS AFFIL...

Page 64: ... defined in FAR 2 101 and are subject to the END USER LICENSE AGREEMENT FOR MAP DATA FOR VIDEO CAMERA RECORDER PRODUCTS under which this SOFTWARE was provided If the Contracting Officer federal government agency or any federal official refuses to use the legend provided herein the Contracting Officer federal government agency or any federal official must notify SONY prior to seeking additional or ...

Page 65: ... Postal Service The following trademarks and registrations are owned by the USPS United States Postal Service USPS and ZIP 4 Screen indicators The following indicators appear when you change the settings See page 26 and 29 also for the indicators that appear during recording or playing Left Indicator Meaning MENU button 45 Self timer recording 47 GPS triangulating status 34 Airplane Mode set to On...

Page 66: ...g time 20 4M Photo size Playback folder 100 112 Current playing movie or photo Number of total recorded movies or photos Touch pad deactivated Bottom Indicator Meaning Micref Level low 48 Wind Noise Reduct 48 Blt in Zoom Mic 48 Low Lux 47 Spot Meter Fcs 47 Spot Meter 47 Exposure 47 Intelligent Auto 26 101 0005 Data file name Protect 48 Flash 47 Red Eye Reduction 47 Indicators and their positions a...

Page 67: ...ay 51 Setting the date and time 20 Smile Shutter 32 Specifications 59 Starting PlayMemories Home 43 Summer Time 20 Supplied items 14 T Thumbnails 30 Tripod 13 Troubleshooting 50 TV 34 U USB cable 16 W Wall outlet wall socket 16 Warning indicators 51 Water dust shock proof performances 7 Windows 41 Wrist strap 14 Z Zoom 27 A AVCHD recording disc 6 32 B Battery pack 15 Beep 21 C Care 55 Charging the...

Page 68: ...GB Printed in China 2013 Sony Corporation Additional information on this product and answers to frequently asked questions can be found at our Customer Support Website http www sony net ...

Reviews: