


1-10
41
Settings and Adjustments
4
Press
X
/
x
to select an item,
then press ENTER.
The settings for the selected item
appear.
Example: “TV Display”
5
Press
X
/
x
to select a setting,
then press ENTER.
The setting is selected and setup is
complete.
Example: “4:3 Pan Scan”
To turn off the Setup Display
Press OPTIONS or
O
RETURN twice.
Settings for the
Display
(General Setup)
Choose playback display options and
settings according to the TV to be
connected.
Select “General Setup” in the Setup
Display. To use the display, see “Using
the Setup Display” (page 40).
The default settings are underlined.
◆
TV Display (DVD only)
Selects the aspect ratio of the connected
TV (4:3 standard or wide).
ENTER
RETURN
General Setup
TV Display
Angle Mark
4 : 3 Pan Scan
4 : 3 Letter Box
16 : 9
On
Screen Saver
PBC
Select:
Cancel:
DivX
Default
Settings
Selected setting
ENTER
RETURN
General Setup
TV Display
Angle Mark
4 : 3 Pan Scan
On
On
On
Screen Saver
PBC
Select:
Cancel:
DivX
Default
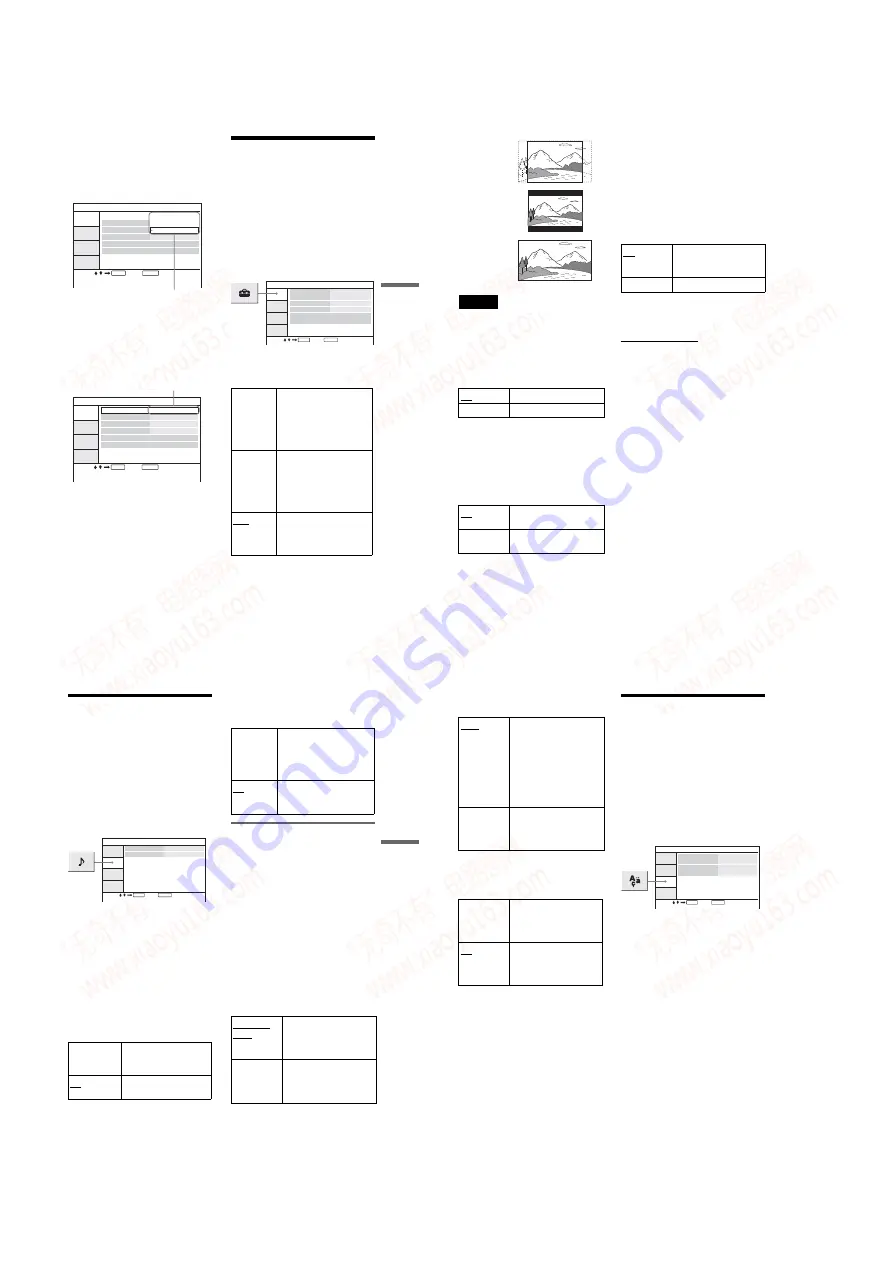
4:3
Pan Scan
Select this when you
connect a 4:3 screen TV.
Automatically displays a
wide picture on the entire
screen and cuts off the
portions that do not fit.
4:3
Letter Box
Select this when you
connect a 4:3 screen TV.
Displays a wide picture
with bands on the upper
and lower portions of the
screen.
16:9
Select this when you
connect a wide-screen TV
or a TV with a wide mode
function.
ENTER
RETURN
General Setup
TV Display
Angle Mark
16 : 9
On
On
On
Screen Saver
PBC
DivX
Default
Select:
Cancel:
,
continued
42
Note
Depending on the DVD, “4:3 Letter Box” may
be selected automatically instead of “4:3 Pan
Scan” or vice versa.
◆
Angle Mark
Displays the angle mark when you can change
the viewing angles during playback of DVDs
recorded with multi-angles.
◆
Screen Saver
The screen saver image appears when
you leave the player in pause or stop
mode for 15 minutes. The screen saver
will help prevent your display device
from becoming damaged (ghosting).
Press
H
to turn off the screen saver.
◆
PBC
By using the PBC (Playback Control)
function, you can enjoy playing
interactive programmes and
programmes with search functions
(page 26). This set up is effective when
you play back VIDEO CDs with the
PBC function. Set up becomes available
by opening and closing the disc lid after
setting.
◆
DivX
Displays the registration code for this
player. For more information, go to
http://www.divx.com
on the Internet.
◆
Default
Each function returns to its original
factory settings. Note that all of your
settings will be lost.
On
Display the angle mark.
Off
Hide the angle mark.
On
Activates the screen saver
function.
Off
Deactivates the screen
saver function.
16:9
4:3 Letter Box
4:3 Pan Scan
On
By the PBC function, you
can play back VIDEO
CDs via the menu screen.
Off
Turn off the PBC function.
43
Settings and Adjustments
Settings for the Sound
(Audio Setup)
“Audio Setup” allows you to set the
sound according to the playback and
connection conditions.
Select “Audio Setup” in the Setup
Display. To use the display, see “Using
the Setup Display” (page 40).
The default settings are underlined.
Makes the sound clear when the volume
is turned down when playing a DVD that
conforms to “Audio DRC.”
This function affects the output from the
following jacks:
– AUDIO jack
– OPTICAL OUT jack only when
“Dolby Digital” is set to “Downmix
PCM” (page 43).
◆
Digital Output
Selects if audio signals are output via the
OPTICAL OUT jack.
Setting the digital output
signal
Switches the method of outputting audio
signals when you connect an audio
equipment such as an AV amplifier
(receiver) with the OPTICAL OUT jack.
For connection details, see page 48.
After setting “Digital Output” to “On,”
select “Dolby Digital” and “DTS.”
If you connect a component that is
incompatible with the selected audio
signal, a loud noise (or no sound) may be
heard from the speakers, damaging your
ears or speakers.
Selects the type of Dolby Digital signal.
On
Makes low sounds clear
even if you turn the
volume down.
Off
Normally select this
position.
On
Normally select this
position. When you select
“On,” see “Setting the
digital output signal” for
further settings.
Off
The influence of the digital
circuit upon the analog
circuit is minimal.
Downmix
PCM
Select this when the player
is connected to an audio
component without a built-
in Dolby Digital decoder.
Dolby Digital
Select this when the player
is connected to an audio
component with a built-in
Dolby Digital decoder.
,
continued
44
◆
MPEG (DVD only)
Selects the type of MPEG audio signal.
◆
DTS
Selects whether or not to output DTS
signals.
Setting the Display or
Sound Track
Language
(Language Setup)
“Language Setup” allows you to set
various languages for the on-screen
display or sound track.
Select “Language Setup” in the Setup
Display. To use the display, see “Using
the Setup Display” (page 40).
◆
OSD (On-Screen Display)
Switches the display language on the
screen.
◆
Disc Menu (DVD VIDEO only)
Switches the language for the disc’s
menu.
When you select “Original,” the
language given priority in the disc is
selected.
◆
Subtitle (DVD VIDEO only)
Switches the subtitle language.
When you select “Off,” no subtitle is
displayed.
◆
Audio (DVD VIDEO only)
Switches the language of the sound
track.
When you select “Original,” the
language given priority in the disc is
selected.
PCM
Select this when the player
is connected to an audio
component without a built-
in MPEG decoder. If you
play multi-channel MPEG
audio sound tracks, only
the Front (L) and Front (R)
signals will be output from
your two front speakers.
MPEG
Select this when the player
is connected to an audio
component with a built-in
MPEG decoder.
On
Select this when the player
is connected to an audio
component with a built-in
DTS decoder.
Off
Select this when the player
is connected to an audio
component without a
built-in DTS decoder.
ENTER
RETURN
Language Setup
OSD
Disc Menu
English
English
English
English
Subtitle
Audio
Select:
Cancel:
www. xiaoyu163. com
QQ 376315150
9
9
2
8
9
4
2
9
8
TEL 13942296513
9
9
2
8
9
4
2
9
8
0
5
1
5
1
3
6
7
3
Q
Q
TEL 13942296513 QQ 376315150 892498299
TEL 13942296513 QQ 376315150 892498299


