Chapter 4 Viewfinder Screen Indications and Menus
Chapter 4 Viewfinder Screen Indications and Menus
55
MENU
ON
STATUS
OFF
CANCEL
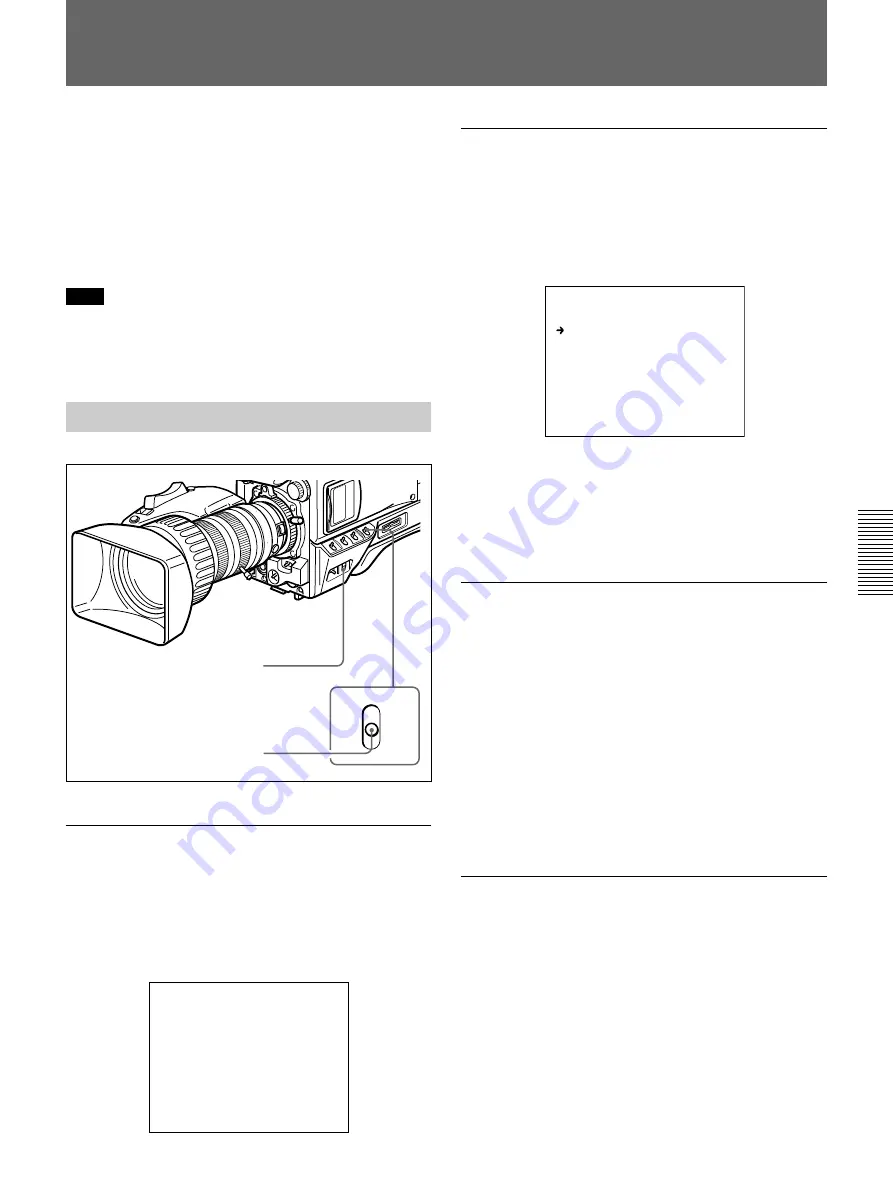
To perform menu operations, first display the menu on
the viewfinder screen or the monitor connected via the
MONITOR OUT connector. There are six menus:
USER, USER MENU CUSTOMIZE, OPERATION,
PAINT, MAINTENANCE, and FILE. You can display
the USER menu directly from the normal-indication
display, but to select other menus, first display the
TOP MENU, then select the desired menu.
Note
The menus cannot be displayed during EZ MODE, EZ
FOCUS, auto white balance adjustment, or auto black
balance adjustment.
Displaying the Menus
Displaying the USER menu
While the normal indications are displayed, press the
MENU switch toward the ON/CANCEL side. The
USER menu that had been displayed when the power
was turned off the last time is displayed on the
viewfinder screen.
<USER PAGE 1> U1
A.IRIS OVERRIDE : 0
DTL LEVEL : 0
MASTER BLACK : 0
PRESET MATRIX : STD
SCREEN MODE : 16:9
Displaying the TOP MENU
The TOP MENU can be displayed in either of the
following ways:
• While holding the MENU dial pressed, press the
MENU switch toward the ON/CANCEL side.
• Select TOP at the right top on the menu.
<TOP MENU>
USER
USER MENU CUSTOMIZE
OPERATION
PAINT
MAINTENANCE
FILE
To make the TOP MENU disappear
Turn off the camera or press the MENU switch toward
the OFF/STATUS side.
The TOP MENU automatically disappears when the
EZ MODE or EZ FOCUS button is pressed.
Displaying your desired menu
1
Display the TOP MENU.
For details, see “Displaying the TOP MENU.”
2
Turn the MENU dial to move the arrow to your
desired menu, then press the MENU dial.
The first page of the selected menu is displayed.
To make the menu disappear
Press the MENU switch toward the OFF/STATUS
side.
Displaying your desired menu page
1
Turn the MENU dial to move the arrow to the page
number at the top of the screen, then press the
MENU dial.
Or, press the MENU switch to the ON/CANCEL
side.
The arrow changes to a question mark.
2
Turn the MENU dial until your desired menu page
is displayed, then press the MENU dial.
Menu Operation
MENU switch
MENU dial
Summary of Contents for D50PH
Page 8: ...Chapter 1 Overview 8 Chapter 1 Overview ...
Page 22: ......
Page 25: ......
Page 28: ...Chapter 2 Fitting and Connections 28 Chapter 2 Fitting and Connections ...
Page 32: ...Chapter 2 Fitting and Connections 32 Chapter 2 Fitting and Connections Using Accessories ...
Page 33: ...Chapter 2 Fitting and Connections Chapter 2 Fitting and Connections 33 ...
Page 34: ...Chapter 2 Fitting and Connections 34 Chapter 2 Fitting and Connections ...
Page 42: ......
Page 48: ......
Page 76: ......
Page 82: ...Chapter 5 Adjustments and Settings 82 Chapter 5 Adjustments and Settings ...
Page 86: ...Chapter 5 Adjustments and Settings 86 Chapter 5 Adjustments and Settings ...
Page 87: ...Chapter 5 Adjustments and Settings Chapter 5 Adjustments and Settings 87 ...
Page 97: ...Appendix Appendix 97 TLCS ...


