


43
Pl
ay
in
g Di
sc
s
About MP3 audio tracks
You can play MP3 audio tracks on CD-
ROMs, CD-Rs, or CD-RWs. However, the
discs must be recorded according to ISO9660
level 1, level 2, or Joliet format for the player
to recognize the tracks.
You can also play discs recorded in Multi
Session.
Refer to the instructions of the CD-R/RW
device or recording software (not supplied)
for details on the recording format.
To play a Multi Session CD
This player can play Multi Session CDs when
an MP3 audio track is located in the first
session. Any subsequent MP3 audio tracks,
recorded in the later sessions, can also be
played back.
When audio tracks and images in music CD
format or Video CD format are recorded in
the first session, only the first session will be
played back.
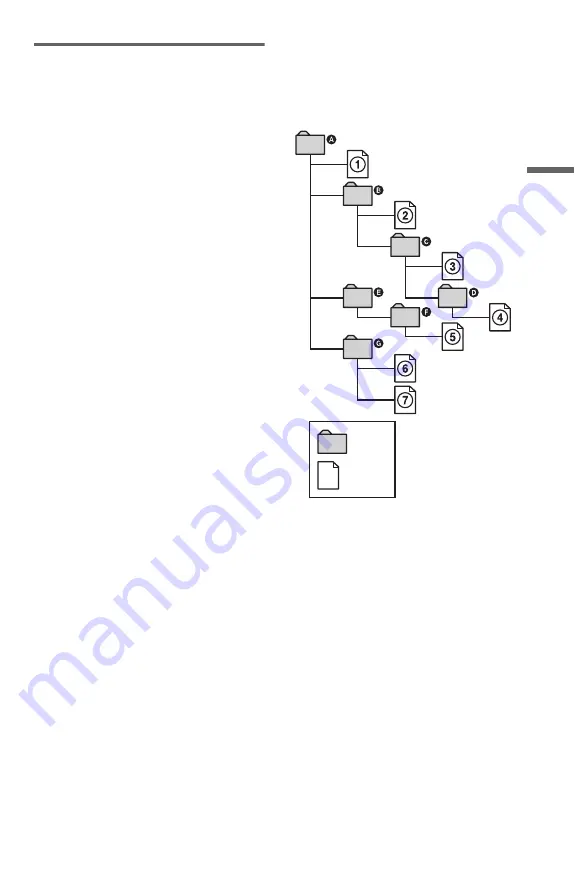
The playback order of MP3 audio tracks
The playback order of albums and tracks
recorded on a DATA CD is as follows.
◆
Structure of disc contents
When you play a DATA CD from its
beginning
(page 34), the numbered tracks are
played sequentially, from
1
through
7
. Any
sub-albums/tracks contained within a
currently selected album take priority over
the next album in the same tree. (Example:
C
contains
D
so
4
is played before
5
.)
When you press MENU and the list of MP3
albums appears (page 42), the albums are
arranged in the following order:
A
t
B
t
C
t
D
t
F
t
G
. Albums that do not
contain tracks (such as album
E
) do not
appear in the list.
z
Hints
• If you add numbers (01, 02, 03, etc.) to the front
of the track names, the tracks will be played in
that order.
• Since a disc with many trees takes longer to start
playback, it is recommended that you create
albums of no more than two trees.
ROOT
Tree 1
Tree 2
Tree 3
Tree 4
Tree 5
album
track
c
continued