background image

Basic Operations

Basic Operations

11

3

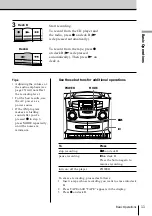
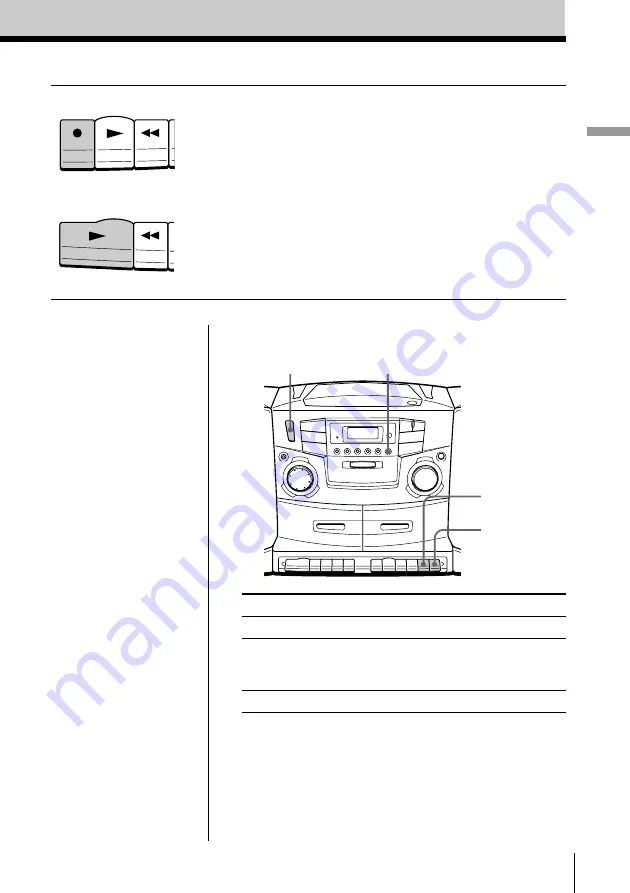
Start recording.

To record from the CD player and
the radio, press 

r

 on deck B (

(

is depressed automatically).

To record from the tape, press 

r

on deck B (

(

is depressed

automatically). Then press 

(

 on

deck A.

Deck B

To

Press

stop recording

p6

 on deck B

pause recording

P

 on deck B

Press the button again to
resume recording.

turn on/off the player

POWER

Use these buttons for additional operations

Tips

• Adjusting the volume or

the audio emphasis (see
page 25) will not affect
the recording level.

• For the best results, use

the AC power as a
power source.

• If the AM program

makes a whistling
sound after you've
pressed 

r

 in step 3,

press MODE repeatedly
until the noise at a
minimum.

POWER

p6

P

To erase a recording, proceed as follows:
1 Insert a tape whose recording you want to erase into deck

B.

2 Press TAPE untill “TAPE” appears in the display.
3 Press 

r

 on deck B.

Deck A

MODE

Summary of Contents for CFD ZW755 - Portable CD / Cassette

Page 1: ...3 046 018 11 1 2000 by Sony Corporation Operating Instructions CD Radio Cassette Corder CFD ZW755 ...

Page 2: ...ergy and if not installed and used in accordance with the instructions may cause harmful interference to radio communications However there is no guarantee that interference will not occur in a particular installation If this equipment does cause harmful interference to radio or television reception which can be determined by turning the equipment off and on the user is encouraged to try to correc...

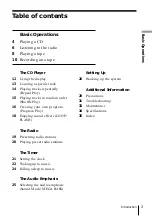
Page 3: ...ks in random order Shuffle Play 16 Creating your own program Program Play 18 Enjoying sound effects LOOP FLASH The Radio 19 Presetting radio stations 20 Playing preset radio stations The Timer 21 Setting the clock 22 Waking up to music 24 Falling asleep to music The Audio Emphasis 25 Selecting the audio emphasis Sound Mode MEGA BASS Setting Up 26 Hooking up the system Additional Information 29 Pre...

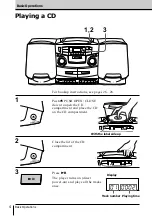
Page 4: ...th the label side up Display For hookup instructions see pages 26 28 1 Push 6 PUSH OPEN CLOSE down to open the CD compartment and place the CD on the CD compartment 2 Close the lid of the CD compartment 3 Press The player turns on direct power on and plays all the tracks once 1 2 ...

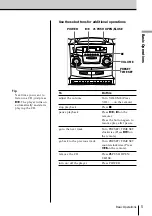
Page 5: ...rn VOLUME Press VOL on the remote stop playback Press p pause playback Press P on the remote Press the button again to resume play after pause go to the next track Turn PRESET TIME SET clockwise Press on the remote go back to the previous track Turn PRESET TIME SET counterclockwise Press on the remote remove the CD Press 6 PUSH OPEN CLOSE turn on off the player Press POWER POWER 6 PUSH OPEN CLOSE ...

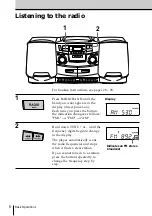
Page 6: ...ress the button the indication changes as follows FM1 n FM2 n AM 2 Hold down TUNE or until the frequency digits begin to change in the display The player automatically scans the radio frequencies and stops when it finds a clear station If you cannot tune in to a station press the button repeatedly to change the frequency step by step Display 2 1 Indicates an FM stereo broadcast ...

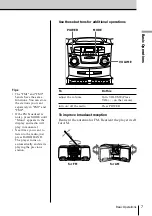
Page 7: ...ODE until Mono appears in the display and radio will play in monaural Next time you want to listen to the radio just press RADIO BAND The player turns on automatically and starts playing the previous station To Do this adjust the volume Turn VOLUME Press VOL on the remote turn on off the radio Press POWER To improve broadcast reception Reorient the antenna for FM Reorient the player itself for AM ...

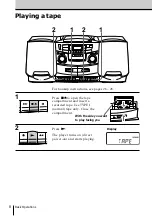
Page 8: ...ns see pages 26 28 1 Press p6 to open the tape compartment and insert a recorded tape Use TYPE I normal tape only Close the compartment 2 Press The player turns on direct power on and starts playing With the side you want to play facing you 1 2 1 2 Display ...

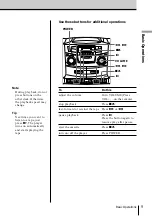
Page 9: ... tape Press or 0 pause playback Press P Press the button again to resume play after pause eject the cassette Press p6 turn on off the player Press POWER Note During playback do not press buttons on the other deck Otherwise the playback speed may change Tip Next time you want to listen to a tape just press The player turns on automatically and starts playing the tape POWER VOLUME 0 0 p6 P p6 P ...

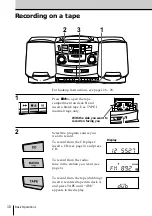
Page 10: ...ormal tape only 2 Select the program source you want to record To record from the CD player insert a CD see page 4 and press CD To record from the radio tune in the station you want see page 6 To record from the tape dubbing insert a recorded tape into deck A and press TAPE until dUb appears in the display Display With the side you want to record on facing you 3 1 2 ...

Page 11: ...ng turn on off the player POWER Use these buttons for additional operations Tips Adjusting the volume or the audio emphasis see page 25 will not affect the recording level For the best results use the AC power as a power source If the AM program makes a whistling sound after you ve pressed r in step 3 press MODE repeatedly until the noise at a minimum POWER p6 P To erase a recording proceed as fol...

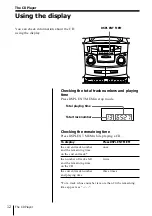
Page 12: ...de Checking the remaining time Press DSPL ENT MEM while playing a CD To display Press DSPL ENT MEM the current track number once and the remaining time on the current track the number of tracks left twice and the remaining time on the CD the current track number three times and playing time For a track whose number is more than 20 the remaining time appears as Total playing time Total track number...

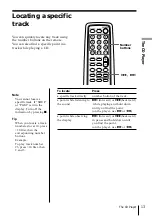
Page 13: ...kward the sound while playing and hold down until you find the point on the player use or 0 a point while observing forward or backward the display in pause and hold down until you find the point on the player use or 0 Note You cannot locate a specific track if SHUF or PGM is lit in the display Turn off the indication by pressing p Tip When you locate a track numbered over 10 press 10 first then t...

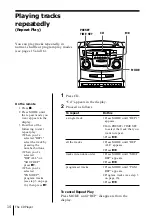
Page 14: ...2 Press tracks in random order 1 Press MODE until SHUF REP appears 2 Press programed tracks 1 Press MODE until PGM REP appears 2 Program tracks see step 3 on page 16 3 Press To cancel Repeat Play Press MODE until REP disappears from the display CD PRESET TIME SET On the remote 1 Press p 2 Press MODE until the repeat mode you want appears in the display 3 Do either of the following to start repeat ...

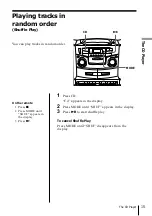
Page 15: ...cks in random order 1 Press CD Cd appears in the display 2 Press MODE until SHUF appears in the display 3 Press to start shuffle play To cancel Shuffle Play Press MODE until SHUF disappears from the display MODE CD On the remote 1 Press p 2 Press MODE until SHUF appears in the display 3 Press ...

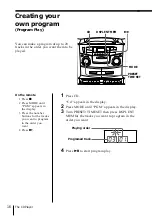
Page 16: ...ars in the display 2 Press MODE until PGM appears in the display 3 Turn PRESET TIME SET then press DSPL ENT MEM for the tracks you want to program in the order you want 4 Press to start program play On the remote 1 Press p 2 Press MODE until PGM appears in the display 3 Press the number buttons for the tracks you want to program in the order you want 4 Press DSPL ENT MEM CD PRESET TIME SET ...

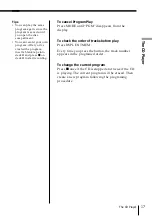
Page 17: ...order To change the current program Press p once if the CD is stopped and twice if the CD is playing The current program will be erased Then create a new program following the programing procedure Tips You can play the same program again since the program is saved until you open the disc compartment You can record your own program After you ve created the program insert a blank tape into deck B an...

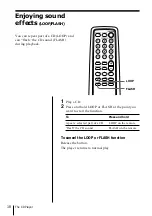
Page 18: ...ASH during playback 1 Play a CD 2 Press and hold LOOP or FLASH at the point you want to start the function To Press and hold repeat a selected part of a CD LOOP on the remote flash the CD sound FLASH on the remote To cancel the LOOP or FLASH function Release the button The player returns to normal play LOOP FLASH ...

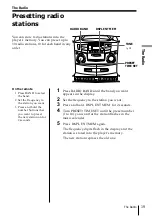
Page 19: ...MEM again The frequency digits flash in the display and the station is stored into the player s memory The new station replaces the old one On the remote 1 Press BAND to select the band 2 Set the frequency to the station you want 3 Press and hold the number buttons that you want to preset the new station on for 2 seconds RADIO BAND PRESET TIME SET TUNE DSPL ENT MEM Presetting radio stations You ca...

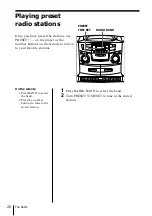
Page 20: ...ayer or the number buttons on the remote to tune in to your favorite stations 1 Press RADIO BAND to select the band 2 Turn PRESET TIME SET to tune in the stored station On the remote 1 Press BAND to select the band 2 Press the number buttons to tune in the stored station RADIO BAND PRESET TIME SET ...

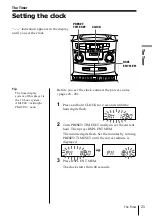
Page 21: ...seconds until the hour digits flash 2 Turn PRESET TIME SET until you set the current hour Then press DSPL ENT MEM The minute digits flash Set the minutes by turning PRESET TIME SET until the correct minute is displayed 3 Press DSPL ENT MEM The clock starts from 00 seconds Tip The time display system of this player is the 12 hour system AM12 00 midnight PM12 00 noon CLOCK DSPL ENT MEM PRESET TIME S...

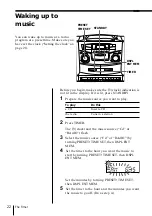
Page 22: ...y To play Do this a CD Insert a CD the radio Tune in a station 2 Press TIMER The clock and the music source Cd or RAdIO flash 3 Select the music source Cd or RAdIO by turning PRESET TIME SET then DSPL ENT MEM 4 Set the timer to the hour you want the music to start by turning PRESET TIME SET then DSPL ENT MEM Set the minutes by turning PRESET TIME SET then DSPL ENT MEM 5 Set the timer to the hour a...

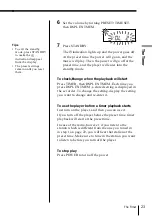
Page 23: ... start Press TIMER then DSPL ENT MEM Each time you press DSPL ENT MEM a stored setting is displayed in the set order To change the setting display the setting you want to change and re enter it To use the player before a timer playback starts Just turn on the player and then you can use it If you turn off the player before the preset time timer playback will start at the preset time In case of the...

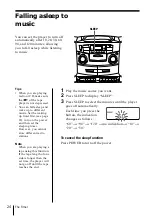
Page 24: ... follows 60 n 90 n 120 n no indication n 10 n 20 n 30 To cancel the sleep function Press POWER to turn off the power Tips When you are playing radio or CD make sure that of the tape player is not depressed You can fall asleep and wake up to different music Set the waking up timer first see page 22 turn on the power and then set the sleeping timer However you cannot store different radio stations N...

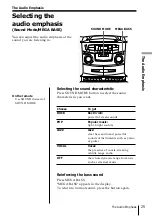
Page 25: ... roll powerful clean sounds POP Popular music light bright sounds JAZZ Jazz clear bass audio and powerful sounds of instruments such as piano or guitar VOCAL Vocal the presence of vocals stressing middle range audio OFF the whole dynamic range for music such as classical music Reinforcing the bass sound Press MEGA BASS MEGA BASS appears in the display To return to normal sound press the button aga...

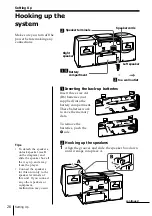
Page 26: ...minals of this unit If you connect any other speakers or equipment malfunction may occur 15 Right speaker Speaker cords to a wall outlet 3 1 Inserting the back up batteries Insert three size AA R6 batteries not supplied into the battery compartment These batteries work to save the memory data To remove the batteries push the side 2 Hooking up the speakers 1 Align the grooves and slide the speaker ...

Page 27: ...necting the AC power cord Insert one end of the supplied AC power cord to the AC IN socket located at the rear of the player and the other end to the wall outlet 4 Inserting batteries into the remote Insert two size AA R6 batteries not supplied Replacing batteries With normal use the batteries should last for about six months When the remote no longer operates the player replace all the batteries ...

Page 28: ...TT indicator dims or when the player stops operating Replace all the batteries with new ones Before you replace the batteries be sure to take out the CD from the player 5 Using the player on batteries Insert six size D R20 batteries not supplied into the battery compartment To use the player on batteries disconnect the AC power cord from the player ...

Page 29: ...s case remove the CD and wait about an hour for the moisture to evaporate If the player has not been used for a long time set it in the playback mode to warm it up for a few minutes before inserting a cassette If you have any questions or problems concerning your player please consult your nearest Sony dealer On safety As the laser beam used in the CD player section is harmful to the eyes do not a...

Page 30: ...considerable rise in temperature inside the car Do not stick paper or sticker on the CD nor scratch the surface of the CD After playing store the CD in its case If there is a scratch dirt or fingerprints on the CD it may cause tracking error Notes on cassettes Break off the cassette tab from side A or B to prevent accidental recording If you want to reuse the tape for recording cover the broken ta...

Page 31: ...ave the CD compartment open for about an hour to dry moisture condensation Make sure Cd appears in the display Reduce the volume Clean the CD or replace it if the CD is badly damaged Place the player in a location free from vibration The sound may drop out or noise may be heard if the CD is recorded using a personal computer CD R etc Replace all the batteries with new ones if they are weak Move th...

Page 32: ...tion is displayed Replace all the batteries in the remote with new ones if they are weak Make sure that you are pointing the remote at the remote sensor on the player Remove any obstacles in the path of the remote and the player Make sure the remote sensor is not exposed to strong light such as direct sunlight or fluorescent lamp light Move closer to the player when using the remote Tape Player Sy...

Page 33: ...der or solvent such as alcohol or benzine Cleaning the lens If the lens becomes dirty it may cause a skipping of sound during CD operation Clean with a commercially available blower Cleaning the tape heads and tape path Wipe the heads the pinch rollers and the capstans with a cleaning swab slightly moistened with cleaning fluid or alcohol after every 10 hours of operation for optimum playback and ...

Page 34: ...sette corder section Recording system 4 track 2 channel stereo Fast winding time Approx 120 s sec with Sony cassette C 60 Frequency response TYPE I normal 80 10 000 Hz General Speaker Full range 10 cm 4 in dia 3 2 ohms cone type 2 Outputs Headphones jack stereo minijack For 16 68 ohms impedance headphones Power requirements For CD radio cassette corder 120 V AC 60 Hz 9 V DC 6 size D R20 batteries ...

Page 35: ...ception 7 L Listening to the radio 6 Locating a specific track 13 LOOP 18 M N O MEGA BASS 25 P Q Playing a CD 4 a tape 8 preset radio stations 20 tracks in random order 15 tracks repeatedly 14 Program Play 16 R Radio stations Playing 20 Presetting 19 Recording on a tape 10 Repeat Play 14 S Selecting audio emphasis 25 tracks 13 Setting the clock 21 Setting up 27 Shuffle play 15 SOUND 25 Sound mode ...

Page 36: ...Additional Information 36 Sony Corporation Printed in China ...

Reviews: