background image

10

Actual total number:

Sony CDX-4160 (

E

,S,C,A) 3-859-005-11(1)

EN

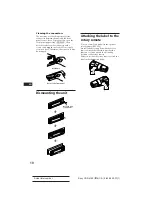
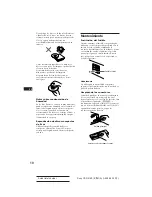
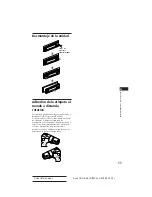
Attaching the label to the
rotary remote

You can control this unit with the optional
rotary remote (RM-X2S).
Several labels are supplied with the rotary
remote. Attach the label that matches the
functions of this unit and the mounting
position of the rotary remote.
After you mount the rotary remote, attach the
label in the illustration below.

SEL

DSPL

MODE

SEL

DSPL

MODE

Release key
(supplied)

Cleaning the connectors

The unit may not function properly if the
connectors between the unit and the front
panel are not clean. To prevent this, open the
front panel by pressing 

(RELEASE)

, then

detach it and clean the connectors with a
cotton swab dipped in alcohol. Do not apply
too much force. Otherwise, the connectors may
be damaged.

Main unit

Back of the front panel

Dismounting the unit

µ

µ

µ

Summary of Contents for CDX-4160 - Cd Receiver

Page 1: ... de instrucciones 3 859 005 11 1 1997 by Sony Corporation EN FM AM Compact Disc Player ES C CDX 4160 For installation and connections see the supplied installation connections manual Con respecto a la instalación y las conexiónes consulte el manual de Instalación conexiones suministrado ...

Page 2: ...l total number Sony CDX 4160 E S C A 3 859 005 11 1 EN Welcome Thank you for purchasing the Sony Compact Disc Player This unit lets you enjoy a variety of features You can use an optional rotary remote RM X2S ...

Page 3: ...guide 13 Index 14 Getting Started Resetting the unit 4 Detaching the front panel 4 Setting the clock 5 CD Player Listening to a CD 5 Playing a CD in various modes 6 Radio Memorizing stations automatically Automatic Memory 6 Memorizing only the desired stations 7 Receiving the memorized stations 7 Other Functions Adjusting the sound characteristics 8 Muting the sound 8 Changing the sound and beep t...

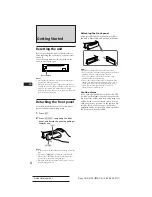
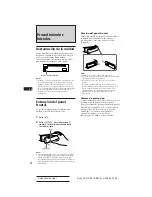
Page 4: ...the unit will turn off automatically to prevent the speakers from being damaged When you carry the front panel with you put it in the supplied front panel case Attaching the front panel Align part A of the front panel to part B of the unit as illustrated and push until it clicks Notes Be sure not to attach the front panel upside down Do not press the front panel hard against the unit when attachin...

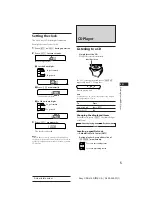
Page 5: ...he clock after you have turned on the radio or started CD playback 100 1000 1000 1008 1008 To locate succeeding tracks To locate preceding tracks SEEK AMS To go forward To go back To go forward To go back 215 MIN SEC Elapsed playing time CD Player Listening to a CD Simply insert the CD Playback starts automatically If a CD is already inserted press SOURCE repeatedly until CD appears Note To play b...

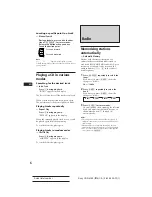
Page 6: ...uring playback SHUFFLE appears in the display To cancel this mode press again SEEK AMS To search forward To search backward FMI FMII FMIII AM Radio Memorizing stations automatically Automatic Memory Stations with the clearest reception are automatically searched and memorized on each band FMI FMII FMIII and AM Up to 6 stations on each band can be stored on the number buttons 1 to 6 in the order of...

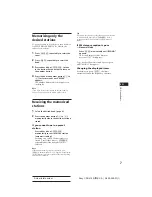
Page 7: ...ired station is stored If you cannot tune in a preset station Press either side of SEEK AMS momentarily to search for the station automatic tuning Scanning stops when the unit receives a station Press either side of SEEK AMS repeatedly until the desired station is received Note If the automatic tuning stops too frequently press SENS momentarily until LCL appears in the display local seek mode Only...

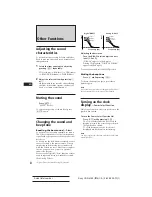
Page 8: ...u get when you use an optional subwoofer system Moreover the Digital D bass function creates even sharper and more powerful bass sound than Analog D bass Digital D bass is available during CD playback Digital D BASS Analog D BASS Level Level 0dB D BASS 3 D BASS 2 D BASS 1 0dB D BASS 3 D BASS 2 D BASS 1 Frequency Hz Frequency Hz Adjusting the bass curve Turn the D BASS dial to adjust the bass level...

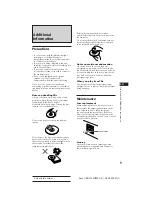
Page 9: ...er use a fuse with an amperage rating exceeding the one supplied with the unit as this could damage the unit Fuse 10 A Additional Information Precautions If your car was parked in direct sunlight resulting in a considerable rise in temperature inside the car allow the unit to cool off before operating it If no power is being supplied to the unit check the connections first If everything is in orde...

Page 10: ...mote After you mount the rotary remote attach the label in the illustration below SEL DSPL MODE SEL DSPL MODE Release key supplied Cleaning the connectors The unit may not function properly if the connectors between the unit and the front panel are not clean To prevent this open the front panel by pressing RELEASE then detach it and clean the connectors with a cotton swab dipped in alcohol Do not ...

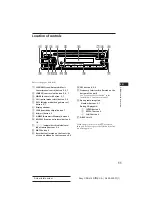
Page 11: ...Display window 7 SENS sensitivity adjust button 7 8 6 eject button 5 9 A MEM Automatic Memory button 6 º RELEASE front panel release button 4 10 volume bass treble balance fader control buttons 5 8 MUTE button 8 Reset button located on the front side of the unit hidden by the front panel 4 OFF button 4 5 8 Frequency Select switch located on the bottom of the unit See Frequency Select Switch in the...

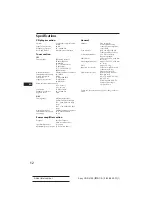
Page 12: ...9 kHz 10 kHz switchable 531 1 602 kHz at 9 kHz step 530 1 710 kHz at 10 kHz step Antenna terminal External antenna connector Intermediate frequency 10 71 MHz 450 kHz Sensitivity 30 µV Power amplifier section Outputs Speaker outputs sure seal connectors Speaker impedance 4 8 ohms Maximum power output 35 W 4 at 4 ohms General Outputs Line output 2 Power antenna relay control Power amplifier control ...

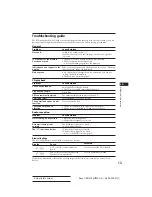
Page 13: ... forcibly inserted upside down Dusty disc The ambient temperature is more than 50 C Press the 6 button for two seconds Press the reset button The unit is installed at an angle of more than 20 The unit is not installed in a sturdy part of the car Problem CD cannot be loaded Play does not begin CD is automatically ejected CD will not eject The operation buttons do not function The sound skips due to...

Page 14: ...tion alarm 4 CD playback 5 Clock 5 D E D BASS 8 Display 5 7 F G H Fader 8 Front panel 4 Fuse 9 I J K Intro Scan 6 L Local seek 7 Locating a specific point 5 a specific track 6 M N O Manual search 6 Manual tuning 7 Memorizing a station 6 Monaural mode 7 Mute 8 P Q Power select 8 R Radio 6 Repeat Play 6 Reset 4 Rotary remote 10 S Shuffle Play 6 T U Treble 8 V W X Y Z Volume 8 ...

Page 15: ...15 Actual total number Sony CDX 4160 E S C A 3 859 005 11 1 EN ...

Page 16: ... 4160 E S C A 3 859 005 11 1 ES Bienvenido Enhorabuena por la adquisición del reproductor de discos compactos Sony Esta unidad le permitirá disfrutar de una serie de funciones Podrá usar un mando a distancia rotativo opcional RM X2S ...

Page 17: ...moria automática 6 Memorización de las emisoras deseadas 7 Recepción de emisoras memorizadas 7 Otras funciones Ajuste de las características de sonido 8 Cancelación del sonido 8 Cambio de los ajustes de sonido y tono del pitido 8 Activación de la indicación de hora Función de selección de alimentación 9 Información complementaria Precauciones 9 Mantenimiento 10 Desmontaje de la unidad 11 Adhesión ...

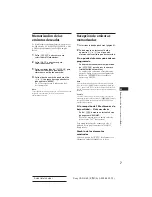
Page 18: ...el incorporado los pitidos se desactivarán Procedimientos iniciales Restauración de la unidad Antes de utilizar la unidad por primera vez o después de sustituir la batería del automóvil es necesario restaurar dicha unidad Pulse el botón de restauración con un objeto puntiagudo por ejemplo un bolígrafo Notas Al pulsar el botón de restauración se borrarán todos los programas memorizados y las funcio...

Page 19: ...os minutos parpadea El dígito de la hora parpadea Para avanzar Para retroceder 1008 100 1000 1000 1008 215 MIN SEC Tiempo de reproducción transcurrido Para localizar temas anteriores Para localizar temas posteriores SEEK AMS Reproductor de discos compactos Reproducción de un disco compacto Basta con insertar el CD La reproducción se iniciará de forma automática Si ya hay un CD insertado pulse SOUR...

Page 20: ...el visor Todas los temas del disco se reproducen en orden aleatorio Para cancelar este modo vuelva a pulsar el botón Para buscar hacia atrás Para buscar hacia delante SEEK AMS Radio Memorización automática de emisoras Función de memoria automática Las emisoras de cada banda que se reciben con mayor claridad se localizan y se almacenan en la memoria de forma automática FMI FMII FMIII y AM Es posibl...

Page 21: ...misora que desee recibir Si no puede sintonizar una emisora programada Pulse momentáneamente cualquier lado de SEEK AMS para buscar la emisora sintonización automática La exploración se detiene al recibirse una emisora Pulse varias veces cualquier lado del botón SEEK AMS hasta recibir la emisora que desee Nota Si la sintonización automática se detiene con demasiada frecuencia pulse SENS durante un...

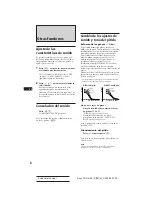
Page 22: ...marcada que la del refuerzo de graves convencional Es posible escuchar la línea de graves con mayor nitidez aunque el sonido vocal se encuentre al mismo nivel Igualmente es posible enfatizar y ajustar los graves fácilmente con el dial D BASS Este efecto es similar al obtenido cuando se utiliza un sistema opcional de altavoces potenciadores de graves Además la función D bass digital crea graves inc...

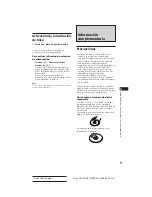
Page 23: ...ase en contacto con el proveedor Sony más próximo Notas sobre el manejo de discos compactos Si el disco está sucio o es defectuoso puede producirse pérdida de sonido durante la reproducción Para disfrutar de buena calidad de sonido maneje el disco como se explica a continuación Agárrelo per por los bordes Para mantenerlo limpio no toque la superficie No adhiera papel ni cinta adhesiva en la superf...

Page 24: ...se evapore Reproducción de discos compactos de 8 cm Utilice el adaptador sencillo de discos compactos opcional de Sony CSA 8 para evitar que el reproductor de discos compactos se dañe Mantenimiento Sustitución del fusible Cuando sustituya el fusible compruebe que utiliza uno con el amperaje especificado en el fusible Si éste se funde compruebe la conexión de alimentación y sustitúyalo Si una vez s...

Page 25: ...o Esta unidad puede controlarse con el mando a distancia rotativo opcional RM X2S Con el mando rotativo se suministra una serie de etiquetas Adhiera la etiqueta que corresponda a las funciones de esta unidad y a la posición de montaje del mando a distancia rotativo Después de montar el mando a distancia rotativo adhiera la etiqueta como se muestra en la ilustración siguiente SEL DSPL MODE SEL DSPL...

Page 26: ...ás información 1 Botón SEEK AMS búsqueda sensor de música automático búsqueda manual 5 6 7 2 Botón SOURCE selección de fuente 5 6 7 3 Botón MODE selección de banda 6 7 4 Botón SEL selección del modo de control 5 8 9 5 Botón DSPL cambio de visualización ajuste de la hora 5 7 6 Visor 7 Botón SENS ajuste de sensibilidad 7 8 Botón 6 expulsión 5 9 Botón A MEM memoria automática 6 0 Botón RELEASE extrac...

Page 27: ...rvalo de 9 kHz 530 1 710 kHz intervalo de 10 kHz Terminal de antena Conector para antena exterior Frecuencia intermedia 10 71 MHz 450 kHz Sensibilidad 30 µV Sección del amplificador de potencia Salidas Salidas de altavoz conectores herméticos seguros Impedancia de altavoz 4 8 ohmios Salida máxima de potencia 35 W 4 a 4 ohmios Generales Salidas Salida de línea 2 Cable de control de relé de antena m...

Page 28: ... amplificador opcional de potencia y no utiliza el incorporado Los pitidos se desactivan página 8 Reproducción de CD Causa Solución Ya se ha cargado otro CD Se ha forzado el CD al introducirlo al revés El disco está sucio La temperatura ambiente es superior a 50 C Presione la tecla 6 durante más de dos segundos Pulse el botón de restauración Ha instalado la unidad en un ángulo superior a los 20 No...

Page 29: ...nte Solución Limpie el CD o insértelo correctamente Pulse el botón de restauración o 6 Indicación Causa El CD está sucio o se ha insertado al revés El reproductor de CD no funciona debido a algún problema Si el problema no se soluciona con las sugerencias anteriormente enumeradas póngase en contacto con el proveedor Sony más próximo Información complementaria ...

Page 30: ... 10 G H I J K Graves 8 L Localización de una parte determinada 6 un tema específico 5 M N O Mando a distancia rotativo 11 Memoria automática 6 Memorización de emisoras 6 Modo monofónico 7 P Q Panel frontal 4 Pitidos 8 R Radio 6 Reloj 5 Reproducción aleatoria 6 Reproducción de CD 5 Reproducción repetida 6 Restauración 4 S T U Selección de alimentación 9 Sensor de música automático AMS 5 Sintonizaci...

Page 31: ...17 Actual total number Sony CDX 4160 E S C A 3 859 005 11 1 ES ...

Page 32: ...Actual total number Sony CDX 4160 E S C A 3 859 005 11 1 Sony Corporation Printed in Korea ...

Reviews: